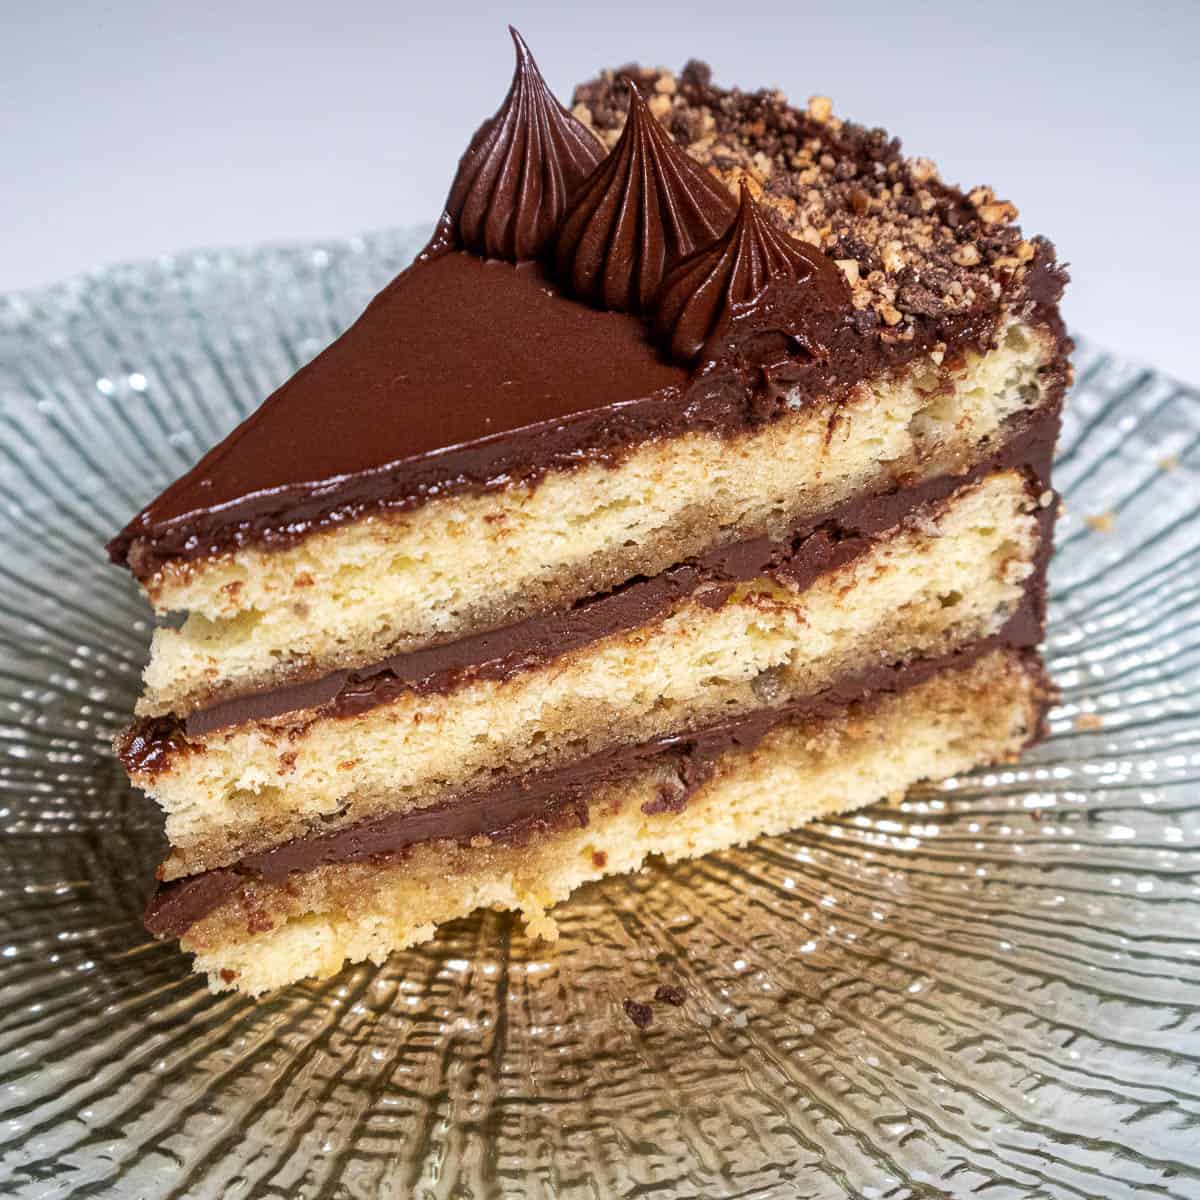
Hazelnut Gianduja Cake
Hazelnut Gianduja Cake is the perfect celebration or holiday cake. A tender hazelnut butter sponge cake is washed in a coffee syrup and finished with and intense but quickly made chocolate hazelnut buttercream. Many of the parts can be made ahead to speed assembly or the cake can be frozen in its entirety.
Servings: 16
Calories: 562kcal
Ingredients
Hazelnut Butter Sponge Cake
- ⅔ cups sifted cake flour (85 grams or 3 ounces)
- 2 ounces hazelnuts, toasted (60 grams or 2 ounces)
- 1 teaspoons baking powder
- 9 large egg yolks
- ¾ cup sugar (150 grams or 5 ⅓ ounces)
- 1 teaspoon vanilla
- 9 large egg whites
- ½ cup sugar (100 grams or 3 ½ ounces)
- 6 tablespoon butter, melted (85 grams or 3 ounces or ¾ stick)
Coffee Syrup
- ½ cups water
- ½ cups sugar (100 grams or 3 ½ ounces)
- 1 teaspoons instant coffee
- 2 tablespoons Kahlua
Chocolate Hazelnut Décor
- ⅔ cup toasted hazelnuts (85 grams)
- 3 ounces semisweet chocolate (85 grams)
Chocolate Hazelnut Buttercream
- ½ pound semisweet chocolate, coarsely chopped (225 grams)
- ¾ cup butter, 30 minutes out of the refrigerator (170 grams or 6 ounces or 1 ½ sticks)
- ⅓ cup 40% cream
- 1 ½ tablespoons Kahlua or other coffee flavored liqueur
- 2 teaspoons vanilla
- 3 tablespoons powdered sugar (40 grams or 1 ⅓ ounces)
- 1 cup Nutella (280 grams or 10 ounces)
Instructions
Hazelnut Butter Sponge
- Preheat the oven to 350°F. Line three 9x2" round cake pans with parchment paper and spray the centers only.
- Place the hazelnuts on a rimmed baking sheet. Toast them for 7 to 9 minutes until deep golden brown. If they have dark skins on them, immediately place them in the bowl of a mixer fitted with the paddle attachment. Mix the nuts on low to medium speed for several minutes until the skins are mostly gone.
- Some will always remain and that is fine. Cool completely. Separate the skinned nuts from the skins.
- Place the cold, skinned, hazelnuts in a food processor. Process until very fine. Do not overprocess or they will become a paste.
- Add the flour and baking powder to the processor. Process to further grind the nuts as fine as possible.
- Place the egg yolks, ¾ cup sugar and vanilla in a mixing bowl fitted with a whisk attachment. Whisk at medium speed until very pale and it reaches the ribbon stage.
- With a clean bowl and whisk attachment, beat the egg whites until you can see a trail in the beaten whites. Slowly add the ½ cup sugar and beat to medium peaks. Pour the egg yolk and half the flour mixture over the whites. Fold in gently; fold in remaining flour.
- Place about 1 cup of the batter into a medium size bowl. Add the melted butter and whisk vigorously until the butter and batter are completely combined; return this to the mixing bowl and fold in.
- Divide the batter between the three pans, using about 275 grams or about 9 ⅔ ounces for each. Smooth out. Bake for 10 to 15 minutes or until the sponge springs back when lightly touched and/or a tester come out clean.
- It will not have a lot of color – that is as it should be. Cool completely before removing from the pans.
- The layers can be baked, cooled and frozen, well covered, up to a month ahead.
- Coffee Syrup
- Combine the water and sugar in a small saucepan. As it approaches the boil, wash the sides of the pan down with a brush dipped in cold water.
- Bring to a boil.
- Dissolve the coffee in the Kahlua. If it won't dissolve microwave for about 10 seconds,
- Stir the Kahlua mixture into the sugar syrup. Cool.
- This may be made days ahead and refrigerated.
Chocolate Hazelnut Decor
- Place the chocolate in the bowl of a processor. Pulse until coarsely chopped but not powdered. Remove from the processor.
- Without cleaning the bowl, add the hazelnuts and process until coarsely chopped.
- Combine the two and freeze.
- This can be done weeks ahead and kept frozen.
Chocolate Hazelnut Buttercream
- Melt the chocolate over a double boiler or in a microwave at half power for about 2 ½ minutes. If microwaving, let it sit for a few minutes then stir. It may need more time in the microwave, depending upon the power of the unit.
- Transfer to the bowl of a processor or blender.
- Cut the butter which has been room temped for 30 minutes into 1 inch pieces and place it in a circle over the chocolate.
- Process about 30 seconds or until smooth. Scrape down.
- Add the the remaining ingredients and process until smooth, scraping down once or twice.
- The buttercream will be amazingly light but will hold its shape.
- This should be made just before using to fill and finish the cake.
Assembly
- Remove the paper from the bottom of the sponge layers. Keeping the layers upside down, brush each layer with ⅓ of the coffee syrup.
- Place one layer on a cake board or serving plate, coffee side up. Spread with ½ cup of the buttercream.
- Repeat with the second cake layer.
- Place the top cake layer on and finish the sides with a thin coat of buttercream. Reserve enough to finish the top with the peaks. Use the remainder of the buttercream to finish the top of the cake.
- Place a 6" cake pan upside down to mark the top of the cake evenly. Alternatively, draw a circle about 1 ½" in from the edge of the cake.
- Working quickly, carefully distribute the frozen decor on the top edge of the cake.
- Pour the decor onto a rimmed baking pan. Apply the decor to the sides of the cake covering them completely. This is most easily done by holding the cake board or plate in your left hand over the pan. Scoop some of the decor in your right hand and press it onto the side of the cake, letting the excess fall onto the pan.
- Fit a pastry bag with a ½" B tip. Pipe the reserved buttercream between the edge of the buttercream and decor to finish the cake. Pipe straight down and pull up to make the peak design.
- If not serving within the next few hours, refrigerate the cake. However, remove it from the refrigerator several hours ahead to make sure it is room temperature when served.
Notes
- The cake layers should be frozen before filling and finishing to make it easier and for a better looking outcome. Freeze them individually with the bottom parchment still on. After they are hard, stack them, wrap well in foil, wrap again and freeze for up to a month.
- It is important to freeze the decor and use it quickly so the chocolate doesn't melt as you apply it to the cake.
- To cut: Run a serrated bread knife under really hot water on both sides to heat it. Dry it quickly with a paper towel and then let it melt through the top buttercream and cut straight down. Pull the knife out at bottom of the cake. Repeat for each cut.
- If the cake has been refrigerated, bring it out several hours before serving. It should always be served at room temperature or the buttercream will lack its full flavor.
Nutrition
Calories: 562kcal | Carbohydrates: 53g | Protein: 8g | Fat: 36g | Saturated Fat: 20g | Polyunsaturated Fat: 2g | Monounsaturated Fat: 11g | Trans Fat: 1g | Cholesterol: 150mg | Sodium: 174mg | Potassium: 301mg | Fiber: 4g | Sugar: 43g | Vitamin A: 628IU | Vitamin C: 1mg | Calcium: 80mg | Iron: 3mg