
This Hazelnut Gianduja Cake is the perfect celebration or holiday cake and the updated methods and instructions make it completely approachable and doable for the home baker. The cake recipe consists of several component parts and three of the four can be made ahead. Actually, the entire cake can be made ahead and refrigerated or frozen if desired.
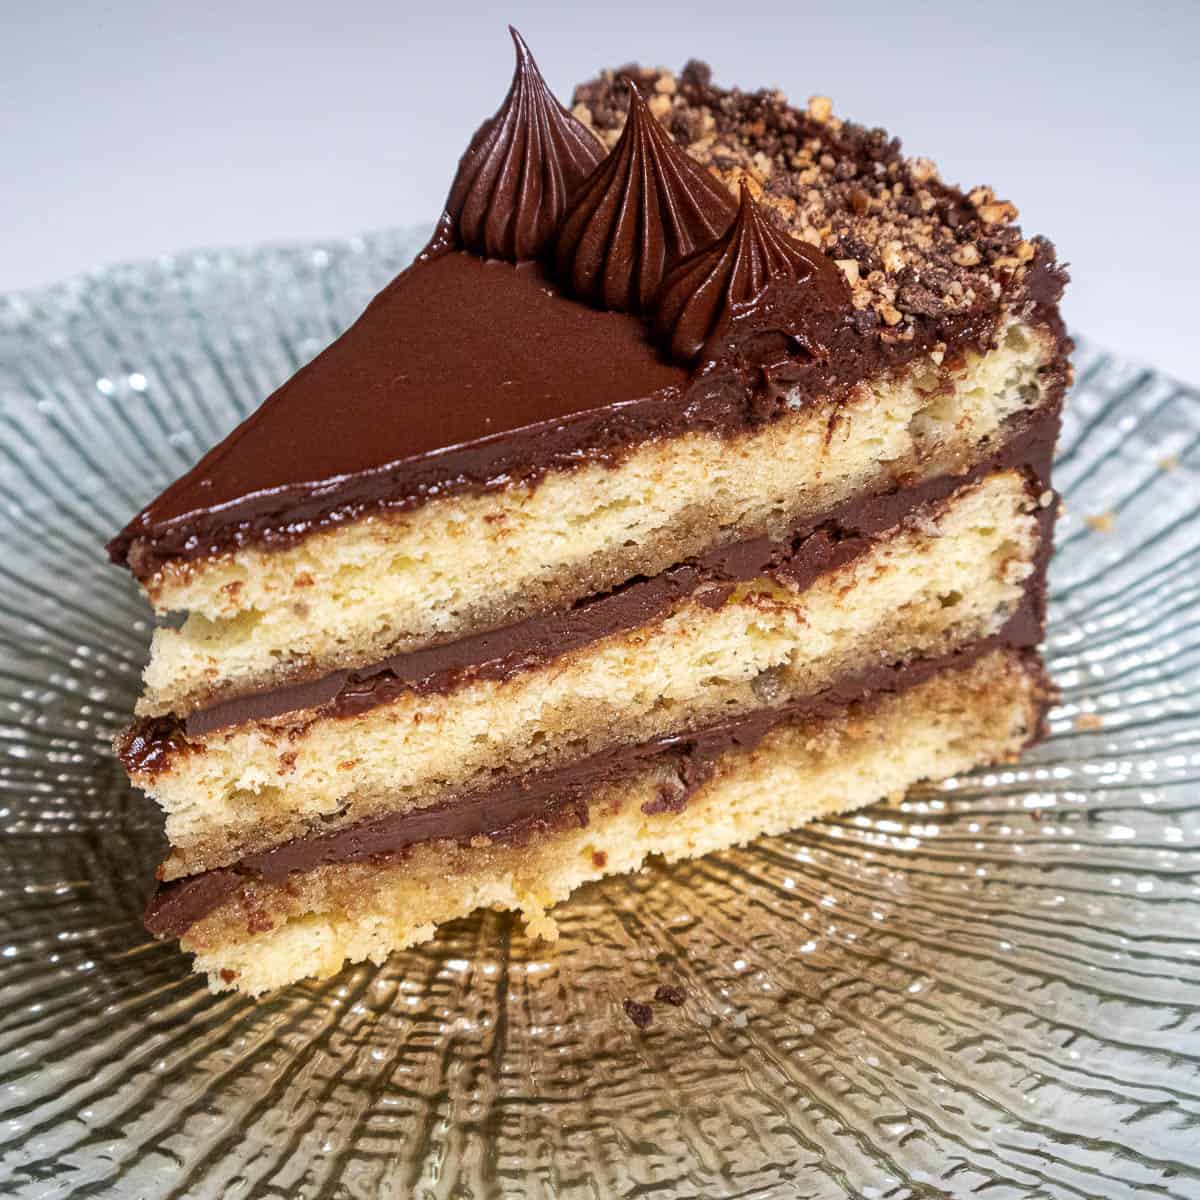
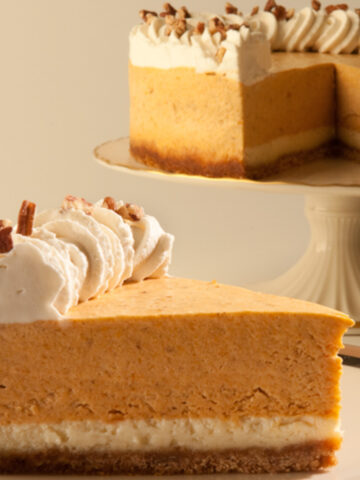
Hazelnut Gianduja Cake is modeled on a European style Gianduja Torte featuring a hazelnut butter sponge, washed with a coffee syrup and finished with an almost cloud like chocolate hazelnut buttercream. The cake is rich but not overwhelming sweet, which is one of the reasons European cakes often differ from American cakes.
The buttercream recipe for this cake is based upon the Viennese Buttercream used for the Dobos Torte. A few quick turns in the processor and the buttercream is light in texture, smooth and intense. It's amazingly simple and literally melts on your tongue.
Ingredients
Hazelnut Butter Sponge
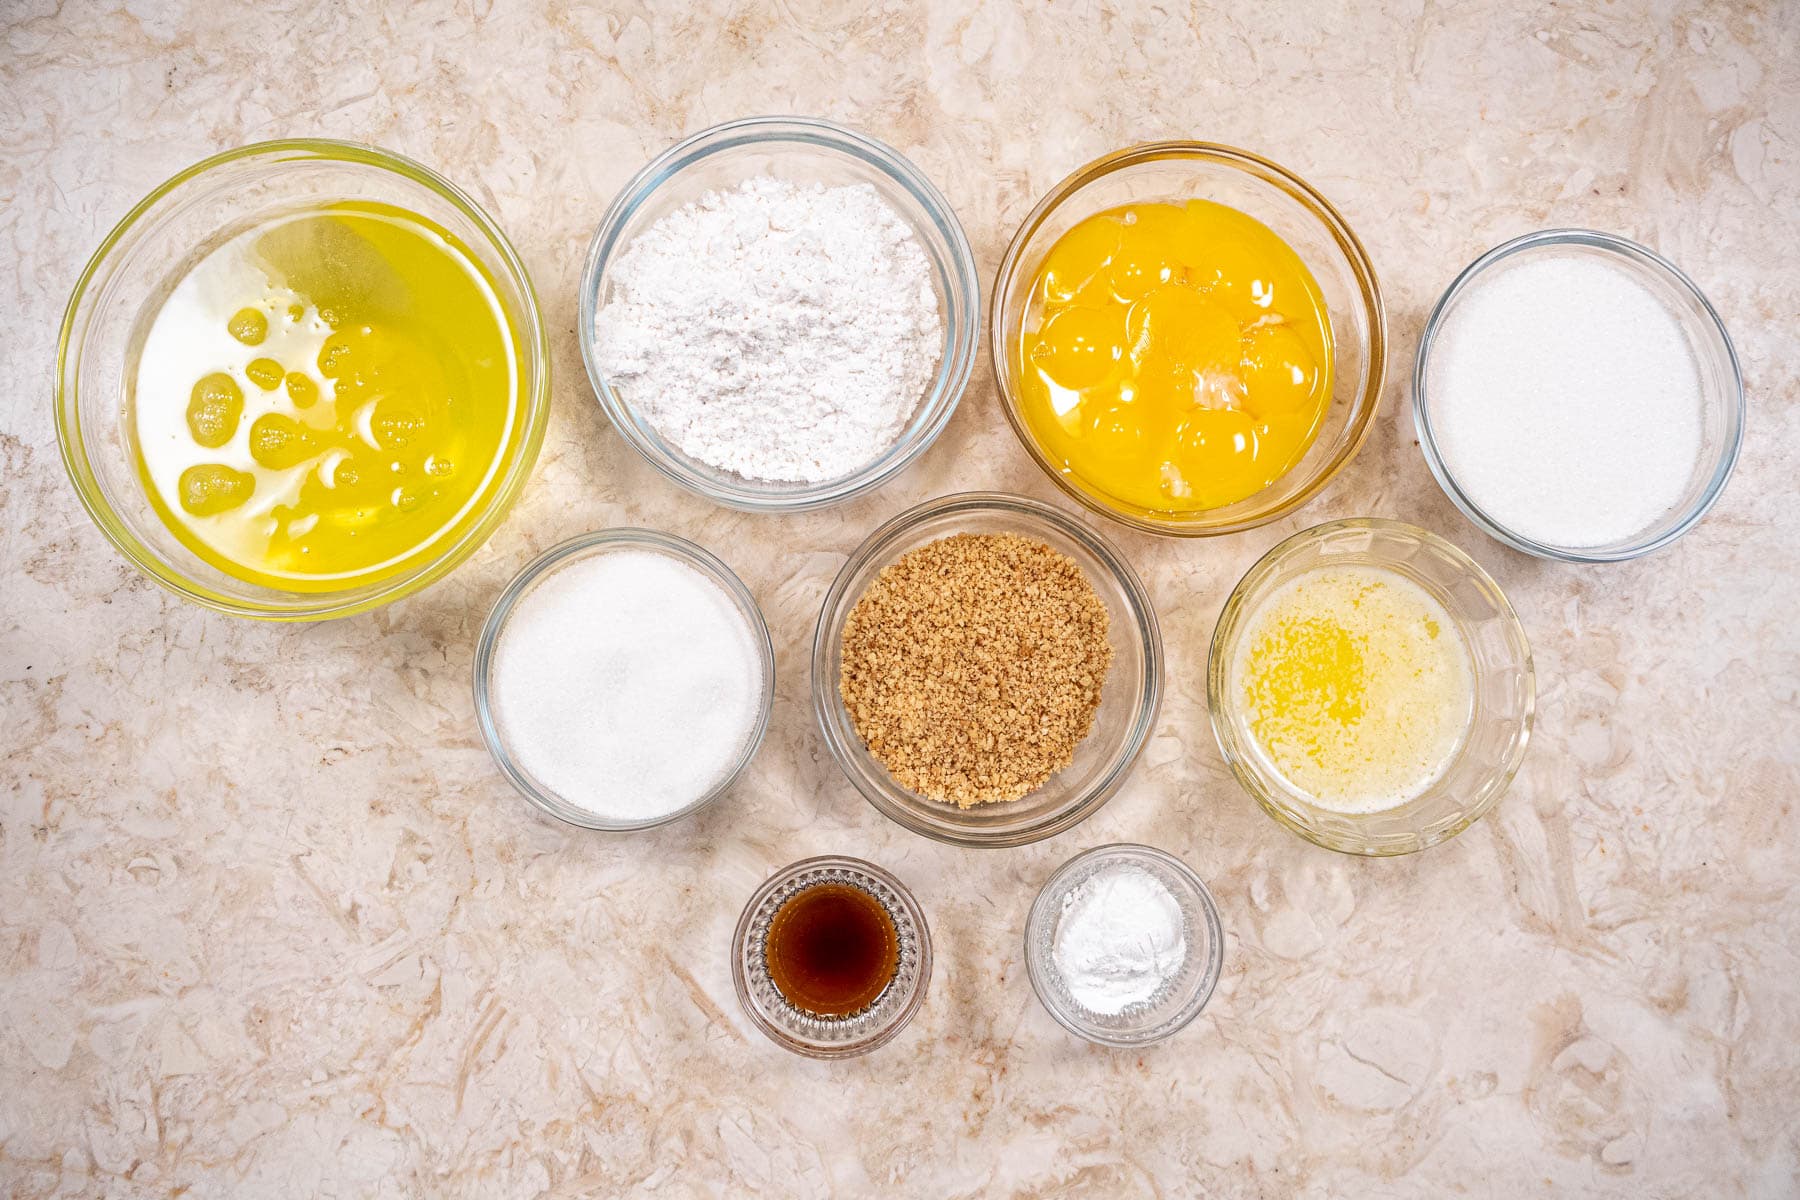
Back Row: Egg whites, flour, egg yolks, sugar. Middle Row: Sugar, ground hazelnuts, butter. Front row: vanilla, baking powder
- Cake flour is used because it is a softer flour with a lower protein count that will make a very tender cake.
- Hazelnuts are often sold with dark brown skins still attached. There is an easy way to remove them. Toasting the hazelnuts will bring out more flavor.
- Baking Powder is added to insure the cake layers rise evenly
- Large Eggs should be used to ensure the correct amount of liquid and fat are added
- Baker's Sugar is preferred over granulated sugar because it is going to be used with beaten egg whites. Baker's sugar dissolves more easily and faster because it is more finely ground. It's easily made in a food processor. However, granulated sugar can also be used.
- Vanilla can be pure or Baker's imitation vanilla which, as noted in Cook's Magazine recently, was chosen over pure vanilla in a blind taste test. An earlier taste test also chose McCormick's imitation vanilla over pure vanilla. Either is fine if using imitation vanilla. For more information on flavorings, go here.
- Unsalted Butter can be American or European
Coffee Syrup
- Water
- Granulated Sugar is fine since it will be dissolved in boiling water.
- Instant Coffee or Espresso
- Kahlua or other coffee flavored liqueur
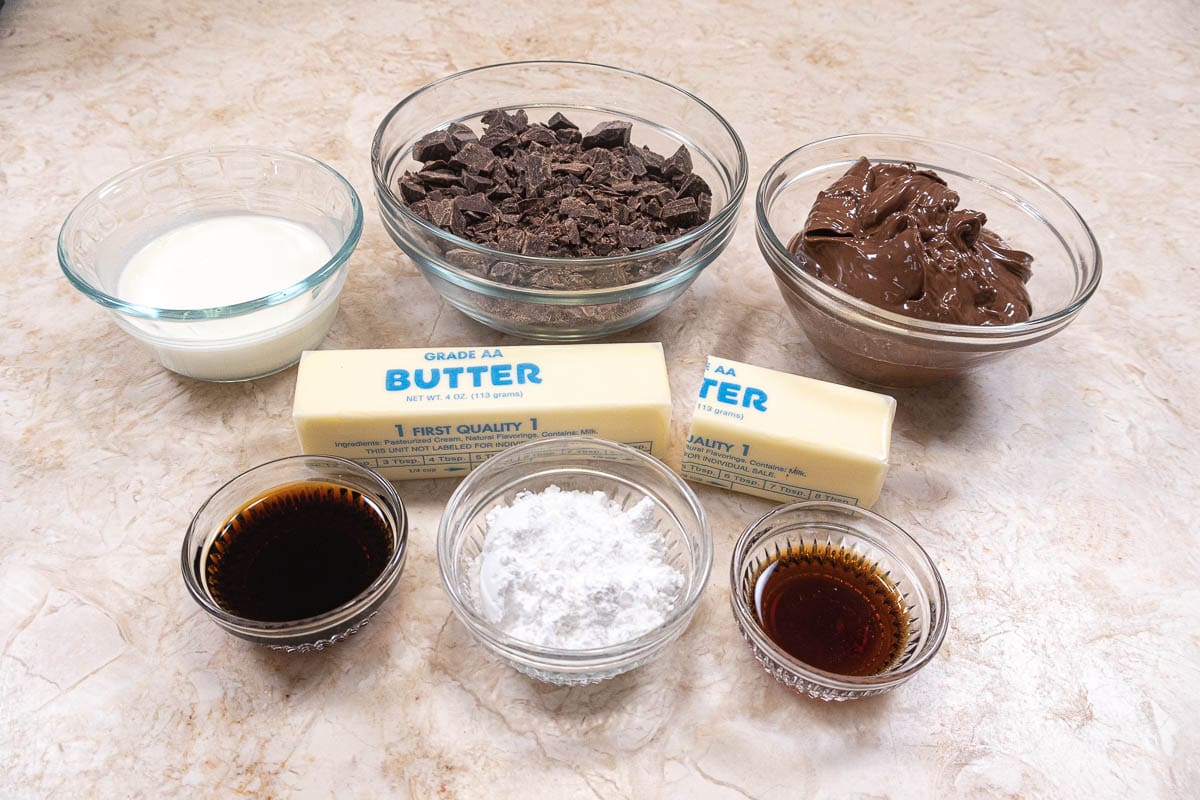
Hazelnut Gianduja Cake Buttercream and Decor
- Semisweet chocolate - My chocolate of choice is Callebaut 811 semisweet chocolate callets, which are 54.5%. This is found easily online. Higher fluidity chocolates will not work as well here as they will make the buttercream too loose.
- Unsalted Butter - American or European
- Heavy Cream - sometimes referred to as 40% cream
- Kahlua or other coffee flavored liqueur
- Vanilla - imitation is fine since the chocolate, nuts and Nutella are predominant flavors
- Powdered Sugar
- Nutella - right out of the bottle
- Toasted Hazelnuts
See recipe card for quantities.
Instructions for Hazelnut Butter Sponge
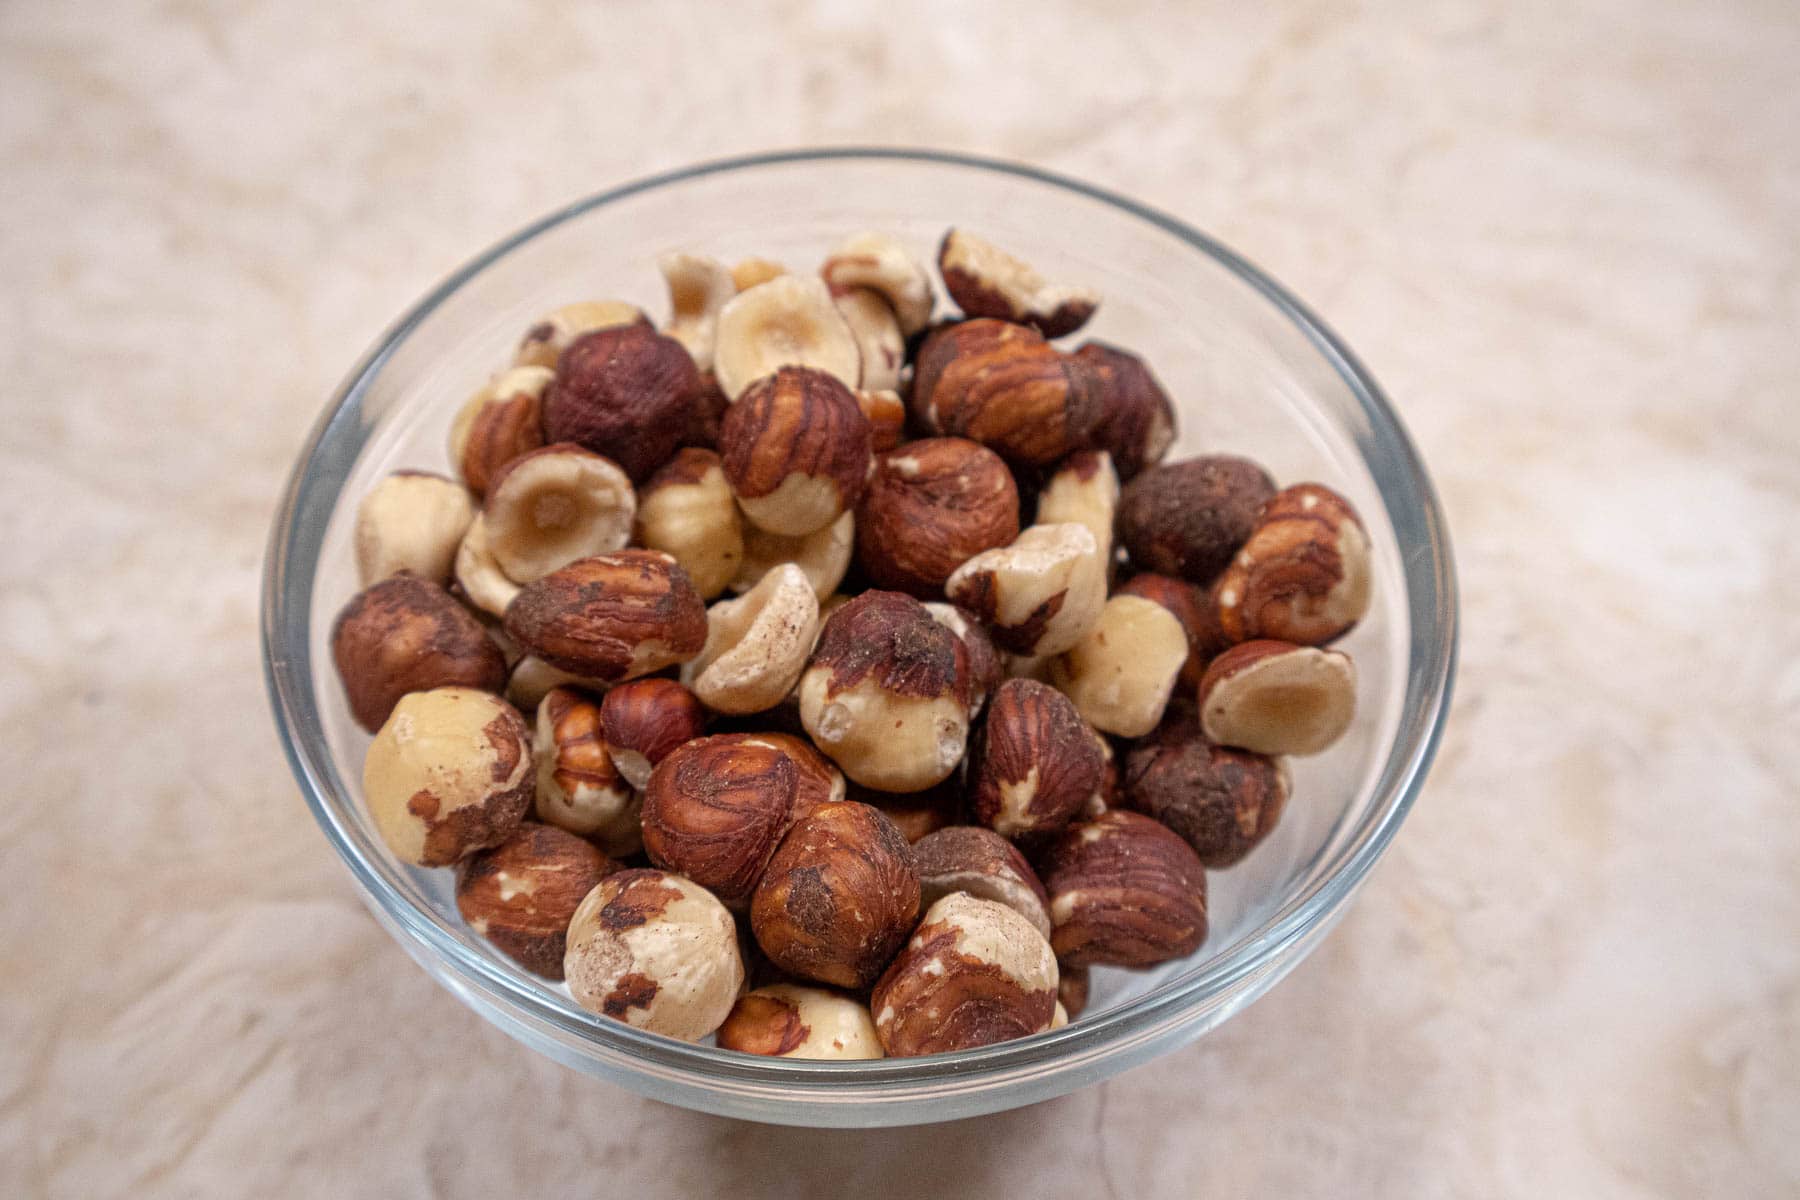
Most hazelnuts are bought with the skins on. They should be toasted until deep golden brown and fragrant.
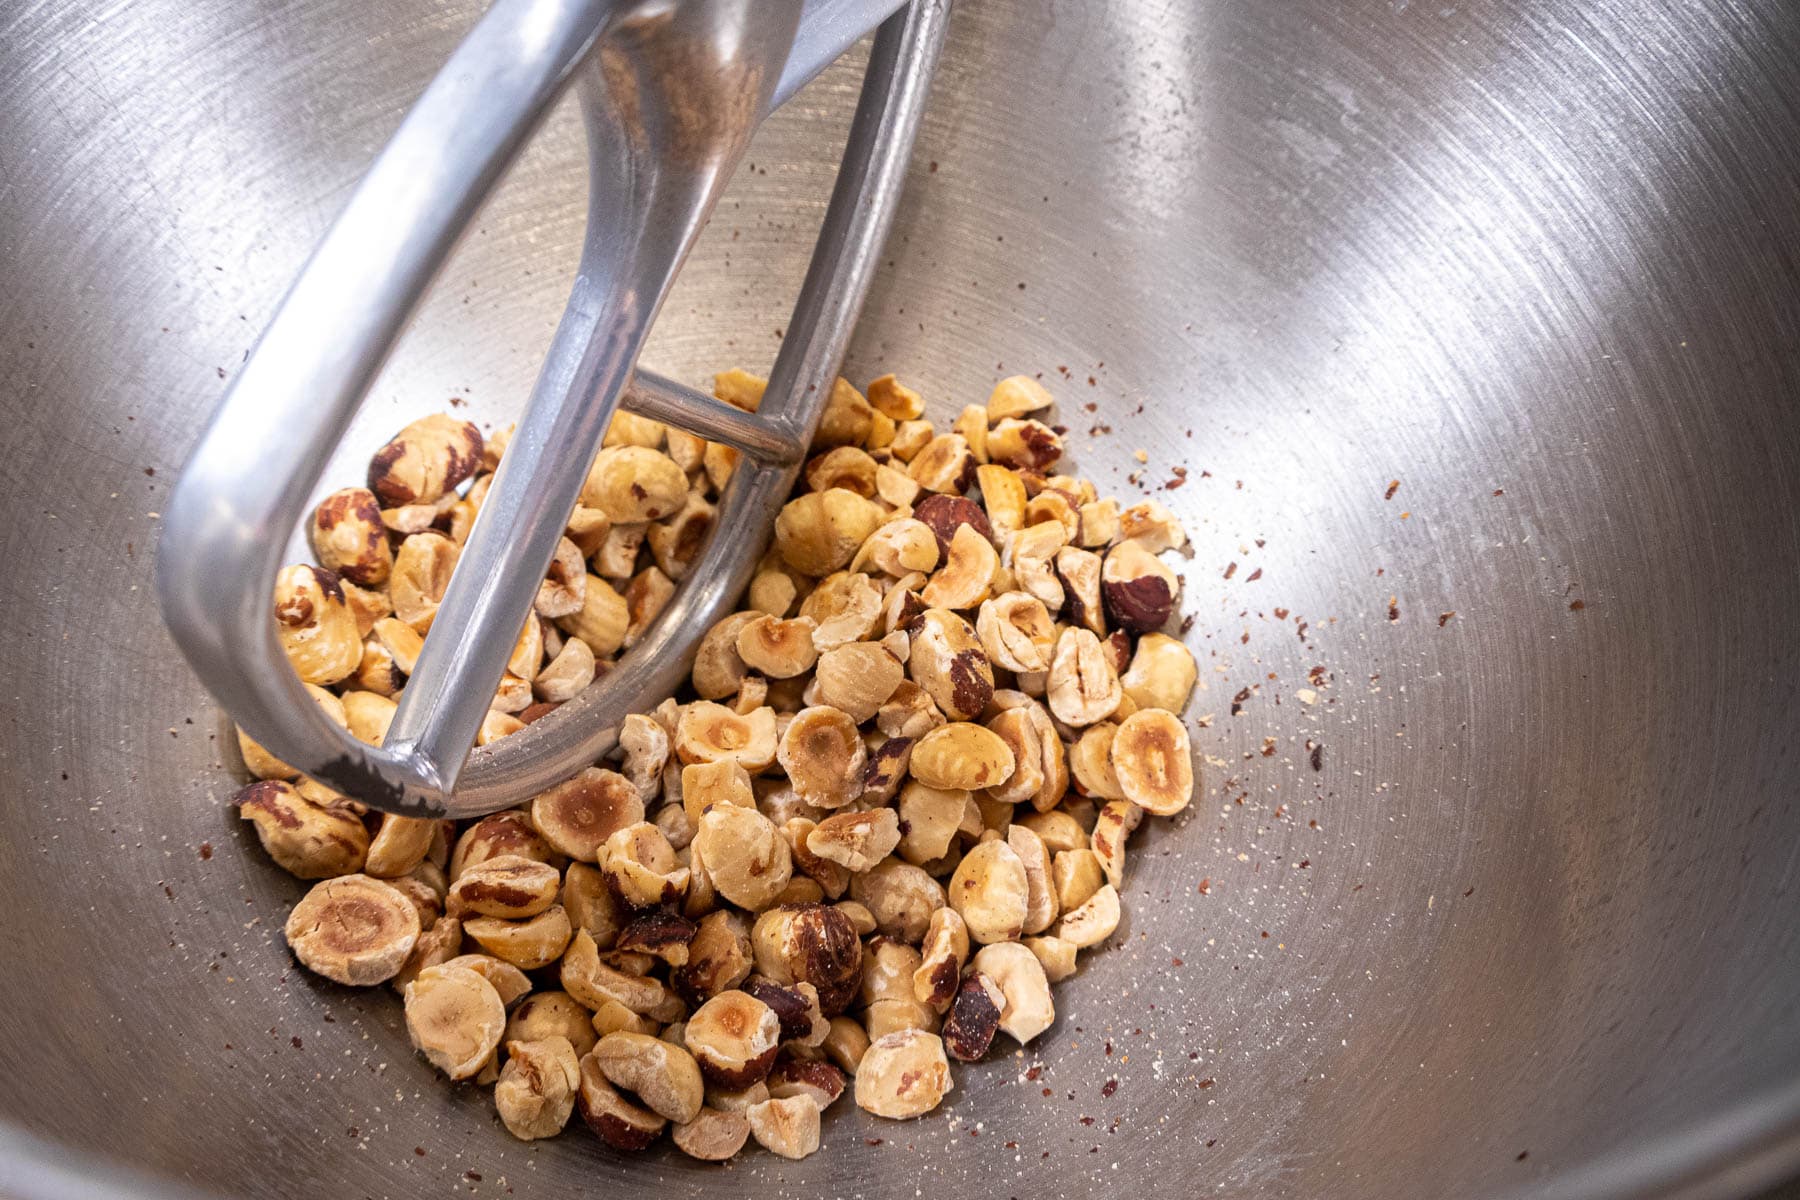
Hazelnuts straight out of the oven are skinned easily by placing them in the bowl of a mixer and mixing on medium for several minutes to remove the skins.
Separate the hazelnuts from the skins. As you can see some skins stubbornly cling to a few of the nuts but that's fine. Cool completely before proceeding.
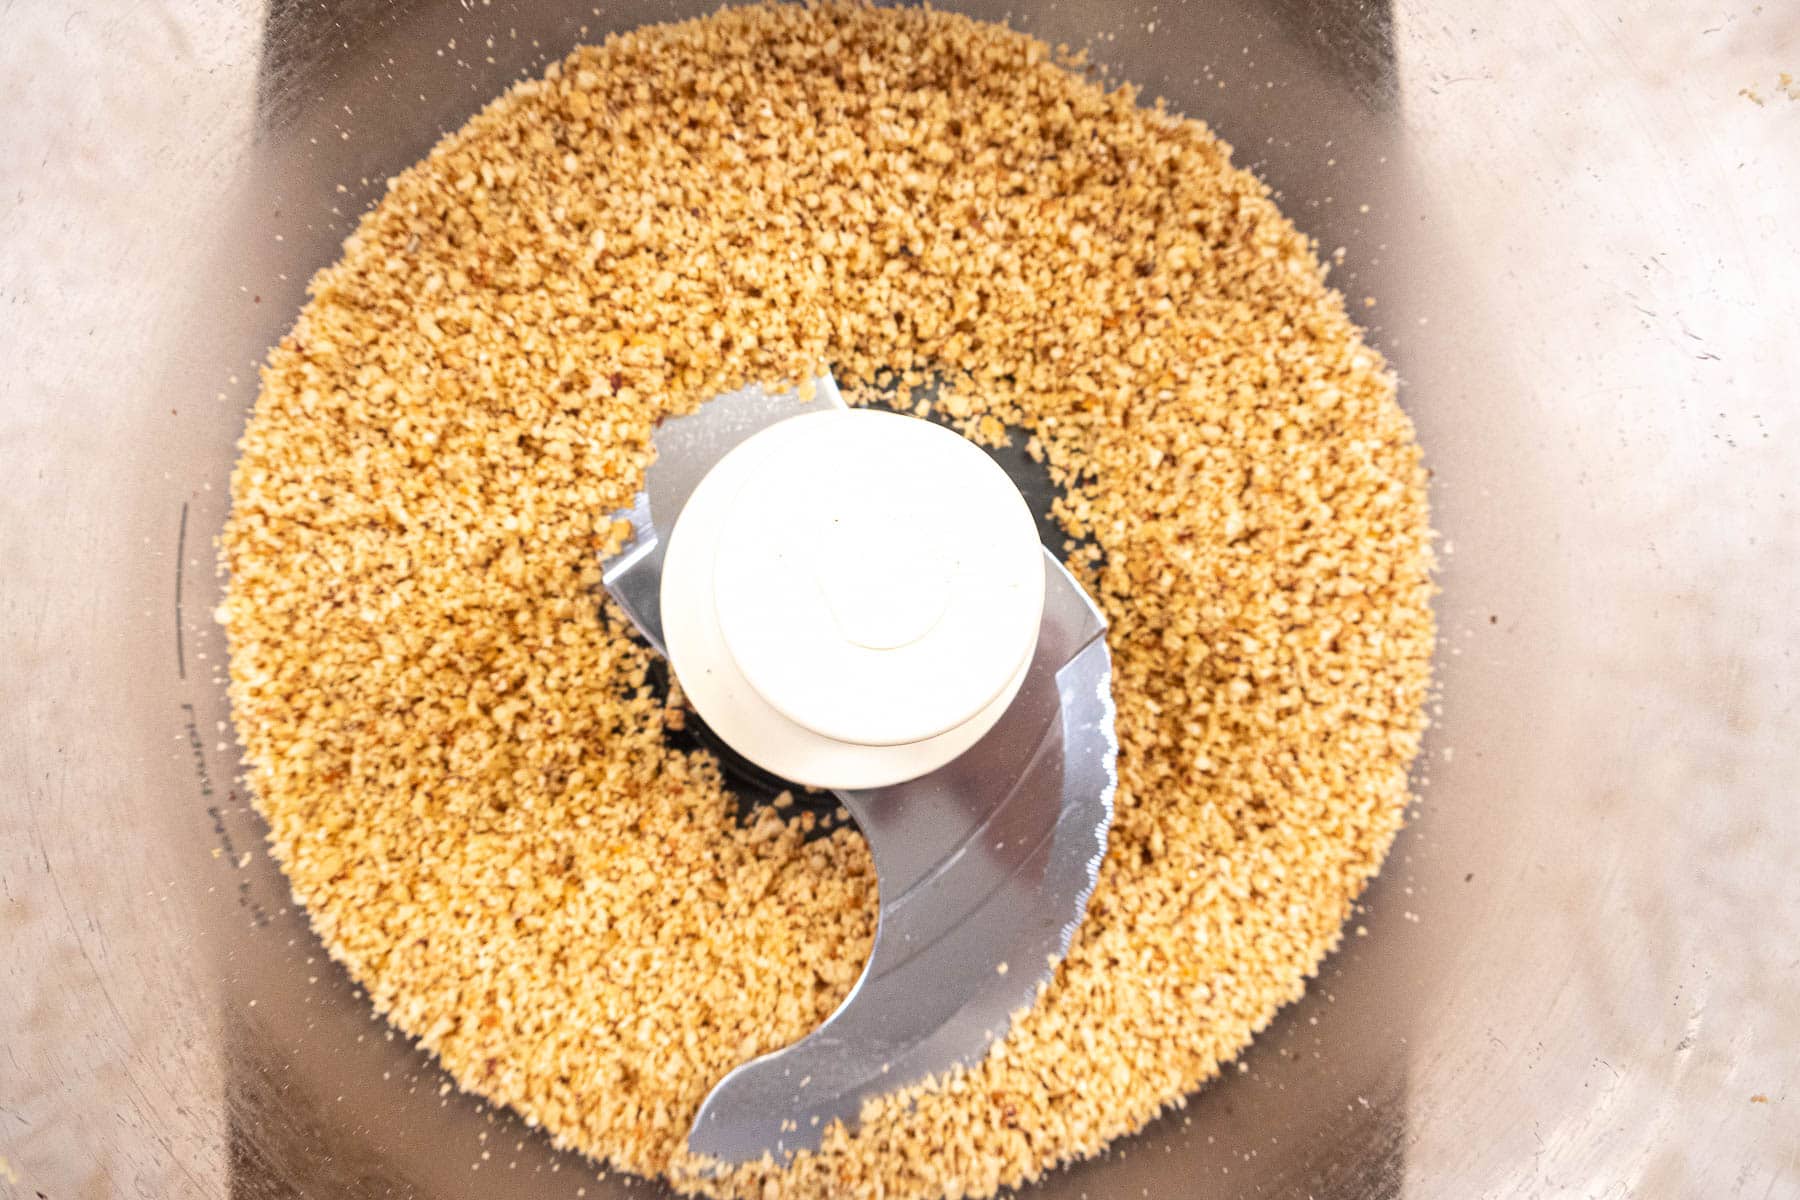
Place the nuts in the food processor and process until finely ground. Be careful not to over process or they can turn into a paste.
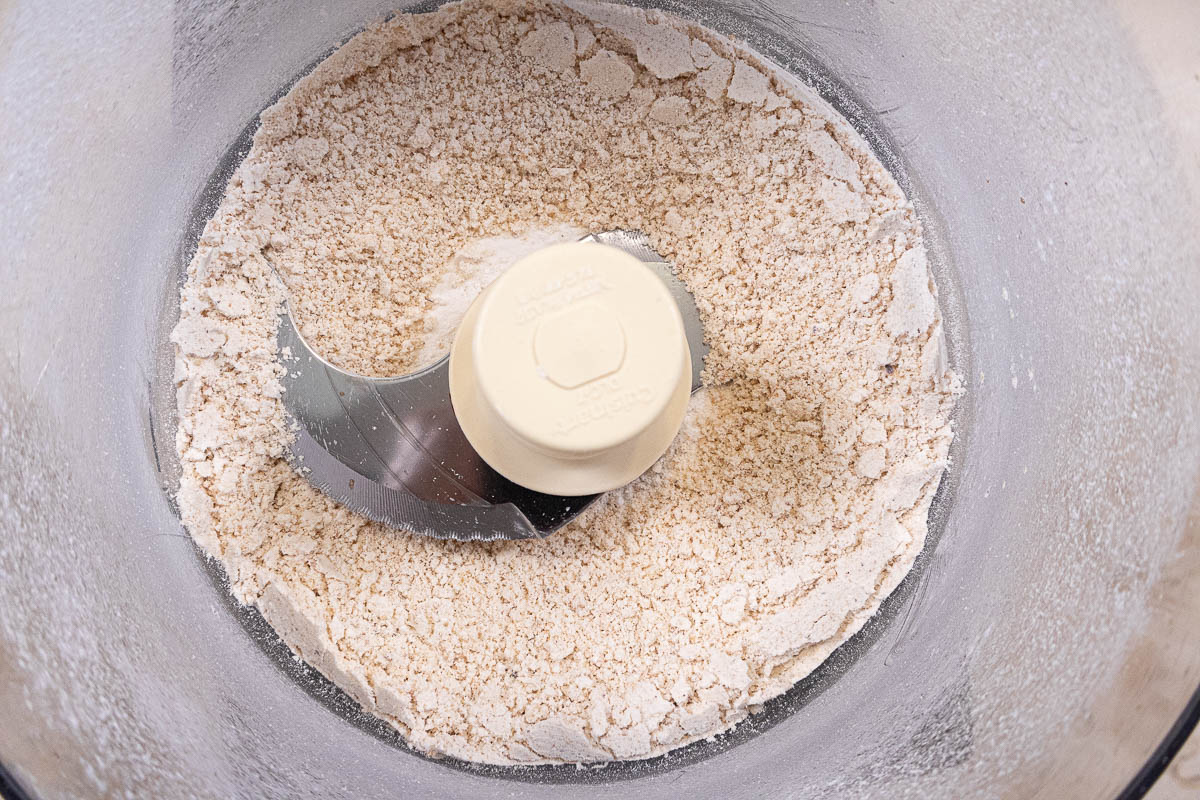
Place the flour and baking powder in the processor with the hazelnuts. Process to further pulverize the nuts as fine as possible and mix the ingredients. Set aside.
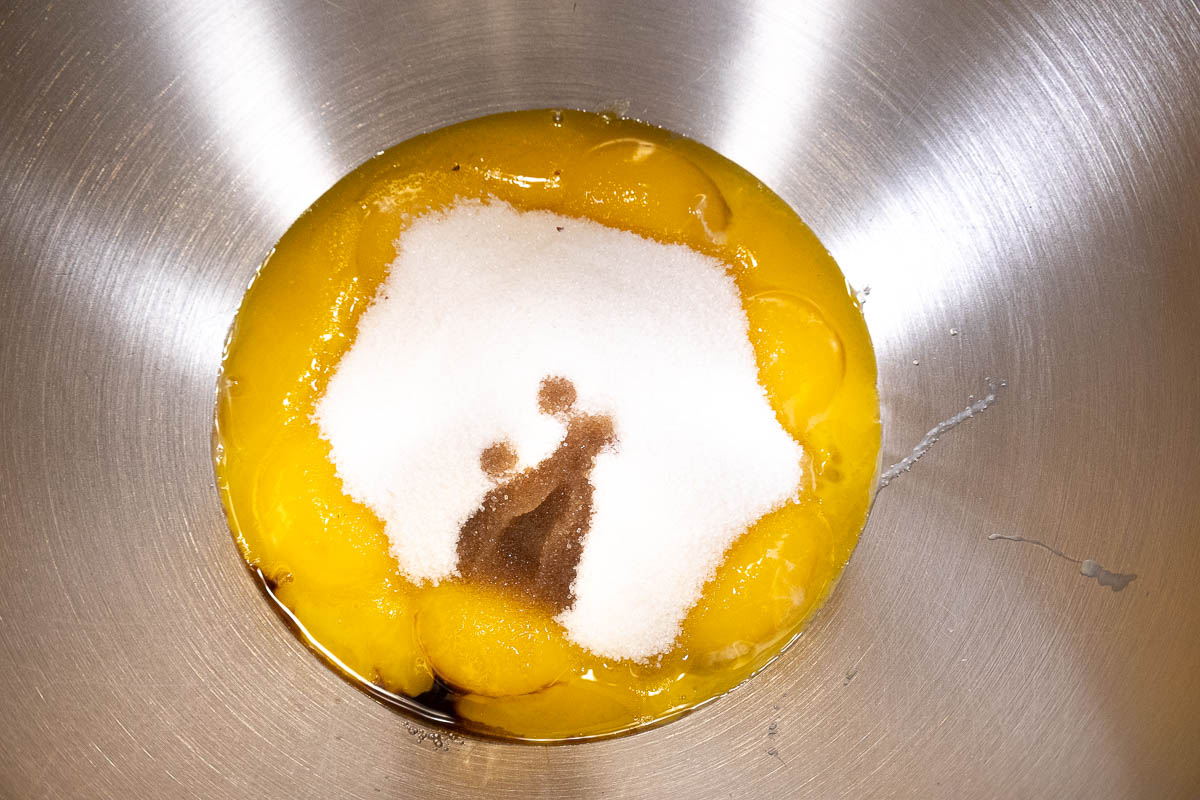
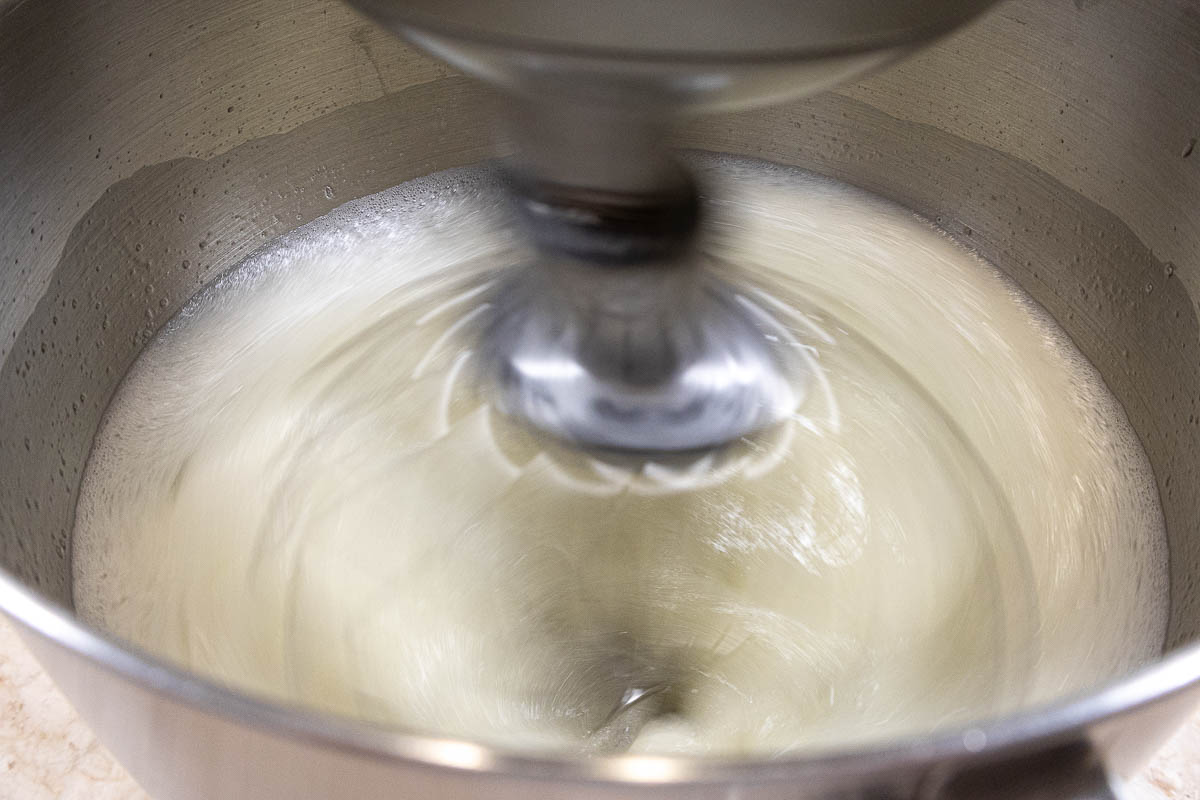
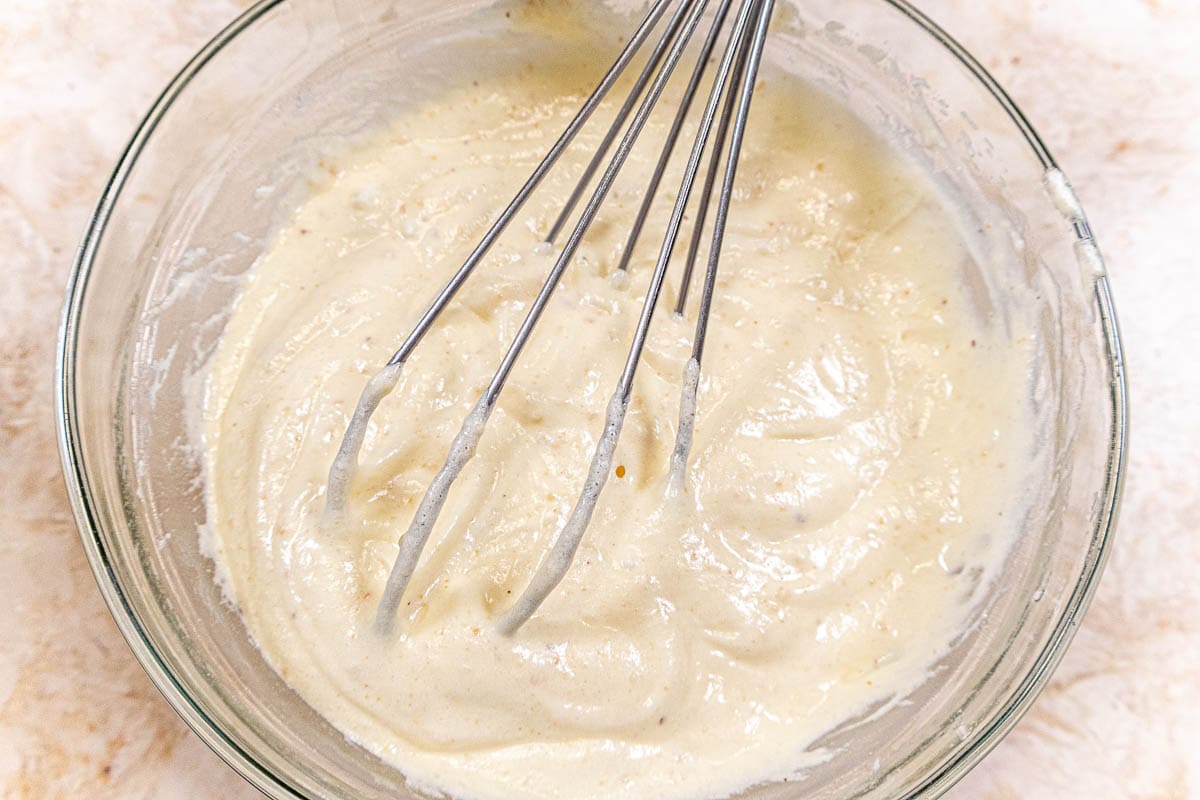
Place the egg yolks, sugar and vanilla in the mixer bowl fitted with the whisk attachment.
Beat the mixture until very, very light and the mixture forms a ribbon as it drops from the whisk.
Place the egg whites in a clean bowl with a clean whisk. The egg whites should be beaten to the point the whisk attachment starts forming lines. Add the sugar a bit at a time and beat to the soft peak stage.
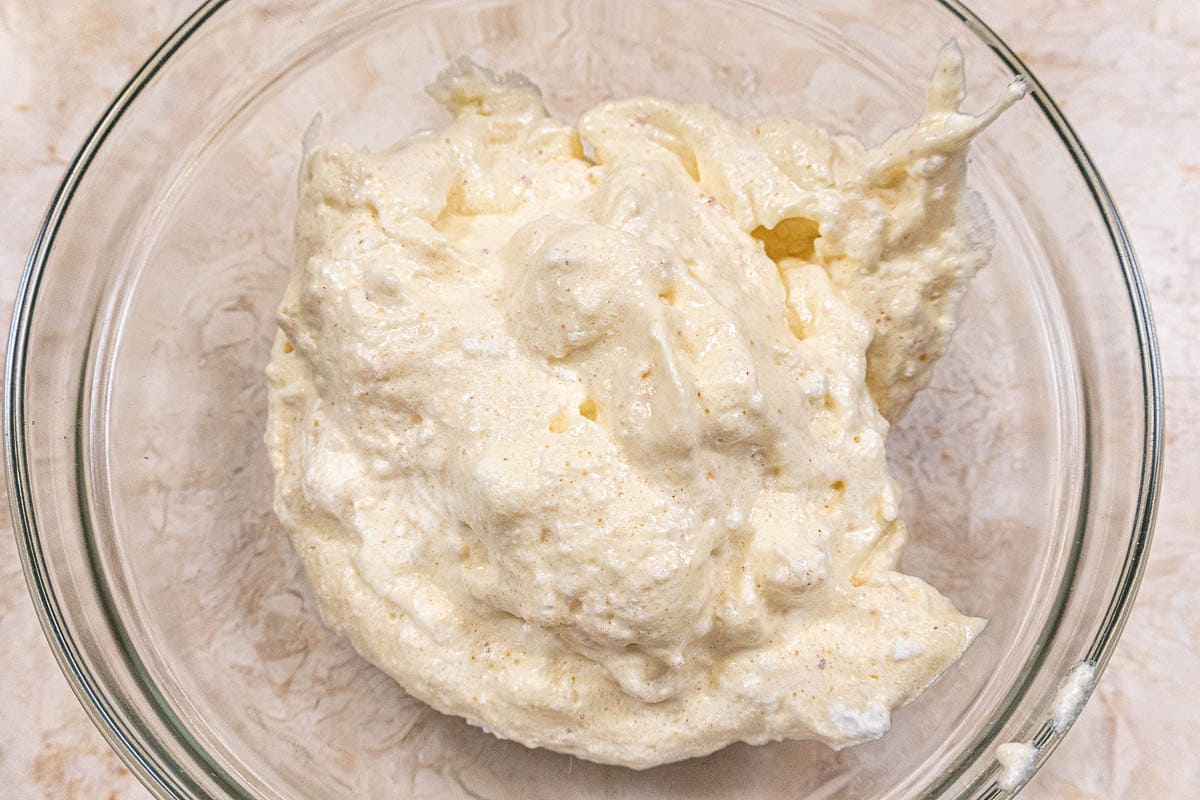
Pour the beaten egg yolks over the whites. Add half of the flour/nut mixture over the beaten egg whites. Fold in about ¾ of the way. Add the remaining flour/nut mixture and fold in.
Place about a 1 cup of the sponge in a medium size bowl.
Add the melted butter and whisk in until the butter is completely blended in the the mixture is emulsified. Return this to the main amount of batter in the bowl and fold in.
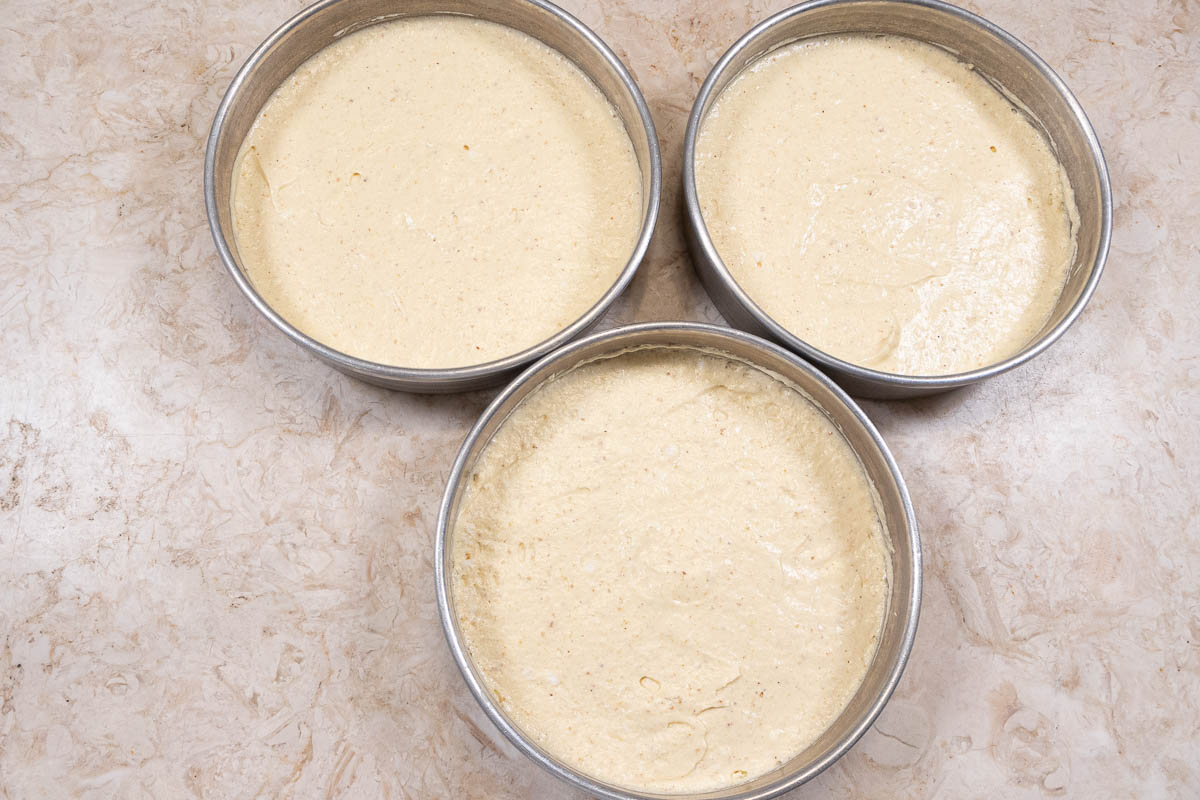
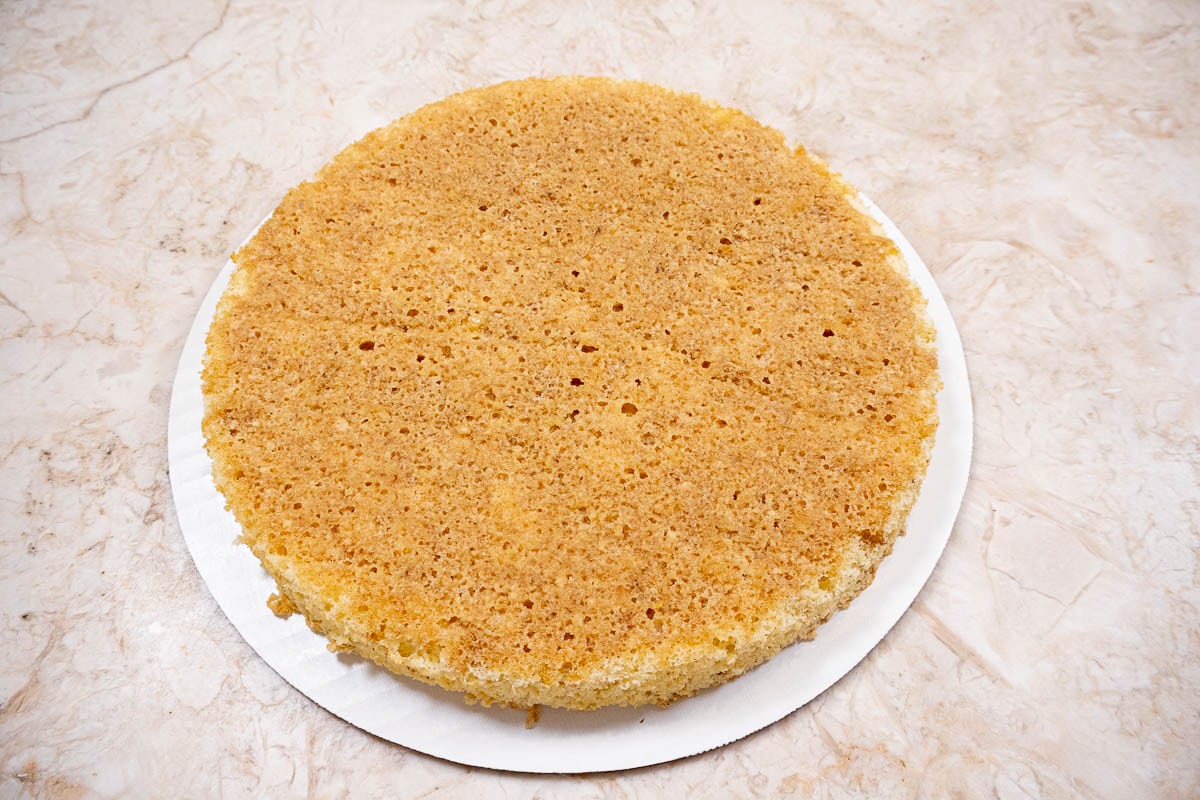
Divide the batter between 3 prepared pans. Bake until the layers spring back when lightly touched and a tester comes out cleanly. Do not overbake.
Coffee syrup adds another layer of flavor the the Hazelnut Gianduja Cake
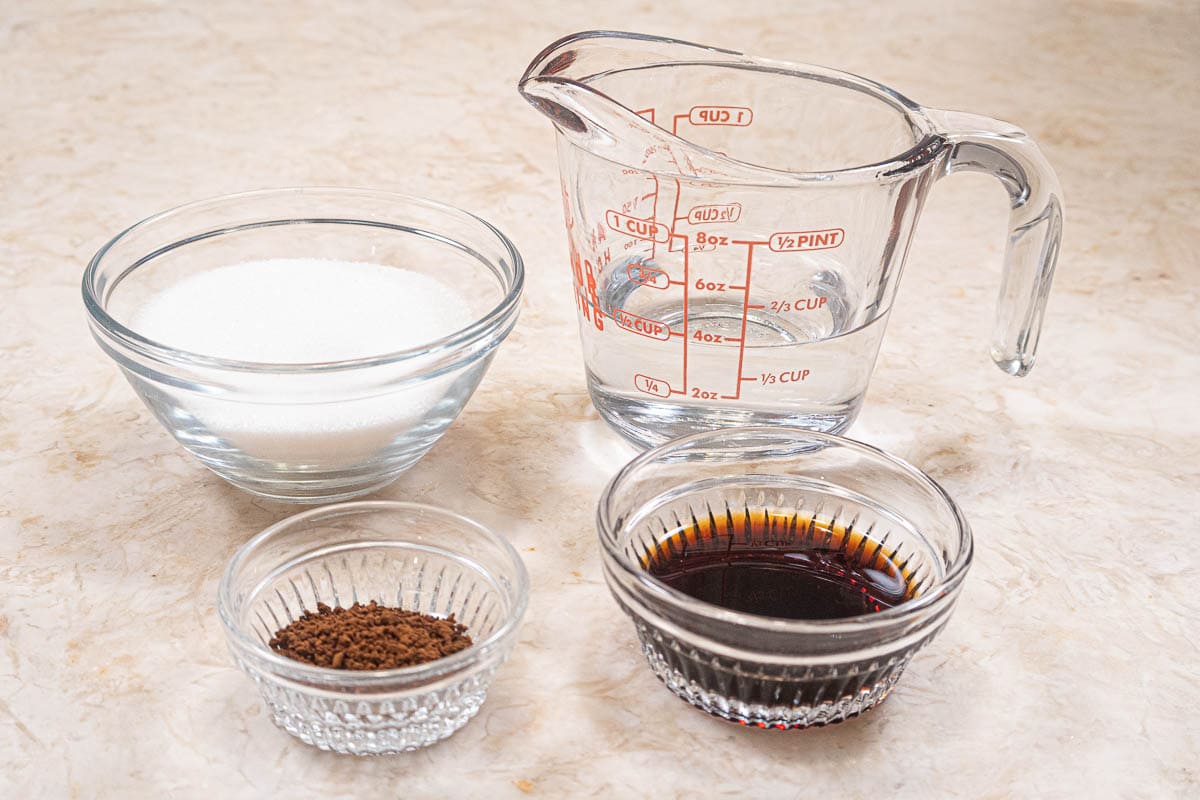
Back Row: Sugar, water. Front Row: Instant Coffee, Kahlua
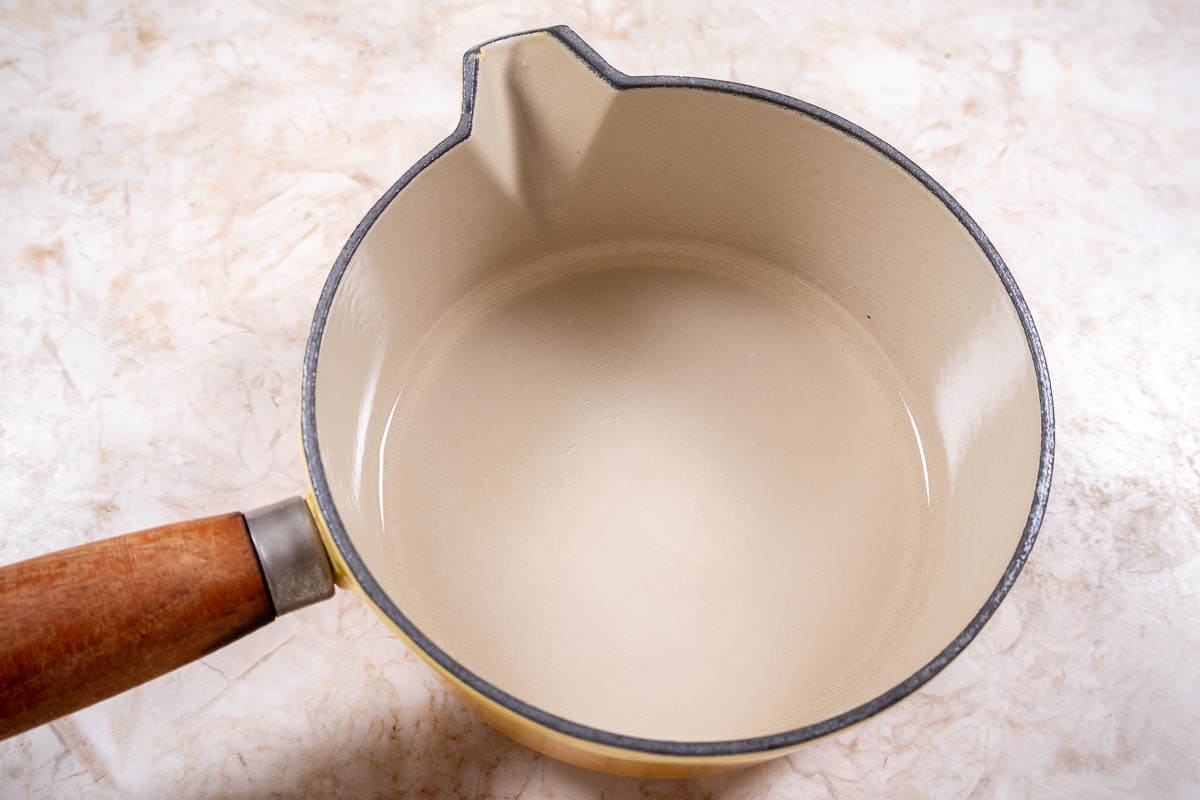
Place the water and sugar in a small saucepan to make a simple syrup.
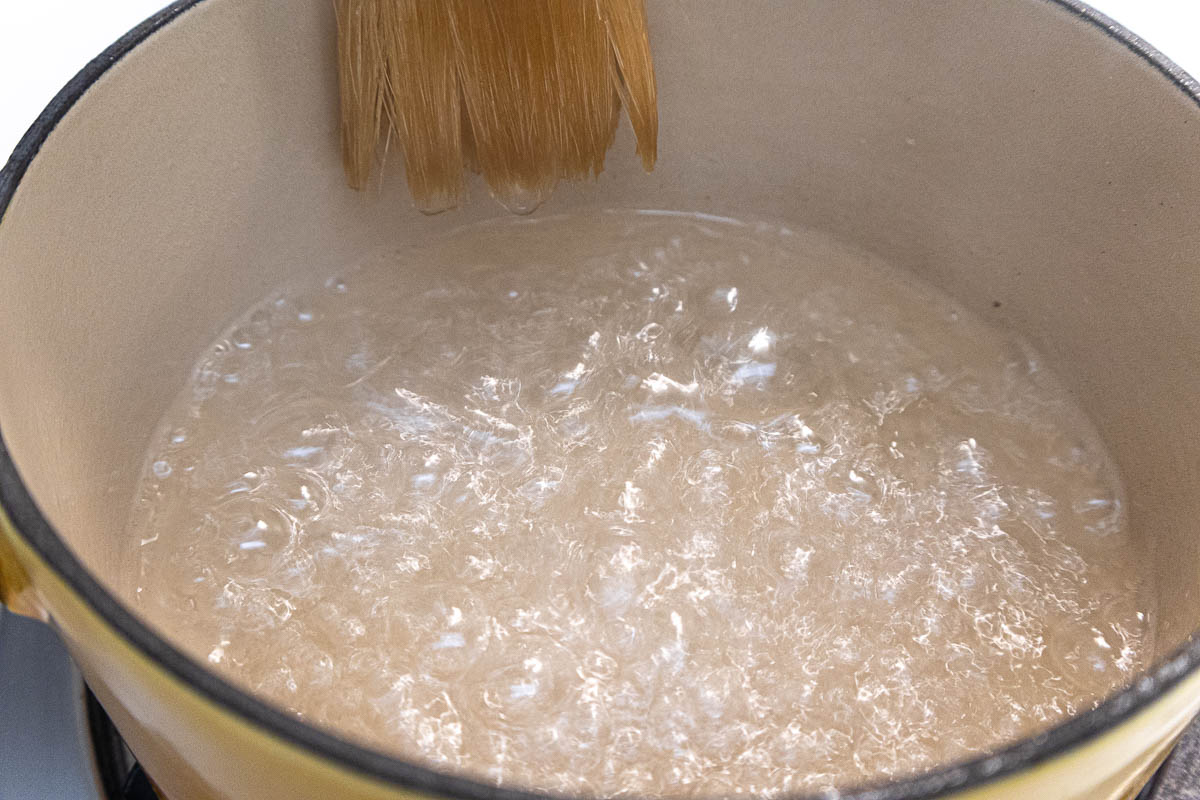
When the syrup comes to a rolling boil, wash the sides of the pan down with a pastry brush dipped in cold water to remove any sugar crystals.

Dissolve the coffee in the Kahlua.
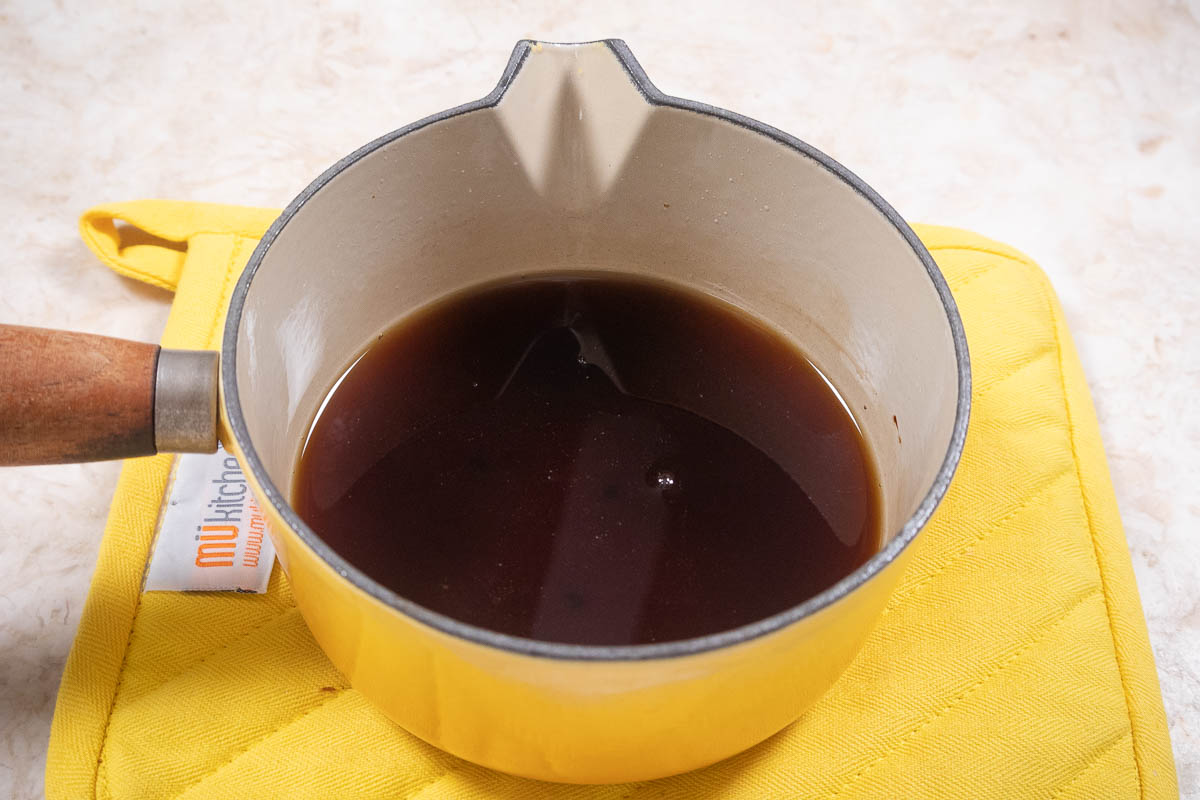
Add the coffee/Kahlua mixture to the simple syrup. Cool completely.
Hazelnut Gianduja Cake Buttercream
Back Row: Cream, semisweet chocolate, nutella. Middle Row: Unsalted butter. Front Row: Kahlua, powdered sugar, vanilla
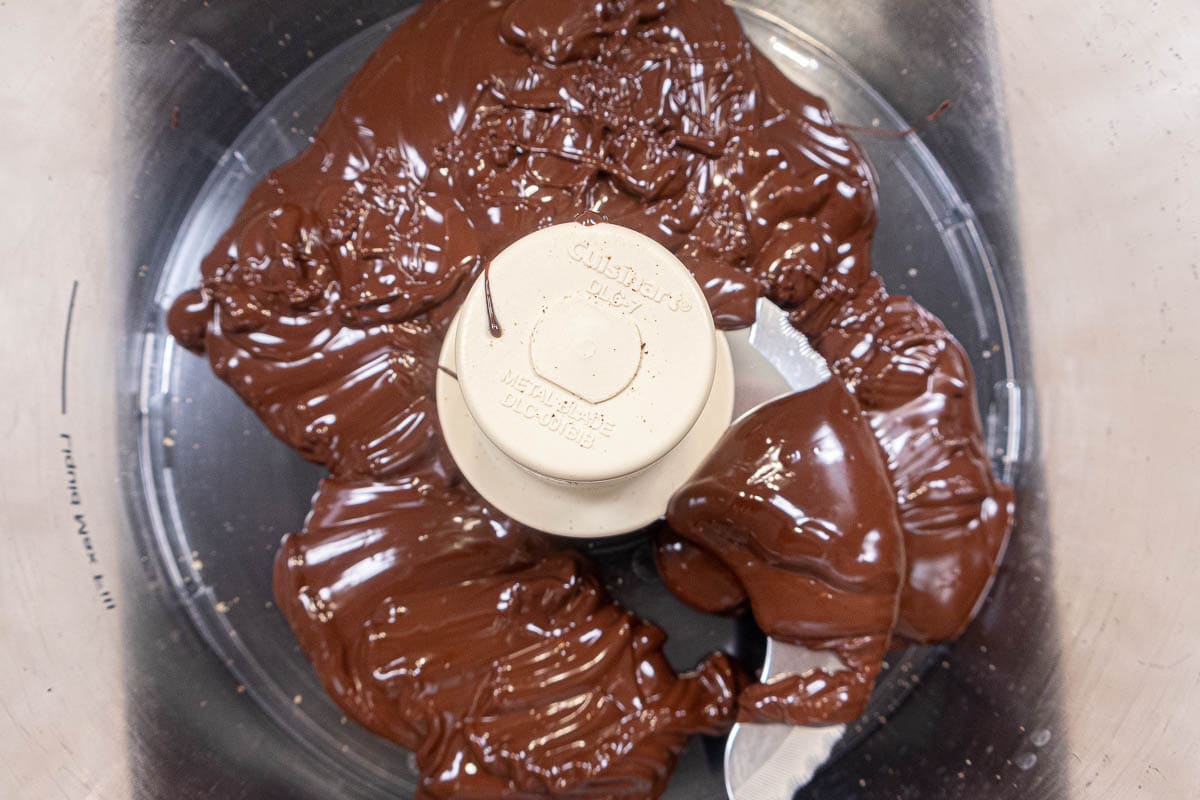
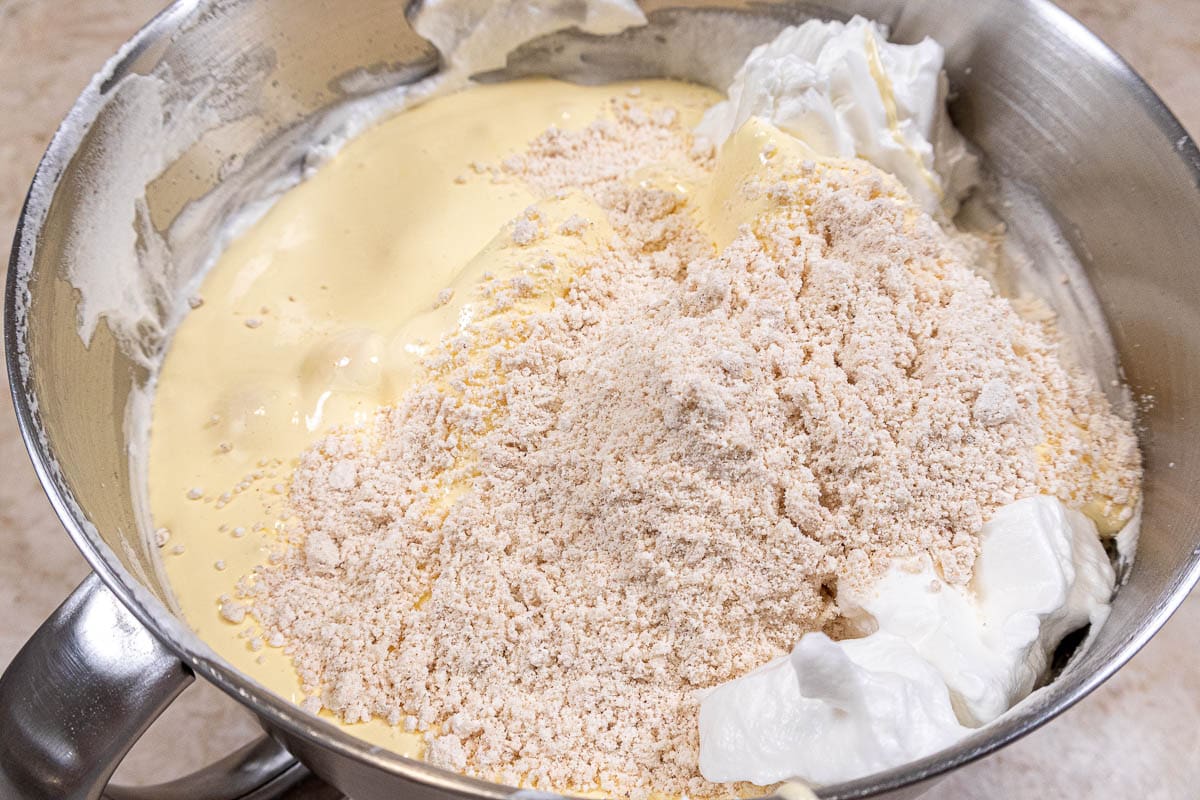
Melt the chocolate over hot water or in the microwave at half power. Cool slightly and place in the bowl of a processor.
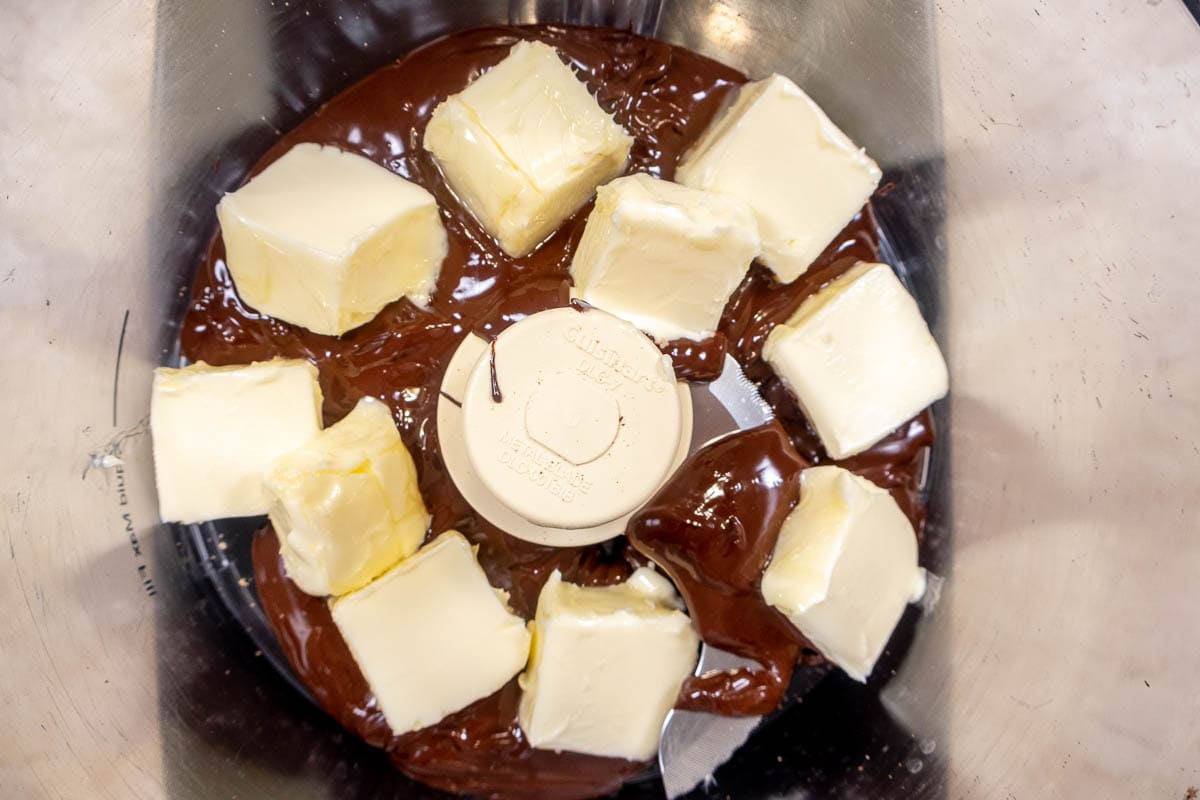
Place the cut up butter, which has been out of the refrigerator for 30 minutes over the chocolate.
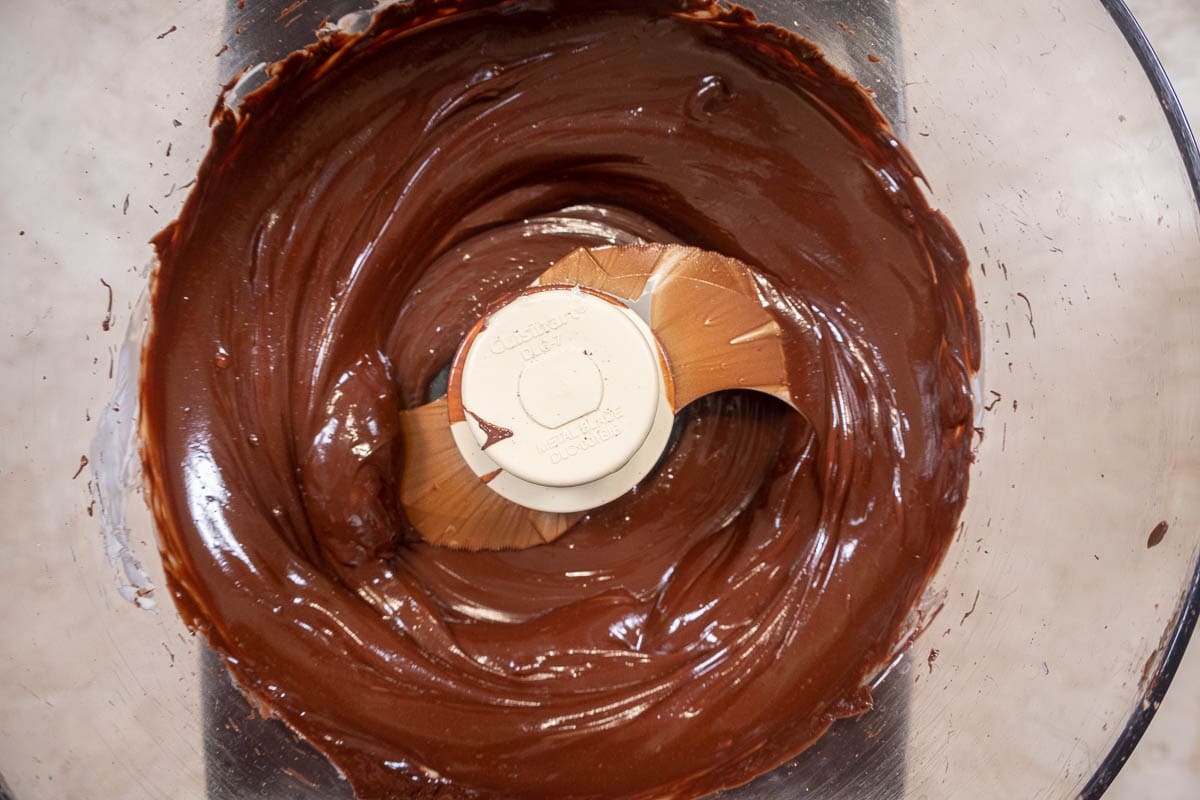
Process the chocolate and butter together.
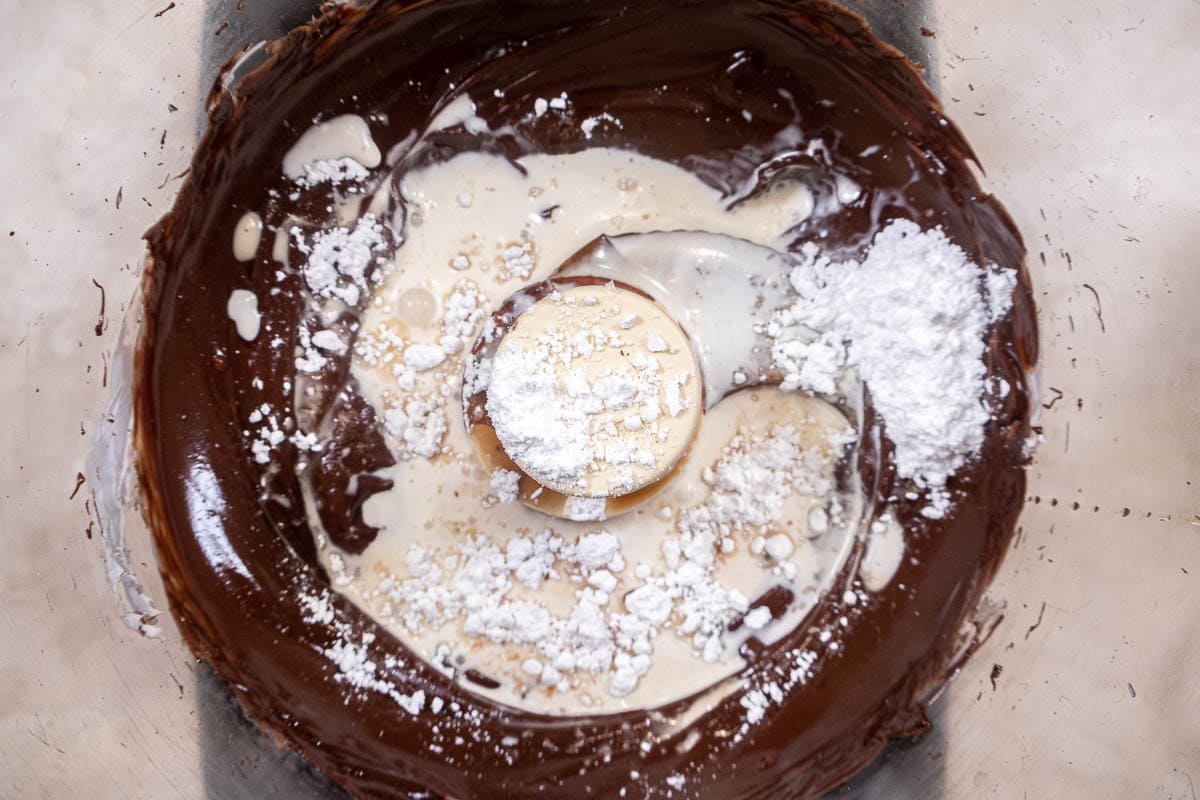
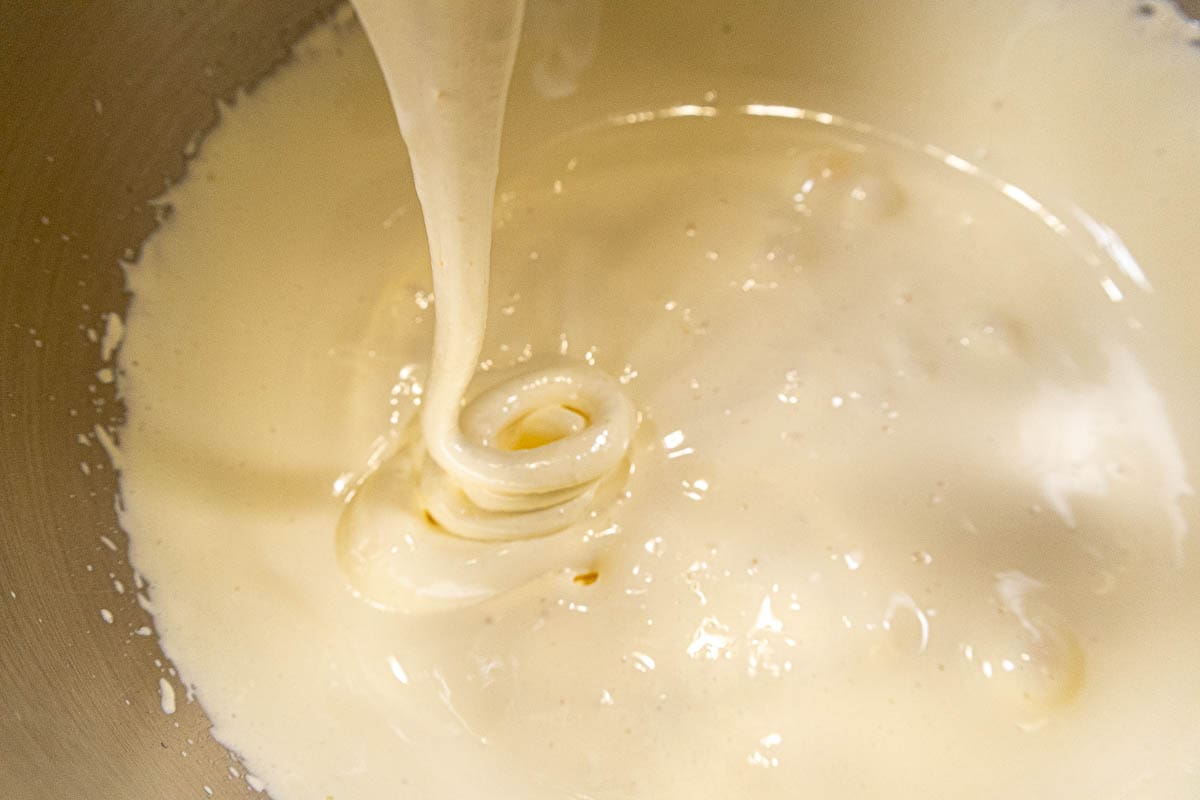
Add the remaining ingredients to the processor and process until smooth, scraping down once or twice.
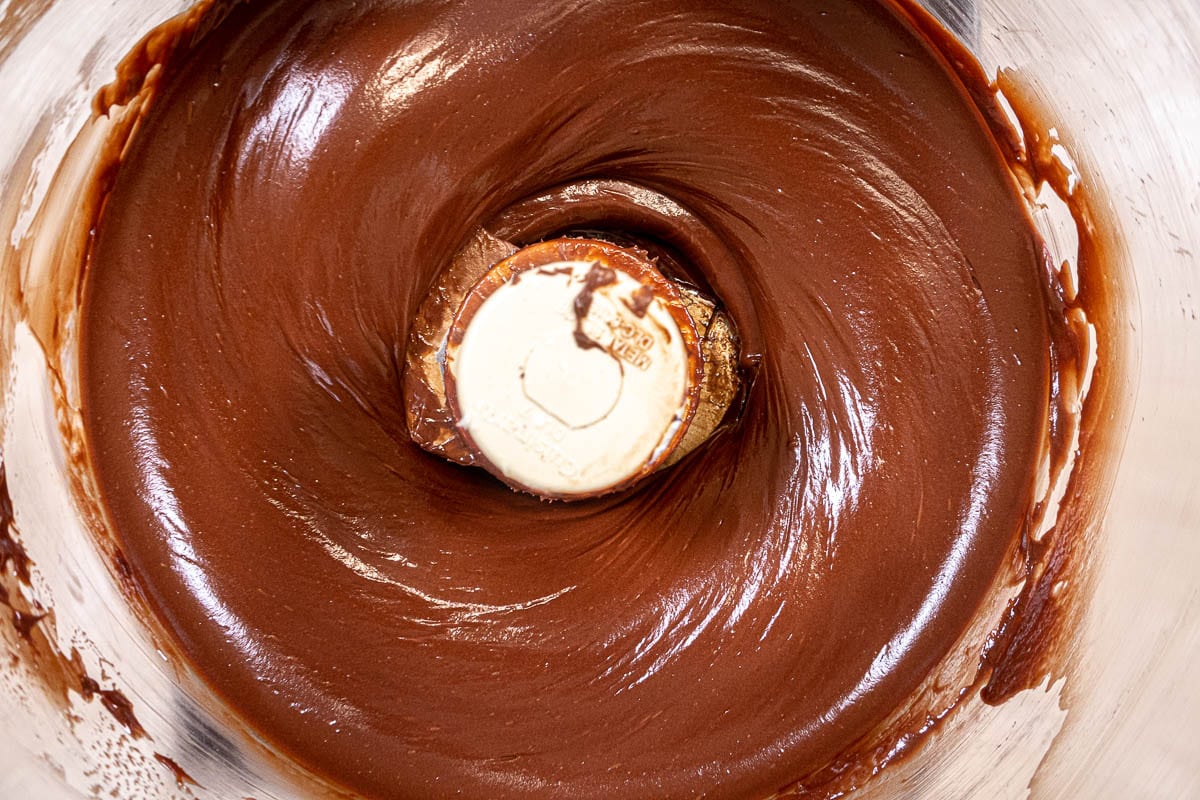
The finished buttercream is very light and smooth but will hold its shape.
Hazelnudt Gianduja Cake Decor
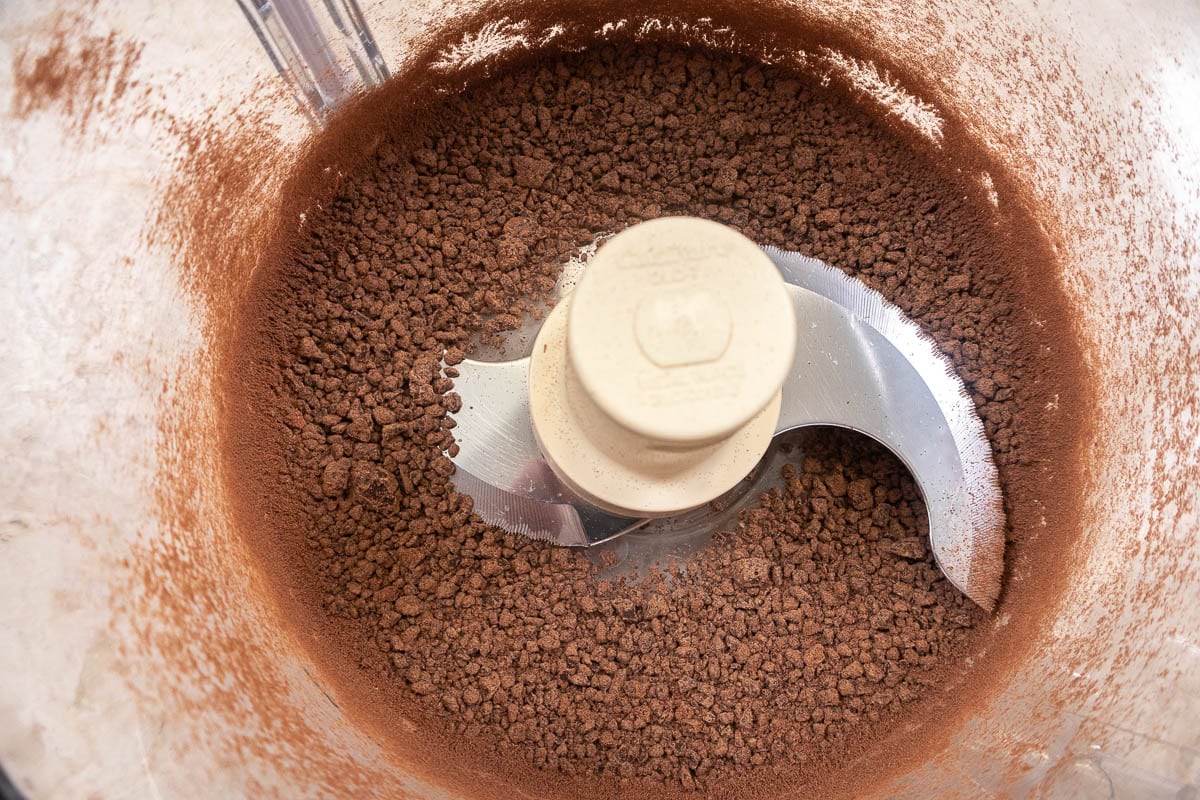
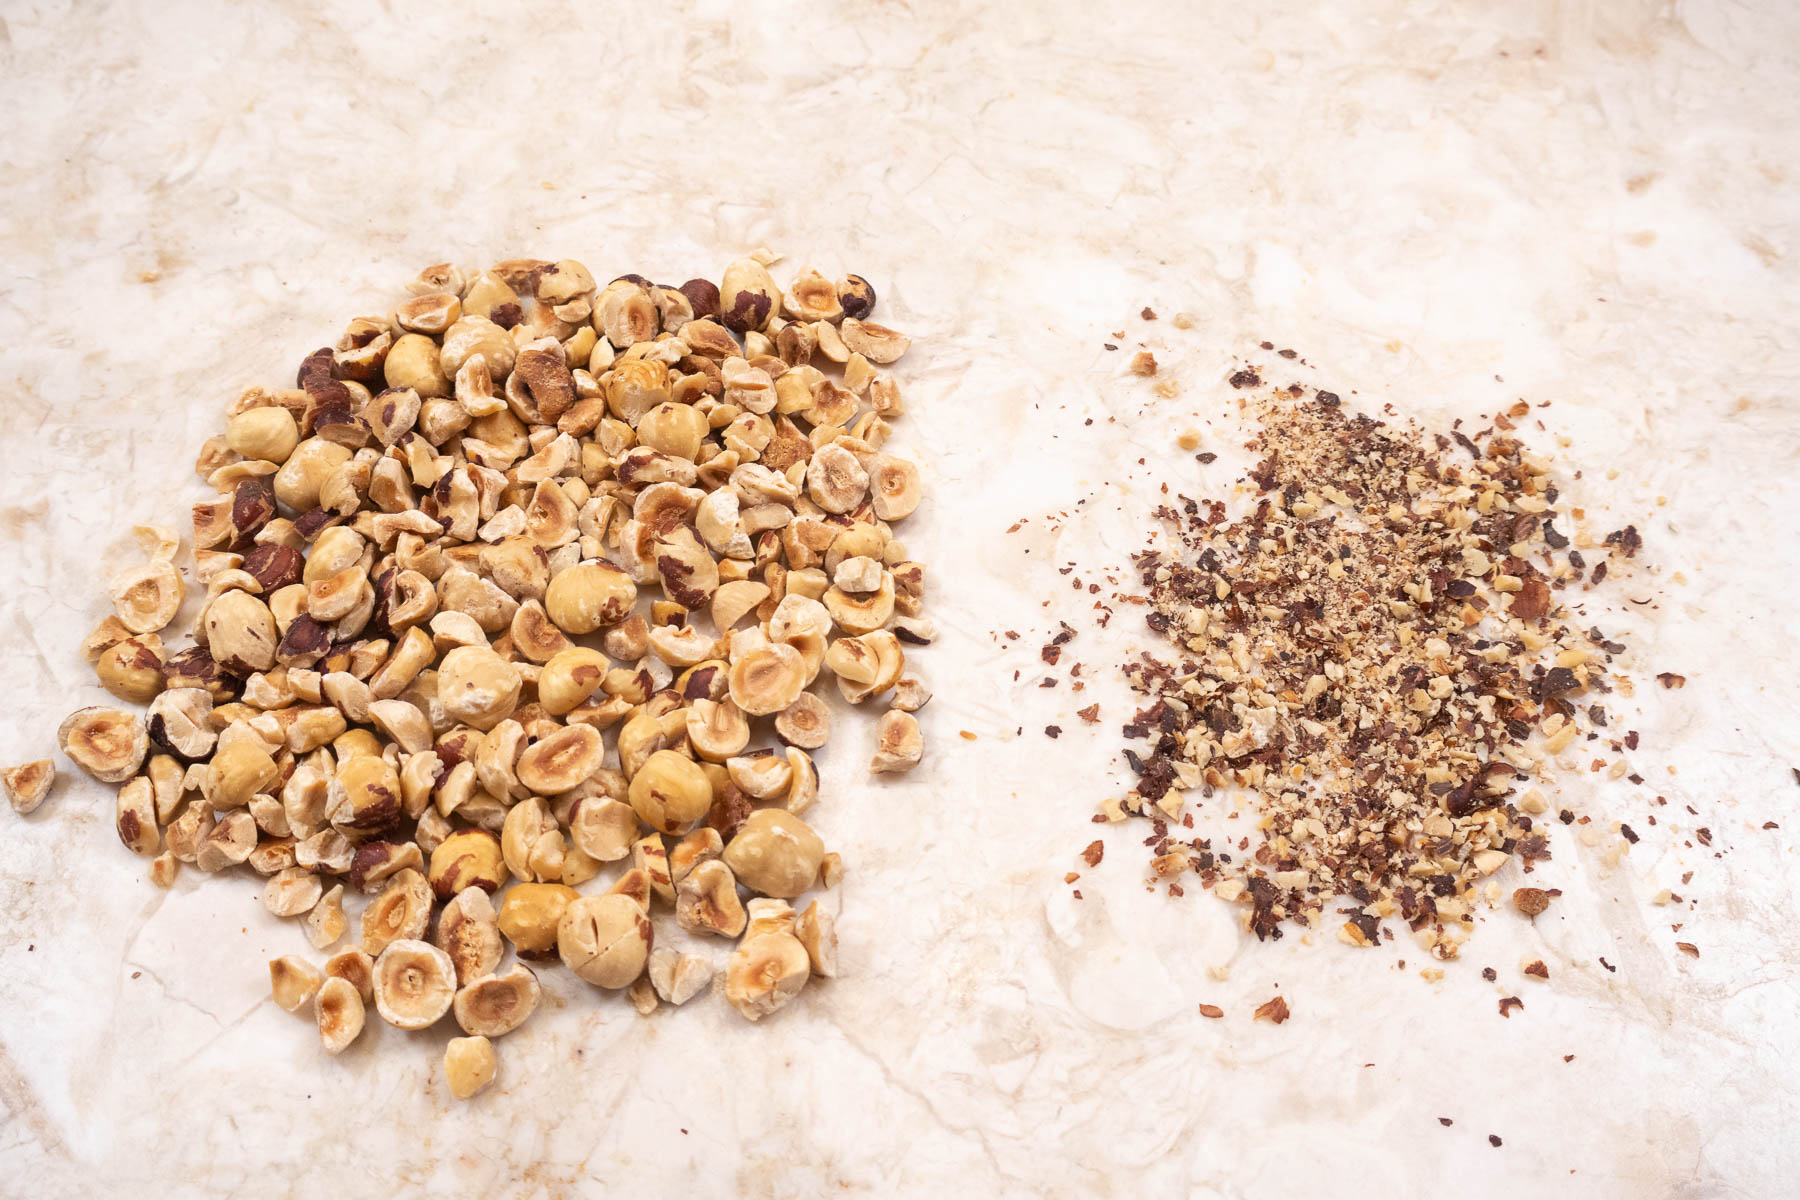
Semisweet chocolate coarsely ground in the processor for the cake decor.
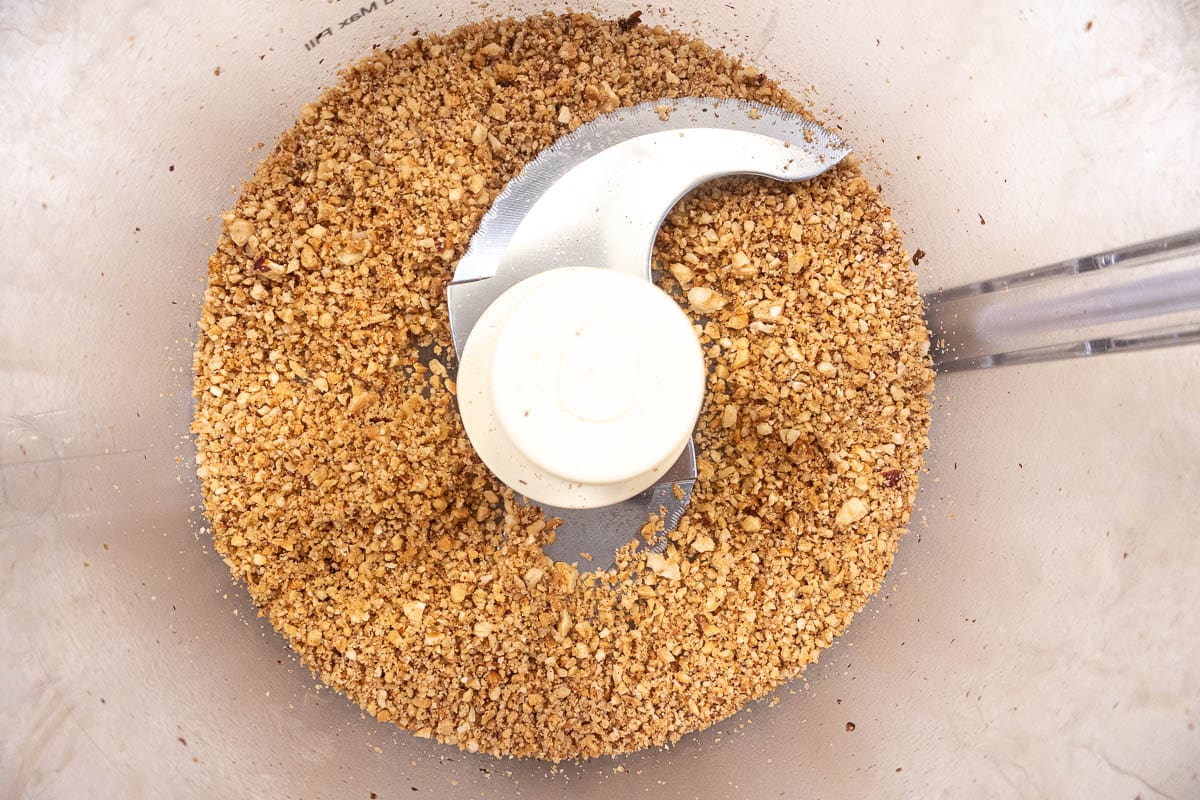
Hazelnuts coarsely ground in processor for deco. Combine and place in the freezer until needed.
Assembly
Turn the frozen cake layers upside down, remove the parchment paper and brush each one with ⅓ of the coffee syrup.
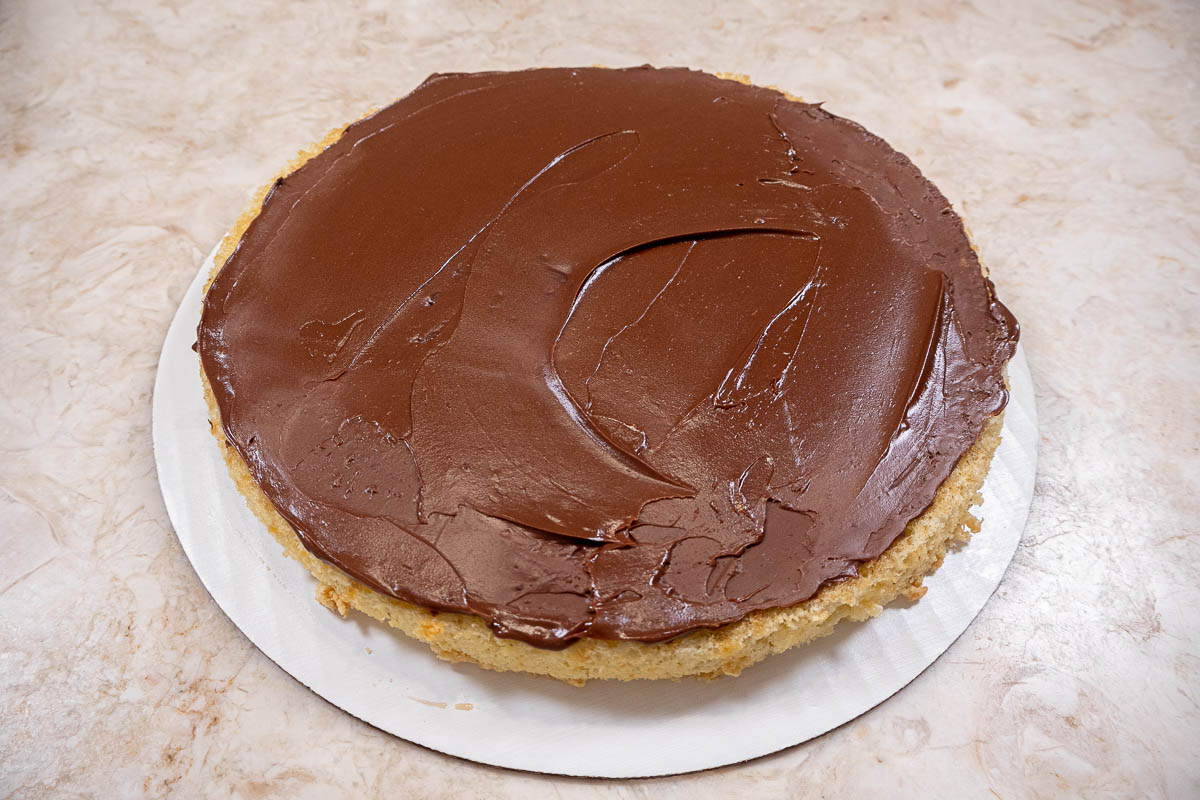
Spread ½ cup buttercream over the bottom layer of the cake. Repeat with the second layer.
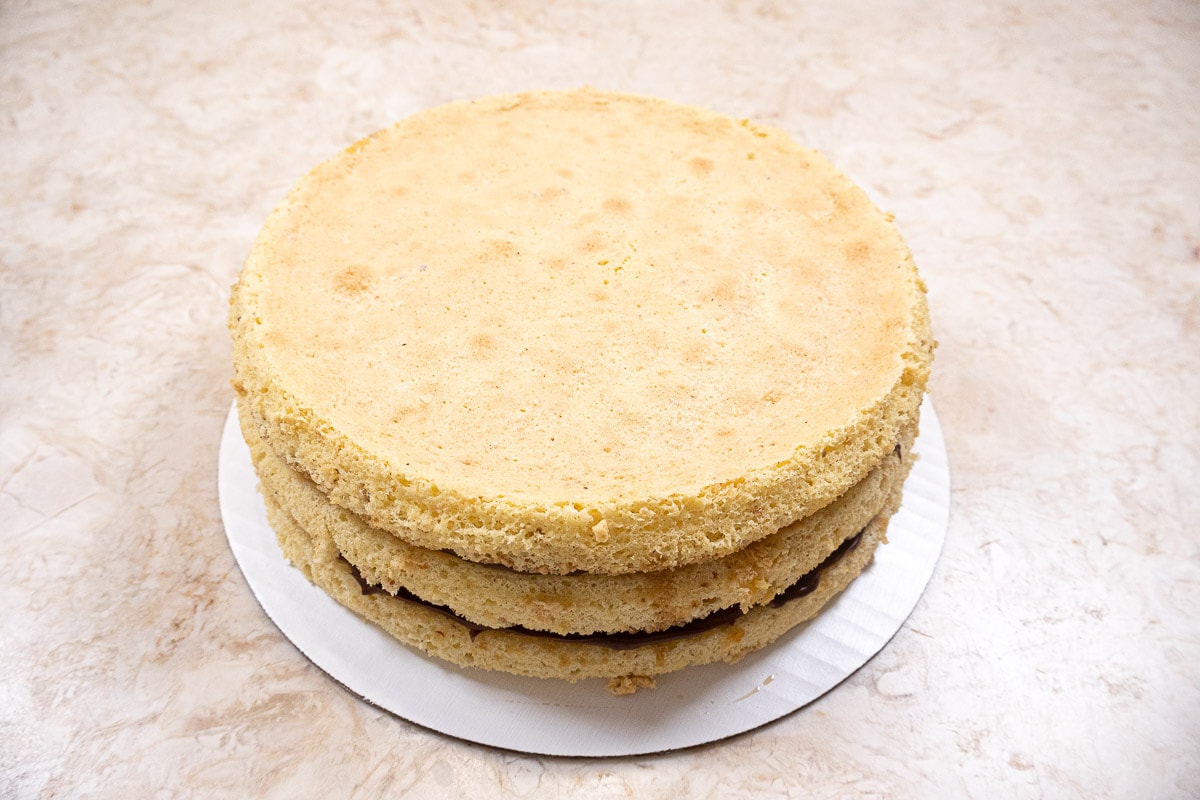
Place the third layer on, coffee side down.
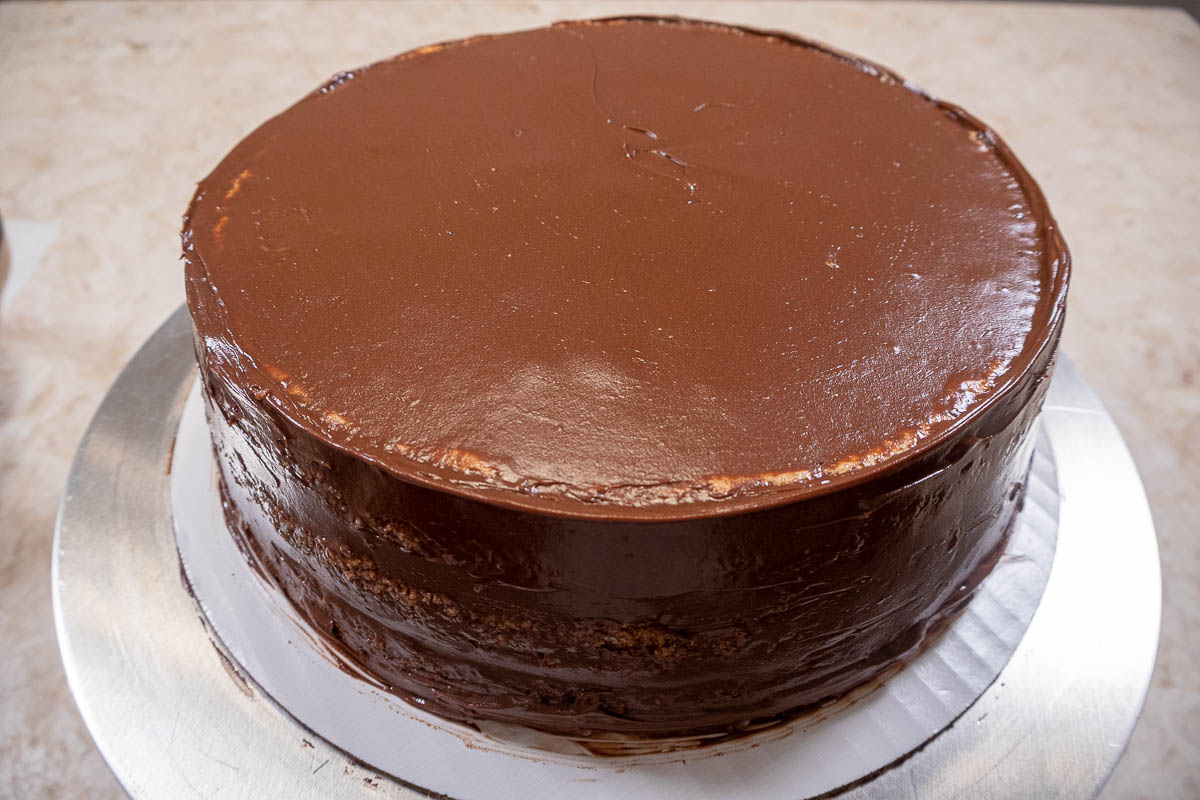
Finish the sides of the cake with a thin layer of buttercream. Reserve about ⅔ cup of buttercream and use the rest to finish the top.
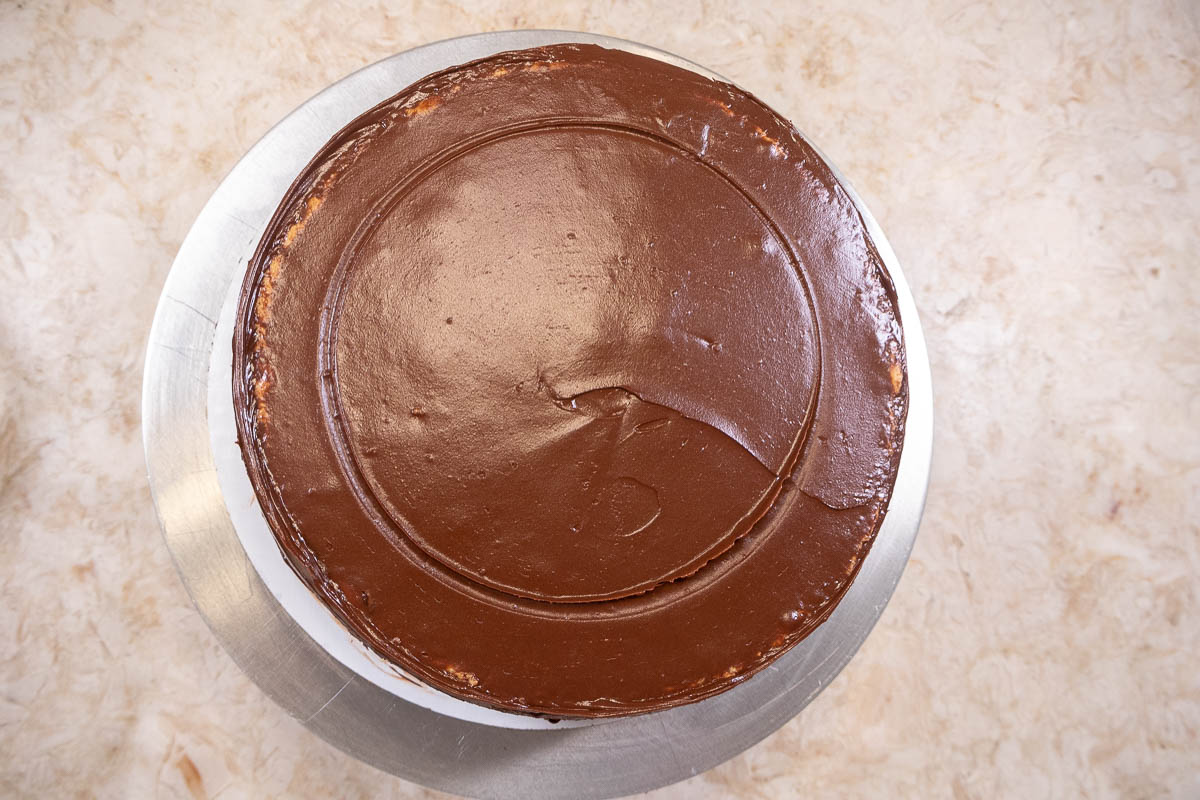
Mark the top of the cake in a 6" circle.
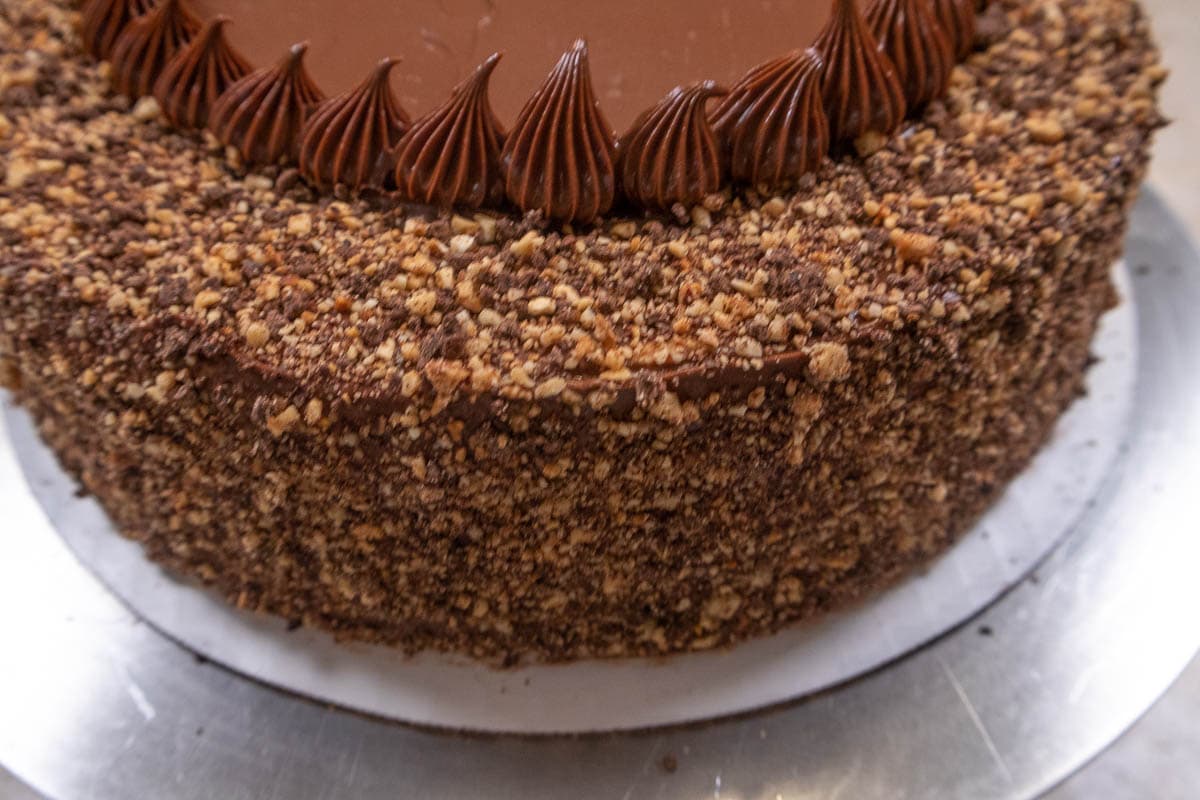
Chocolate-Hazelnut decor added to the edges and sides of the cake.
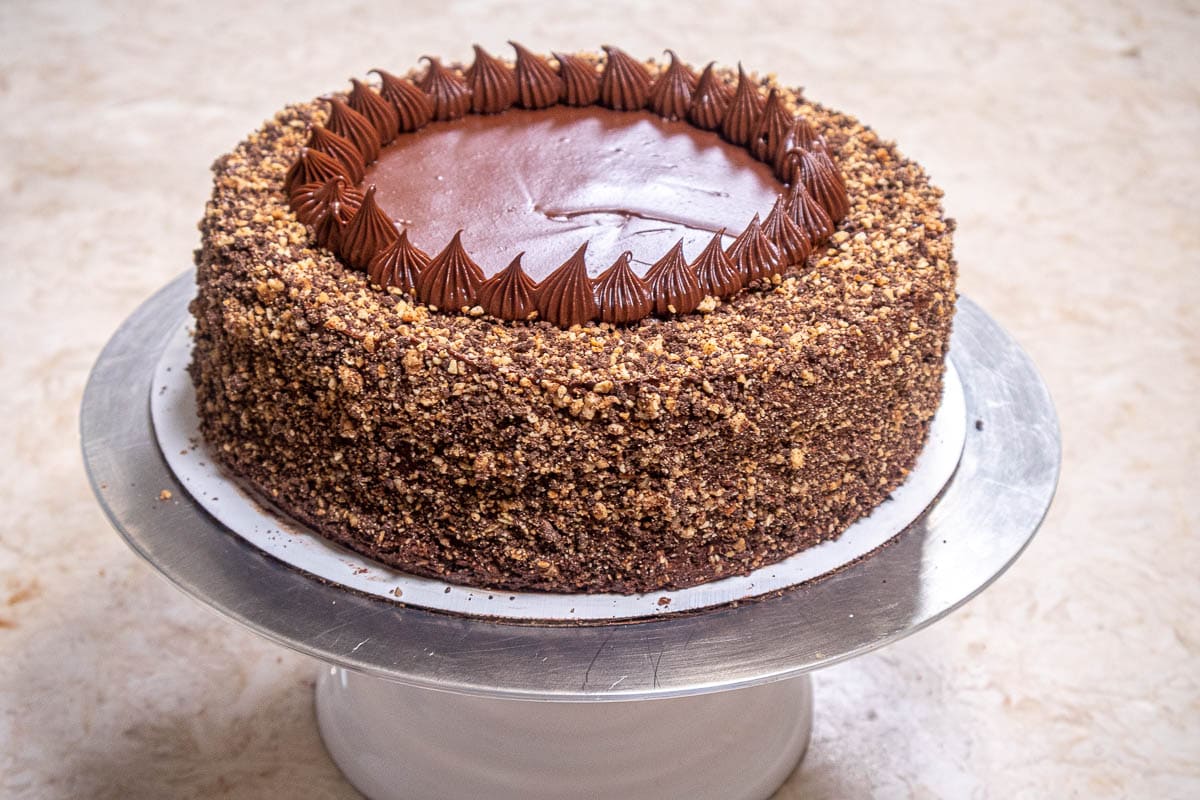
The inner edge of the top of the cake piped with the reserved buttercream.
Hint: To easily remove the last of the buttercream from the processor bowl and blade, go the Food Processor Tips When Baking
Substitutions
If hazelnuts aren't your thing, then substitute blanched almonds, toasting them as are the hazelnuts. Or, half almonds and half hazelnuts can be used.
If you don't want to use the Kahlua, substitute water in the same amount and double the instant coffee.
Equipment
- Scale
- Measuring spoons, cups
- Bowls
- Rimmed baking sheet
- Mixer with bowl and whisk attachment
- 3- 9x2" round baking pans
- Offset spatulas
- Rubber spatula
- Food Processor and scraper
- Small saucepan
- Pastry Brush
- Double boiler or microwave
Storage
The Hazelnut Gianduja Cake can be kept, covered, at room temperature for 4 to 6 hours and then refrigerated. It can also be made in its entirety and frozen. Defrost in the refrigerator, covered if possible, overnight.
Top tip
When working with sponge cakes, it is best to freeze the layers before filling and finishing the cake. It makes them much more stable and the resulting look of the cake much better.
FAQ
Can all-purpose flour be used instead of cake flour? It can but the resulting cake will not be as tender. The cake flour has a lower protein count which makes it softer which is why it is important to some cakes.
Can anything be substituted for the Nutella? Go to Dobos Torte - A Hungarian Speciality and use the Chocolate Buttercream in that recipe.
Why is there baking powder in this sponge? I didn't think sponge cake used a leavening agent. Normally they don't. However, the addition of the butter in this sponge can cause the sponge layers to bake up shorter. This is especially true for novice bakers who are just learning the technique of folding ingredients together. The addition of the baking powder is an aid to getting the right outcome.
Why emulsify the butter with a small amount of cake batter? Melted butter added to a sponge or genoise cake can cause problems if folded in by itself. Because the butter is heavy, it immediately sinks to the bottom of the mixing bowl if added by itself. It is difficult to fold it in completely without knocking much of the air out of the batter resulting in a rubbery layer at the bottom of the baked cake layers. By removing a small amount of the batter and whisking the butter into it, the butter becomes one with the sponge batter making it much easier to return to the main amount of batter and fold it in.
What does Gianduja mean? The word Gianduja refers to a combination of chocolate and hazelnuts. It comes from the Piedmont district in Italy. It was created in 1806 i Turin as a way to reduce the amount of cocoa used in making chocolates. In today's world, white, milk or dark chocolate can be used.
Is Gianduja the Same as Nutella? They both share hazelnuts but in addition to hazelnuts, Nutella's ingredients include sugar, palm oil, skim milk, , cocoa, lecithin, and vanillan. So no, it is not the same.
Are Hazelnuts the same as Filberts? Yes, in America hazelnuts are referred to as Filberts. The same nut is referred to as Hazelnuts in Europe and that name is most commonly used.
Hazelnut Gianduja Cake
Ingredients
Hazelnut Butter Sponge Cake
- ⅔ cups sifted cake flour (85 grams or 3 ounces)
- 2 ounces hazelnuts, toasted (60 grams or 2 ounces)
- 1 teaspoons baking powder
- 9 large egg yolks
- ¾ cup sugar (150 grams or 5 ⅓ ounces)
- 1 teaspoon vanilla
- 9 large egg whites
- ½ cup sugar (100 grams or 3 ½ ounces)
- 6 tablespoon butter, melted (85 grams or 3 ounces or ¾ stick)
Coffee Syrup
- ½ cups water
- ½ cups sugar (100 grams or 3 ½ ounces)
- 1 teaspoons instant coffee
- 2 tablespoons Kahlua
Chocolate Hazelnut Décor
- ⅔ cup toasted hazelnuts (85 grams)
- 3 ounces semisweet chocolate (85 grams)
Chocolate Hazelnut Buttercream
- ½ pound semisweet chocolate, coarsely chopped (225 grams)
- ¾ cup butter, 30 minutes out of the refrigerator (170 grams or 6 ounces or 1 ½ sticks)
- ⅓ cup 40% cream
- 1 ½ tablespoons Kahlua or other coffee flavored liqueur
- 2 teaspoons vanilla
- 3 tablespoons powdered sugar (40 grams or 1 ⅓ ounces)
- 1 cup Nutella (280 grams or 10 ounces)
Instructions
Hazelnut Butter Sponge
- Preheat the oven to 350°F. Line three 9x2" round cake pans with parchment paper and spray the centers only.
- Place the hazelnuts on a rimmed baking sheet. Toast them for 7 to 9 minutes until deep golden brown. If they have dark skins on them, immediately place them in the bowl of a mixer fitted with the paddle attachment. Mix the nuts on low to medium speed for several minutes until the skins are mostly gone.
- Some will always remain and that is fine. Cool completely. Separate the skinned nuts from the skins.
- Place the cold, skinned, hazelnuts in a food processor. Process until very fine. Do not overprocess or they will become a paste.
- Add the flour and baking powder to the processor. Process to further grind the nuts as fine as possible.
- Place the egg yolks, ¾ cup sugar and vanilla in a mixing bowl fitted with a whisk attachment. Whisk at medium speed until very pale and it reaches the ribbon stage.
- With a clean bowl and whisk attachment, beat the egg whites until you can see a trail in the beaten whites. Slowly add the ½ cup sugar and beat to medium peaks. Pour the egg yolk and half the flour mixture over the whites. Fold in gently; fold in remaining flour.
- Place about 1 cup of the batter into a medium size bowl. Add the melted butter and whisk vigorously until the butter and batter are completely combined; return this to the mixing bowl and fold in.
- Divide the batter between the three pans, using about 275 grams or about 9 ⅔ ounces for each. Smooth out. Bake for 10 to 15 minutes or until the sponge springs back when lightly touched and/or a tester come out clean.
- It will not have a lot of color – that is as it should be. Cool completely before removing from the pans.
- The layers can be baked, cooled and frozen, well covered, up to a month ahead.
- Coffee Syrup
- Combine the water and sugar in a small saucepan. As it approaches the boil, wash the sides of the pan down with a brush dipped in cold water.
- Bring to a boil.
- Dissolve the coffee in the Kahlua. If it won't dissolve microwave for about 10 seconds,
- Stir the Kahlua mixture into the sugar syrup. Cool.
- This may be made days ahead and refrigerated.
Chocolate Hazelnut Decor
- Place the chocolate in the bowl of a processor. Pulse until coarsely chopped but not powdered. Remove from the processor.
- Without cleaning the bowl, add the hazelnuts and process until coarsely chopped.
- Combine the two and freeze.
- This can be done weeks ahead and kept frozen.
Chocolate Hazelnut Buttercream
- Melt the chocolate over a double boiler or in a microwave at half power for about 2 ½ minutes. If microwaving, let it sit for a few minutes then stir. It may need more time in the microwave, depending upon the power of the unit.
- Transfer to the bowl of a processor or blender.
- Cut the butter which has been room temped for 30 minutes into 1 inch pieces and place it in a circle over the chocolate.
- Process about 30 seconds or until smooth. Scrape down.
- Add the the remaining ingredients and process until smooth, scraping down once or twice.
- The buttercream will be amazingly light but will hold its shape.
- This should be made just before using to fill and finish the cake.
Assembly
- Remove the paper from the bottom of the sponge layers. Keeping the layers upside down, brush each layer with ⅓ of the coffee syrup.
- Place one layer on a cake board or serving plate, coffee side up. Spread with ½ cup of the buttercream.
- Repeat with the second cake layer.
- Place the top cake layer on and finish the sides with a thin coat of buttercream. Reserve enough to finish the top with the peaks. Use the remainder of the buttercream to finish the top of the cake.
- Place a 6" cake pan upside down to mark the top of the cake evenly. Alternatively, draw a circle about 1 ½" in from the edge of the cake.
- Working quickly, carefully distribute the frozen decor on the top edge of the cake.
- Pour the decor onto a rimmed baking pan. Apply the decor to the sides of the cake covering them completely. This is most easily done by holding the cake board or plate in your left hand over the pan. Scoop some of the decor in your right hand and press it onto the side of the cake, letting the excess fall onto the pan.
- Fit a pastry bag with a ½" B tip. Pipe the reserved buttercream between the edge of the buttercream and decor to finish the cake. Pipe straight down and pull up to make the peak design.
- If not serving within the next few hours, refrigerate the cake. However, remove it from the refrigerator several hours ahead to make sure it is room temperature when served.
Notes
- The cake layers should be frozen before filling and finishing to make it easier and for a better looking outcome. Freeze them individually with the bottom parchment still on. After they are hard, stack them, wrap well in foil, wrap again and freeze for up to a month.
- It is important to freeze the decor and use it quickly so the chocolate doesn't melt as you apply it to the cake.
- To cut: Run a serrated bread knife under really hot water on both sides to heat it. Dry it quickly with a paper towel and then let it melt through the top buttercream and cut straight down. Pull the knife out at bottom of the cake. Repeat for each cut.
- If the cake has been refrigerated, bring it out several hours before serving. It should always be served at room temperature or the buttercream will lack its full flavor.
Nutrition

KAREN says
I am dying to make this! How would you adjust this for high elevation?(6035ft)
Also, can the recipe be halved with equally good results?
Thanks.
Helen S Fletcher says
Hi Karen, I haven't tested this regarding any of questions. I know there are differences with high altitude baking, but having never lived in such an area, I have no idea. As to halving the recipe, I don't think the results would be the same.
Mark Mayer says
Helen,
Thank you and apologies. I realize that my email sounded like a rant and anyway, it’s not as if you could have magically downloaded a photo at the proper stage without making another cake. The irony is that I’ve made plenty of sponge cakes and knew how the eggs should look. Years of bad Passover sponge cakes motivated me to learn how to make a good one a long time ago. The decor is in the freezer ( by the way, what a great “skinning tip.” I did it in the Breville mixer- which I happily purchased based on your recommendation!). The frosting will certainly be a hit, now….if I can summon the courage to make the cake again before my friend’s birthday dinner this Saturday. Very much tempted to make your yellow cake or RLB’s All Purpose Downy yellow cake- both of which, I could make in my sleep blindfolded. Finally, thanks for the earlier yeast recommendation. Turns out my kitchen and the refrigerator were just too cold. Breaking down and using the oven’s proofing function took care of the problem.
Regards,
Mark
Helen S Fletcher says
Good for you Mark. For sure substitute the cake if you are more comfortable. Just add the hazelnuts to it. You have a lucky friend and he will appreciate whatever you make. Besides, he probably won't know the cake was switched. Baking should be enjoyable so don't stress out. Happy the oven proofer worked out. I use it all the time for the best results. I love your enthusiasm and willingness to try new recipes.
Mark Mayer says
Help! I made this twice now following the pictures ( rather than reading from the instructions and looking at the pictures after each step). I had read the instructions several times before even gathering the ingredients. I was all set to place batter in the pan and discovered that I had not poured the egg yolk mixture over the whites. Instruction#7. I tried folding the yolk mixture in at the end. I guess this is beyond repair, although I will cool on counter and freeze. This sounds silly, but a picture of folding the yolks over the whites might be a good idea. I was so hung up on seeing that everything looked right that I missed this twice.
Helen S Fletcher says
Hi Mark, Ok so here's the compromise because truthfully, I'm not going to make this again to insert one photo. I checked my photo take and there is no picture showing the egg yolks over the whites without the flour mixture. You can see in the photo the yolks are poured over the whites. So what I did, was preface adding the flour with "pour the egg yolks over the whites" and then added the sentence about the adding half the flour. That should take care of the problem. In the 7th instruction on the recipe card, it clearly states to pour the egg yolk over the whites. Hope this helps.
PDX Ken says
I agree, Helen - your recipes are so easy to follow! I do have a question on this one, though - I'm in the process of making it, followed the directions (I believe after re-reading) to the T, but I think I did something wrong. My layers yielded a clean toothpick and looked pale and fluffy as I believe they should after 15 minutes, but during cooling they deflated a lot and are VERY sticky and seem not done. Is that how they are supposed to be? I'm thinking I may need to make the layers over, and I don't want to proceed with the recipe if I've ruined these. I appreciate any guidance you can share.
Helen S Fletcher says
Hi Ken, Not being there, I don't know what went wrong, but they are definitely not correct. My guess is the egg white were either not beaten stiff enough or the ingreients were overfolded, knocking the air out. When you took the cup of batter out to whisk in the butter, did they look like mine in the photo. The batter should have body and not been runny even after whisking the butter in. Were the nuts ground so fine you couldn't see them in the flour? Did you use the baking powder? Mostly though, it sounds like the air was pretty much reduced or knocked out during folding. You did remove only a cup of batter to whisk in the butter, right? Let me know. You can email me at [email protected].
Wrenn Kates says
Can you make this cake using 8” cake pans? I love all of your thoughtful tips! Thanks
Helen S Fletcher says
Hi Wrenn. I would imagine. I haven’t done it. Your layers will be a bit talle but that should be fine. Add 3or 4 minutes to the baking time. Thanks for the kind words.