
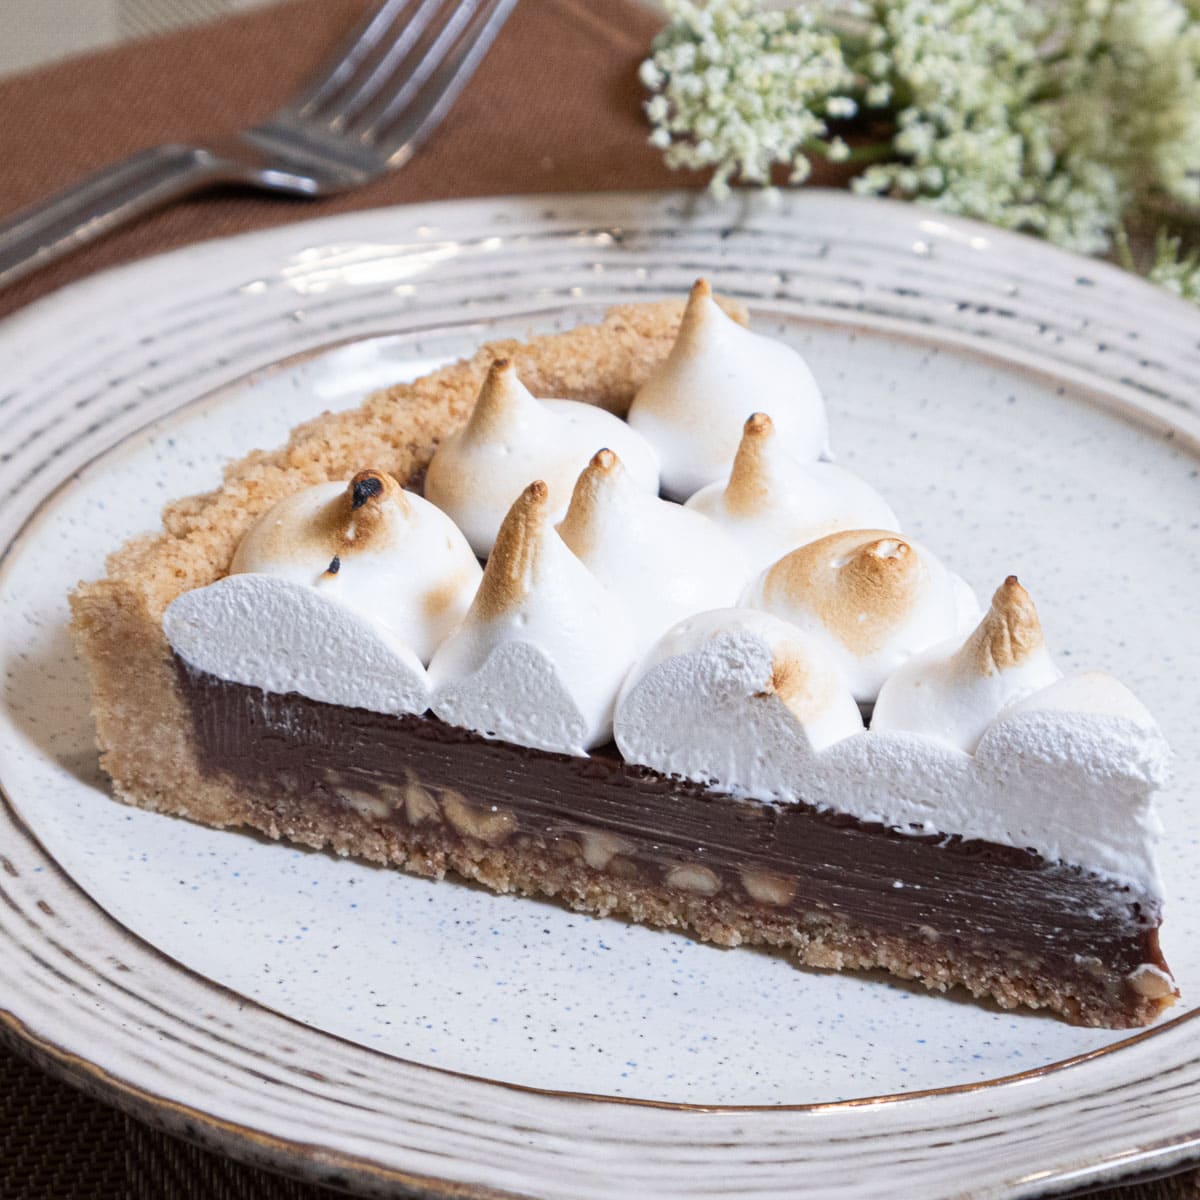
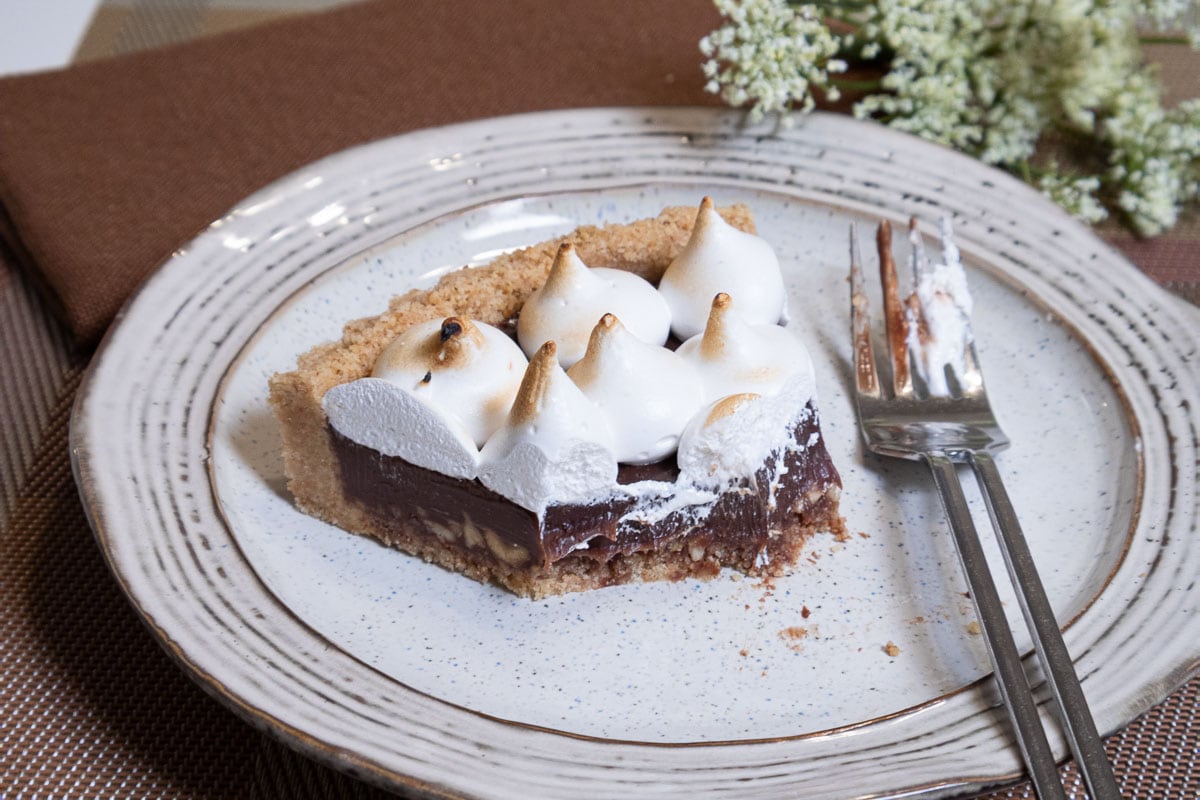
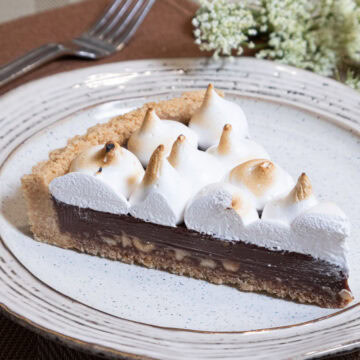
How to Make S'mores Tart is more than just one more no bake recipe. It comprises some basic baking elements that you can use over and over. The graham cracker crust and the marshmallow cream (creme or fluff whatever you call it) is so simple to make from scratch you'll wonder why you haven't done it before.
The crust can be used in many no bake or baked options, think cheesecake, as a base for mousse cakes or as a part of cold desserts. The marshmallow cream can be sandwiched between cookies, added to hot chocolate and used as a finished on other cakes and pie. It can be spoon on or piped on. In any case it will hold its shape.
As one of the favorites of summer, especially when camping, this easy tart is one you'll want to put on your dessert menu over and over. It's a great way to start getting children interested in the kitchen. Let them try their hand at piping - I can guarantee it will be interesting.
Amazingly, this S'mores Tart is not too sweet which allows all the flavors to come through. If you loved this s'mores recipe, you must try Truly Amazing S'mores Ice Cream Cake.
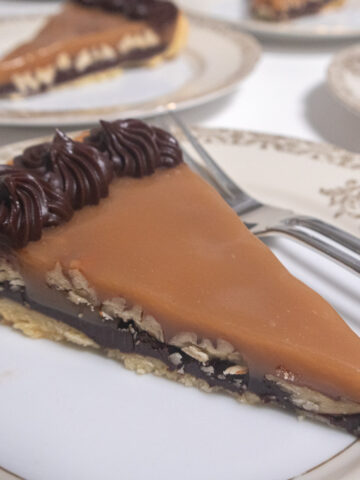
Here are a few cookies that would be fantastic with marshmallow cream sandwiched between them: Peanut Butter Sandwich Cookies (sub for the filling or add it as a second filling), Fudgy Chocolate Cookies with Variations, Very Lemon Butter Crisps, Best of All Spiced Molasses Cookies, Base Recipe for Cookies with 8 variations, Flourless Chocolate Raspberry Cookies with or without the raspberry, Oatmeal Cookies, and while we're at it why not the really fast Cocoa Brownies. And as they say wait there's one more The Café au Lait Tart.
Jump to:
What's Not to Like About this Recipe
- It's another no bake recipe that is quick and easy.
- Simple ingredients are used so there's no chasing something down.
- It's super kid friendly as long as the sugar syrup is supervised.
- How neat would it be to make your own marshmallow?
- Because it is not overly sweet all the flavors of the milk chocolate, graham cracker crust and marshmallow cream come through.
Variations
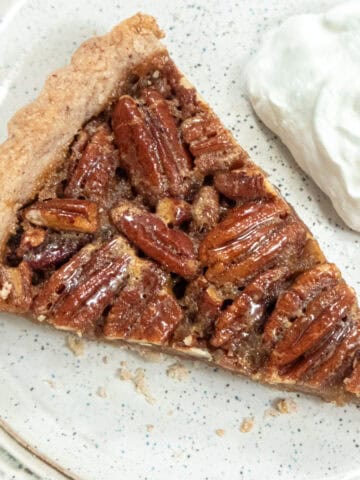
I know traditional S'mores don't include nuts but I think they are perfect in this tart. Don't like peanuts? Use toasted pecans....or a nut you do like.
Stir rice krispies into the marshmallow cream as soon as it is finished for a quick, low fat version of Rice Krispy Treats. Add nuts, chips, dried fruit, etc. as desired.
Thin the marshmallow cream with a little water and use it to top ice cream.
Recipe Ingredients
Graham Cracker Crust
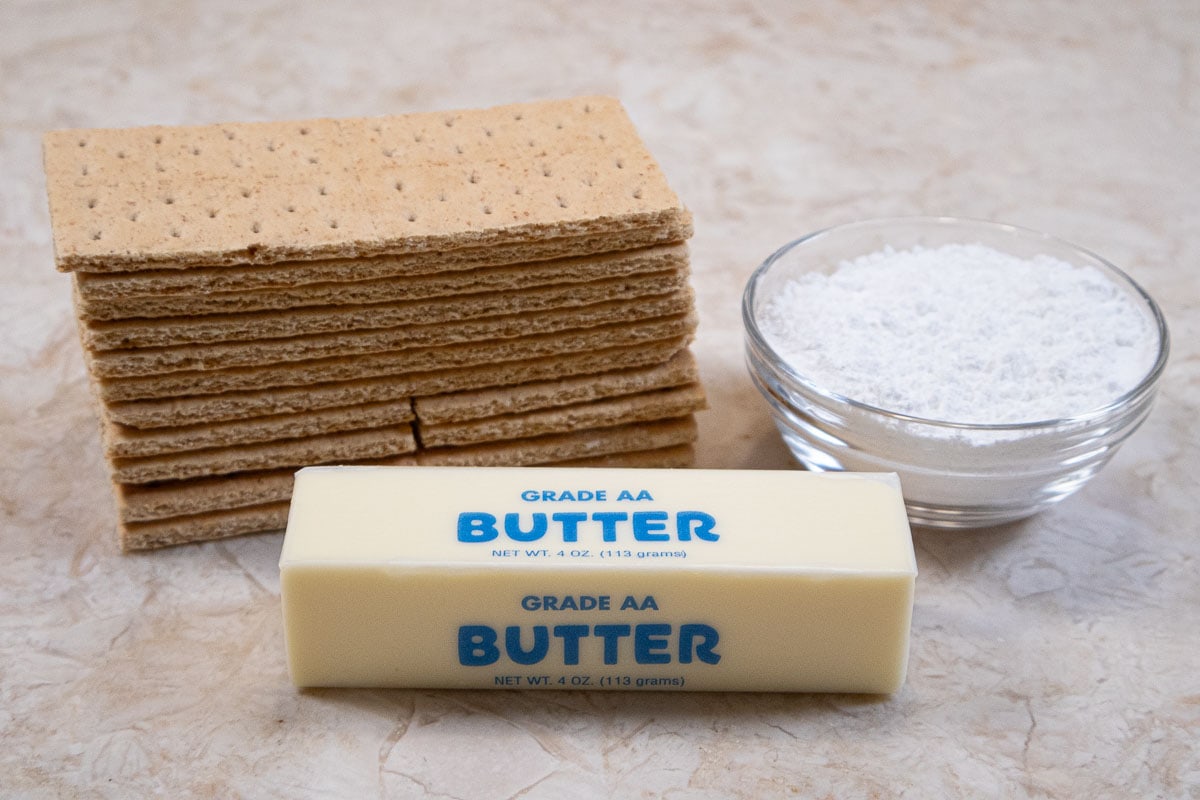
FRONT ROW: Unsalted Butter
BACK ROW: Graham crackers, powdered sugar
Milk Chocolate Filling
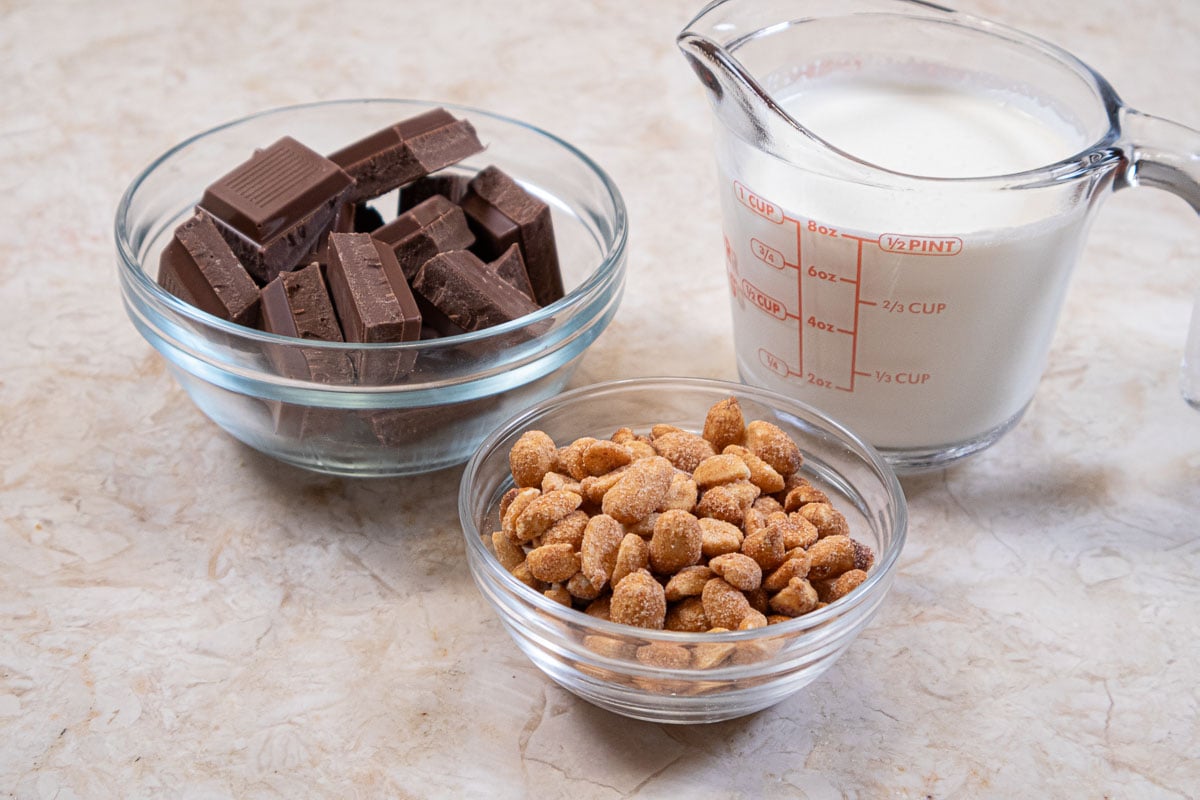
FRONT ROW: Honey roasted peanuts
BACK ROW: Milk chocolate, heavy cream
Marshmallow Cream
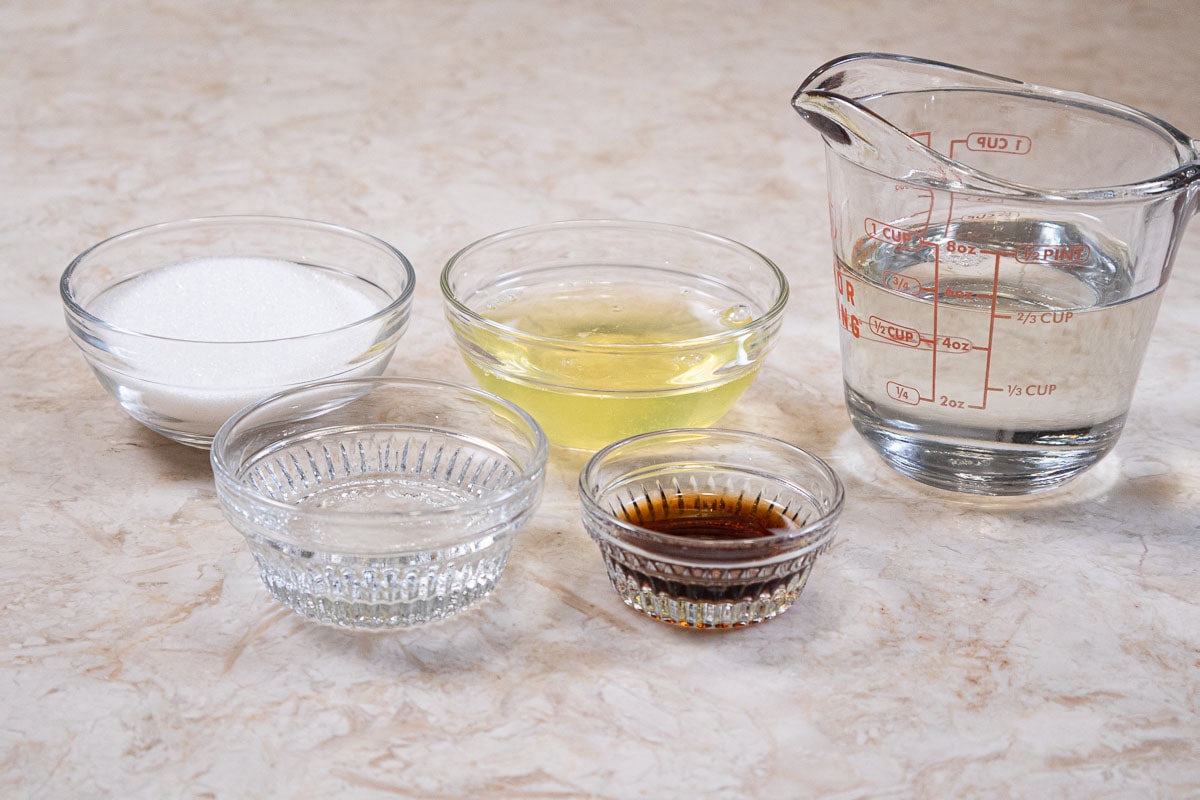
FRONT ROW: Water, vanilla extract
BACK ROW: Granulated Sugar, egg whites, corn syrup.
Key Ingredients
Any plain graham cracker will due but be aware that different brands may take more or less butter to bind them. So start off with ¾ of the butter and if the crumbs don't stick together well when a small amount is pressed between your fingers, add the rest.
Powdered sugar is used to avoid a grainy textured crust.
Milk Chocolate is the traditional choice for S'mores. I use Trader Joe's Pound Plus Milk Chocolate for it's depth of flavor and caramel overtones. Any good milk chocolate will due though. I don't recommend milk chocolate chips or Hershey's milk chocolate.
Honey Roasted Peanuts are a great addition as I believe any nut would be - salted or unsalted. Other nuts such as toasted pecans would be great or use the nut of your choice or omit it.
Corn Syrup seems to be a problem with some people. There is some confusion between corn syrup and high fructose corn syrup. Karo Corn syrup as found on grocers' shelves, either clear or dark, is 100% glucose (sugar) and is not the same as the high fructose variety used in commercial products. Years ago Karo changed their formula for consumer corn syrup to no longer include the offending high fructose corn syrup. I don't know about other brands.
Be sure to see the recipe card below for the exact ingredients & instructions.
Step by Step Instructions
Graham Cracker Crust

Step 1. Crush the graham crackers between your hands and place them and the powdered sugar in the bowl of a processor. Step 2. Process to make fine crumbs. (If you aren't using a processor, place the crackers in a plastic bag and roll over them with a rolling pin to crush them. Put them in a bowl with the powdered sugar and continue as in the directions.) Step 3. Add ¾ of the melted butter to the processor. Step 4. Pulse the machine until all the crumbs are uniformly moistened. Take a small amount crumbs and squeeze them between your fingers. If they hold firmly together you're done. If they don't add the additional butter.
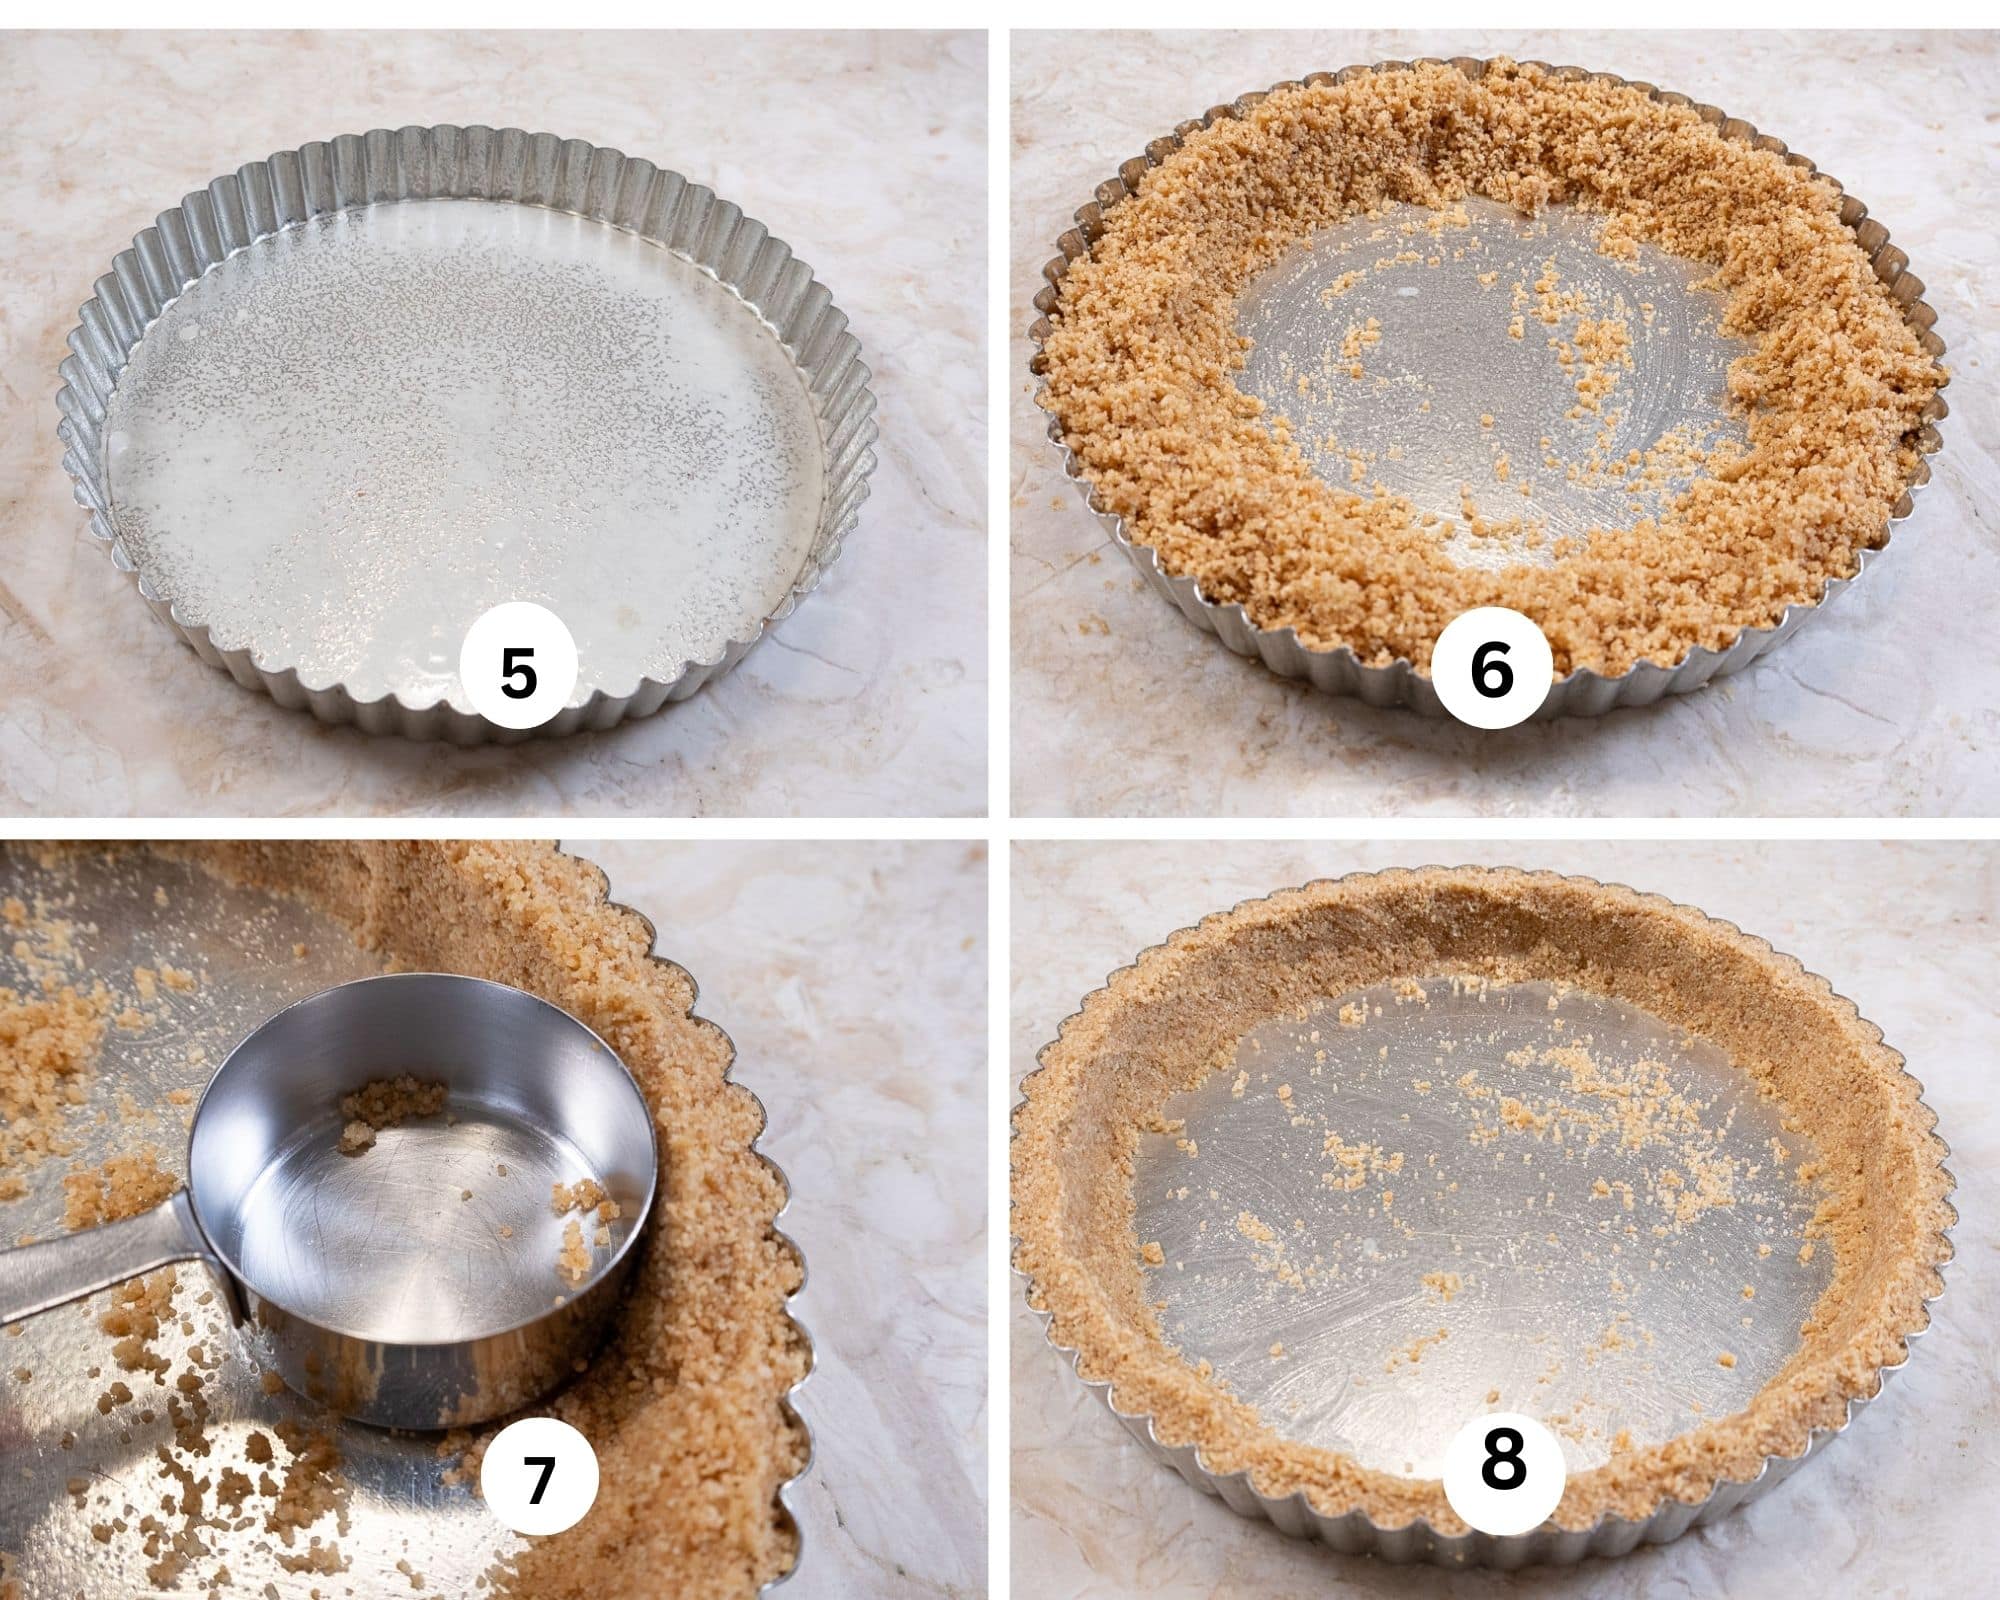
Step 5. Spray a 9x1" tart pan with a removable bottom with a non-stick baking release. Steo 6. Arrange ⅔ if the crumbs around the inside edge of the tart pan. Step 7. With your hand or a measuring cup, press the crumbs very firmly against the side of the pan. Step 8. Go around a second time to make sure they are evenly pressed in.
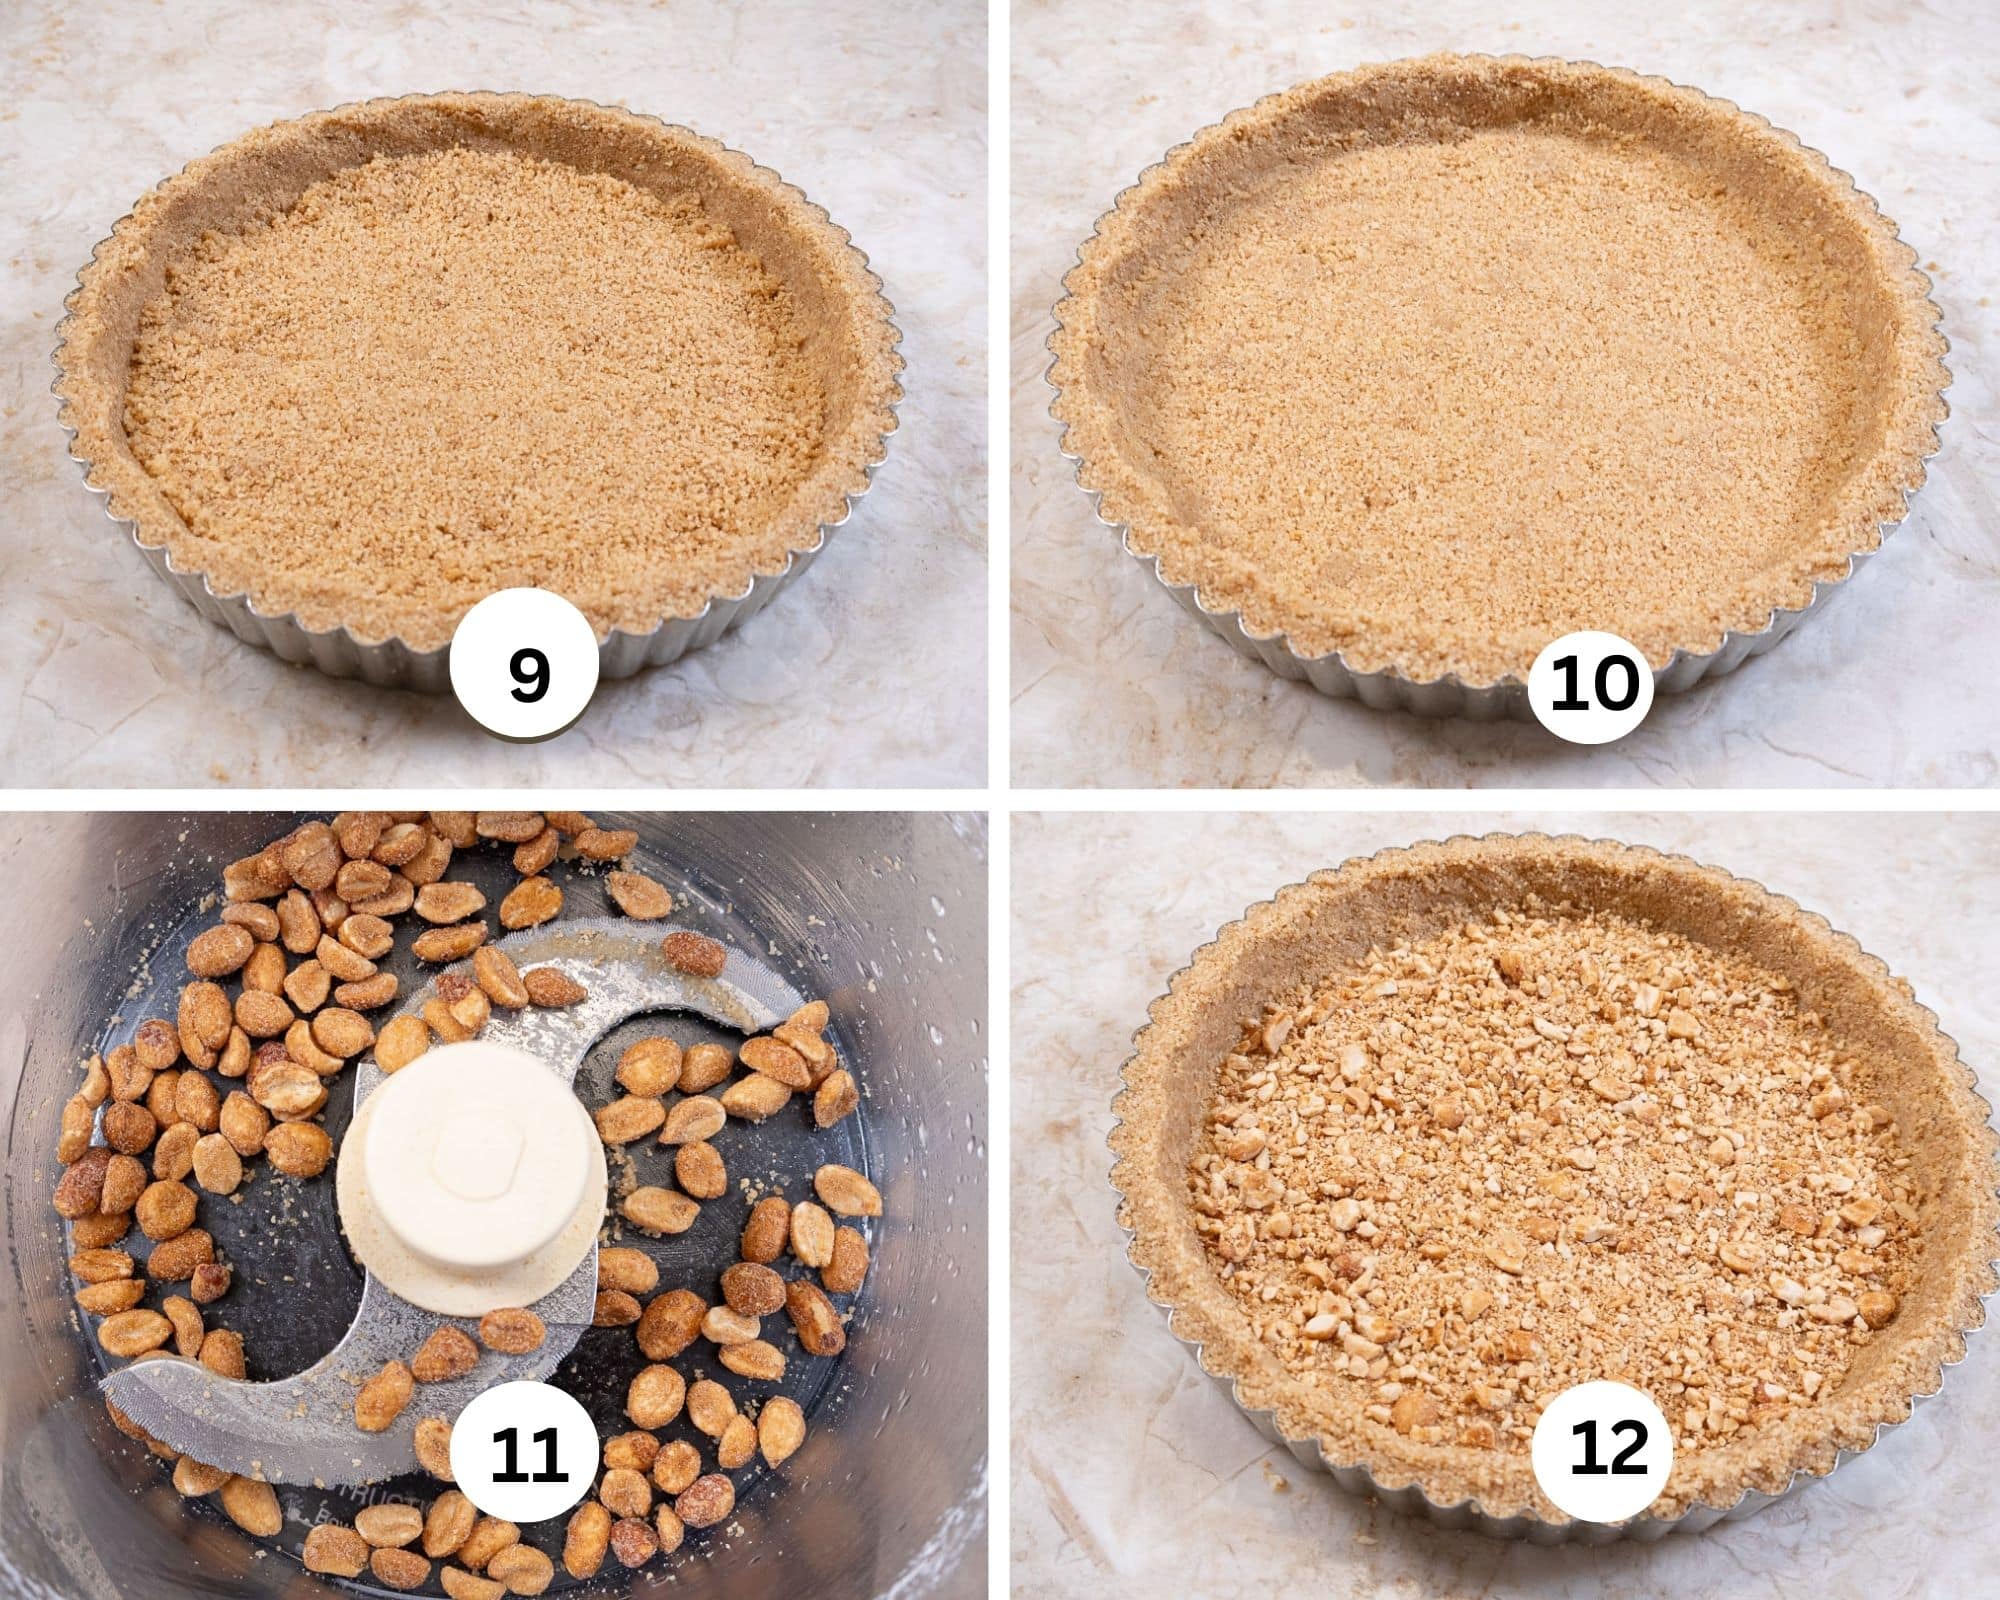
Step 9. Distribute the remainder of the crumbs evenly over the bottom of the pan. Step 10. Press them firmly into the shell. Step 11. Place the nuts in the processor (no need to clean it) and pulse to coarsely chop them. Step 12. Spread the nuts evenly over the crust.
Milk Chocolate Filling
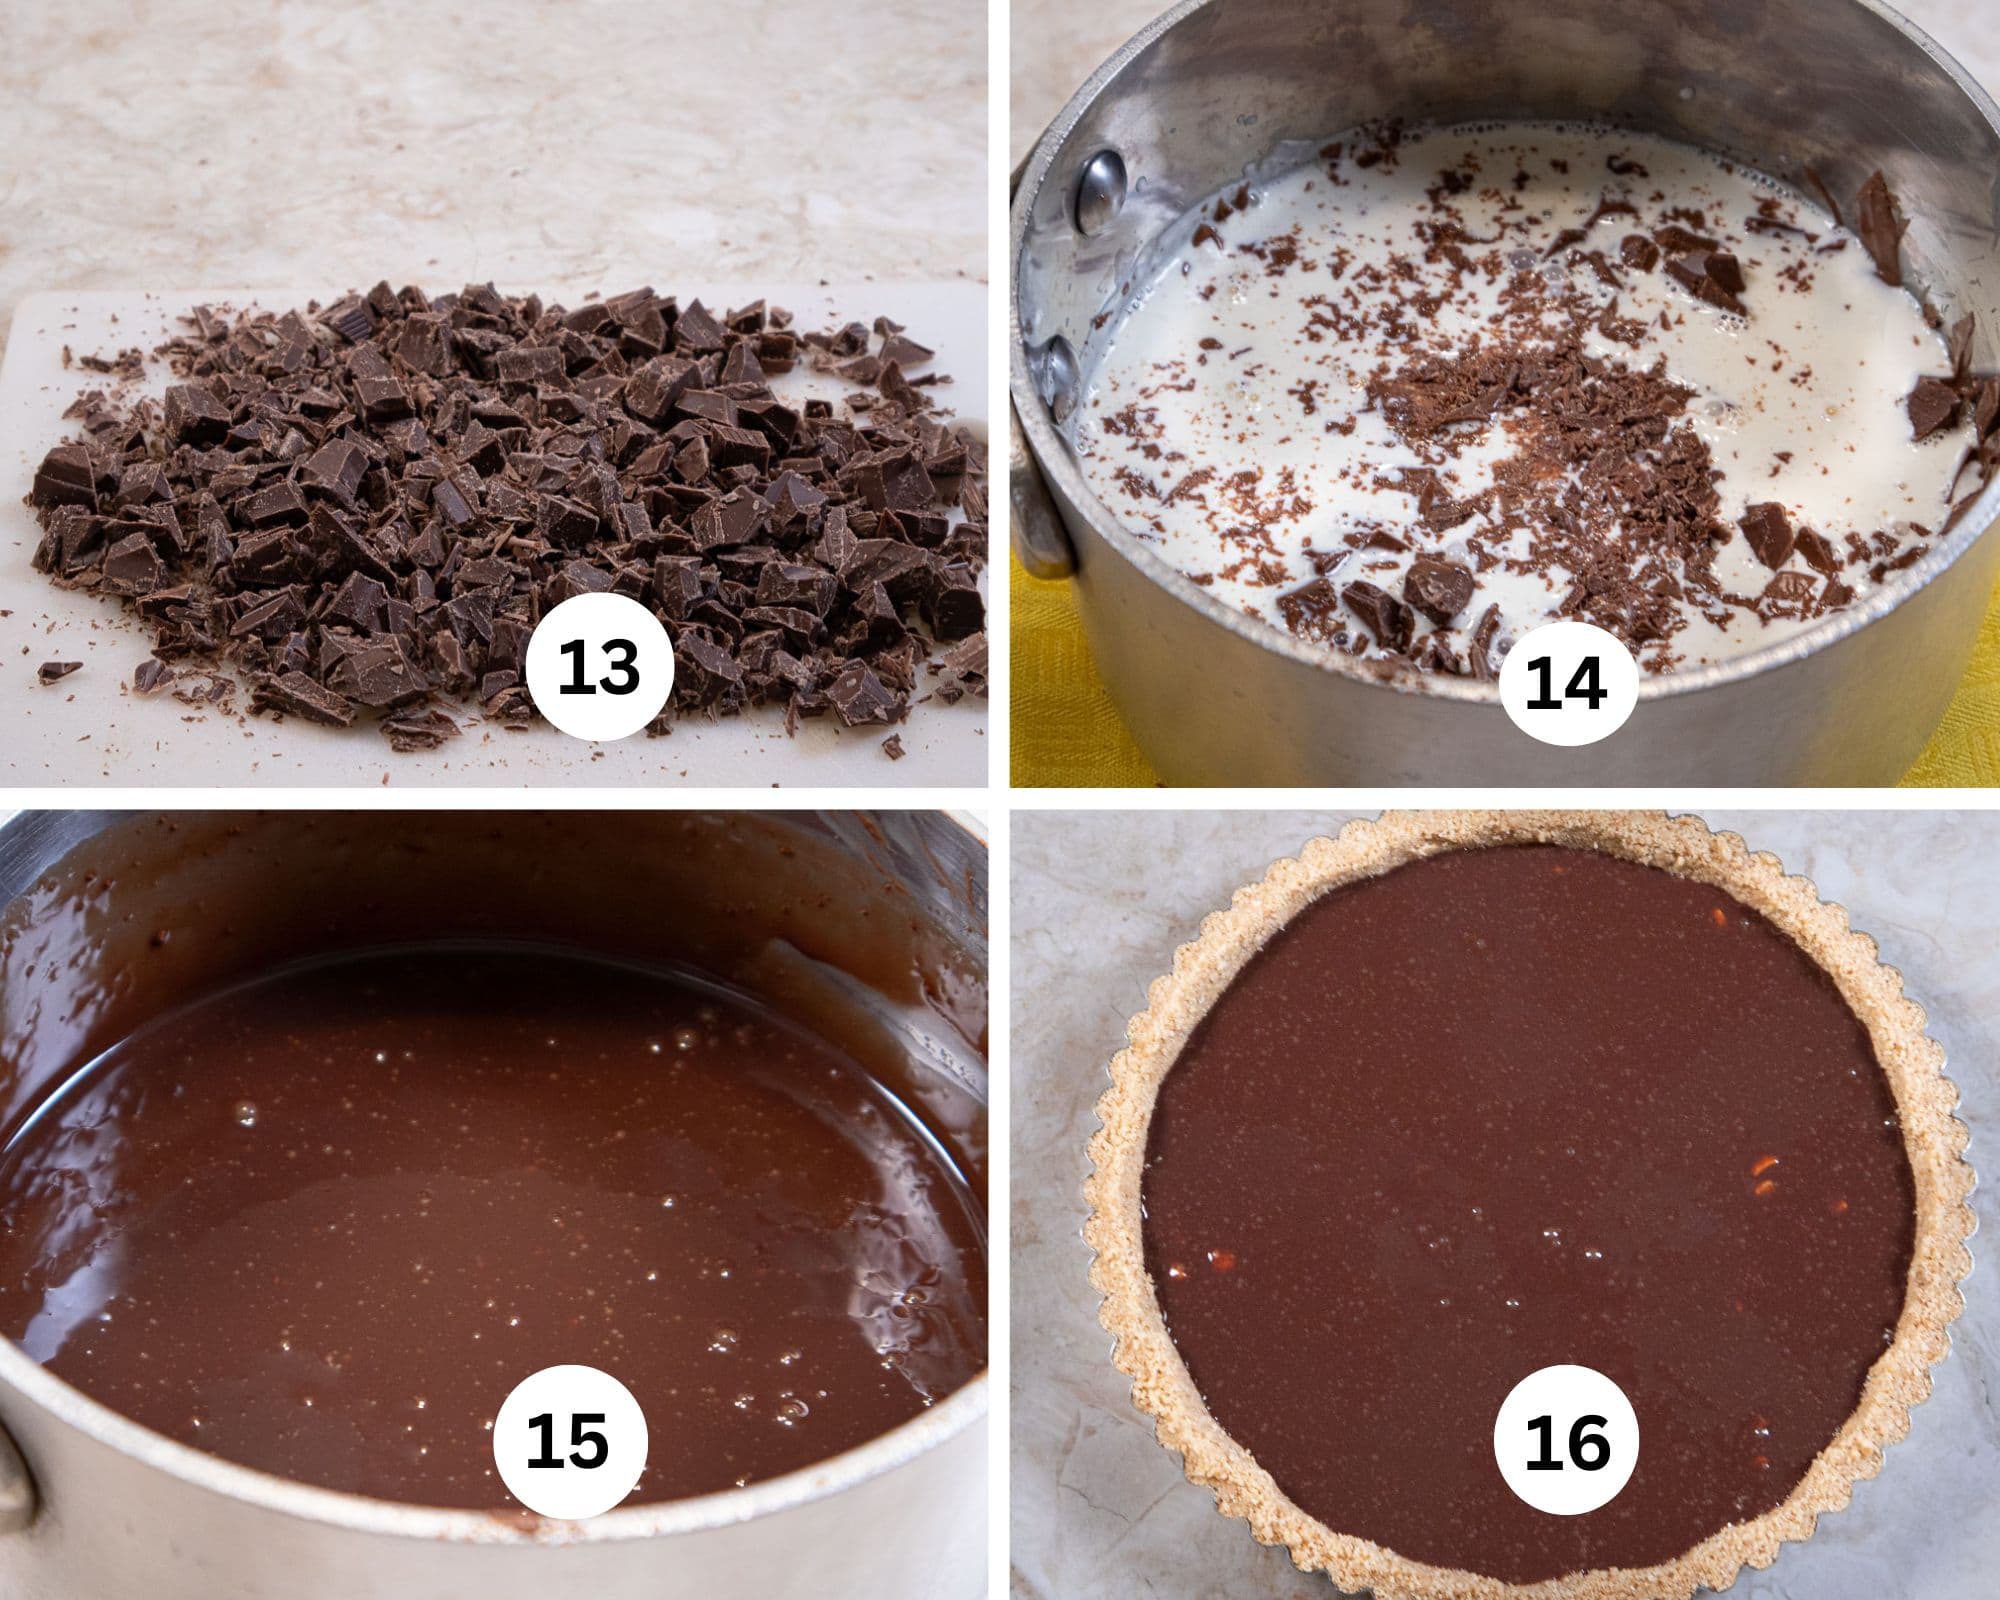
Step 13. Chop the chocolate so it will melt uniformly. Step 14. Heat the cream until steaming hot but not boiling. Add the chocolate and submerge it under the cream. Let it sit for a few minutes to melt the chocolate. Step 15. Whisk the mixture until it is smooth and no lumps remain. Be sure to get into the edges of the pan. Step 16. Pour it into the crust. Set aside for the chocolate to firm up. To speed it along, place it in the refrigerator.
Marshmallow Cream
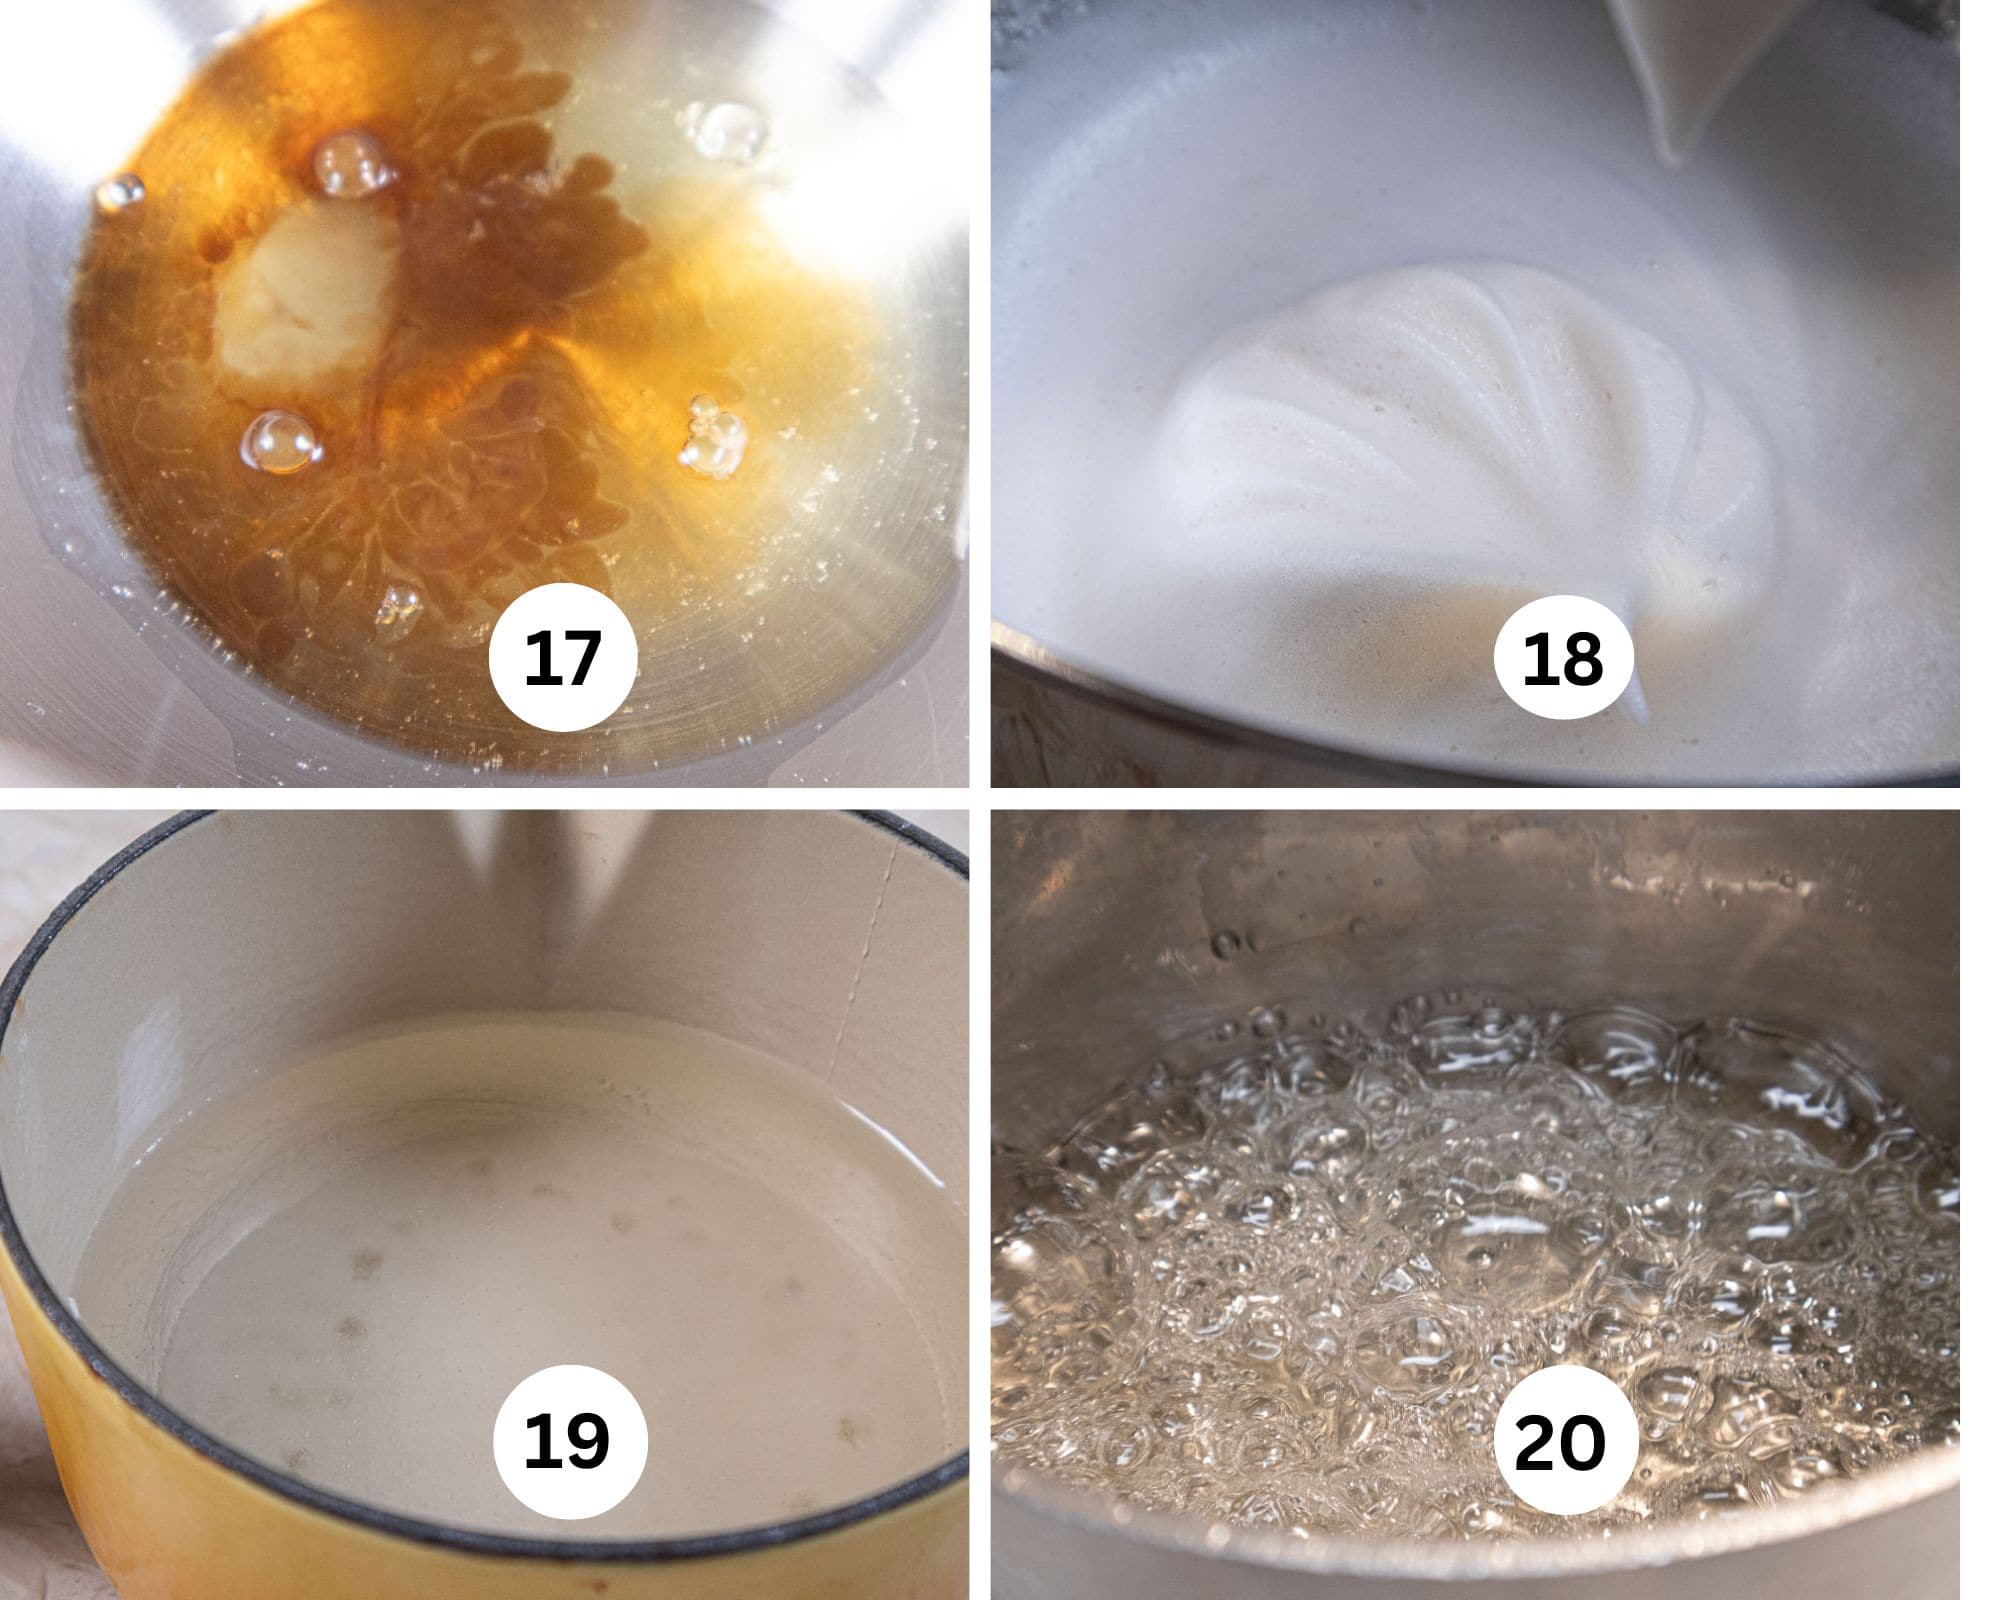
Step 17. Place the egg whites and vanilla in the bowl of a mixer. Step 18. Beat just until very soft peaks form. Then start adding the sugar as called for a little at a time. When the whites form soft peaks, reduce the speed of the mixer to it's lowest point and keep moving them around. Do not turn the machine off while making the syrup or the texture of the whites will change and they could become unusable. Step 19. In the meantime as the whites are beating, put the water, corn syrup and sugar in a smallish saucepan. Bring it to a boil and continue cooking until the temperature reaches 245°F.
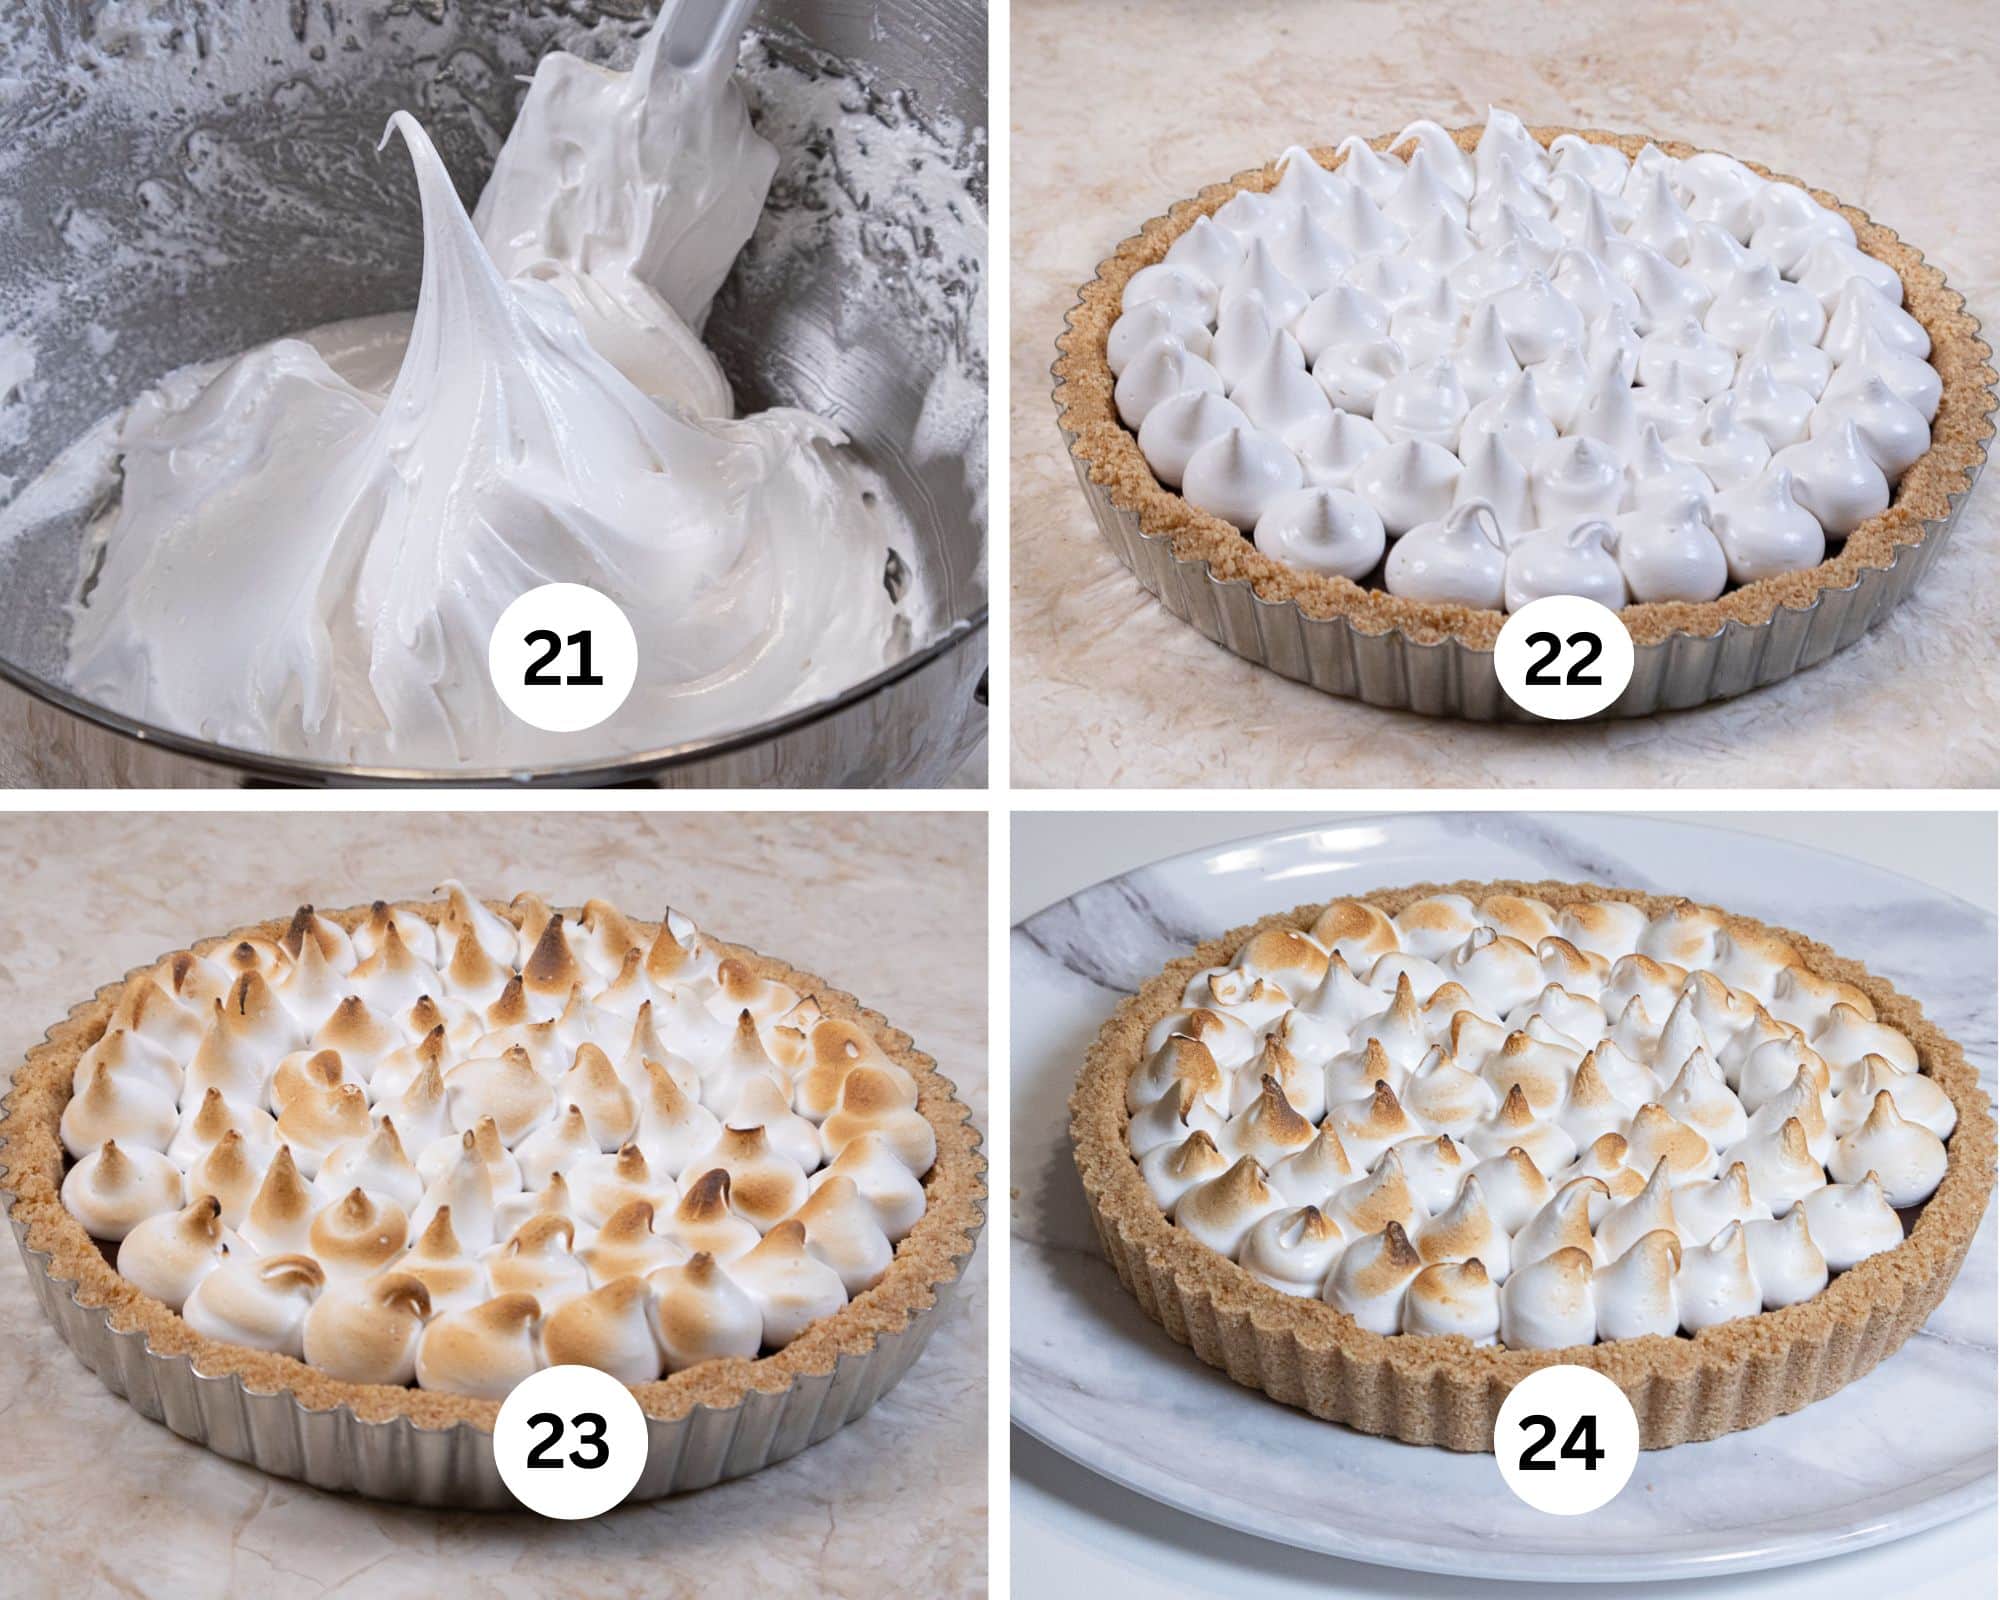
Step 21. Increase the egg whites to medium low. Pour the syrup slowly into the whites. After all the syrup is in, increase the speed of the mixer to medium and then medium high and beat until it is very stiff and holds sharp peaks. Allow it to cool. Step 22. Fit a piping bag with a ½" or ¾" plain tip and pipe "kisses" all the way around the outer edge. Keep moving inward until the tart is completely covered. Don't want to pipe? Spoon it on and make pretty swirls with the back of the spoon. Step 23. Using a small blow torch or propane tank, lightly toast the marshmallow to color them. Step 24. Remove the side of the tart pan. To take it off the bottom, slide a metal spatula between the bottom of the tart and the tart pan. Go all around the tart. Slide it off onto a serving dish.
Recipe FAQS
The first recipe was found in the Girl Scouts of America Handbook published in 1927. The term s'more is first found the 1938 guide “Recreational Programs for Summer Camps,” by William Henry Gibson. It is a contraction of "some more".
Ancient Egyptians. It was only eaten by gods and royalty because it was deemed so special as early as 2000 BC.
The marshmallow was originally made from the mallow plant (Athaea officinalis) that grows wild in marshes....hence marsh mallow.
Expert Tips
- When adding the butter to the crumbs withhold about a quarter of it. Different graham crackers absorb more or less butter. More can always be added. If it does become too wet, add more crumbs.
- Press the crumbs into the pan very firmly or it will crumble when cut.
- For the best cuts as seen in the photos of the completed tart, use a hot, dry knife. Run the knife under really hot water and quickly wipe it dry. Cut straight down on the tart, do not use a sawing motion.
- When making the syrup for the marshmallows, use a saucepan that holds about 6 cups. The mixture rises up as it boils. However, do not use a large pan or the ingredients will spread out too much making it difficult to use the thermometer.
- Chopping the chocolate helps to melt it quickly and evenly. Whisk it smooth but don't be too enthusiastic or there will be a lot of air bubbles.
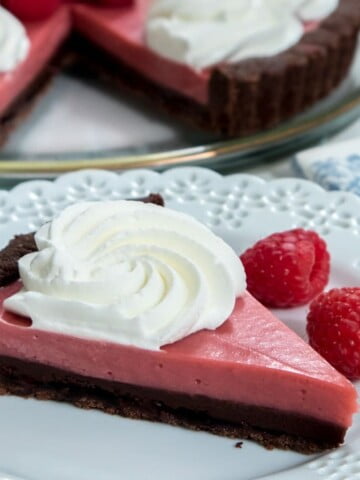
More Lucious Tarts
If you love this S'Mores Tart, It would be hugely helpful and so appreciated it if you would take a moment to leave a rating below. Thank you.
How to Make A S'mores Tart
Equipment
- 9x1" tart pan with removable bottom
- Thermometer
Ingredients
Graham Cracker Crust
- 1 ⅓ cups graham cracker crumbs (170 grams)
- ⅓ cup powdered sugar (34 grams)
- 10 tablespoons unsalted butter (140 grams)
Milk Chocolate Filling
- 12 ounces milk chocolate (340 grams)
- 1 cup heavy cream
- ½ cup peanuts or other nuts, optional (60 grams)
Marshmallow Cream
- 3 tablespoons water
- ⅔ cup corn syrup
- ⅓ cup granulated sugar (65 grams)
- 2 large egg whites (64 grams)
- 2 teaspoons vanilla extract
Instructions
Graham Cracker Crust
- Place the graham crackers and powdered sugar in the processor bowl and process to make crumbs. If not using a processor, put the crumbs in a plastic bag and roll over them with a rolling pin to make the crumbs. Continue as below.
- Add ¾ of the butter and pulse until the crumbs are evenly coated. Press a small amount of crumbs between your fingers to make sure it will stick together firmly. If not, add the remainder of the butter.
- Spray the 9x1" tart tin with a non-stick baking release. Arrange ⅔ of the crumbs evenly along the inside edge of the pan. Using your hand or a measuring cup, press the crumbs firmly into the side of the pan.
- Place the remainder of the crumbs evenly on the bottom of the pan and press in firmly. Set aside.
Milk Chocolate Filling
- Without cleaning the processor bowl, add the nuts and pulse to chop coarsely. Distribute evenly over the crust. Set aside.
- Put the cream in a saucepan and bring to a simmer. Do not boil. Remove it from the heat. Submerge the chocolate under the cream for a few minutes.
- Stir, or gently whisk the mixture together until the chocolate is completely melted and the mixture is combined. Make sure to get into the edges of the pan.
- Pour it into the shell and let it set up at room temperature or speed it along by refrigerating it.
Marshmallow Cream
- In a small saucepan, bring the water, cornsyrup and ¼ cup (50 grams) of sugar to a boil. Continue to boil hard until a candy thermometer reaches 245°F.
- In the meantime, place the egg whites and vanilla in a clean mixing bowl fitted with a whisk. Beat the egg whites to the soft peak stage.
- Slowly add the remaining sugar and return to the soft peak stage. If the whites get done before the syrup, reduce the speed to the lowest and keep mixing. Do not turn the mixer off.
- When the syrup comes to temperature, raise the speed of the mixer to medium and slowly drizzle it into the whites. Turn the mixer to high and beat until thick and lukewarm.
- Fit a piping bag with a ½" to ¾" plain tip and pipe "kisses" around the outer edge of the tart. Continue piping moving in towards the center until it is completely covered. Not into piping? Spoon on the marshmallow cream and make pretty swirls with the back of a spoon.
- With a small blow torch or a propane tank, lightly toast the topping.
- To make perfect slices, heat the knife under really hot water, dry it quickly and slice straight down. Do not use a sawing motion.
- Store the tart in the refrigerator. But serve it at or near room temperature.
Notes
Nutrition


Becky Chase says
Hello Helen!
I’ve been wanting a great marshmallow fluff recipe for making specialty rice crispy treats (souped up a bit with a nut butter & chocolate layer in top) for just before my daughter’s mountain bike races. I’m have a marshmallow recipe I’ve made many times, but definitely appreciate this marshmallow fluff recipe (especially the description of when to start the mixture, keep it moving, then start the sugar syrup - your description of that timeline is really helpful!) Now to my question: is there a reason that there is no gelatin in the marshmallow fluff? Is that the difference between marshmallows and marshmallow fluff, perhaps?
Helen S Fletcher says
To my knowledge and every recipe for marshmallow fluff I've looked at online, there is no gelatin. Yes, gelatin is used when making marshmallows. See my post on Hazelnut Crunch Bars for a discussion and recipe for marshmallow and the different ways of making it. Hope this helps.
SallyBR says
Another masterpiece goes to my files to try soon or as soon as possible!
love this one!
Hope you are doing well..... thinking of you!
Helen S Fletcher says
Thanks Sally. Sort of a dressed up version of S'mores!