
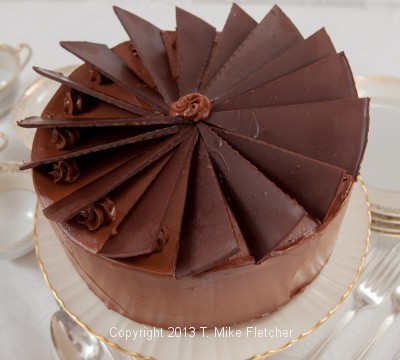
Dobos Torte is an Hungarian multilayered cake consisting of anywhere between 6 to 11 layers of spongecake filled with an intense, but super light, chocolate buttercream made like no other I have seen. Traditionally it is topped with hard caramel fans. Since no one ever ate the caramel and it was a pain to make and cut, I changed it to chocolate!
Invented by a Hungarian confectioner József C. Dobos, this classic cake remains in the pastry repertoire. The combination of lemon butter sponge with chocolate is unusual but works really well together.
Dobos Torte is one of Hungary's best known desserts. The butter sponge layers are filled sparingly with a light, delicate but intense chocolate buttercream. You won't believe the ease of the buttercream. The original recipe uses raw egg yolks. Updating the recipe required getting rid of the egg yolks. Since 40% or heavy cream is fat and egg yolks are fat, I simply switched the yolks for the cream. I honestly can't tell the difference in texture or taste and it is certainly a lot easier than separating 12 eggs. Besides, one cake with 21 egg yolks seems excessive to me.
Dobos Torte was one of the very special desserts my mother would make. I have no idea where she got the recipe but my mother was both a talented cook and baker. I grew up with croissants, Schaum tortes, Dobos Tortes, all manner of phyllo desserts including strudels and pitas.
Mother made the buttercream in a blender as processors weren't on the market yet. I use a food processor with the same technique.
This can be made over a number of days. If I want to make the majority of it ahead of time, I make it to the point of undercoating the cake. Make half the buttercream, fill and undercoat it then freeze and wrap it. Thaw it the day before finishing in the refrigerator. When ready to finish it, make another half of the buttercream and apply the top coat. Make the chocolate fans and assemble the cake. I have included one half the buttercream recipe for your convenience.
Making this Dobos Torte even easier, the finished cake holds well for several days in the refrigerator so it isn't a last minute hassle.
While this looks like a difficult dessert, it actually isn't at all. The fans make it showy but are simple to make. And it is certainly worth whatever effort it takes.
Lemon Butter Sponge - see https://pastrieslikeapro.com/2014/05/lemon-butter-sponge-cake/#more-8158
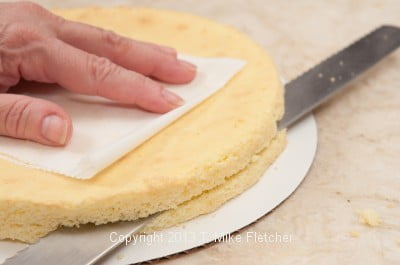
Make the 3 layer version. When they are cool, freeze them for several hours. These can be made a month ahead if desired. If they are frozen solid, allow them to partially defrost. Place a piece of waxed paper or parchment on top of the cake as it will be very moist. With a serrated knife, cut each of the layers in half horizontally. Assemble the layers as they were and set aside while you make the buttercream and fans.
Chocolate Buttercream for Dobos Torte
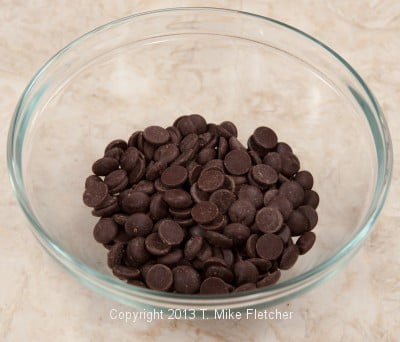
1 pound semisweet chocolate, coarsely chopped (454 grams)
1 ½ cups butter, 30 minutes out of the refrigerator (340 grams or 12 ounces or 3 sticks)
⅔ cup 40% cream
3 tablespoons Kahlua or other coffee flavored liqueur
1 tablespoon vanilla
⅓ cup powdered sugar (40 grams or 1 ⅓ ounces)
One half the recipe for Chocolate buttercream
8 ounces semisweet chocolate (225 grams)
¾ cup butter (170 grams or 6 ounces)
⅓ cup cream
1 ½ tablespoons Kahlua or other chocolate liqueur
1 ½ teaspoons vanilla
3 tablespoons powdered sugar (20 grams or ⅔ ounce)
Melt the chocolate over a double boiler or microwave at half power until it looks shiny and it is beginning to melt. If microwaving, let it sit for a few minutes then stir. It may need more time in the microwave, depending upon the power of the unit and/or size of the bowl.
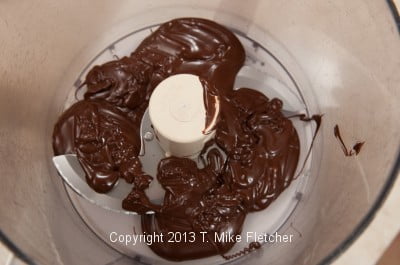
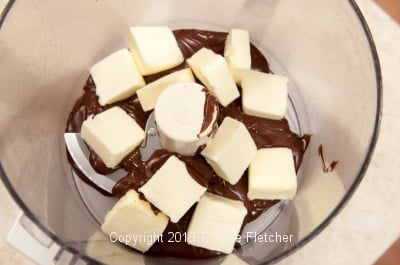
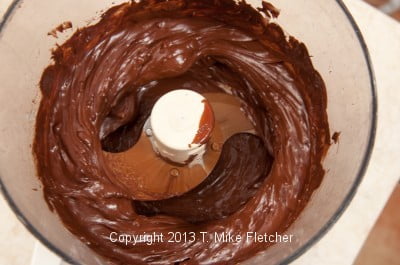
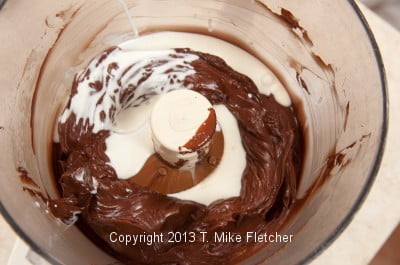
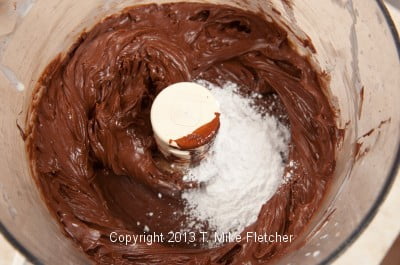
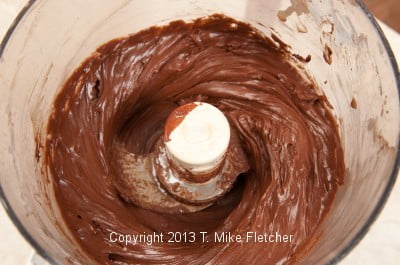
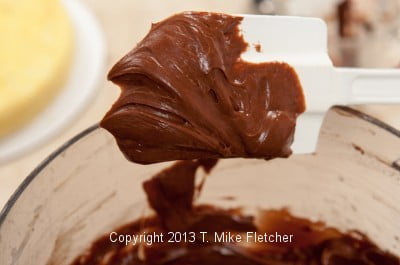
Transfer to the bowl of a processor or blender. Cut the butter into 1 inch pieces and place in a circle over the chocolate.Process about 30 seconds or until smooth. Add the 40% cream and process about 10 seconds. Add the Kahlua, vanilla and powdered sugar. Process about 5 seconds. The buttercream will be amazingly light but hold its shape.
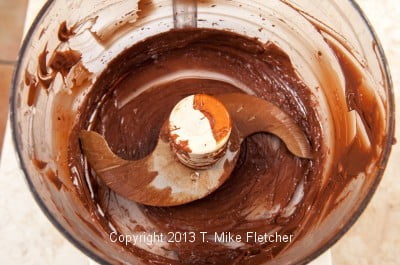
Getting all the buttercream off the processor blade is easy if, after removing most of the buttercream from the processor bowl, you put the blade back in and pulse the machine several times. Whatever is stuck to the blade will be flung off by centrifugal force and your blade will be clean. Simply scrape the rest out of the bowl and you're done.
Yield: About 4 cups.
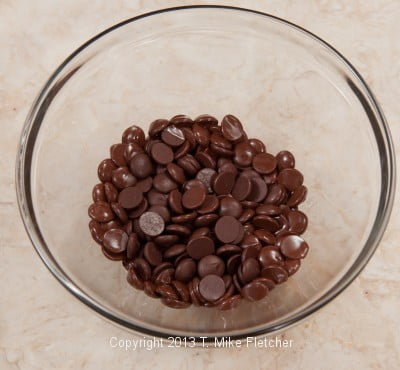
Chocolate Fans:6 ounces semisweet chocolate
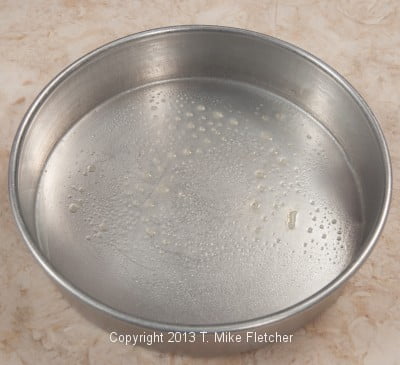
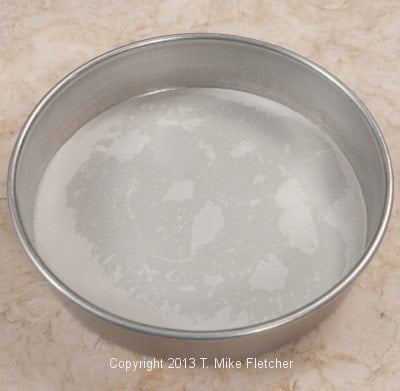
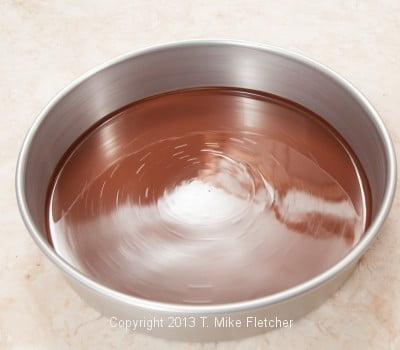
Spray a 9" round cake pan and line it with parchment. Do not spray the parchment.Melt chocolate over hot water or at half power in a microwave.
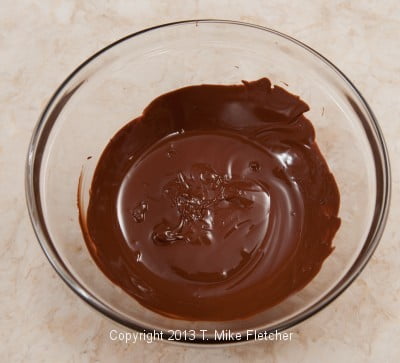
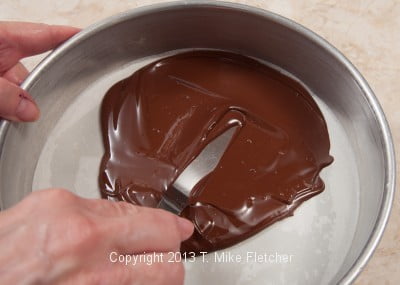
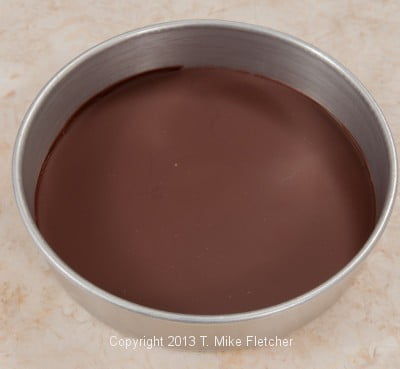
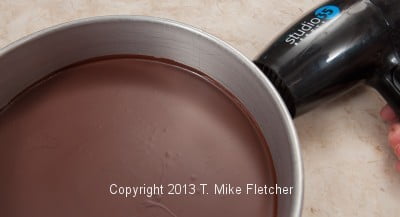
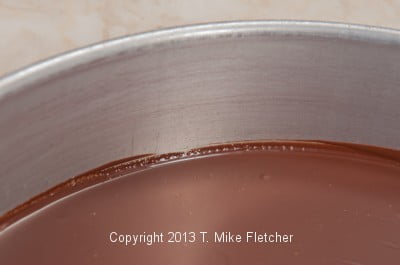
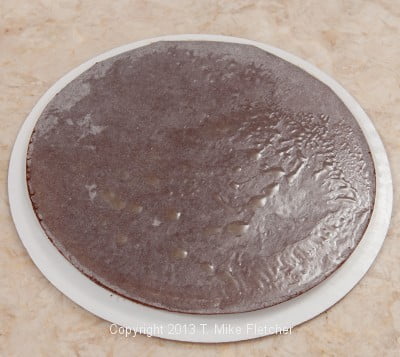
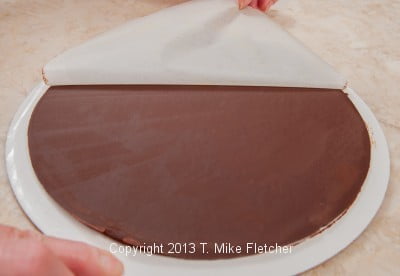
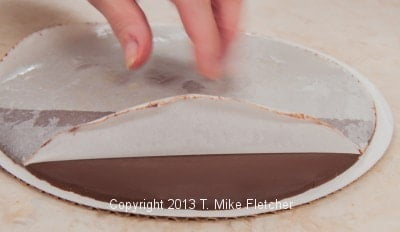
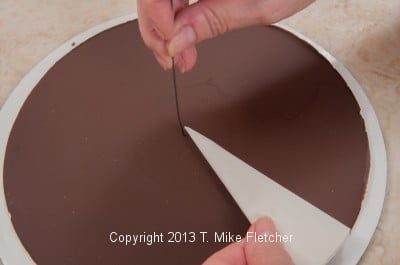
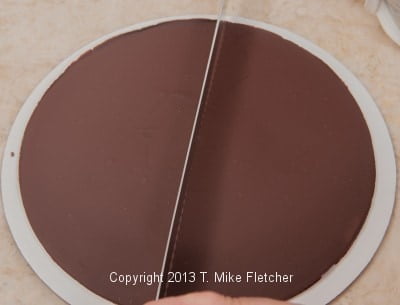
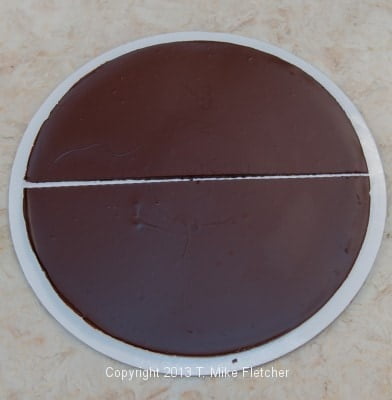
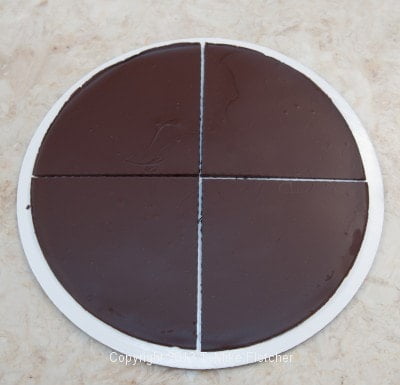
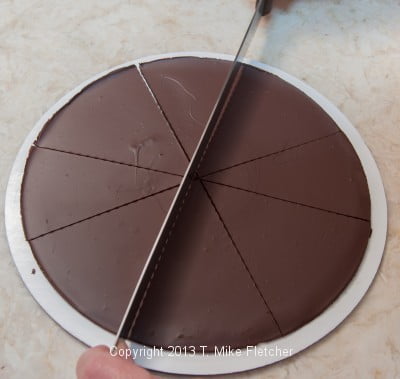
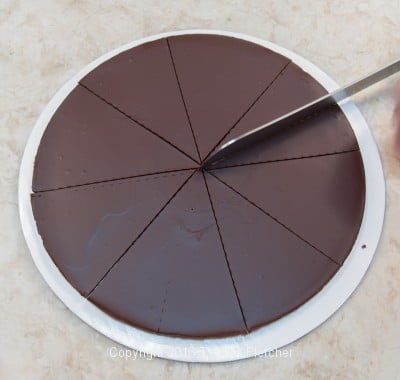
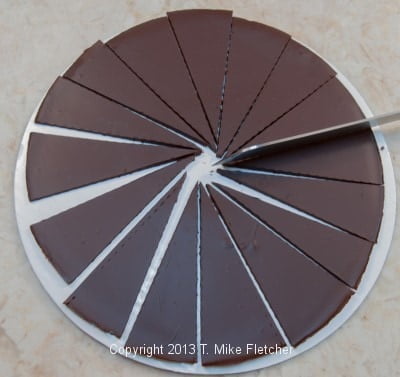
Stir or gently whisk to smooth out. Reheat at half power if necessary.Spread evenly over the parchment. Refrigerate briefly to set up. Release from pan by using a blow dryer to briefly heat the sides of the panuntil the chocolate just begins to melt. Place a cake board over the top of the cake pan and turn it upside down. Rap the cake board with the cake pan on the table several times until the chocolate falls onto the board. Reheat if necessary.Remove ⅔ of the the parchment and turn the chocolate around facing you. Remove the paper pulling it towards the center until it is free. Make a small hole with a toothpick or cake tester marking the center. I have taken a 9" parchment circle and folded it in half several times until I have a narrow wedge. I use this by lining it up at the edge of the chocolate and then marking the center. To cut, heat the knife under really, really hot water. Quickly dry it with a paper towel. Melt through the chocolate. Wiggle the knife to separate the pieces slightly. Reheat and dry the knife between cuts. Let the knife melt through the chocolate, do not apply a lot of pressure. Cut into 12 to 16 pieces. Keep the fans refrigerated while you assemble the cake.
Reserve ½ cup buttercream for rosettes. Set aside.
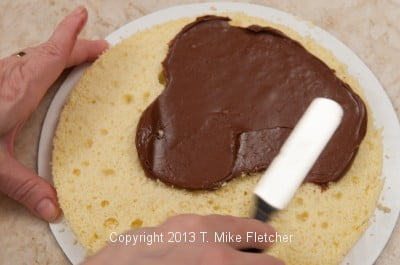
Place one of the six layers on a cake board. Spread ⅓ cup buttercream between the layers.
It will not look like enough. It is.
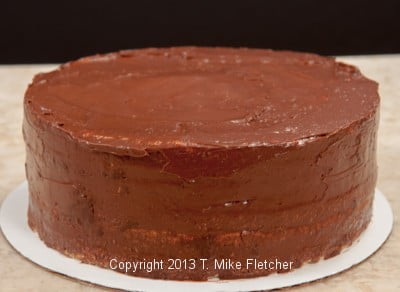
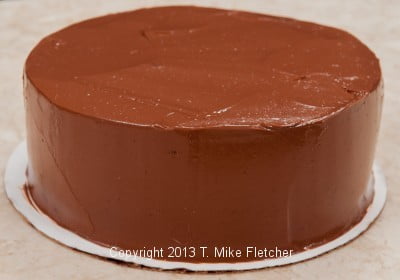
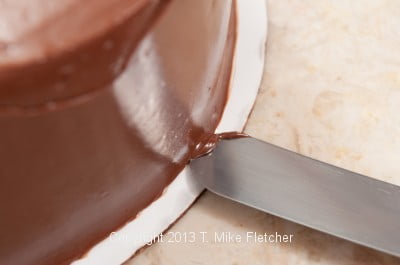
Crumb coat the sides and the top. See the Carrot Cake blog for how to photos.Place in the refrigerator to set up. When the buttercream is set, apply the finish coat. See the Carrot Cake blog, minus the finish for the carrot cake. At this point you need to make a channel at the bottom of the cake so when you move it onto a cake plate, the buttercream will not crack. To do this, take a small, flexible spatula and very carefully, remove the buttercream touching the cake board.
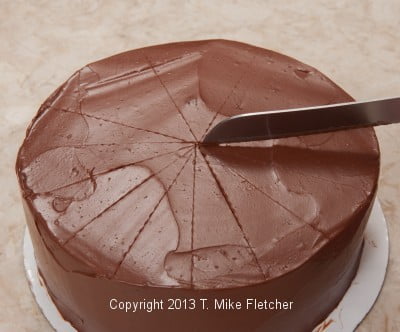
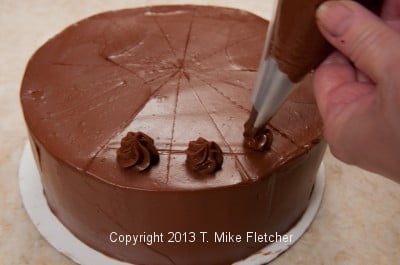
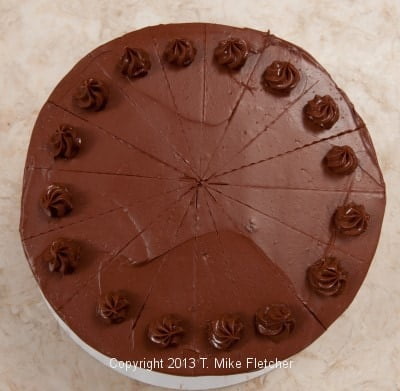
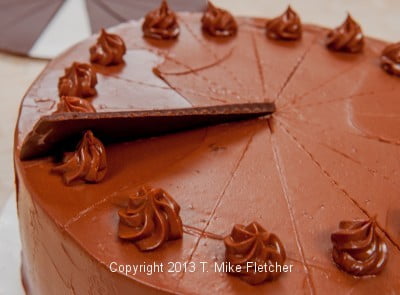
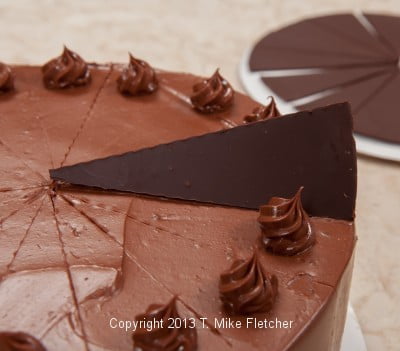
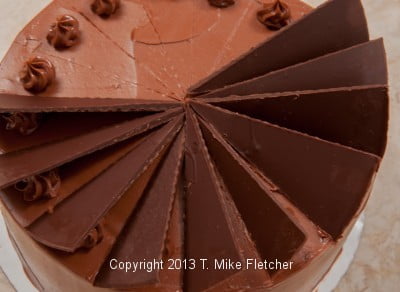
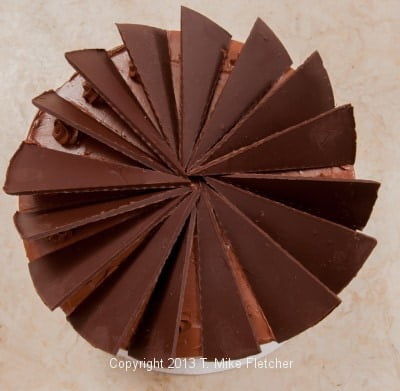
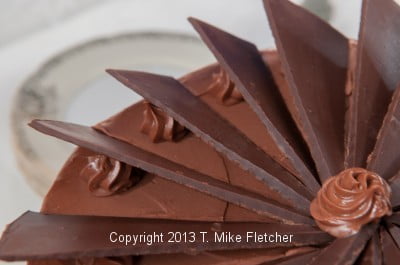
Mark the cake for the number of pieces you have fans for using the same technique as for the fans. Twelve to sixteen are good numbers. Fit a pastry bag with a number 4 or 5 open star. Fill the bag with the reserved buttercream. Pipe a rosette in the middle of each piece. Refrigerate briefly to firm up the rosettes.Picking up a fan by the edges, lean one fan on each rosette fitting them into the center.Pipe a large rosette in the middle to cover all the points.Remember to look like this was the hardest thing you ever made when you present it. I can guarantee a lot of oohs and aahhs!

memarose3 says
This is beautiful. The step by step photos are great. Hope to make it for my family soon.
hfletcher says
Thank you so much. Hope your family enjoys it.
Cyd Hay says
Chef Helen, thank you for this recipe
I love your step by step photos. It makes it so very easy to follow .
I can't wait to prepare this recipe
hfletcher says
Thanks Cyd: I think you will like this.
surekha says
i gone sure try this...its tempting me
hfletcher says
Hi Surekha: Thanks for letting me know. I hope you enjoy it.
Vivian Vuong says
What a beautiful cake. You make it look so easy. I'm going to make this for my daughter's 16th birthday. Thank you for the posting.
hfletcher says
Hi Vivian: What a special 16th birthday cake. It can be made over several days or weeks so plan accordingly and it will be very doable. Let me know how it went.
Mari gold says
Oh my! This is one of my most favorite cakes and until now have never attempted to try it. My family will be impressed if I can pull it off. Being from St. Louis, I miss miss hullings and Phiffers bakery's. I miss their seven layer cakes that. were similar. Thanks a million, I AM going to try.m
hfletcher says
You will do just fine. This is actually easy, just take it in steps over a number of days. Let me know how it goes - I have every faith in you. This is one of my favorites.