
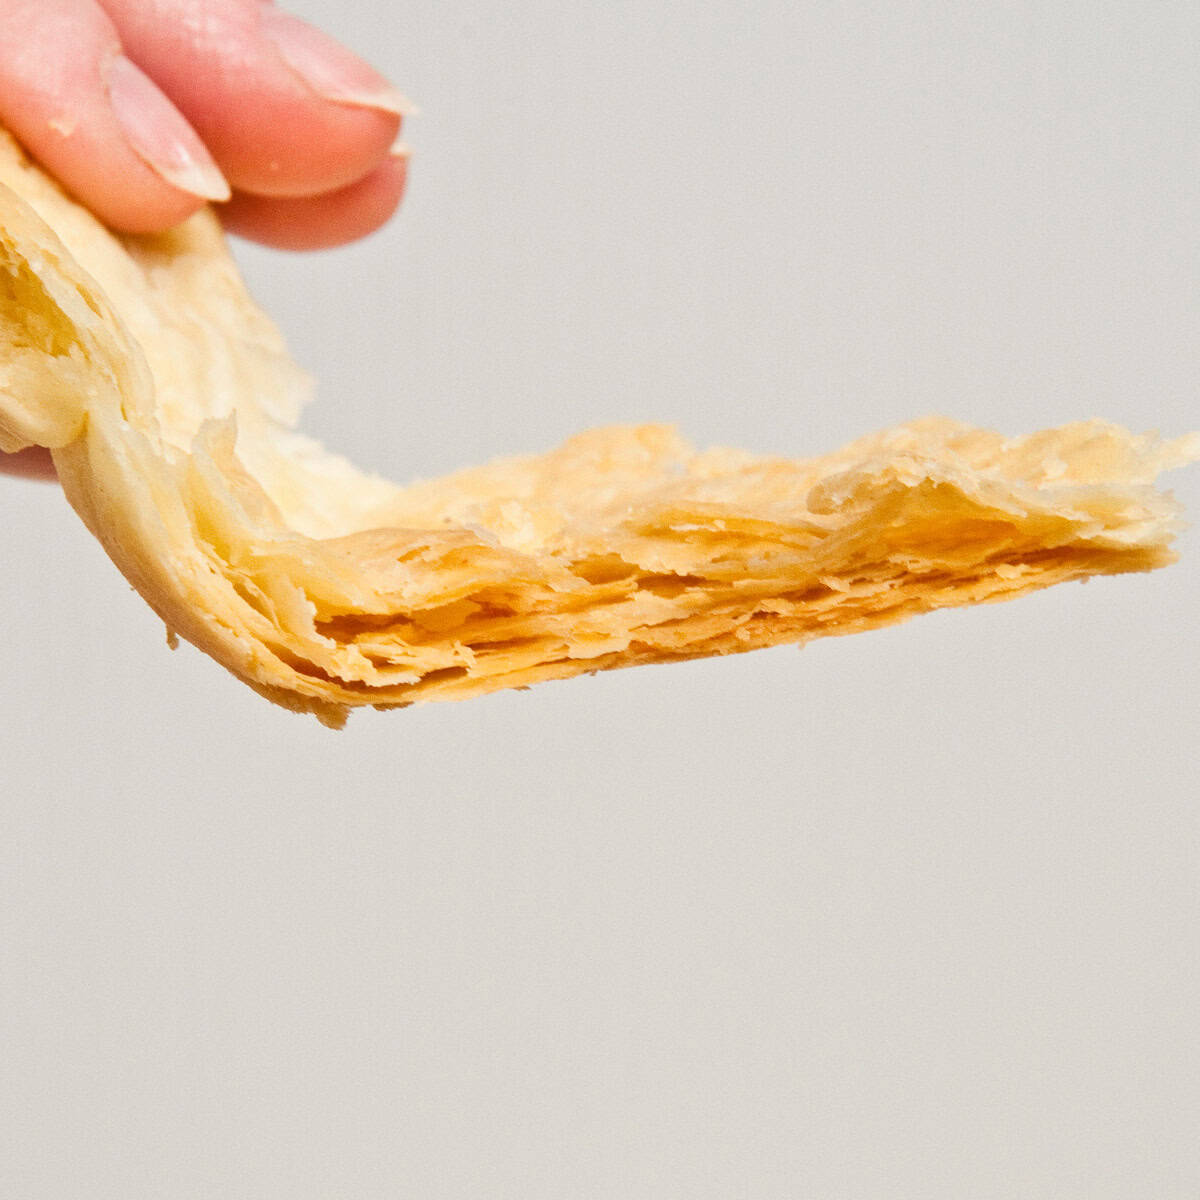
This American Pie Crust From Scratch Tutorial is for beginners as well as seasoned bakers. Many a great cook or baker is still intimidated by a pie crust. Trying to wrangle a few ingredients into a flaky crust that will bake beautifully without sliding down the pan or hold a juicy filling without getting soggy is a challenge and with good reason.
Follow along in this deep, deep dive into how to make a pie crust from scratch that lets you master this most important element in baking with lots of step by step photos to guide you. But be ready, this challenges many of the most popular recipes but it works!
Several years ago, Midwest Living magazine asked me to provide a “no fail pie crust”. The results elicited this comment from the food editor: “We share a test kitchen with Better Homes and Gardens, Traditional Home, Successful Farming, Diabetic Living and more. The staff is educated in food science or through a culinary school. We used your crust for all the pies and they were blown away with the recipe. Not only does it taste great, it was easy to work with. You became a sensation! One of the staffers refuses to make any other crust at home and she’s been on staff for almost 20 years. I hope you feel the love!” I think you will too after making this melt in your mouth crust.
For More information on how i devised this pie crust please see my white paper
Jump to:
How to Make a Pie Crust from Scratch
Purpose and Kinds of Flour Used
Many elements go into a pie crust and an understanding of how they work will help allay any misgivings you have. First of all, let’s talk about flour. The type of flour used will determine, almost completely, the outcome of the crust due to the protein count of the gluten. In making pastry dough, the fat is cut into the flour so that the two proteins in flour, which make up the gluten, cannot come together to link up and form a chain or strand. On the other hand, bread dough is worked vigorously by kneading in order to link the two proteins to form a chain. Whereas the elasticity gained by working the dough is desirable in bread, it is not in pastry, which is why pastry dough is handled and worked as little and as quickly as possible with a lower protein flour.
Bread flour has the highest percentage of gluten followed, in descending order, by all- purpose flour, pastry flour and cake flour which has the very least. It would seem reasonable that if the lowest amount of protein is desired then cake flour would be the choice. Using all cake flour does make a very tender crust, however it is rather mealy and without good texture.
Because pastry flour is not commonly available to the consumer, many recipes combine two thirds all-purpose flour with ⅓ cake flour. While this yields a better crust, reversing it and using a larger amount of cake flour with just a little all-purpose yields the requisite tenderness and flakiness without sacrificing the crispness, texture or strength. In addition, it can stand a little more handling than crusts made with other flours – a boon to beginners.
Which Fats Work Best
The most important item is the fat used. The colder and harder the fat, the flakier the crust. At every point while and after adding the fat, the pastry should be worked quickly and kept cold. Lard, a very hard fat, is advocated by die hard pie crust makers as providing the flakiest crusts. This is true, but its very definite flavor along with its very high cholesterol and the difficulty of finding it in the supermarkets make this the least used choice.
The second flakiest crust will be obtained with vegetable shortening, as it is 100 percent fat, although not as hard as lard but it doesn't have any flavor. Butter, with a fat content of 75 to 80 percent, will not produce as flaky a crust, but the taste is superior. To maximize flavor and retain flakiness a combination of butter and shortening is used in this recipe. Both are used frozen. Under no circumstances use butter substitutes such as I Can’t Believe it’s Not Butter, etc. They have a lot of water in them that alters the proportions of fat and water.
Liquids
Liquids make the dough cohesive. Water, although the main liquid usually used in pie crusts, is not the only one to be considered. Egg and lemon juice play an important part also. Ice cold water is used to slow down the formation of the gluten strands. Several ice cubes placed in a cup of water 5 to 10 minutes before using are sufficient to chill it. Egg in the crust adds firmness, crispness and color and is particularly good when making pies with juicy fillings. When less than a whole egg is called for, beat a whole egg with a fork until the yolk and white are completely mixed, then measure the amount called for. Lemon juice, because of its acid content, acts as a tenderizer on the gluten. Vinegar can be substituted. I have seen crusts that use vodka but I haven't seen that it substantially improves the crust.
Measuring
Measuring the flours is very important to the finished pastry which is why I suggest using a scale. It makes all the difference in the world for consistent outcomes when baking. As a professional baker, I weigh everything and recommend home bakers do also. If you don't, stir the flour in the bag or canister lightly, dip the cup in and fill to overflowing. With the back of a knife or anything flat, sweep the excess flour off. Be sure to use a dry measure – one that has no lip on the top.
Mixing
At this point you are ready to mix. There are several ways to mix the dough. But the best way is to use the food processor. The only caveat is you mustn’t over mix – use pulses as they are easy to control. Frozen butter and shortening are cut into the flours with pulses. You want the pieces to remain the size of peas so when the pastry is rolled out the fat gets trapped between the layers of flour. When it bakes, the fat melts and the steam causes the pastry to puff and become flaky. After the fat is cut in, the liquids are combined and pulsed in until large crumbs are formed.
The food processor allows you much more control than does a mixer. By using pulses you can more easily control it keeping the butter and shortening in large pea size pieces. It's also easier to keep the gluten in the flour under control and shows you how to make a pie crust from scratch.
Rolling the Pastry Out
To roll the pastry, use as little flour as possible. You may think a photo of "lightly floured surface" is ridiculous but I have had students that use so much flour you can't see the surface of the table. Extra flour rolled into the dough at this point will only serve to toughen it.
To keep a round shape when rolling, roll from the middle out to the edges. If, no matter what you do, the shell does not form a good circle you can help it along. Cut away the bulging part of the pastry, moisten the edge of the pastry that needs help with water and patch it with the cut piece overlapping to make a seam. Sprinkle lightly with flour and roll lightly. The seams will not adhere to each other without the water.
Roll the pastry into a circle about 12 ½ to 13 inches round for a 9" pie pan. To make sure the pastry fits into the corner of the pan and is not being stretched, ease about one eighth of the pastry at the side of the pan gently toward the middle. Now bring the pastry back to the rim and slide it down the side of the pan so you can see it fits the angle at the bottom. Continue around the pan in this manner. Trim the overhang a uniform 1 ½". Turn it under and flute the edges if making a single crust. Both a single and double crust are shown below.
The crust can be baked at this point or it can be frozen for several months. It can also be rolled out flat, frozen, stacked with parchment paper between them and frozen for several months. Simply remove a crust, thaw in the refrigerator and use as directed.
Baking the Pie Crust
Baking an empty shell is called “blind” baking the shell. The biggest obstacle here is the tendency towards shrinking when baking. To forestall this, it is necessary to freeze the shell first then weight it. I am always amused by the pictures of a few aluminum weights on the bottom crust or something that looks like a string of beads. These will do nothing to help your cause.
Line the frozen pie crust with foil that has been sprayed with a releasing agent (do not use parchment paper – it doesn’t have enough strength when removing), lightly pressing it, sprayed side down on bottom of the crust and against the sides letting it stick up over the top. Fill the crust completely to the top with dried beans such as pinto or lima beans. It will take about two pounds of beans for a nine inch crust. Preheat the oven to 425°F. Bake for 20 minutes with the beans. Remove the foil and the beans and bake for 15 to 18 minutes more for a full baked crust. It is important for the finished shell to have color so it remains crisp and flaky. Cool the beans completely and store in a covered container to use over and over. I have had mine for years.
To par bake (or partially) a shell reduce the time after removing the beans to about 10 to 12 minutes. The crust should be firm but not browned as for the fully baked crust. This crust is used when it will be filled and baked again. Be sure to cover the edges of the crust after it is filled and before it goes into the oven. Be sure to change the oven temperature to whatever your filling suggests.
Anytime a pie is going to bake for 30 to 40 minutes the crust should be par baked.
Cover the Edges Before Baking
If you are baking a pie longer than 30 to 40 minutes, the edges need to be covered or they will become overly brown. It is much safer to do this before baking instead of waiting until it is halfway or more done then trying to cover it while hot. After the top is put on the pie, simply tear off strips of foil about 3 inches wide and cover the edges. These are left on for about half the baking time and then removed so these edges can bake also.
Choice of Pie Pans or Plates
The color of the pans will alter the baking times. I see mostly dark ware for consumers these days, very little aluminum. Dark metal or glass pie pans require a twenty five degree reduction in heat in order not to over brown or burn. My preference is aluminum or glass.
Amount of Filling for 9" Pie Pans
To figure out how much filling you need, a standard pie pan requires about 6 cups of fruit, plus sugar and thickeners. The deep dish pie pans require about 8 cups of fruit plus sugar and thickeners.
By following the steps you see here, you will be assured your pie crusts will be fast, flaky, fantastic and fail-proof because you learned how to make a pie crust from scratch.
Recipe Ingredients

FRONT ROW: Salt, egg, lemon juice
MIDDLE ROW: Unsalted butter, shortening (such as crisco)
BACK ROW: Cake Flour, ice water, all-purpose flour
Key Ingredients
- Cake flour is essential in this recipe.
- A bit of all-purpose flour boosts the strength and stability of the cake flour
- Unsalted butter is used. If salted butter is used reduce the salt by ⅓.
- Shortening, such as crisco, is used to ensure maximum flakiness. All butter can be substituted but it may not be as flaky. It will also soften faster when working with it.
- Freezing both the butter and the shortening is necessary to ensure visible pieces of each will be visible so these will melt and cause the flakiness.
- Ice water is necessary to keep the dough as cold as possible.
Be sure to see the recipe card below for the full ingredients and instructions.
Step by Step Instructions
Make sure the butter and shortening are frozen before proceeding.
Making the Crust
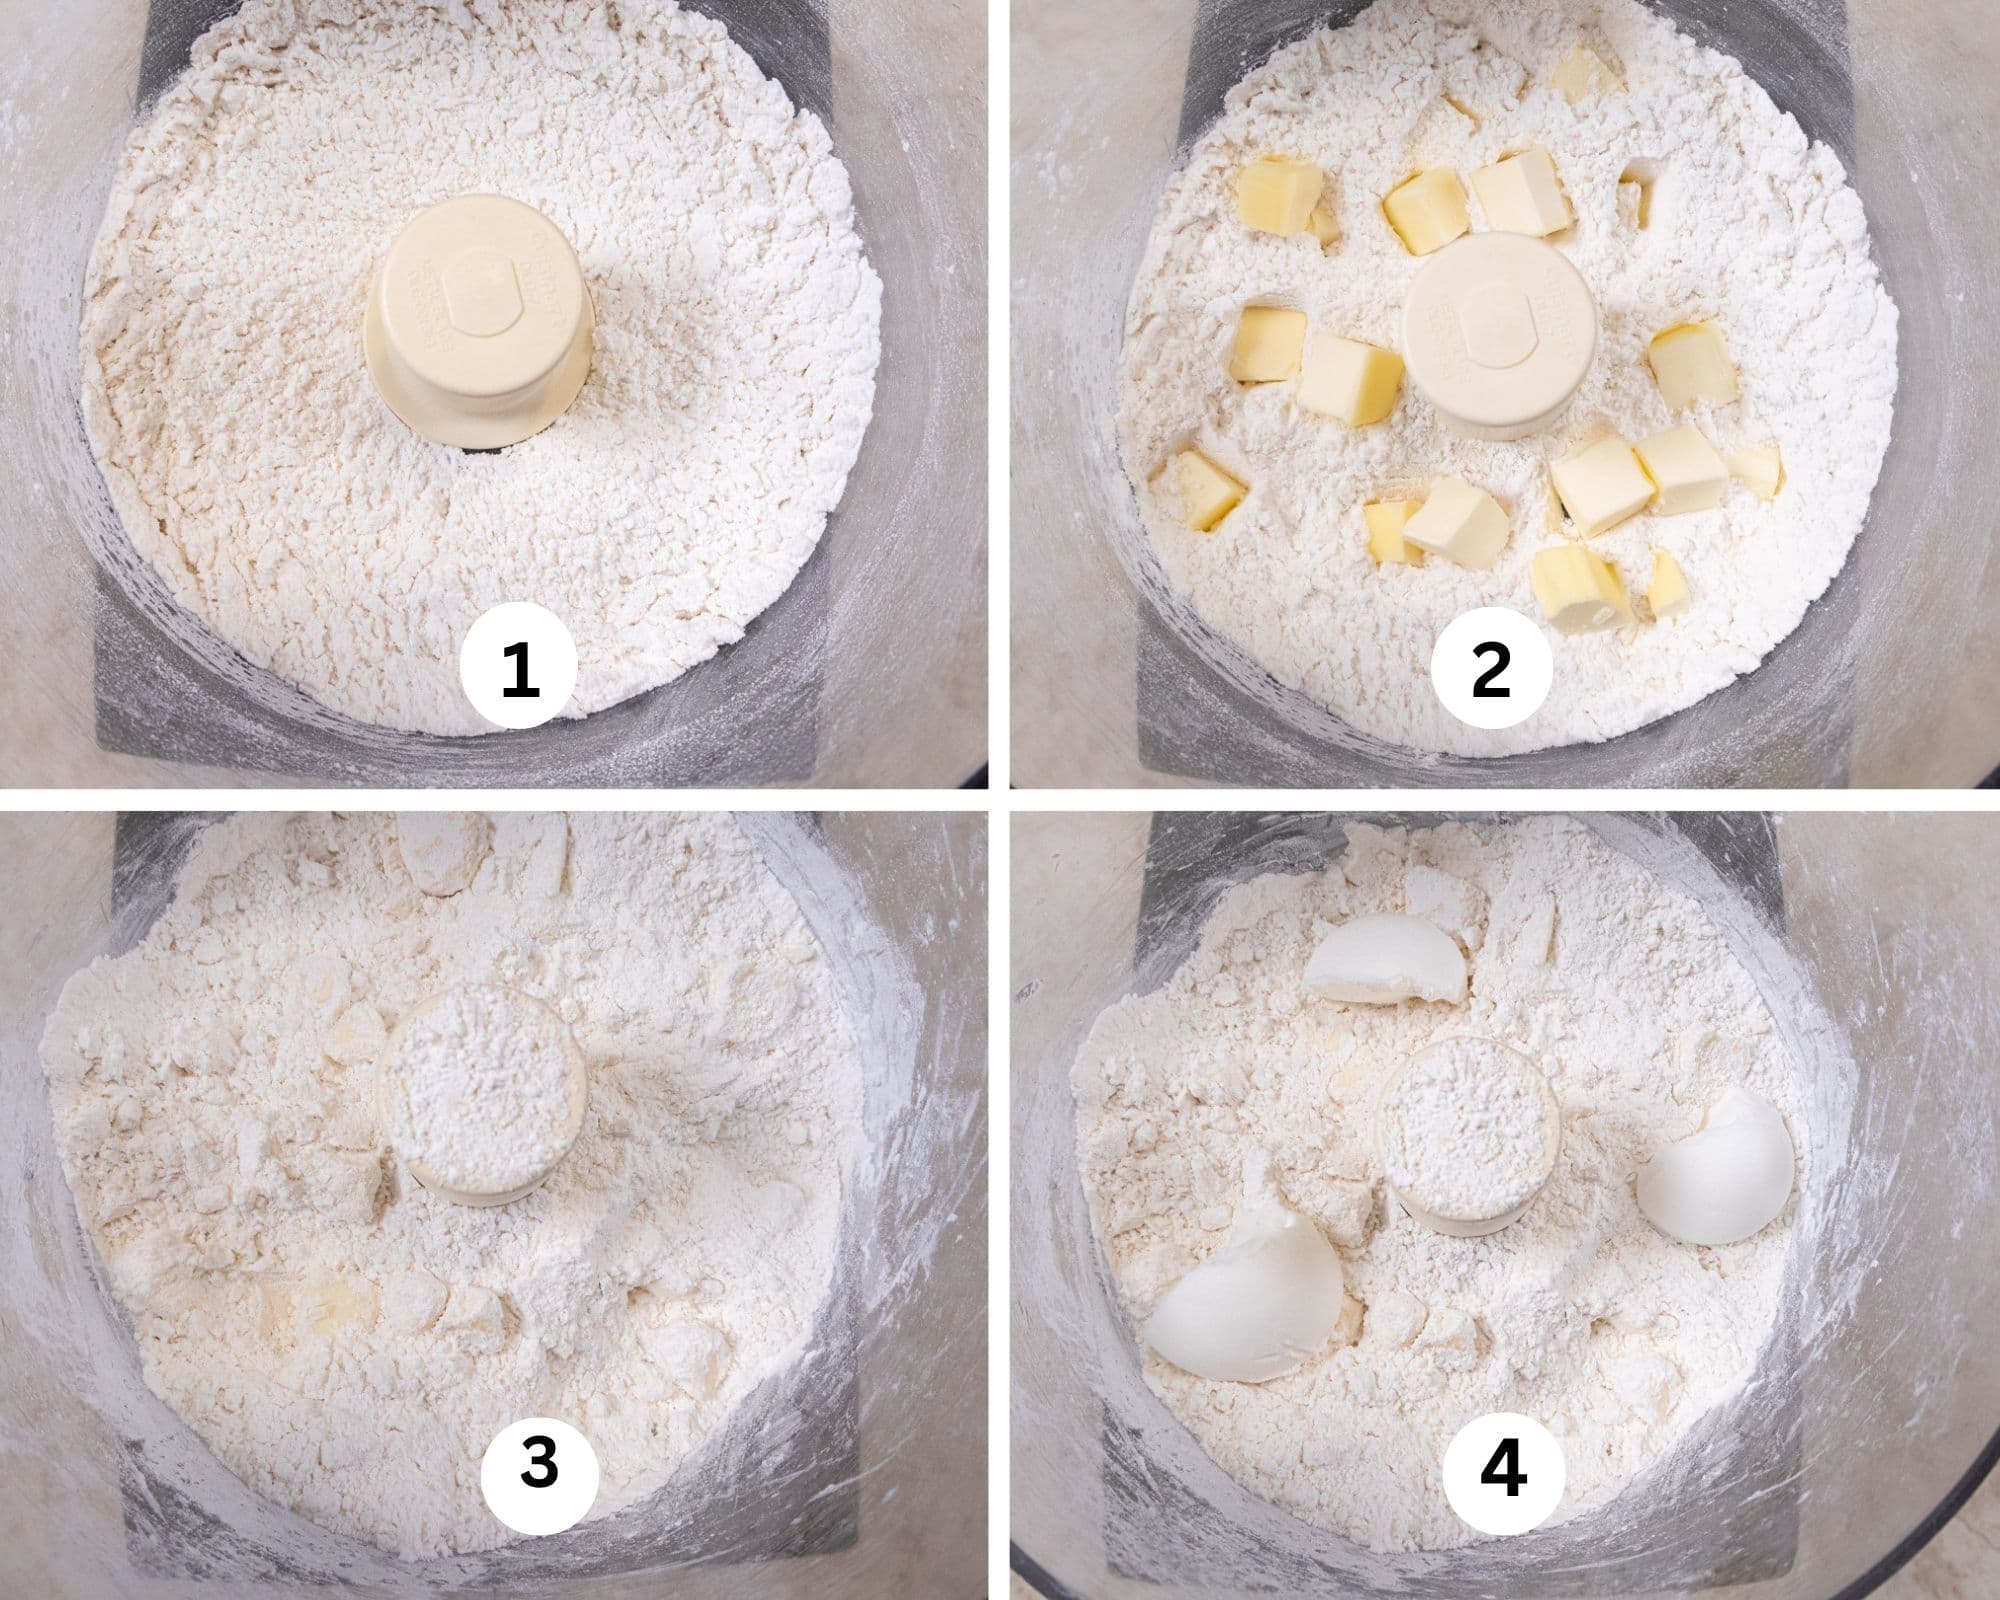
Step 1. Combine the flours in the bowl of a processor and pulse several times. Step 2. Step 2. Add the frozen butter. Step 3. Pulse a few times to break it up in large clumps. Step 4. Add the frozen shortening.

Step 5. Beat the egg to until completely combined. Combine the the 2 tablespoons egg, lemon juice and water. Step 2. Pour it in a circle over the processor contents. Step 7. Pulse until large clumps of dough form. Do not over process. Step 8. Pour it out onto a work surface. Note: One of my long time readers came up with an alternative way to add the liquid that worked better for her. After cutting in the butter and shortening, she removed everything to a large bowl. Then added the liquids and stirred them in by hand to prevent the butter and shortening from being cut into too small of pieces.

Step 9. Push the dough together in a cohesive block. Step 10. Knead it several times and shape it into a round 1" thick. Here you can plainly see butter pieces in the dough. Step 11. Wrap it in plastic wrap and refrigerate a minimum of 2 hours or overnight. Step 12. Lightly flour your work area. It may seem unnecessary to show you this, but I have seen people really heavily cover their surfaces with flour. All of that flour going into your crust will toughen it and inhibit the flakiness.
Rolling the American Pie Crust Out

Step 13. Remove the dough round from the fridge and place it on the lightly floured surface. Step 14. With a rolling pin, press the dough down in 3 or 4 places to make rolling out easier. Step 15. Roll the dough out to about 13" for a 9" pie pan. Step 16. This is an optional step, but I place a 12 inch cardboard on my rolled out dough and then cut it slightly larger to ensure a 13" round. This makes a uniform amount of dough being turned under at the edge.
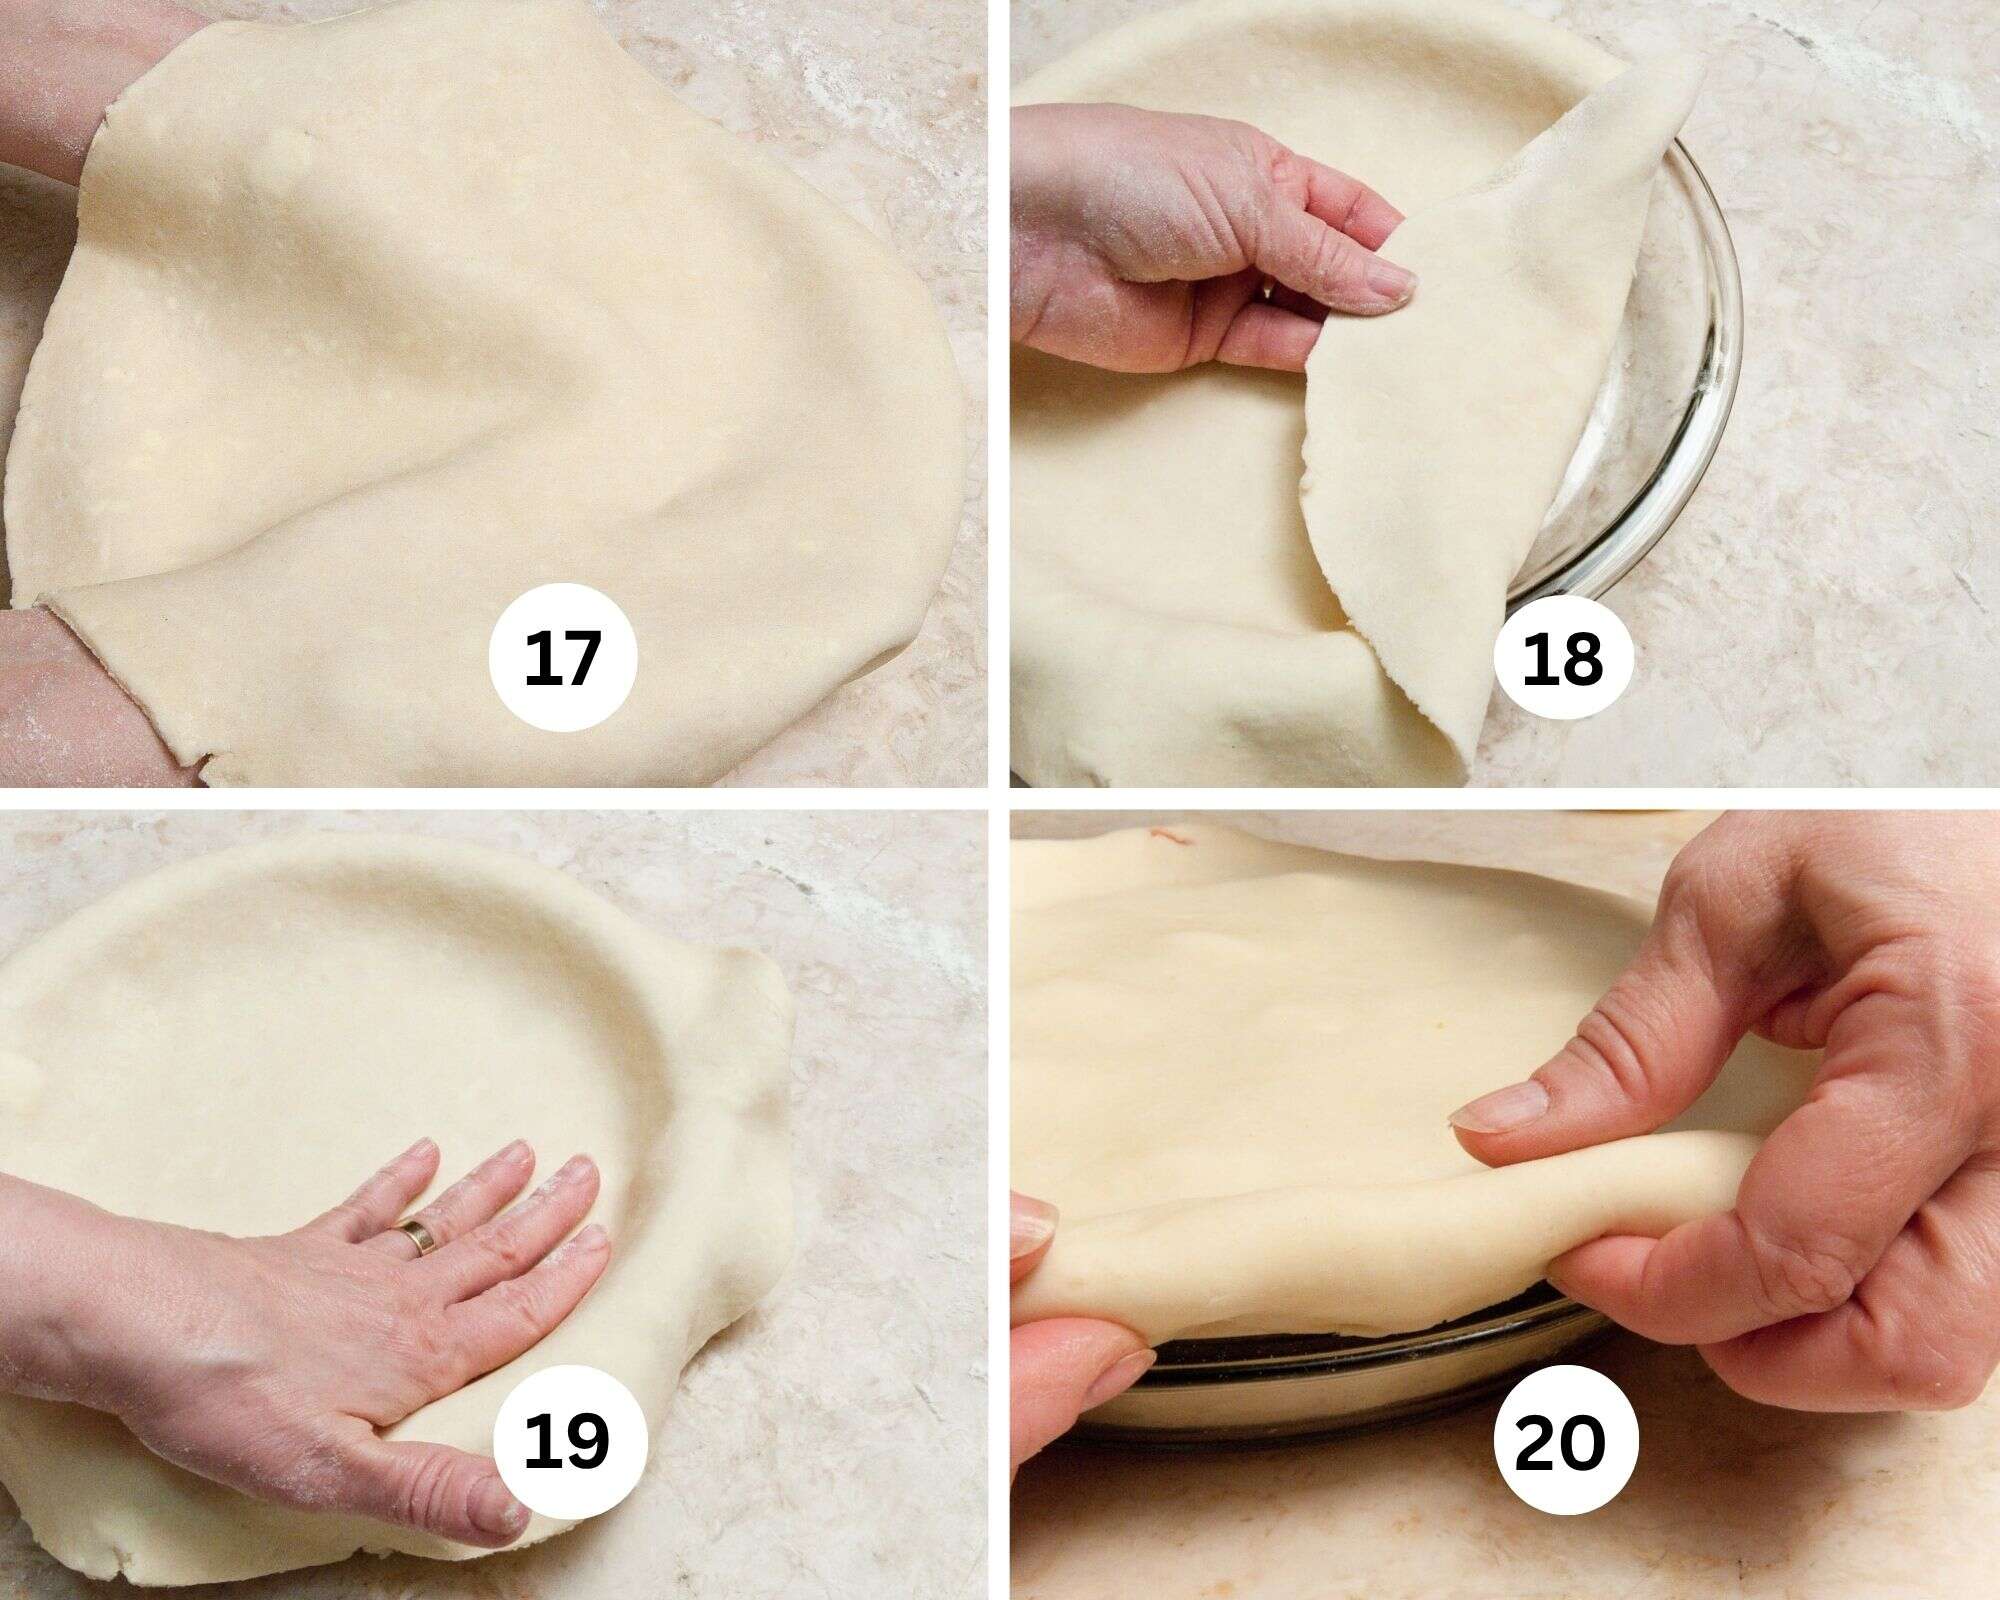
Step 17. Pick the crust up by slicing both hands under the crust and transferring it to the pie plate making sure it is evenly set in. While I do this with my hands, you can also roll the dough loosely around a rolling pin and simply unroll it in the plate. Step 18. Going around the edge of the pan, pull the dough back and make sure it is securely seated to the edge. Step 19. Press it lightly against the side and the bottom. Step 20. Tuck the overhang under the top edge of the crust.
Blind Baking a Single Crust

Step 21. Flute the edges of the crust by placing your finger on the inside of the crust and pinching it from the outside or however you wish. Step 22. Go around the entire edge to finish the crust. I do not dock mine with a fork. Freeze the crust until it is rock hard. Step 23. To keep the crust from sliding down the side of the pie plate, spray a large piece of foil with a non-stick baking release and place it, sprayed side down, onto the crust. Make sure the foil fits well into the edges of the crust. Fill it to the top completely with beans or rice. Step 24. Bake as called for removing the foil and beans about half way through to allow the crust to bake completely.
Double Crusted Pie
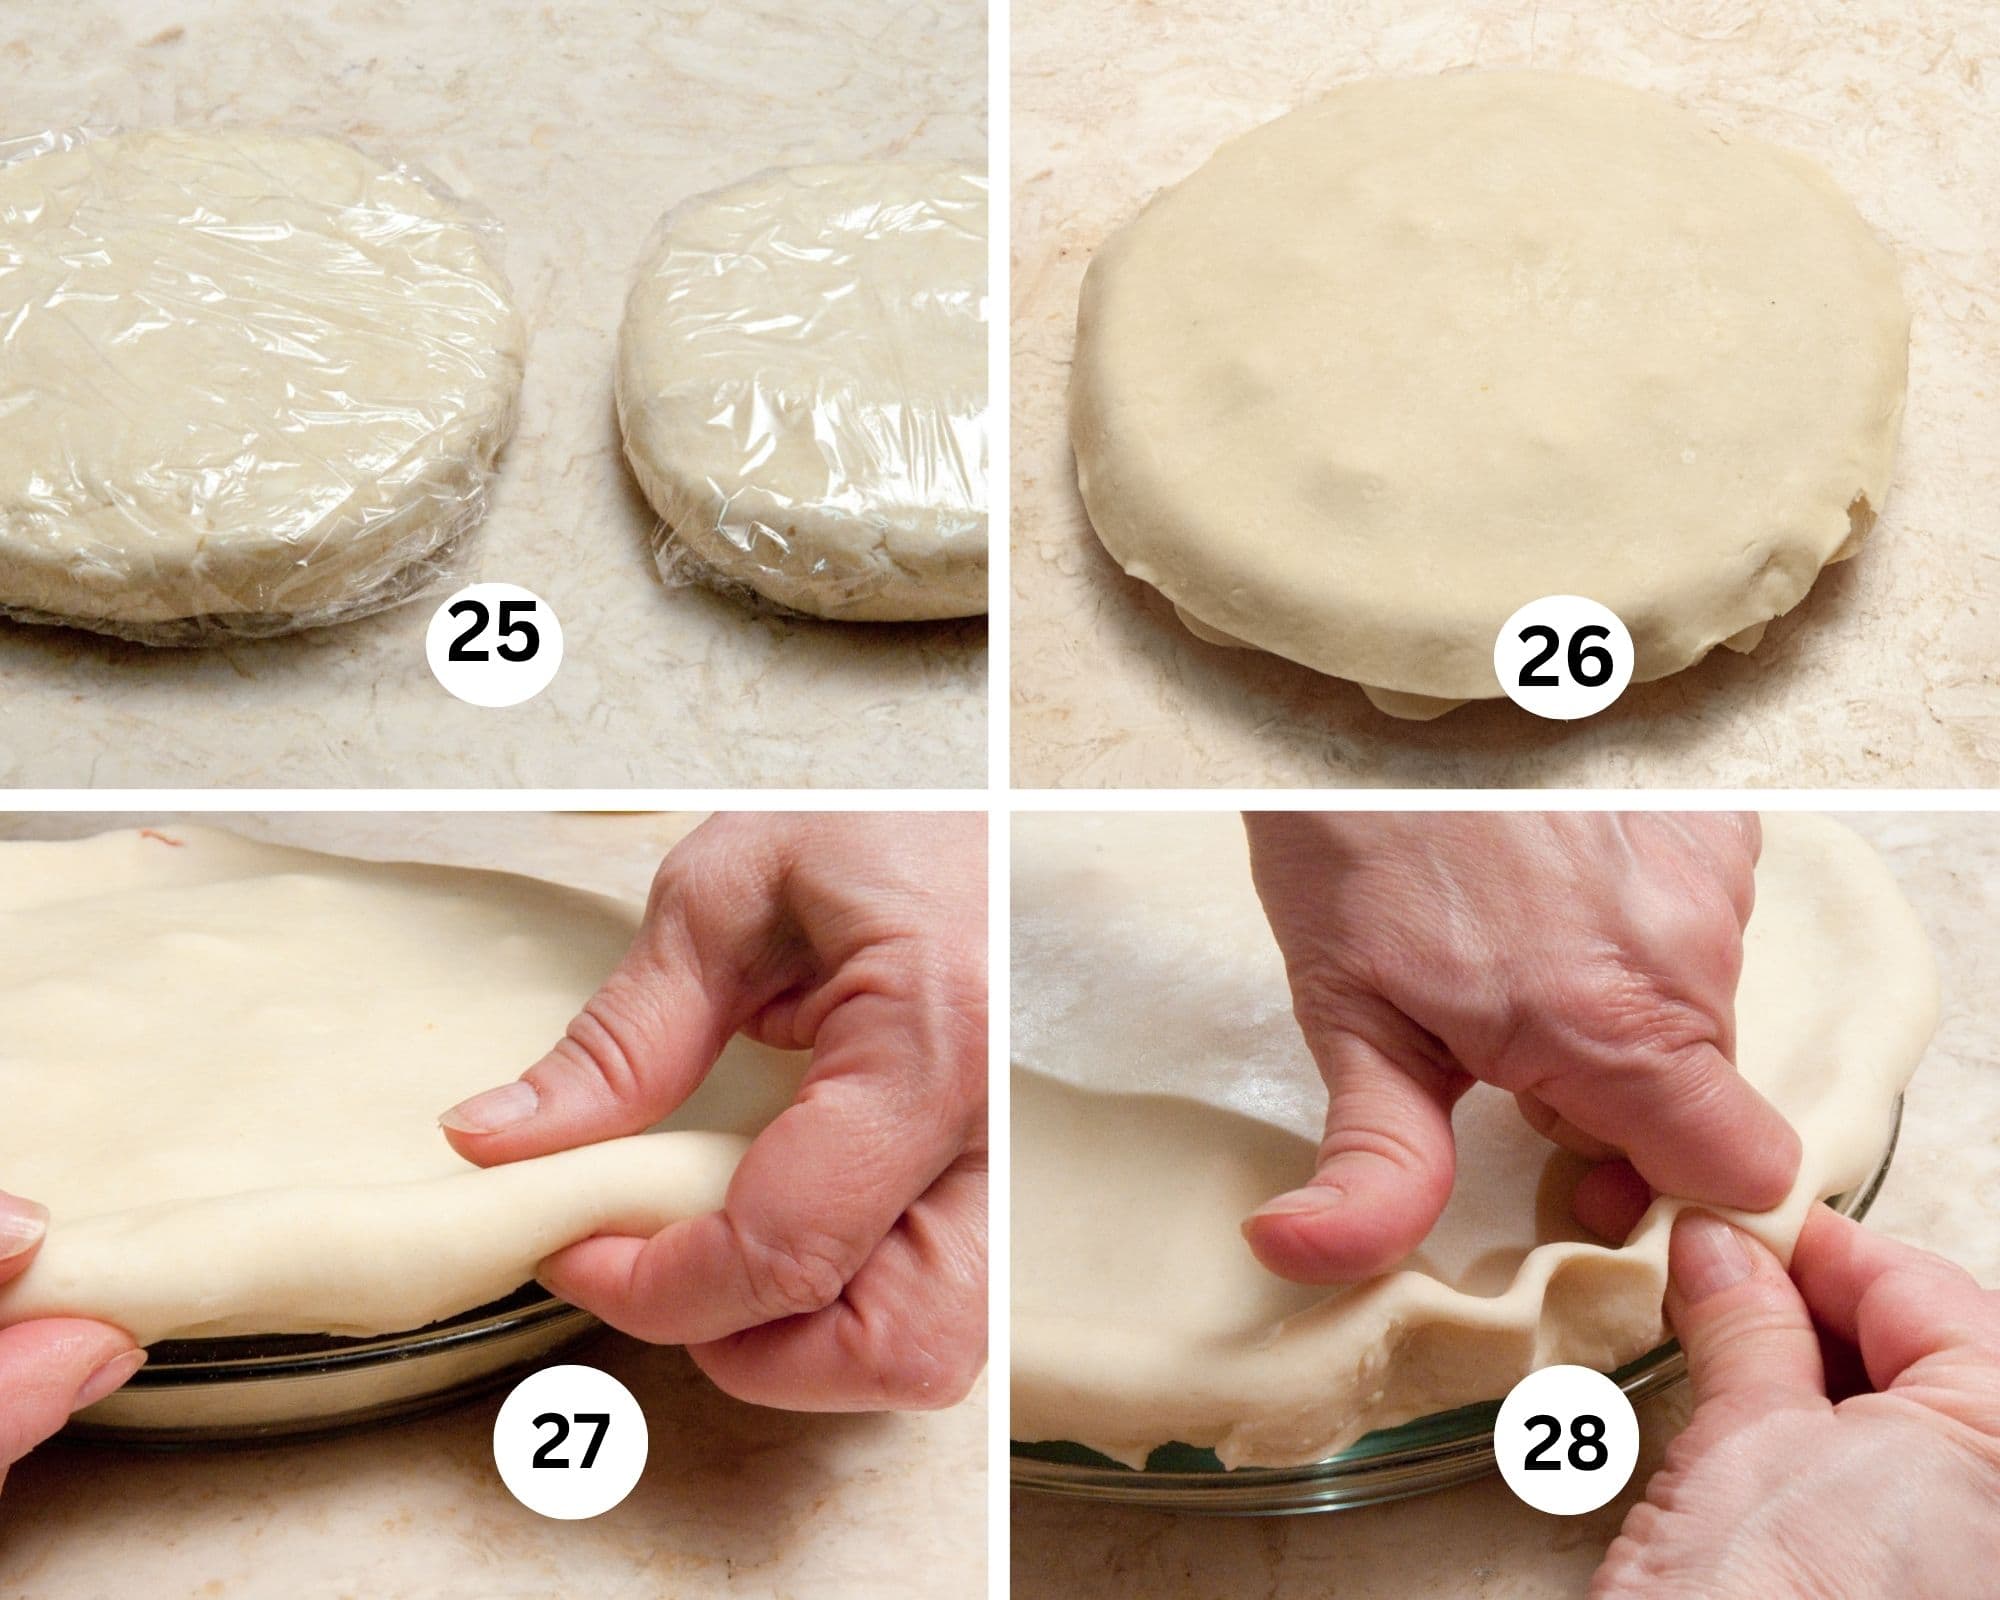
Step 25. Divide the dough as called for. Step 26. Roll the crust into a 13" round as above and place it evenly in the pie plate as for the single crust. Step 26. Roll the top crust about 12" round. Wet the overhang on the bottom crust and place the top crust on. Step 27. Press the two edges together. The water will seal the top and bottom edges. Turn them under. Step 28. Flute the edges as above or however you please.

Step 29. Brush the top of the crust with a beaten egg for a beautiful top. Step 30.Cut a vent or vents into the top of the pie. This will prevent the crust from splitting on its own. Sprinkle the pie with sanding sugar for a sparkly look. Step 31. Place the finished pie on a foil lined baking sheet to catch any drips. This is one of the most important steps. Cover only the edges of the pie with foil before it goes into the oven. They will over bake and burn with the long baking time needed if not protected. By covering them now and removing the foil half way through, you don't have to take the pie out of the oven and cover them when the pie is hot. We used this method at the bakery. Step 32. This is your pie, beautifully golden brown with a flaky crust that you will be proud to serve.
Recipe FAQ'S
This helps in a couple of ways. One it helps bake the bottom crust and secondly, the burst of hot heat starts the butter and/or shortening to melt fast and start the layers separating for a flaky crust. The temperature is then lowered to finish the baking.
Because they are all fat. Butter contains water so it doesn't have as high a percentage as the lard and shortening.
If a recipe calls for both butter and another shortening, then yes it can be made with all butter but it may not be as flaky and tender.
Make Ahead, Storage and Freezing
The crusts can be made ahead frozen at several different times for several months. When it is initially made into the 1" round, when it is rolled out or when it is in the pie plate. If more than one crust is frozen when rolled out, separate with parchment paper. If frozen in the pie plate it is safest to use a metal pan or make sure the glass pie plate will go from freezer to oven safely. In any case, freeze the crusts hard, then wrap well in foil or place in freezer proof bags. If frozen flat, thaw in the fridge for the best result.
Expert Tips
- Everything should be worked cold - the butter, shortening, egg and water.
- I don't poke holes in the unbaked crusts to prevent liquids from escaping through them. If bubbles do pop up, I simple flatten them.
- If a crust is to be par baked, that means only bake it partially. It will finish in the oven after the filling is added. It needs to be weighted down with beans or rice.
- A blind baked crust is one that is fully baked and weighted down half way through baking.
- The tray with the pie can be placed on the lowest rack in the oven to ensure the bottom bakes.
- The egg wash on top is optional but makes for the best looking pies.

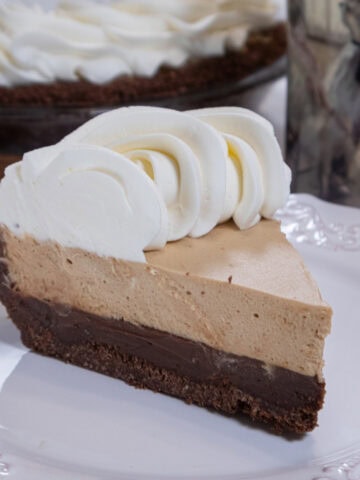
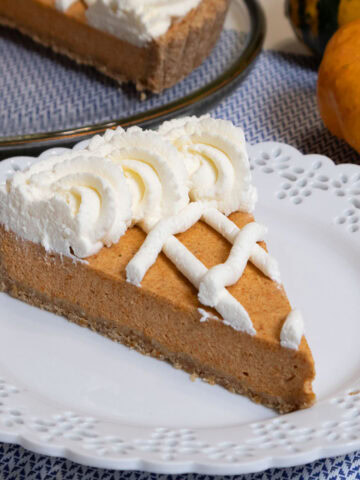
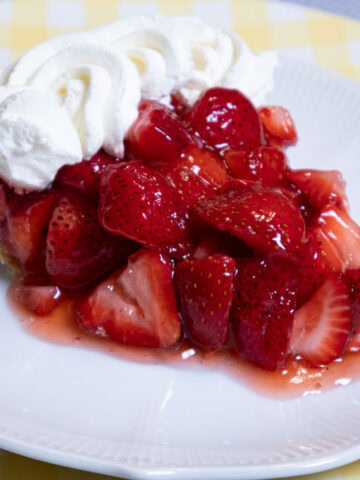
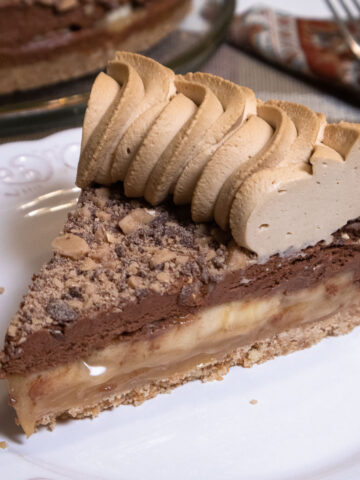
More Wonderful Pies with an American Pie Crust
A lot of work goes into each of my recipes and my only ask is that if you like the recipe or even the looks of it, please leave me a star rating to help me rank better. It’s important and I appreciate it and I appreciate you.

American Pie Crust Tutorial
Equipment
- 9" Pie plate
Ingredients
Single American Pie Crust
- 1 ¾ cups cake flour (180 grams)
- ½ cup all-purpose flour (70grams)
- ¾ teaspoon table salt
- 6 tablespoons unsalted butter (85 grams)
- 3 tablespoons shortening (45 grams)
- 2 tablespoons beaten egg
- 1 teaspoon lemon juice
- 5 tablespoons ice water
Double American Pie Crust
- 2 ¼ cup cake flour (280 grams)
- ⅔ cup all-purpose flour (95 grams)
- 1 ¼ teaspoon table salt
- 9 tablespoons unsalted butter (130 grams)
- ¼ cup shortening (60 grams)
- 3 tablespoons beaten egg
- 1 ½ teaspoons lemon juice
- 8 to 9 tablespoons ice water
Instructions
Single American Pie Crust
- Cut the butter into tablespoons size pieces and cut those in half. Freeze until rock hard.
- Measure the shortening in tablespoons and freeze those until they are rock hard also.
- Combine the cake. all-purpose flour and salt in the bowl of a food processor. Pulse several times to mix well.
- Place the frozen butter over the flours. Pulse several times to cut the butter into large chunks.
- Add the frozen shortening. Pulsing the processor, cut in until the butter and shortening are the size of large peas. Do not over process. Use short bursts.
- Combine the egg, lemon juice and water. Pour it in a circle over th e processor contents. Pulse until it forms small clumps in the bowl. Note: One of my long time readers came up with an alternative way to add the liquid that worked better for her. After cutting in the butter and shortening, she removed everything to a large bowl. Then added the liquids and stirred them in by hand to prevent the butter and shortening from being cut into too small of pieces.
- Pour it onto a lightly floured work surface. Push the clumps together to form a cohesive mass.
- Knead it 4 or 5 times to forma dough. Pat into a circle about 1" thick. Wrap in plastic warp and refrigerate a minimum of 2 hours or overnight.
- Preheat the oven to 425°F.
- Roll the dough into a circle about 13 ½" for a 9" pie pan. The easiest way to do this is to roll the dough from the center to the outside. Go around the entire circle of dough this way. Trim to a 13" circle.
- Pick this up by sliding both hands under the crust and lifting it into the pie plate. It can also be rolled up on a rolling pin and unrolled in the pie plate. Position it so it is even in the plate. There will be a 1" overhang.
- Turn the overhang underneath the dough at the edge. Flute the edge as shown or as you please. I do not make holes with a fork.
- Fill and bake as your recipe requires.
To Blind Bake a Crust which is to bake it empty.
- After the crust has been completed in the pie plate freeze it until it is rock hard.
- When ready to bake, spray a large piece of foil with a non-stick baking release. Place it, sprayed side down into the crust shaping it to fit. Do not use parchment paper as it can break when you have to remove the weights.
- Fill it to the top with beans or rice which I favor over the marble like pie weights and I think they are too heavy and can mark the crust.
- Bake for 20 minutes with the beans. Remove the beans by bringing the four corners of the foil together and lifting it out. Return the crust to the oven and bake or about 15 to 18 minutes more until evenly browned and baked through.
- Cool and fill as desired.
Double Crusted American Pie
- Divide the dough into two pieces. One about 400 grams and the other 200 grams. Form each int a round about 1" thick. Wrap in plastic wrap and chill for about 2 hours or overnight.
- Roll the larger amount of pastry as above for the single crust but do not flute the edge.
- Fill the pastry as desired.
- Roll the smaller piece into a 12" circle. Wet the overhanging edge of the bottom pastry with water. Place the 12" circle on top and press the edges slightly together. Tuck the overhang underneath and flute the edge.
- Cut vents in the top.
- Brush with a beaten egg and sprinkle with sanding sugar.
- Line a rimmed baking sheet with foil. Place the pie on it. This will make clean up easy if the filling goes over te edge while baking.
- To prevent the edges from browning too much or burning, it is easier to cover them with foil before you bake than halfway through when it is hot. We did this at the bakery. Halfway through baking we removed the foil from the edges and after baking they were the same color as the rest of the crust. Tear off 3 pieces of foil about 4" wide. Place them over the fluted edges of the crust, covering them front and back.
- Bake as directed in your recipe.
- Allow the pie to cool on a cooling rack before serving or freezing.
Notes

Ines says
Thank you Helen for sharing your recipes and lessons! Throughout my life (and I'm no spring chicken), I have learned that no matter how many years a person bakes, you can always learn more to put together a recipe better. I have always used vodka/water when preparing my crust. I am looking forward to using your recipe. I just know that this will be my go to pie crust recipe from now on. At the end, I do agree with one of your other ladies, that I pour the flour/butter/shortening in a bowl and then add the liquid. I then pour the contents onto parchment and use the parchment to press the dough and form a disk (my hands tend to be warm) before wrapping the disk in saran.
Helen S Fletcher says
Hi Ines - I agree with you completely. I am a very old hen at this point and love learning. Thanks for this.
RR says
Best pie crust and easiest to work with. And I've been making pie crusts at home for some time.
A real home run 👍
Helen S Fletcher says
Thank you so much. I appreciate the time you took to comment. If you can, go back and leave a star rating. It helps my blog rank.
Elaine Daminski says
Another great, easy to understand lesson from a great teacher! Thank you Helen! Yes it does take time and alittle extra effort , but the end result is the prize!
Helen S Fletcher says
You're very welcome Elaine - so proud of you for making this.
KariG says
Thank you for this recipe. I made a double batch of the double crust recipe, but I’m pretty sure I added too much salt. Possibly the amount listed in the ingredient list is incorrect, or I am not understanding the concept of multiplying recipes and, for example, how yeast doesn’t scale the same way? I am certain I measured correctly, but it is absolutely unpalatable.
I will try again, but I don’t really have time (money, supplies) to make another batch of this specific recipe, so I will have to substitute a different version for my Thanksgiving offerings this year. Will let you know when I make it successfully! I always love each of your posts and I followed you for several years now. Thank you for your dedication and constant willingness to answer all of our questions!
Helen S Fletcher says
Hi Kari - I am so sorry to hear this. This is the exact same recipe I have made and taught forever. I just checked to make sure this is the same on I sent to Midwest Magazine and it is. No one has ever mentioned this before. It would make a difference if salted butter were used or a different salt was used. I will retest again to verify but as I said, this is the same crust I have used forever. My suggestion the next time you make it is to reduce the salt to 1 teaspoon. I agree that everything has become so expensive and I work to make suggestions to keep those costs down.
KariG says
Thank you, Helen. I will use one teaspoon next time.
KariG says
Well, I figured out the issue, finally. Using a recipe program to multiply the ingredients, it only multiplied the first column (cups, tablespoons) not the weights, which is what I used. Darn it. Thank you for your patience :)
Helen S Fletcher says
Hi Kari - Thanks for letting me know. I knew there had to be a glitch somewhere. I turned off the automatic program that would increase the amounts for you because of that. Sorry you had this experience.
LS Barr-Tiemann says
Please note: I think the amount of cake flour for a Single American Pie Crust should be 218 gm. 125 gm/C x 1.75 C = 218 gm
Helen S Fletcher says
That would be true if both flours weighed the same but they do not. The original recipe was written with sifted cake flour which is 100 grams per cup which is 175 grams for the 1 3/4 cups. The all purpose is determined on 140 grams per cup which is my usual measurement per cup. There's an article on my blog, https://pastrieslikeapro.com/flour-for-baking/, that talks about the differences in flour.
Barbara says
I am planning to bake a pumpkin pie. I use the recipe from the can of Libby's 100% Pure Pumpkin, which calls for an unbaked pie crust. So I just use the first recipe, except I don't bake it? I have tried many pie crust recipes, but I still haven't gotten it right. So I am going to try yours! I like Rocky's method of adding the liquid. I will be doing that as well!
Helen S Fletcher says
Hi Barbara, Libby only cares about the filling being cooked not the crust. You have to par bake the crust so it will be baked as well as the filling. Go to the Blind Baked Crust in the header of the article. I added instructions for par baking the crust which you need to do for the pie crust to be baked as well as the filling. Hope this helps.
Nancy says
I like the that you go into detail.
Helen S Fletcher says
Thanks Nancy - I try to give every help I can so those just starting to make a recipe get off on the right foot - providing they read the header and not jump to the recipe!
Rebecca Harman says
This recipe is perfection! She made pie crust an art by considering the science of each ingredient and how it will react to every other ingredient. It may seem to some to be overkill, but if those doubters would try it just once, they would be converted to believers.
Helen S Fletcher says
Thank you so much Rebecca. I appreciate your kind words.You are correct in that explanations are connected to the a successful outcome. You put it perfectly.
Nancy Wilson says
Love the insight that you give me.
Rocky says
Lots of wonderful useful information, Im going out to buy some new cake flour today. Ive got some in the freezer But will make this recipe with fresh. One thing I do differently is after the fat is cut into the flour with the FP I dump it all into a large bowl ( yes another thing to wash) then I stir the liquid in and shape the dough. I find I sometimes get carried away and have to pulse the machine too long to get the dough mixed and the fat gets too small. Do you think that is just wasting my time?
Happy holidays and as always thanks for your great professional advice.
Helen S Fletcher says
Hi Rocky - so happy to hear from you. I didn't know if you were still baking or not. I think this is a wonderful idea and that you found a way to make it work better for you. I'm going to add it to the post in case others have the same problem. Hope all is well down south.