
This Blueberry Lemon Poke Cake (minus the lemon) was an exciting find for me and I think will be for you also. The Blueberry Poke Cake recipe originally appeared in the Washington Post Food Section Voraciously by Jessie Sheehan and I couldn’t have been happier to find it. Unfortunately, they aren't sharing it anymore. A Poke cake is so named because you literally poke holes in it.
This is truly one of the longest posts I've written, but there is so much information to share because I want to make sure your cake brings you the raves you deserve.
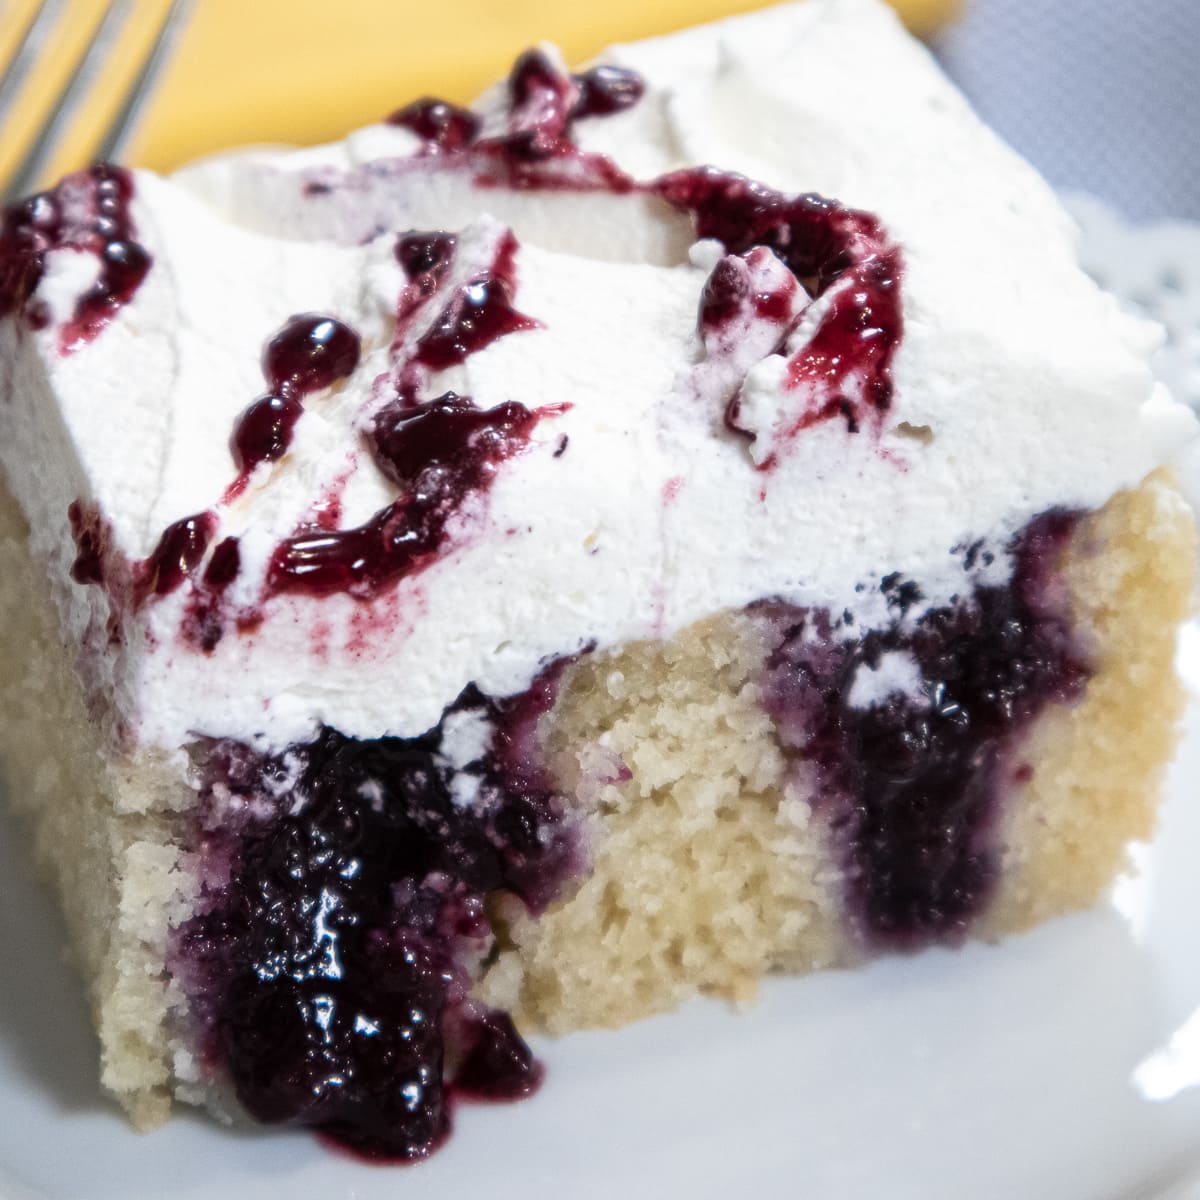
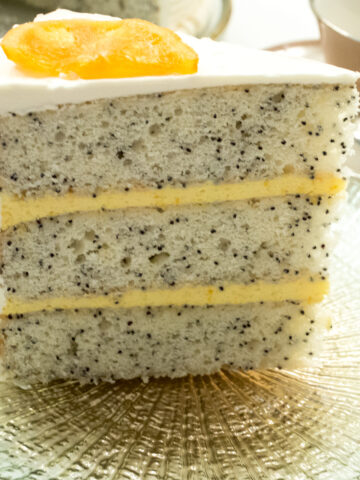
This cake takes a bit of time but is so stunning when presented cut that it’s worth every minute. One of the fascinating aspects of this dessert is it is not too sweet. It’s perfectly balanced to remember every bite and want more.
Blueberry and blueberry and lemon recipes abound for good reason. Here are a couple more sure to please: Lemon Blueberry Cake, Blueberry Crumb Coffee Cake, and the Blueberry Pizza in a Brioche Crust (yep, the 60 Second Brioche that is the wonder of the brioche world.
Jump to:
Why You'll Truly Love This Cake
- It is gorgeous when cut and everyone will ask how you striped it inside. Tell or don't tell, it's up to you.
- As fantastic as it looks, it tastes even better. The cake, filling and whipped cream topping are perfectly balanced making each bite complete.
- It can be made ahead and frozen. Just be sure to thicken it with one of the thickeners I use. Cornstarch breaks down when frozen and thawed.
Recipe Ingredients
Blueberry Puree
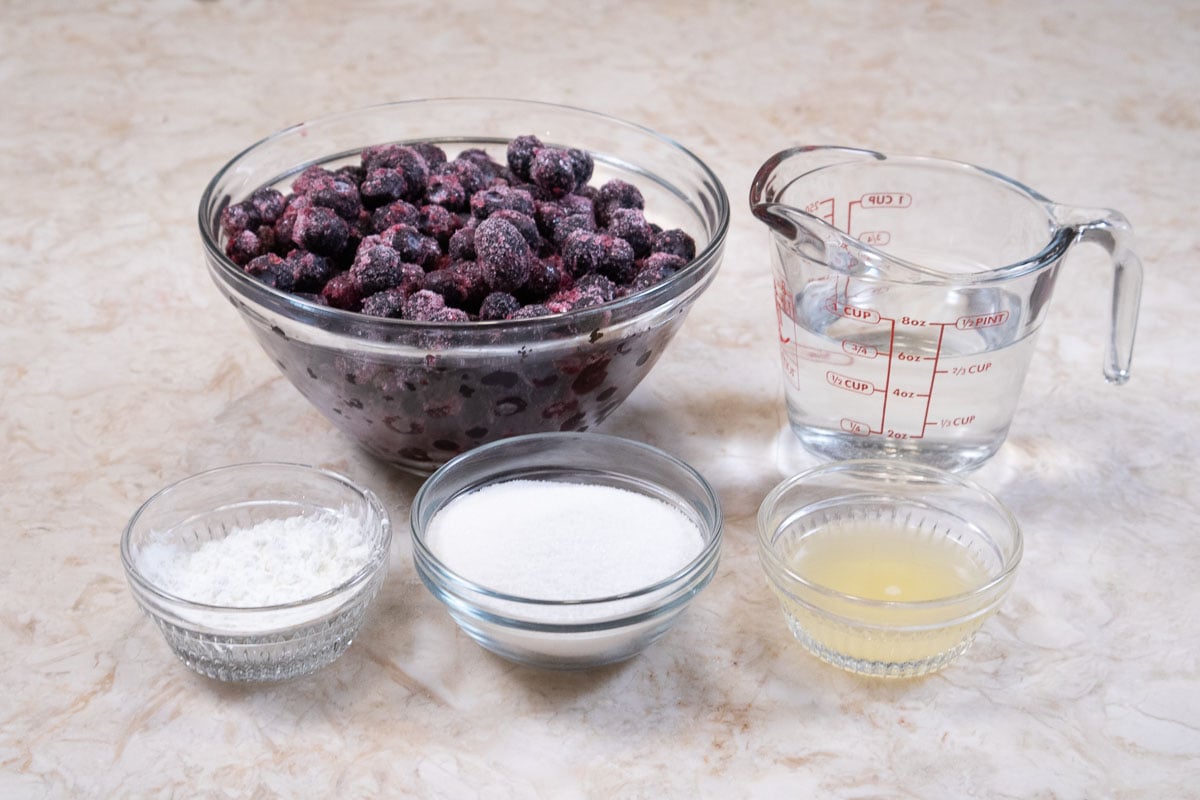
FRONT ROW: Cornstarch, granulated sugar, lemon juice
BACK ROW: Blueberries, water
Lemon Cake
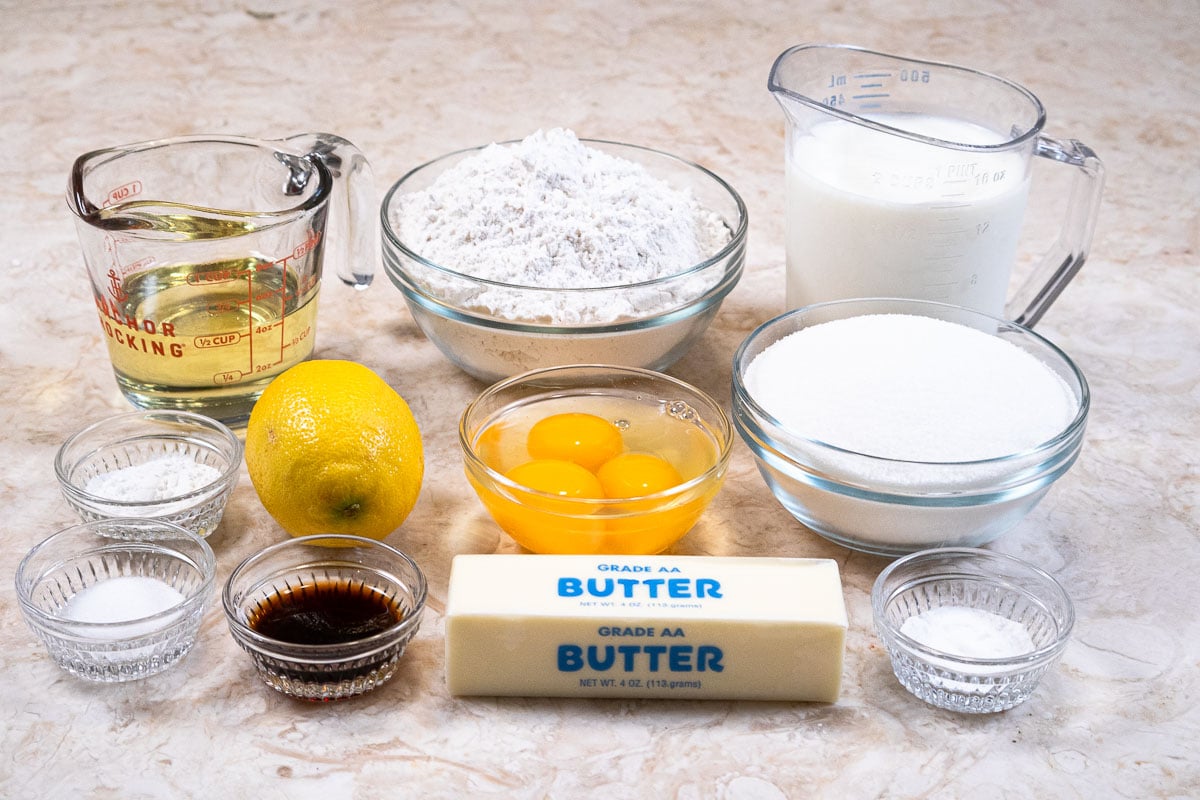
FRONT SODA: Salt, vanilla extract, unsalted butter, baking soda
MIDDLE ROW: Baking powder, lemon, eggs,egg yolk, granulated sugar
BACK ROW: Oil, cake flour, buttermilk
Whipped Cream Topping

FRONT ROW: Vanilla extract
BACK ROW: Powdered Sugar, heavy cream
The Cake
- It’s basically what is referred to as a muffin mix or, in days gone by, a dump cake. Basically, the liquids are mixed and then the flour is dumped in. A quick mix and it's done.
- Half oil and half melted butter are used. The oil keeps the cake moist, the butter is for flavor. Buttermilk adds longevity to a cake as well as flavor.
- When I wrote about freezing cream in an earlier post, one of my readers mentioned she froze buttermilk also. I tried it and after thawing in the refrigerator for a day or two, I gave it a good shaking and it worked perfectly for this cake.
About the Flour
- If you went to the Post recipe there is a discrepancy between the volume of my flour and theirs.I know I'll get a question about this. Since I use 140 grams per cup of flour my volume measurement will be different than those using another method. See my post, The Frustrating Facts about Measuring Flour for more detailed information.
- However, the weight of the flour remains the same. 310 grams is 310 grams no matter how it is measured which is why I strongly encourage everyone to
- buy a scale.
- Cake flour is called for because it makes a softer cake than all-purpose. However, if no cake flour is to be had, use 2 ¼ cups all-purpose flour can be used. The weight remains the same.
Thickening the Puree
- Because I was going to place half the cake in the freezer , I changed the thickener originally used. Cornstarch breaks down when frozen and then thawed.
- Sweet rice flour is wonderful and easier to use. Don’t confuse it with white rice flour - they are not the same. It can easily be found online or in Asian stores if your grocery story doesn’t carry it. I have a post, Thickeners as Used in Baking and Pastry, that has more information.
Whipped Cream Frosting
- I have often been asked about stabilizing whipped cream. This works anywhere whipped cream is called for as a filling, in a filling or as a finish.
- I want to share what we did at the bakery. We used heavy cream and powdered sugar. Period. Nothing else – well maybe a bit of extract or liqueur. It was whipped to a spreadable or pipeable consistency and then used as called for. There is no need to use anything else. Products were finished with it and the cream didn’t separate, leak, or become watery. Cakes, tarts and other desserts were frozen with the cream as a filling or frosting and thawed in the refrigerator where they were stable for days.
- Using cream that is not marked heavy cream can cause problems. Using the correct cream is the key.
- One last note about whipped cream. I have seen where the rage is to whip the cream in the food processor. I love my processor and use it for all kinds of prep but not whipping cream. It never achieves the lightness of being beaten in a mixer or by hand if you are so inclined. It's heavier and tastes closer to butter.
Be sure to see the recipe card below for the exact ingredients and instructions.
Step by Step Instructions
Blueberry Puree
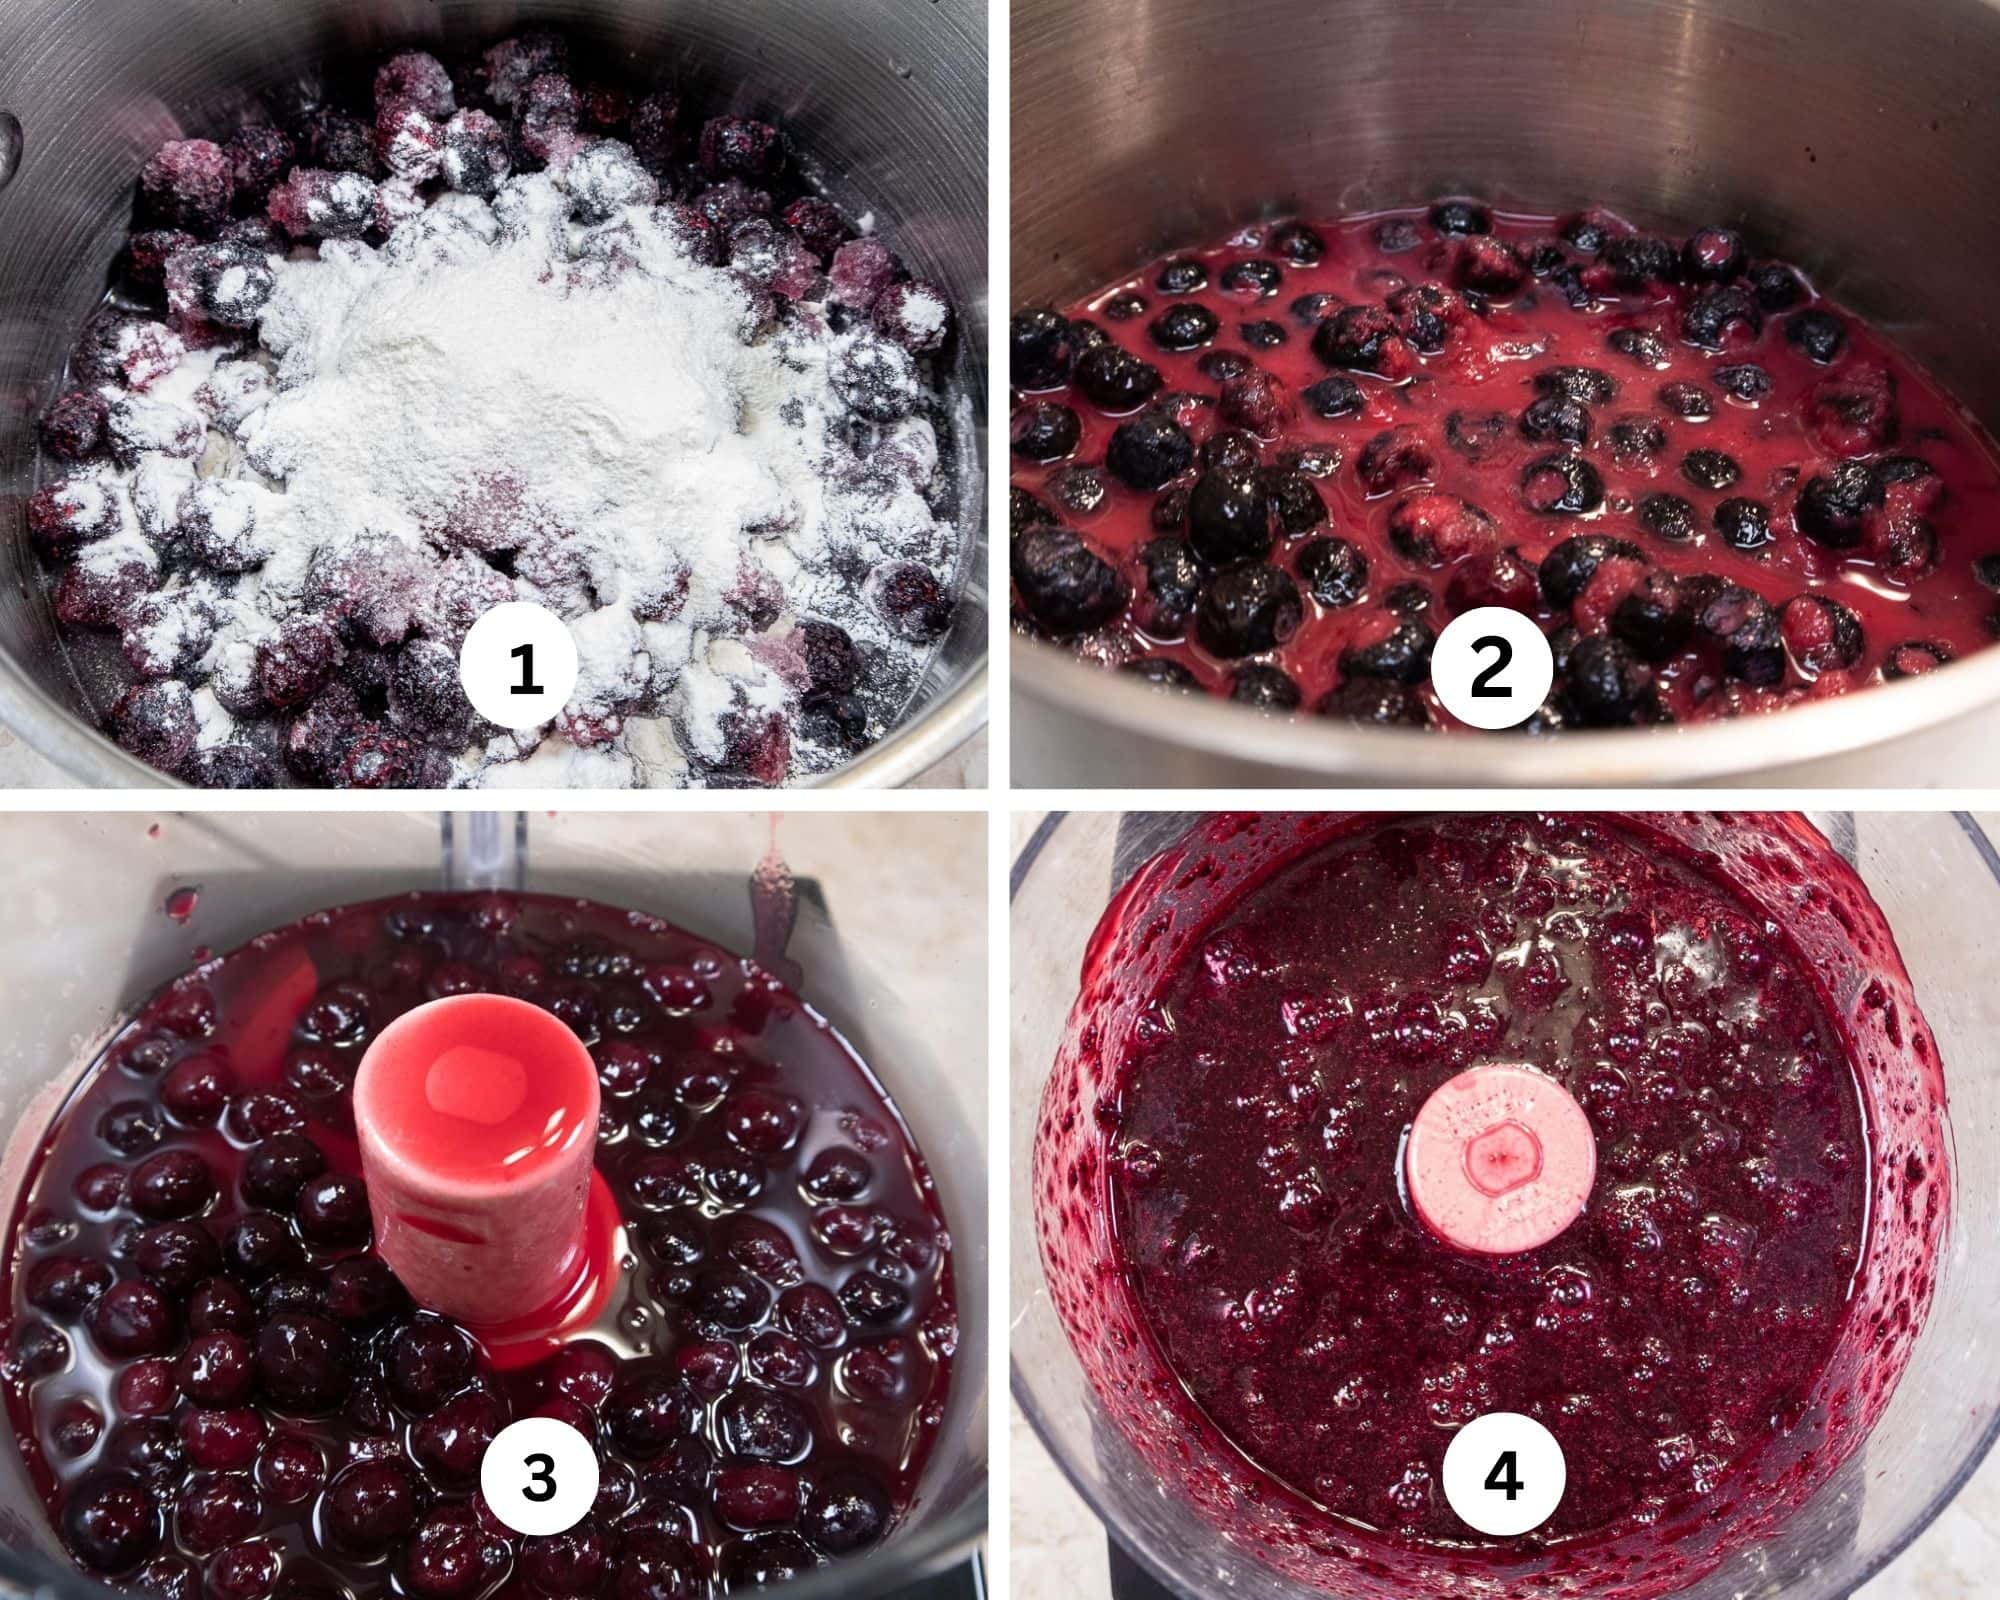
Step 1. Frozen or fresh blueberries can be used. If the berries are frozen, do not thaw them. Mix the sugar and thickener together. Add the water and lemon juice to a medium size sauce pan. Add the blueberries and then the sugar and thickener. Step 2. Place over medium-high heat and, stirring constantly, bring the mixture to a boil if using the cornstarch. If using the sweet rice flour, it will thicken before it boils. If using cornstarch it will have to boil for 1 to 2 minutes. See my post on Thickeners as Used in Baking and Pastry. Remove from the heat and allow to cool to room temperature or chill it in the fridge . Step 3. Add the cooled berries to the bowl of a processor or blender. Step 4. Process to puree as smooth as possible. The blender will make a smoother puree than the processor but both are fine. The puree can be made several days ahead and refrigerated. Warm in the microwave or on the stove top to just barely warm or bring to room temperature.
The Cake
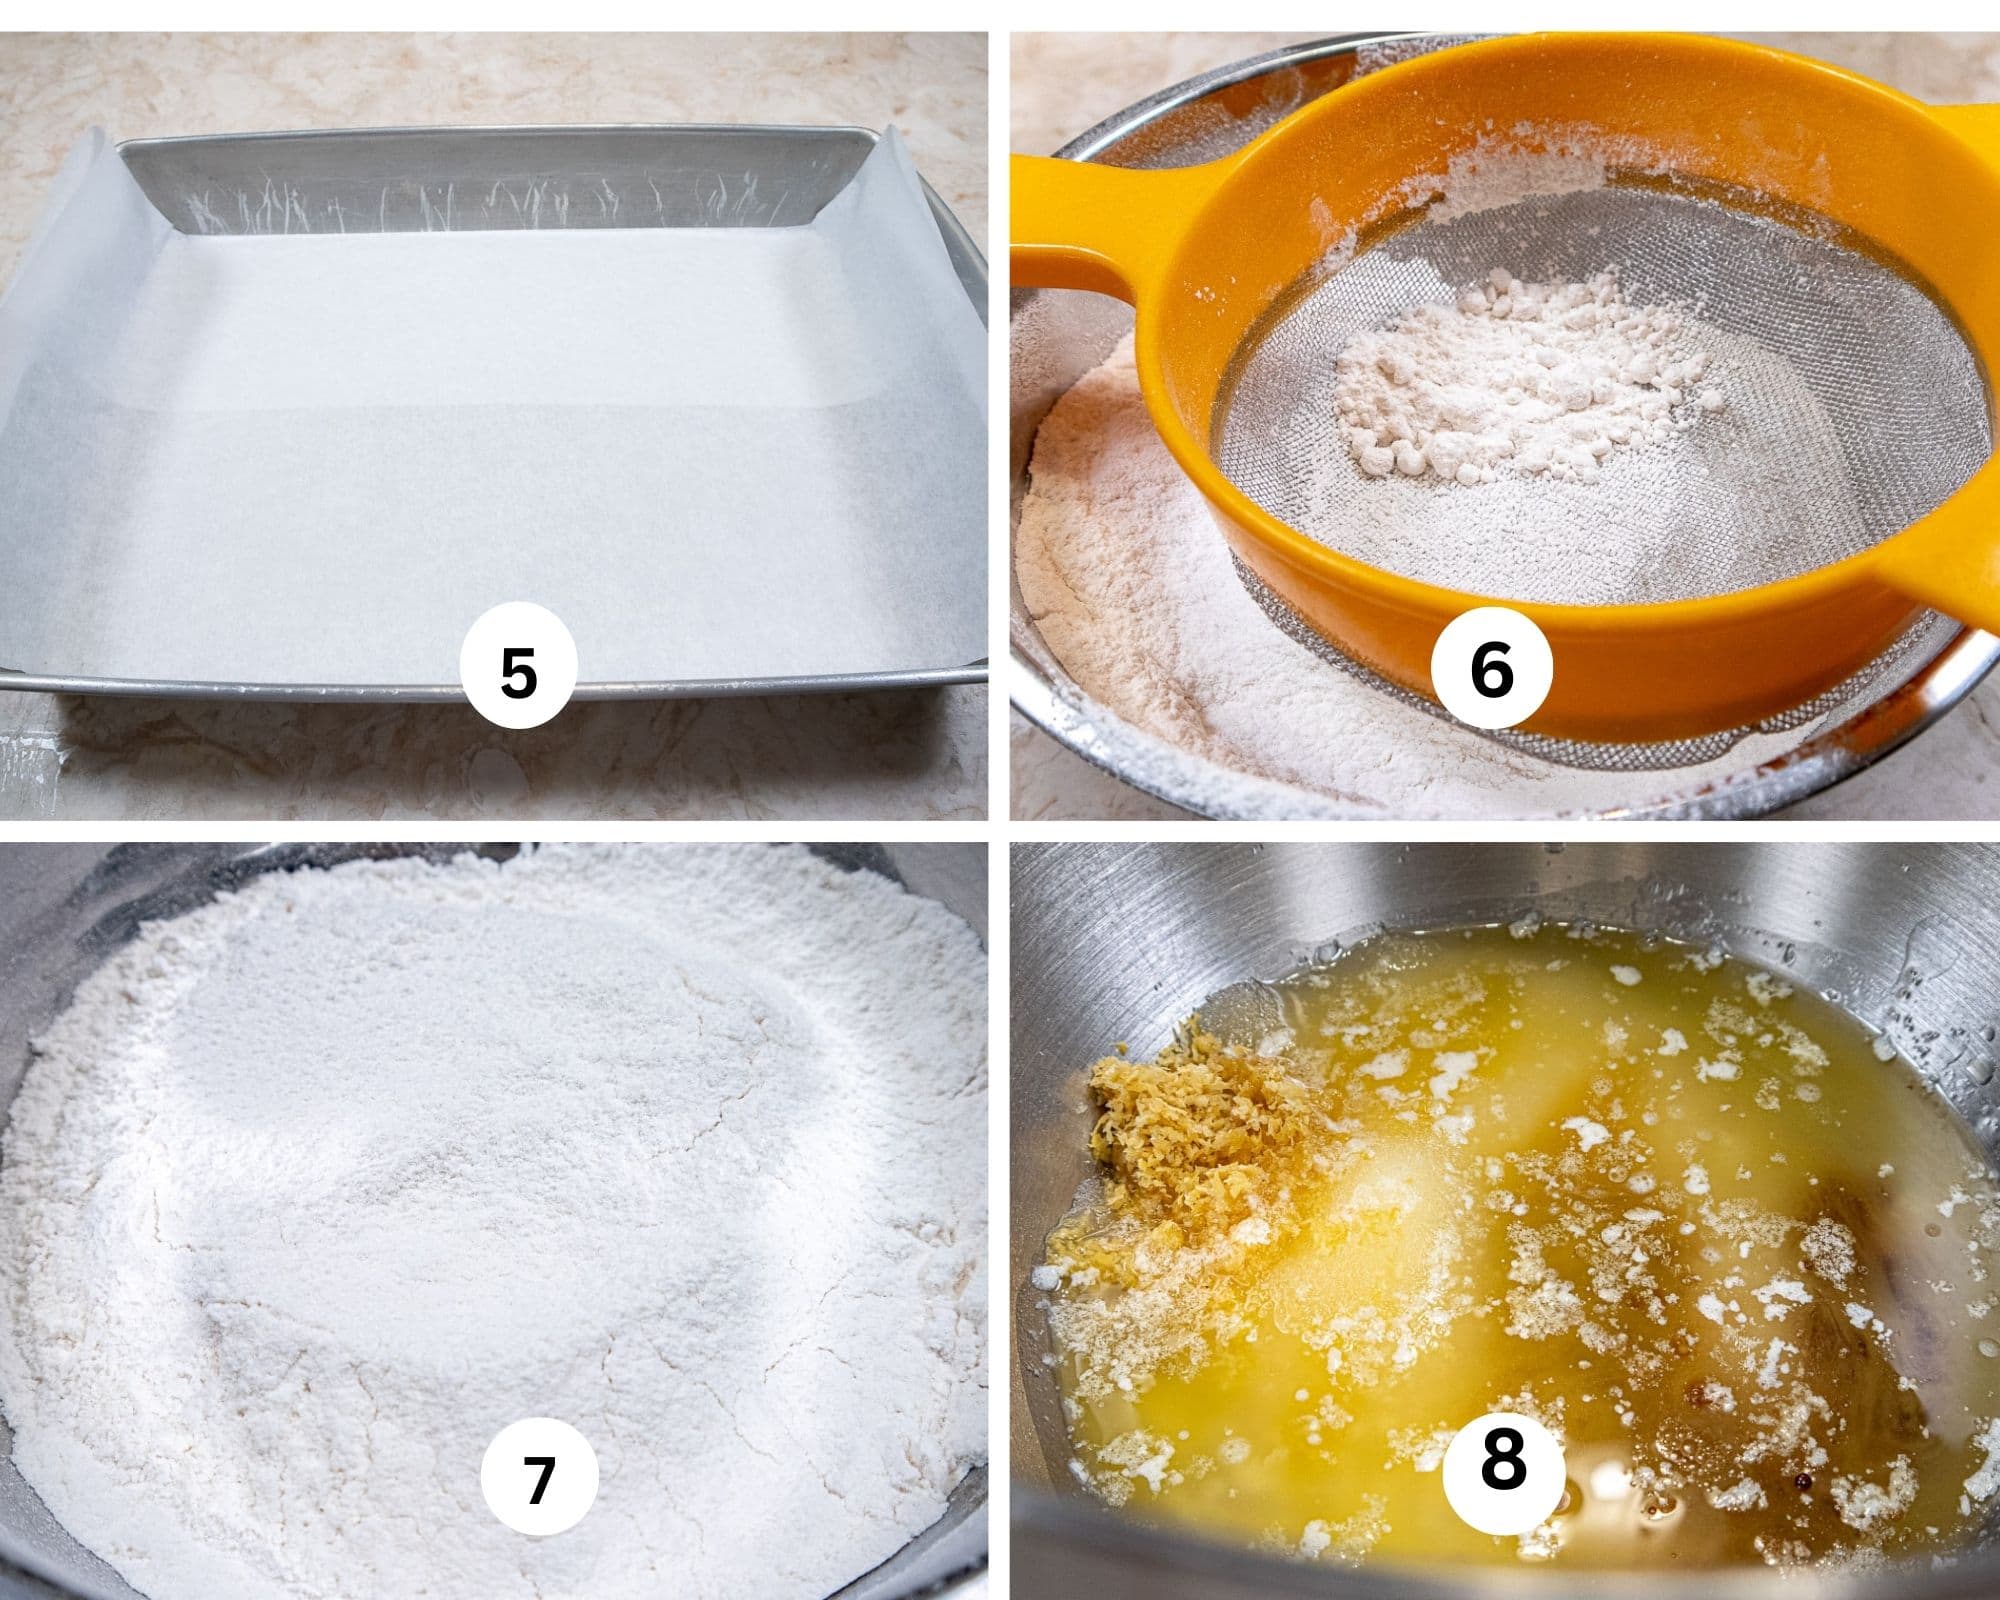
Step 5. Line the bottom of a 9x13x2 inch baking pan with parchment paper letting the paper overhang the edges of the pan. Spray the paper and side of the pan. Set aside. Step 6. Because cake flour is very fine it has a tendency to clump together. These clumps do not always mix in smoothly so it is important to sift before using. Step 7. Whisk the cake flour, baking powder, baking soda, and salt together. Set aside. Step 8. Add the sugar, oil, butter, lemon zest and vanilla extract to the mixing bowl.
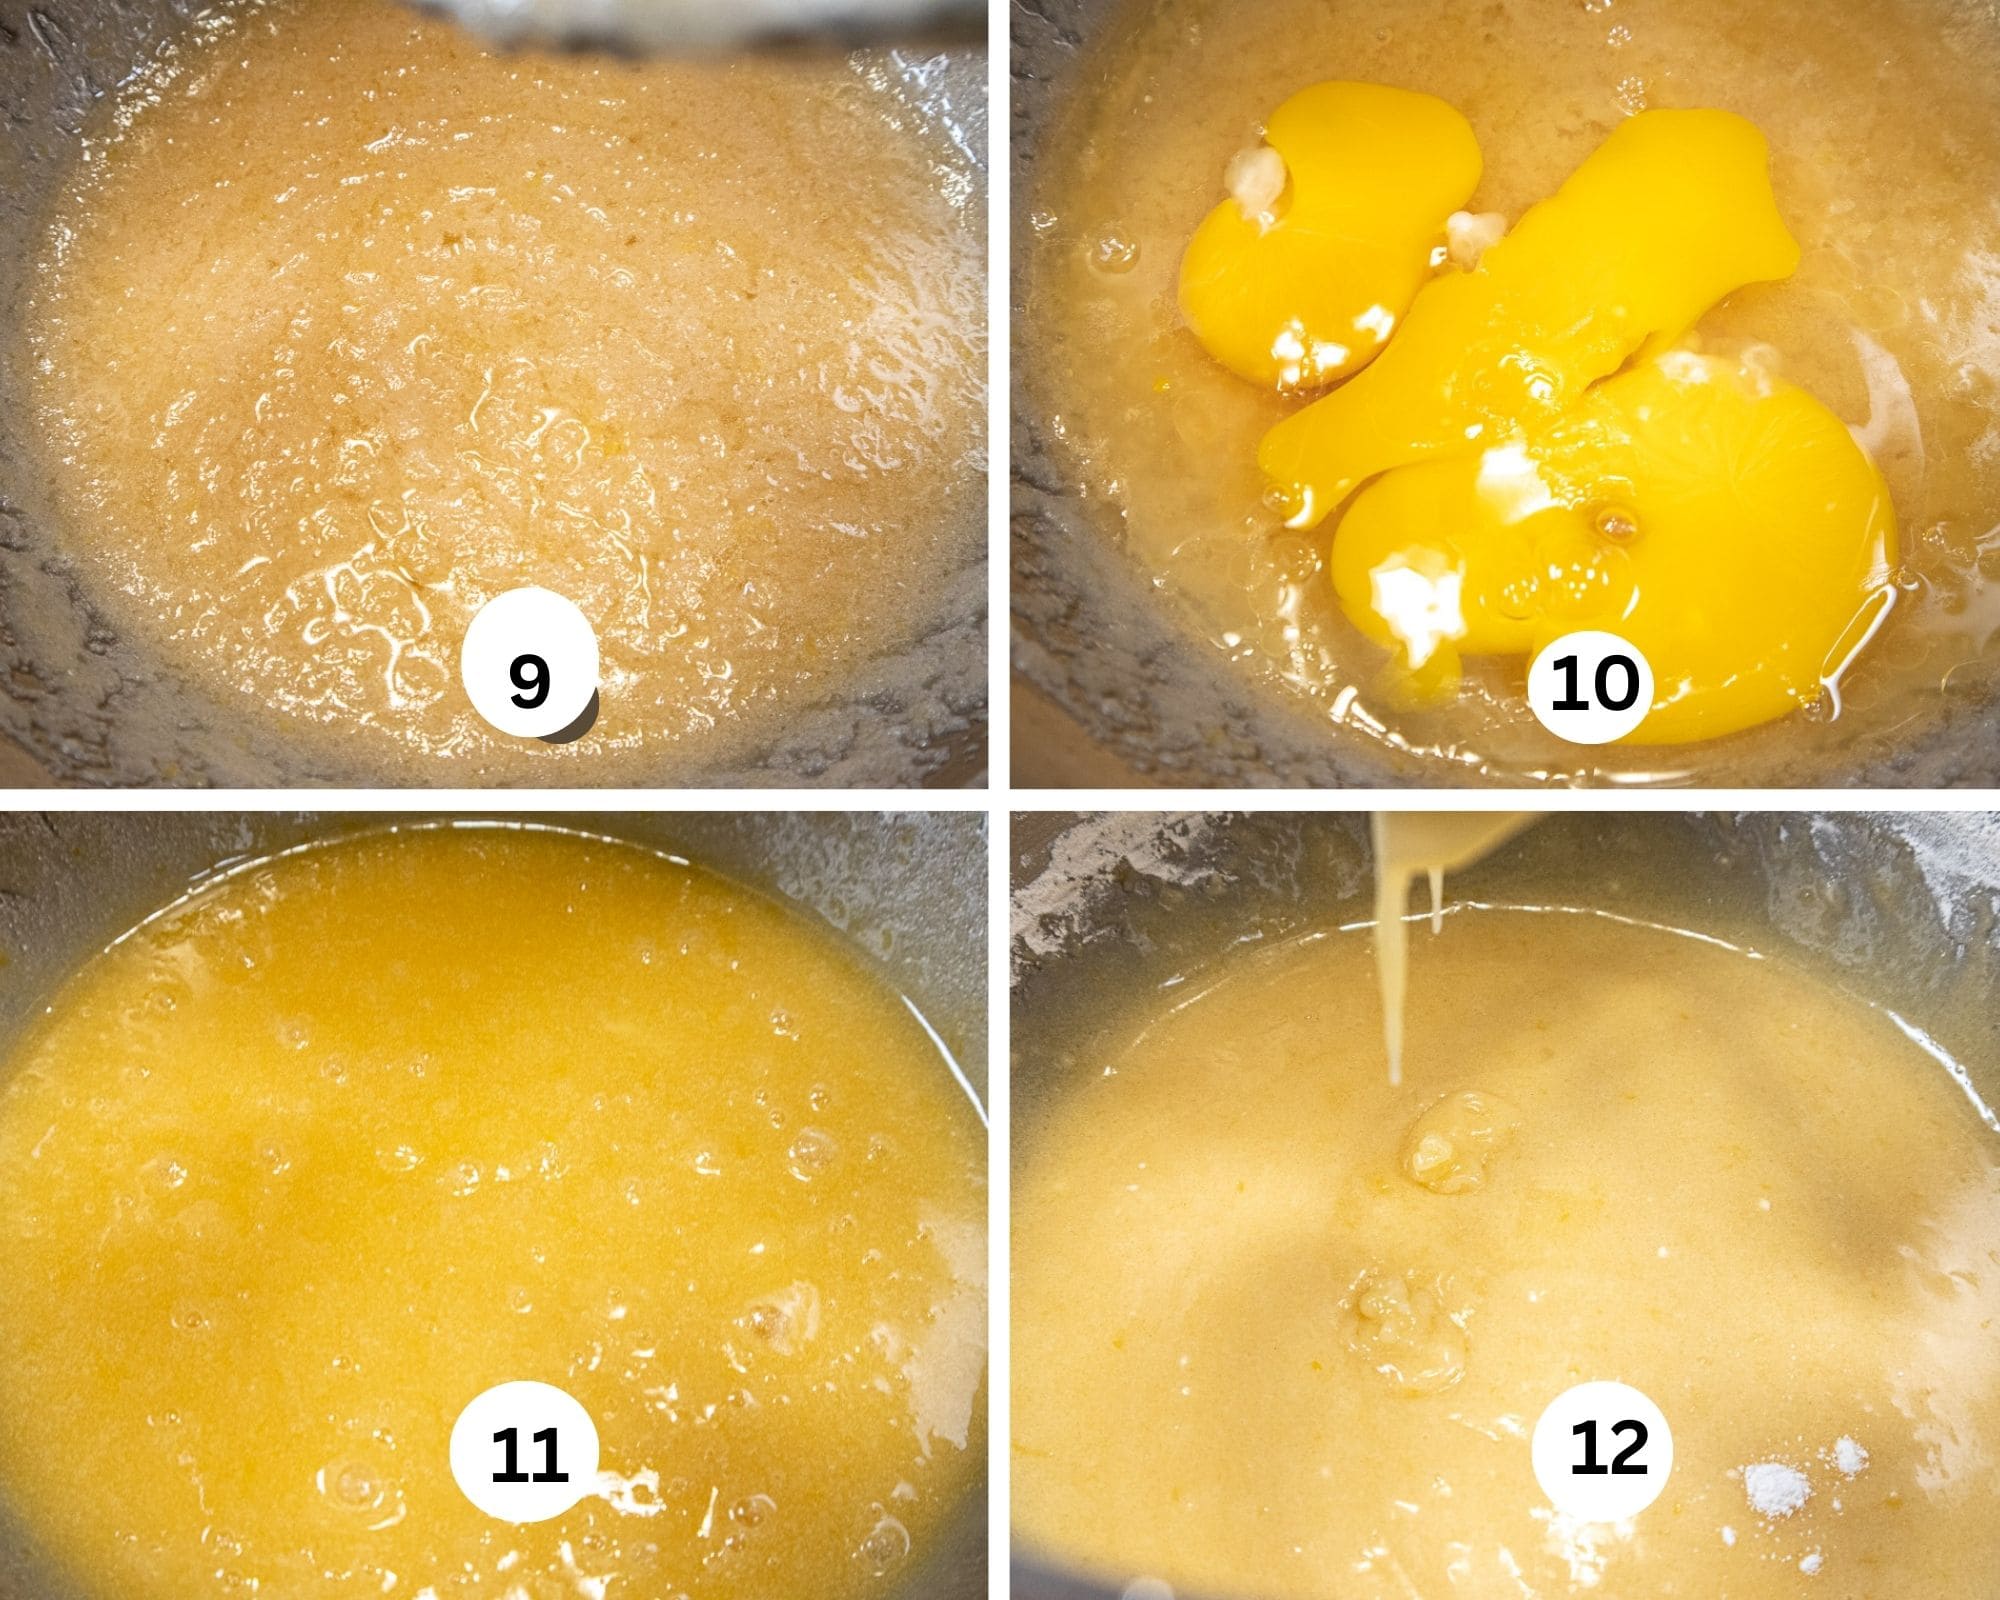
Step 9. Beat on low to blend them together. Step 10. Add the eggs and yolk. Step 11. Mix the eggs and yolk in completely. Step 12. Add the buttermilk and mix.
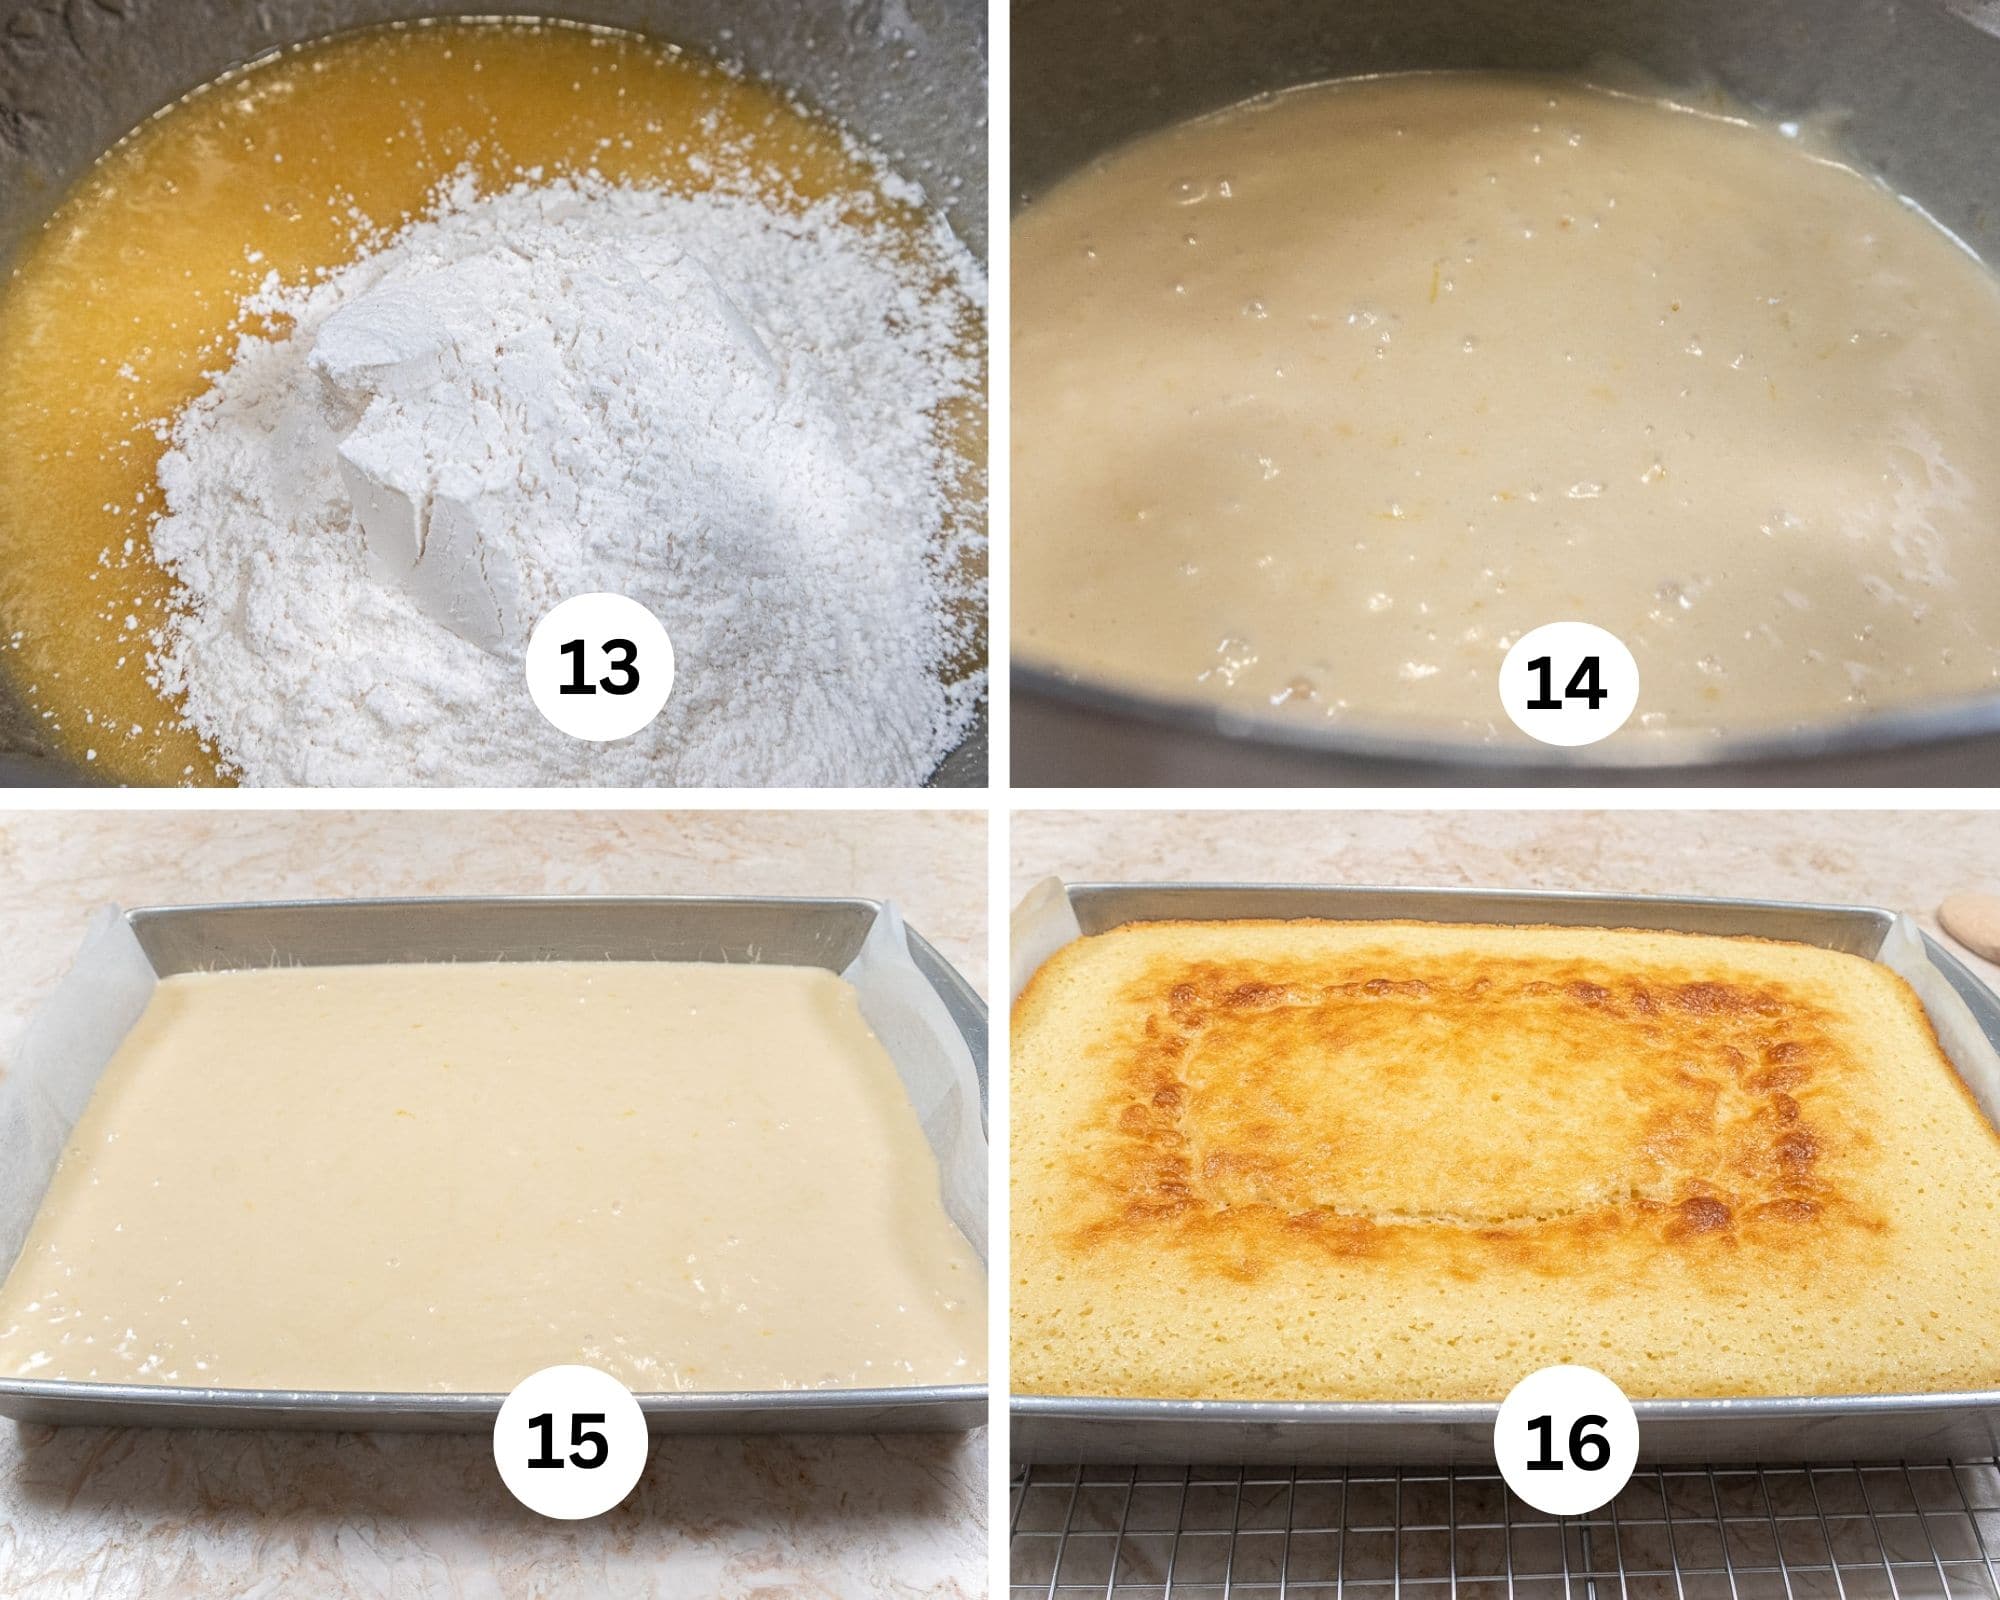
Step 13. Add the flour mixture. Step 14. Beat on low to combine completely, scraping as necessary. The batter will be rather on the thin side. Step 15. Pour into the prepared pan. Step 16. Bake as directed.
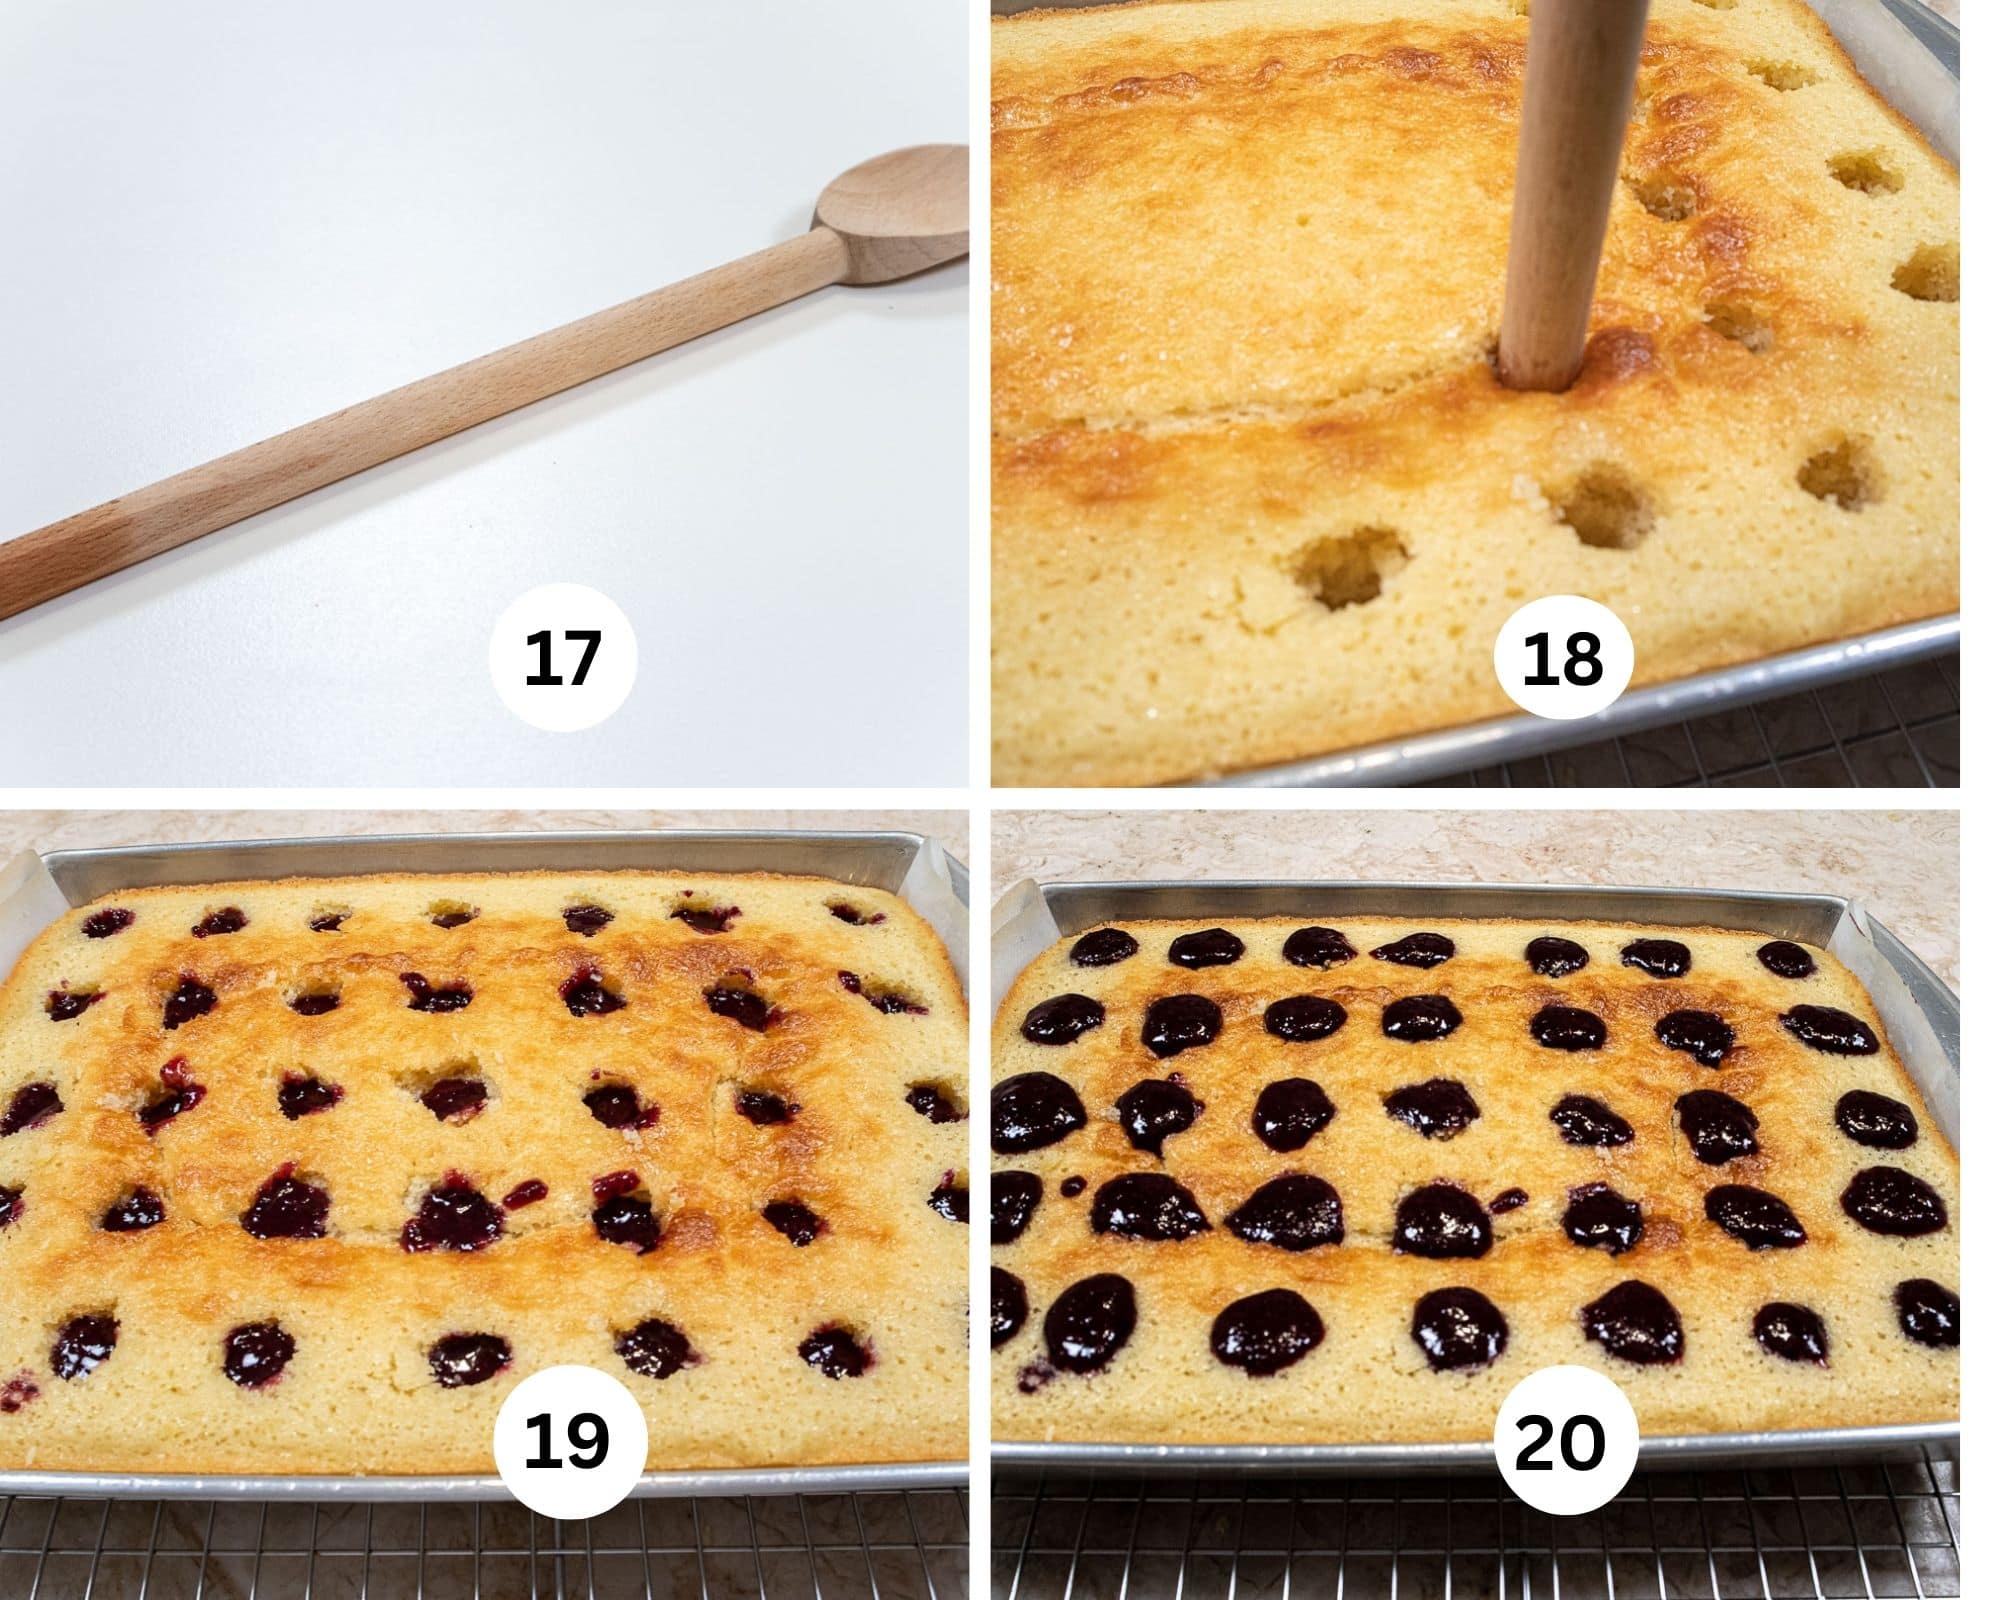
Step 17. The ½" smooth handle of a wooden spoon is used to make the holes in the cake. Step 18. Reserve 3 or 4 tablespoons of puree. Immediately upon removing the cake from the oven poke the holes in it using the end of a wooden spoon about ½ inch round. Poke holes almost to the bottom of the cake about 1 inch part - do not go through the cake.. Twist the spoon from side to side for the best holes. After each poke, clean the utensil with a paper towel. Continue until the entire cake has been covered with holes. Sometimes the holes will partially fill back in. Re-poke them. I poked twice to make sure they would hold the most puree. Poking 5 across the 9" side and 7 down the 13" side works well. Step 19. Fill the holes to the very top with the blueberry puree. I found an ice tea or baby spoon works well here. Let the puree settle for about 10 to 15 minutes. Step 20. Repeat twice more, allowing the puree to settle before moving on. Allow to cool completely at room temperature. Cover the top of the cake directly with plastic wrap and refrigerate overnight.
Assembly
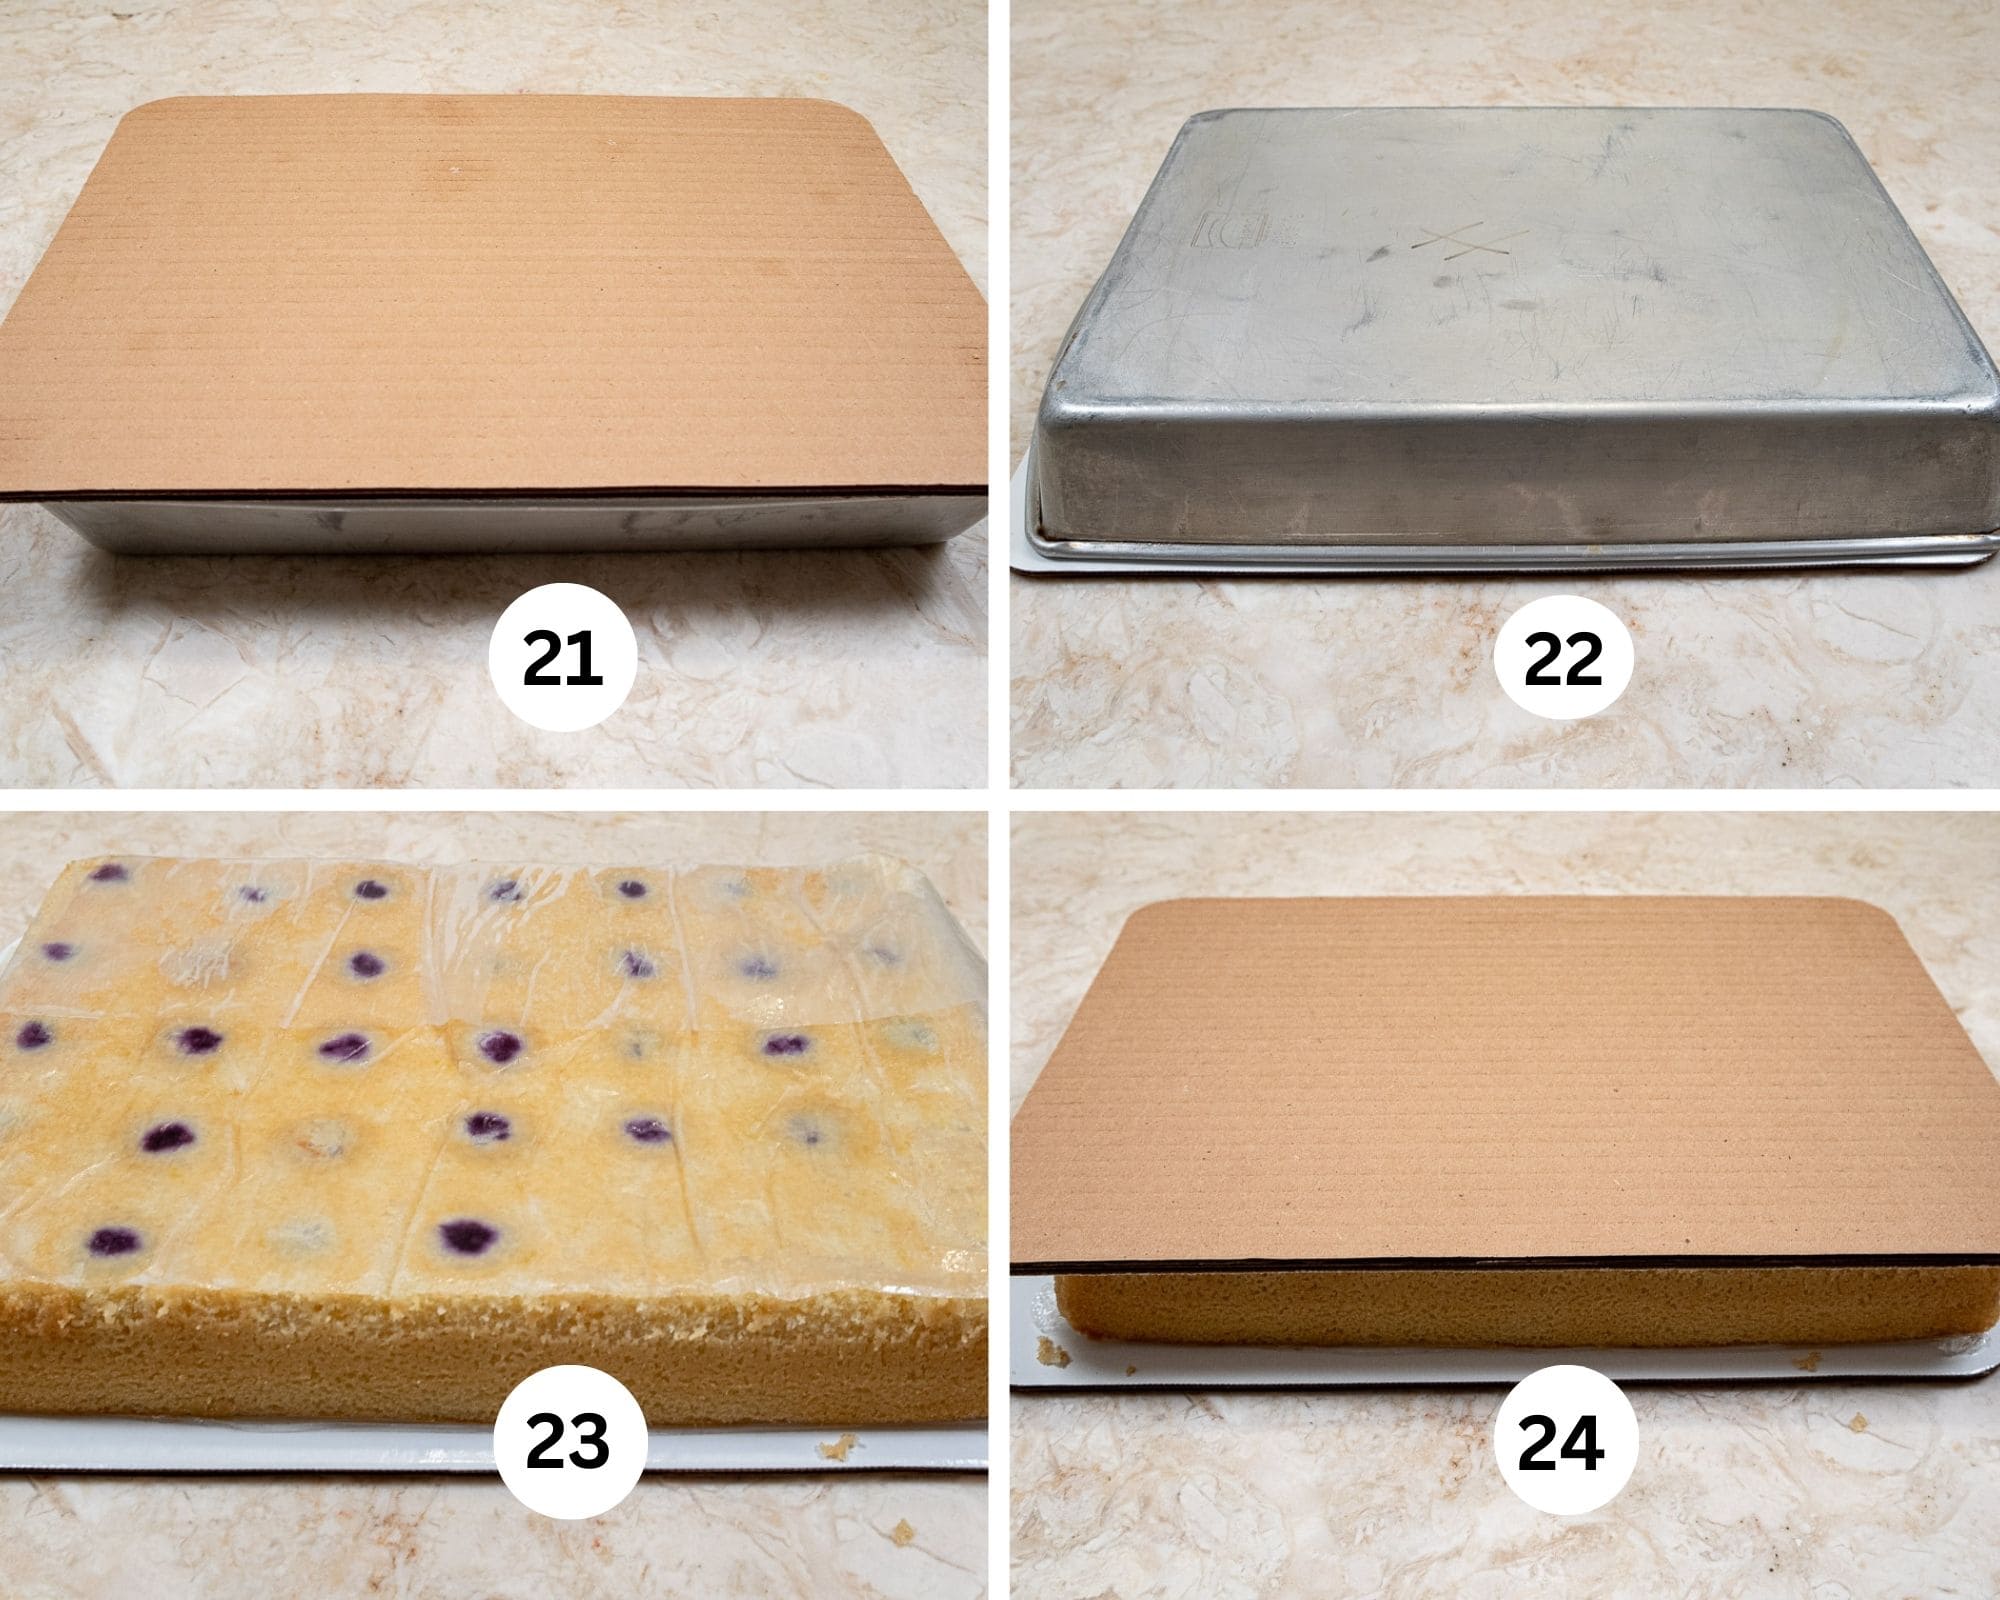
Step 21. After the cake has chilled, Go around the edges of the cake with a small metal spatula. Place a cake board or half sheet pan on top of the cake pan, keeping the plastic wrap in place. Step 22. Turn the pan over. Step 23. Remove the pan and parchment paper. Step 24. Place a second board or presentation platter on the cake and flip back over so the blueberry filled holes are now on top. Remove the plastic wrap.
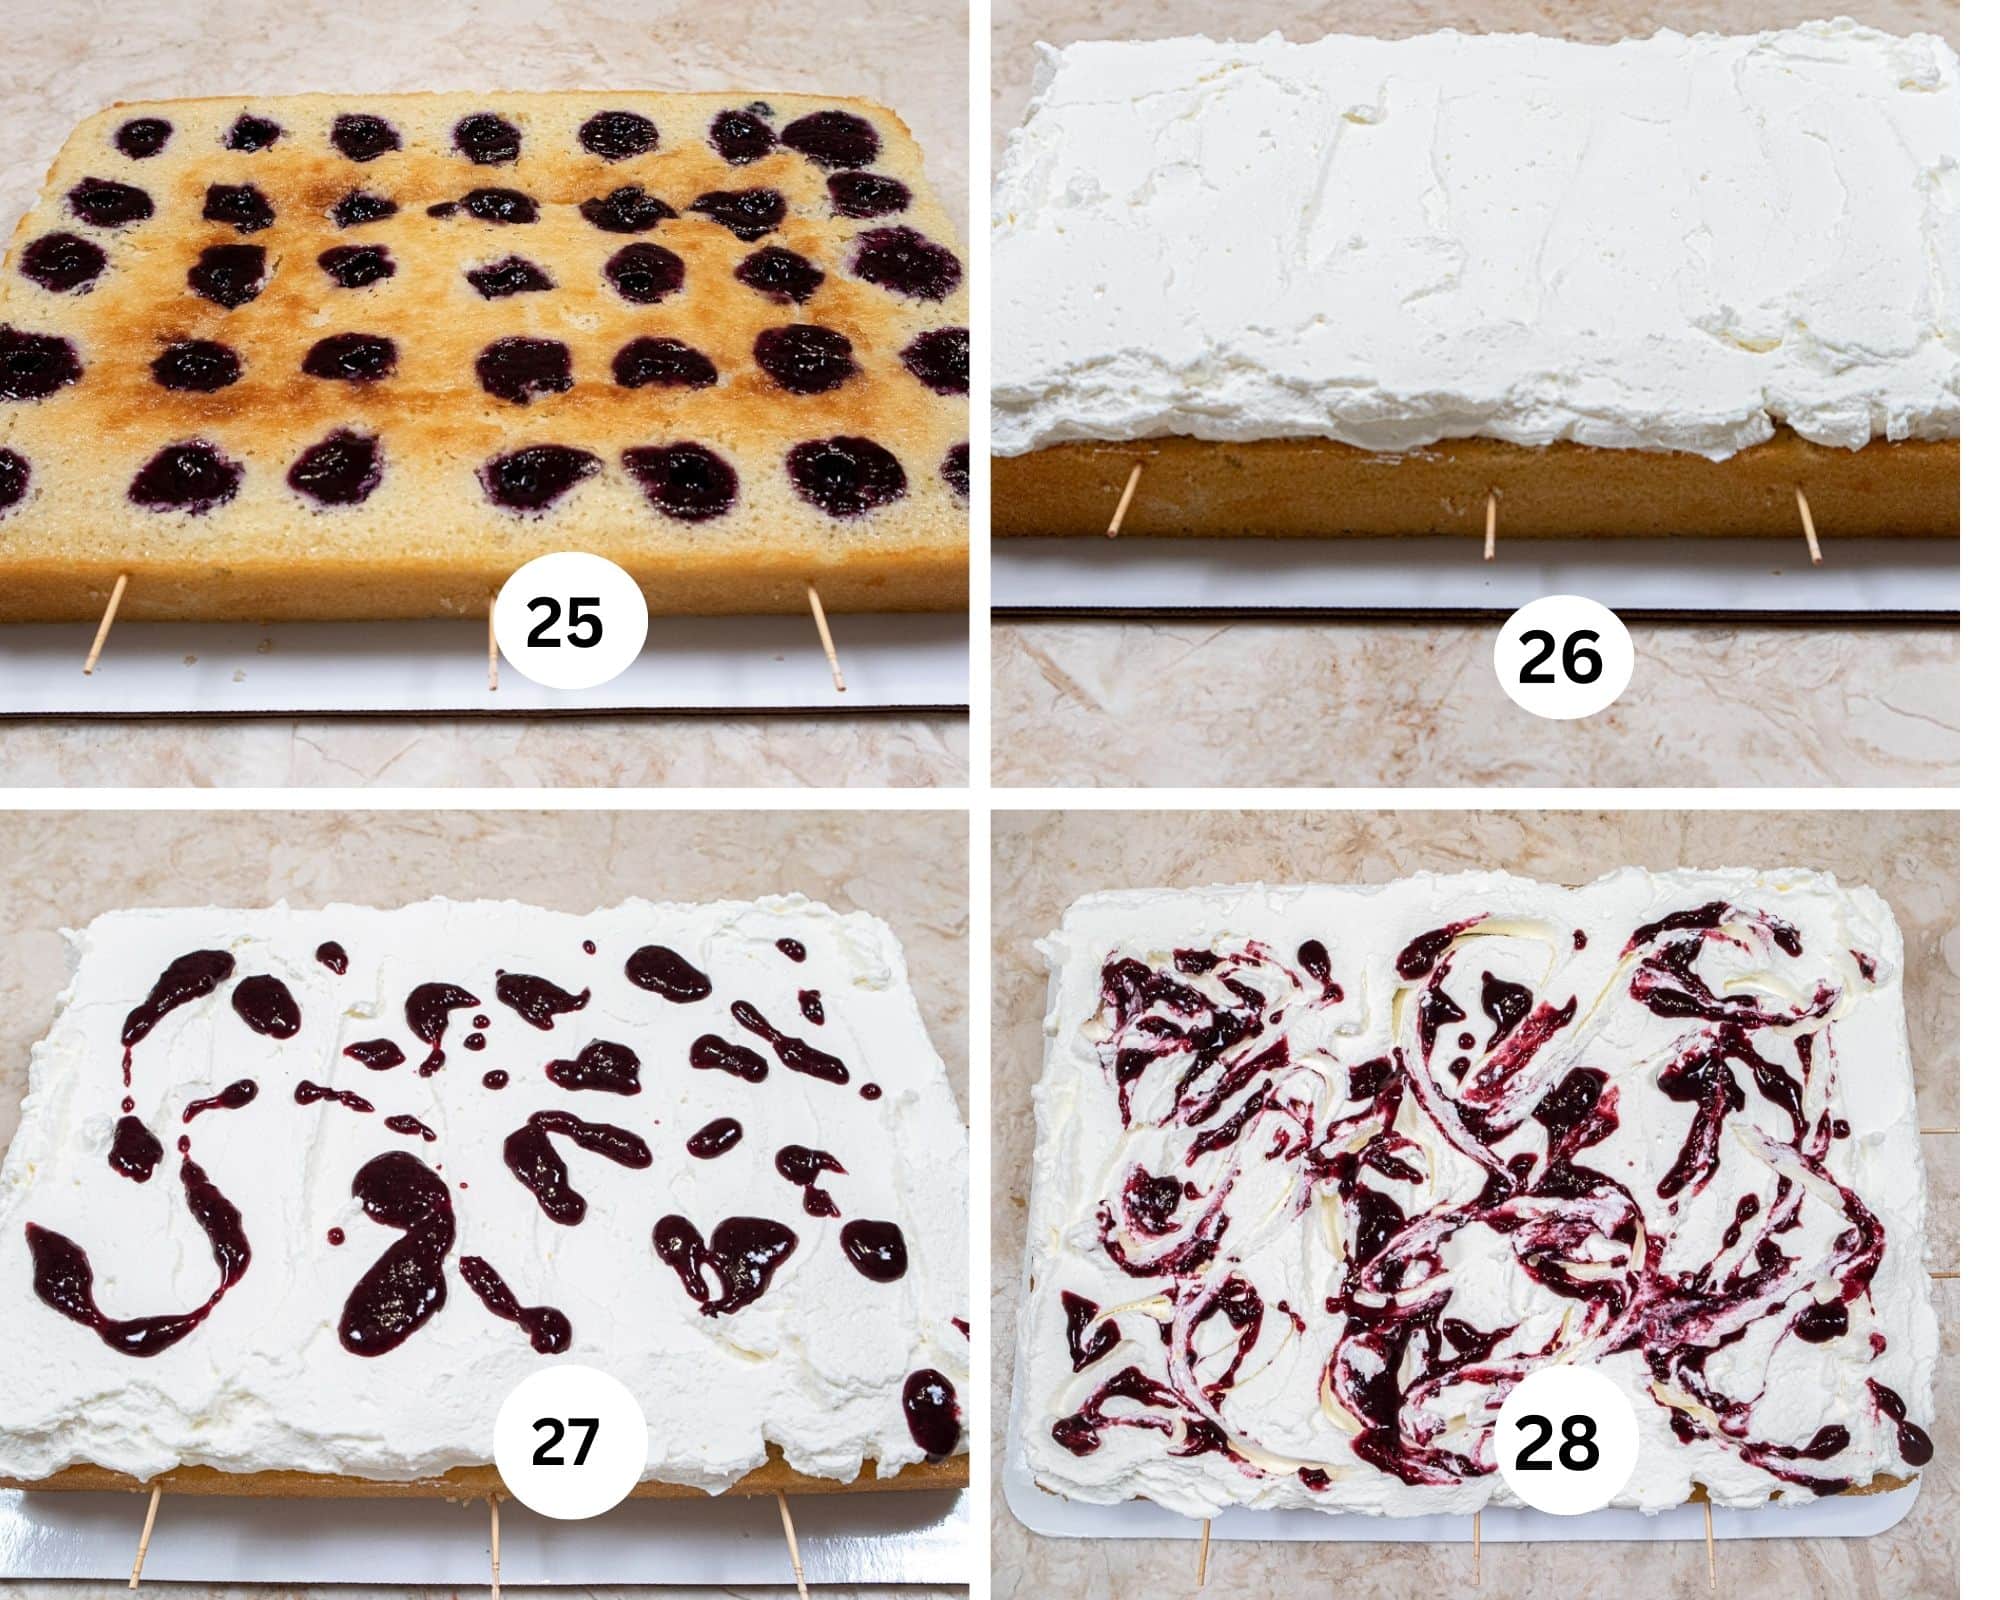
Step 25. On the both the long and short side of the cake, place toothpicks on the edge of the puree so you will know where to cut for the most dramatic effect. Step 26. Cover the top with the whipped cream whipped to stiff peaks . Step 27. Spoon the reserved blueberry puree over the cream randomly. Step 28. With the tip of a small spatula or knife, swirl the puree. To serve, cut along the toothpick lines to expose the puree.
Recipe FAQS
In order to have a cake absorb a liquid throughout, some cakes are poked with a fork or skewer. Poke cakes are different because ½" holes are made throughout the cake and purees, condensed milk, pudding mixes, all kinds of things are poured into the holes. Done correctly, they not only add flavor but when cut make a dramatic appearance.
It is important to have the filling thick and not to fluid. It is also important not to poke the holes to the bottom of the cake. They should be at least ¼"above the bottom.
Any flavor can be used. The cake should be a butter cake or one that is more substantial in texture than a sponge or genoise cake.
Expert Tips
- Please see the information above under the Recipe Ingredients for in depth help.
- The cake can be completed and held in the refrigerator for up to 3 days.
- Additionally, if the sweet rice flour is used to thicken the puree, the cake can be frozen in its entirety. Place the cake on a cake board. Do not cover. Freeze until hard. Cover well with plastic wrap and wrap several times in foil. Freeze for up to 2 months. Unwrap and thaw in the refrigerator the day before serving.
- Bring to room temperature to serve.
- In the newspaper comments several people said they were going to make the American flag for the 4th by putting blueberries in the corner of the cake and strawberries or raspberries to make the horizontal lines. Neat idea!

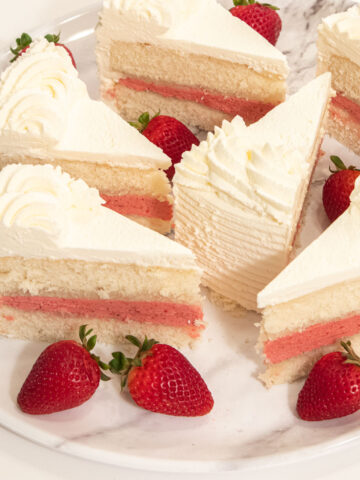
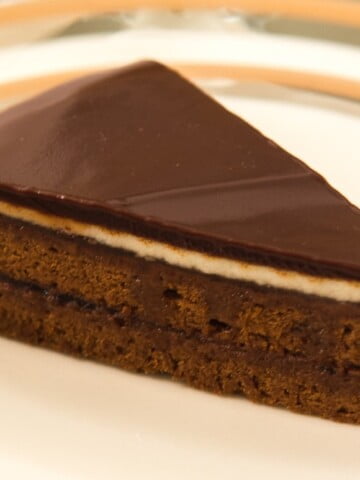
More Special Cakes for You
If you love this Blueberry Lemon Poke Cake, It would be hugely helpful and so appreciated it if you would take a moment to leave a rating below. Thank you.

Blueberry Lemon Poke Cake
Equipment
- 9x13" baking pan
- 2 quarter sheet boards
Ingredients
Blueberry Puree
- ½ cup granulated sugar (100 grams)
- 2 tablespoons cornstarch or sweet rice flour
- ¾ cup water
- 2 tablespoons fresh lemon juice
- 3 cups fresh or frozen blueberries (420 grams)
Lemon Cake
- 2 ½ cups cake flour (310 grams)
- 2 teaspoons baking powder
- ¾ teaspoon baking soda
- 1 teaspoon salt
- 1 ⅔ cups granulated sugar (330 grams)
- ½ cup vegetable oil
- ½ cup unsalted butter, melted and slightly cooled (114 grams or 1 stick)
- 1 tablespoon vanilla extract
- Zest of 1 large lemon
- 2 large eggs
- 1 large egg yolk
- 1 ¾ cups buttermilk
Whipped Cream
- 2 cups heavy cream
- ⅓ cup powdered sugar (45 grams)
- 2 teaspoons vanilla extract, optional
Instructions
Blueberry Puree
- Add the water and lemon juice to a medium size saucepan.
- Add the blueberries.
- Whisk together the sugar and thickener. Add it to the saucepan.
- Stir all together.
- Place over medium heat and, stirring constantly, bring the mixture to a boil if using the cornstarch. If using the sweet rice flour, it will thicken before it boils.
- Remove from the heat and allow to cool to room temperature.
- Puree in a blender or processor.
- The puree can be made several days ahead and refrigerated. Warm in the microwave or on the stove top to just barely warm or room temperature. Yield: About 2 ¼ cups.
Lemon Cake
- Preheat the oven to 350°F.
- Line the bottom of a 9x13x2 inch with parchment paper. Spray the paper and side of the pan. Set aside.
- In a medium bowl, whisk together the sifted cake flour, baking powder, baking soda, and salt. Set aside.
- In the bowl of a mixer, blend together the sugar, oil, butter and vanilla extract and lemon zest.
- Add the eggs and yolk, mixing the combine.
- Incorporate the buttermilk into the mixture.
- Last, add the flour and beat on low just to completely mix. The batter will be rather on the thin side.
- Pour it into the prepared pan.
- Bake for 25 to 30 minutes until golden brown and a tester comes out clean.
- Poke the holes in the cake immediately upon removing the cake from the oven while the cake is hot. See Assembly of the Blueberry Lemon Poke Cake below.
Whipped Cream Frosting
- Place everything in the bowl of a mixer fitted with the whisk attachment. Whip to medium peaks.
Assembly of the Blueberry Lemon Poke Cake
- Lemon Cake
- Blueberry Puree
- Whipped Cream
- Reserve 3 to 4 tablespoons of blueberry puree. Set aside.
- Using the handle end of a ½ inch round wooden spoon or other utensil, poke holes almost to the bottom of the cake about 1 inch part. Twist the spoon from side to side for the best holes. After each poke, clean the utensil with a paper towel.
- Continue until the entire cake has been covered with holes. Sometimes the holes will partially fill back in. Re-poke them. I poked twice to make sure they would hold the most puree. Poking 5 across the 9" side and 7 down the 13" side works well.
- Fill the holes to the very top with the blueberry puree. I found an ice tea or baby spoon works well here. Let the puree settle for about 10 to 15 minutes.
- Repeat twice more, allowing the puree to settle before moving on. Allow to cool completely to room temperature.
- Cover the top of the cake directly with plastic wrap and refrigerate overnight.
- Go around the edges of the cake with a small metal spatula. Place a cake board or half sheet pan on top of the cake pan, keeping the plastic wrap in place.
- Turn the pan over.
- Remove the pan and parchment paper.
- Place a second board or presentation platter on the cake and flip it back over so the blueberry puree filled holes are now on top.
- On both the long and short side of the cake, place toothpicks on the edge of the puree so you will know where to cut for the most dramatic effect. Remove the plastic wrap.
- Cover with the whipped cream.
- Spoon the reserved blueberry puree over the cream randomly.
- With the tip of a small spatula or knife, swirl the puree.
- Cut along the toothpick lines to expose the puree.
- Refrigerate any leftovers.
Notes
Nutrition

Grace says
Just in case you want to give it a try this is how I remove the parchment paper from all my cakes and it will work on this filled one too. Using a long, fairly thin dowel (or long handled wooden spoon) roll the exposed edge of the paper around the dowel and continue to roll it to the side of the cake then carefully continue rolling it under the edge of the cake all the way across the underside until it comes out the other side. I've never broken a cake using this method. I never have to flip-flip any cake now!
Helen S Fletcher says
Hi Grace. However, I have no exposed edges of parchment. I line the bottom of pans with the exact size of paper. There is no extra. Also, how do you get the layer out of the pan if you don't turn the pan over which makes it easy to just remove the parchment.
Mary Smith says
Wondering why the word "lemon" is in the title for this cake when I can't find lemon juice, zest or extract in the ingredients list.
Helen S Fletcher says
Thanks for reaching out. It is now in the ingredients and the instructions. #4 in the instructions has it in the bowl with the other ingredients. So at least I didn't forget it everywhere.
Angela Murray says
Where's the lemon in the cake ???
sallybr says
I am traveling but will be back today and DEFINITELY will make this cake to donate this week..... I can hardly wait!
thank you again for another fantastic idea!
Helen S Fletcher says
Hi Sally - This one has turned out to be one of our favs. Travel safely!!!