
This Lemon Meringue Pie post is deep dive into the subject and is going to tell you everything you need to know about making the perfect pie that will remain firm and fantastic for days in the fridge if it lasts that long. No weeping meringues, no shrinking crusts, no soggy pie shells - just the perfect Lemon Meringue Pie.
When I first considered blogging about a Lemon Meringue Pie I thought it would be an easy blog since everybody knows about Lemon Meringue Pie.
As I began researching, I found no one agreed on a number of details. Among the problems were the meringue separating from the shell after it was baked, the pie getting watery after cutting, and the meringue "weeping".
Meringue Problems
Most of the problems with a Lemon Meringue Pie are caused by the meringue.
Test 1. Most recipes recommended putting the meringue on while the filing was hot, making sure it was attached to the crust. It seems everybody agreed on that. Finishing it in a 350°F oven for 10 to 12 minutes to brown it was also pretty much the norm. The results were less than desirable. The meringue separated and the tart got very watery after refrigerating it. The soggy crust was a real turn off!
Test 2. Alton Brown had a theory. His theory that putting the meringue on the filling when it was hot would partially bake the meringue. The first thing to realize, is that no matter what you do meringue does not bake. It either stays soft as in the topping for Baked Alaska and Lemon Meringue Pie or it is dried out in the oven as in a Pavlova shell or meringue cookies. The top may brown but it never bakes through. So that didn't work either.
Test 3. The sugar allocated to the meringue in most recipes was between ⅓ to ½ cup to 4 egg whites. In my second test, I used ½ cup sugar (100 grams or 3 ½ ounces) to 4 egg whites. However, this time I decided to put them on a chilled filling. Big mistake! I covered the filled crust with film and refrigerated until it was cold. However, it condensed and no amount of patting it with paper towels dried it enough to keep the meringue tight to the filling.
More Research Needed
So at this point I started researching some more when I came across an answer to the question, "How do you keep meringue from pulling away from the sides of a pie after it is baked? The person answering the question was Takamo - no kind of address so that is all I can tell you. His answer was directly opposed to most of the information on the internet or in cookbooks, but it works. His reasoning is spot on and it was wonderful to find something that I had been thinking about.
Basically, he agreed with attaching the meringue to the side of the crust, particularly the inside of the crust on top. However, he explains that the meringue should be put on top of a room temperature filling. Not chilled, not hot, just room temperature. His reasoning is thus: "Hot filling is what causes the sugar in the meringue to liquefy when condensation occurs due to the heat. The filling must be cooled first.
"Then, the meringue, when made should incorporate cream of tarter which is often left out during its preparation. This stabilizes the mixture and prevents the egg whites from separating. Also, excessive whipping can cause the meringue to separate, as does an inaccurate amount of sugar added to the egg whites. Here is a recipe for meringue: Rule of thumb: one cup of sugar for every 3 large egg whites. (for medium sized eggs, use four eggs and for jumbo sized eggs, add ¼ cup of sugar) Rule of thumb,: ¼ teaspoon of Cream of Tartar for every 3 egg whites. (for meringue only) Egg size in this case doesn't matter. 1 teaspoon of vanilla for every cup of sugar.
The whipping time varies. Room temp, size of eggs and speed of mixer are dependent on how fast the eggs whip. Always start on a low speed until the eggs start to foam. Then finish on medium speed. High speed on the mixer causes the egg whites to separate and the formation of the meringue can occur too quickly and control of the meringue is lost. The idea is to slowly incorporate air into the mixture, not breaking down the egg whites. The chemical properties of the sugar are what "cook" the egg whites. Not heat.
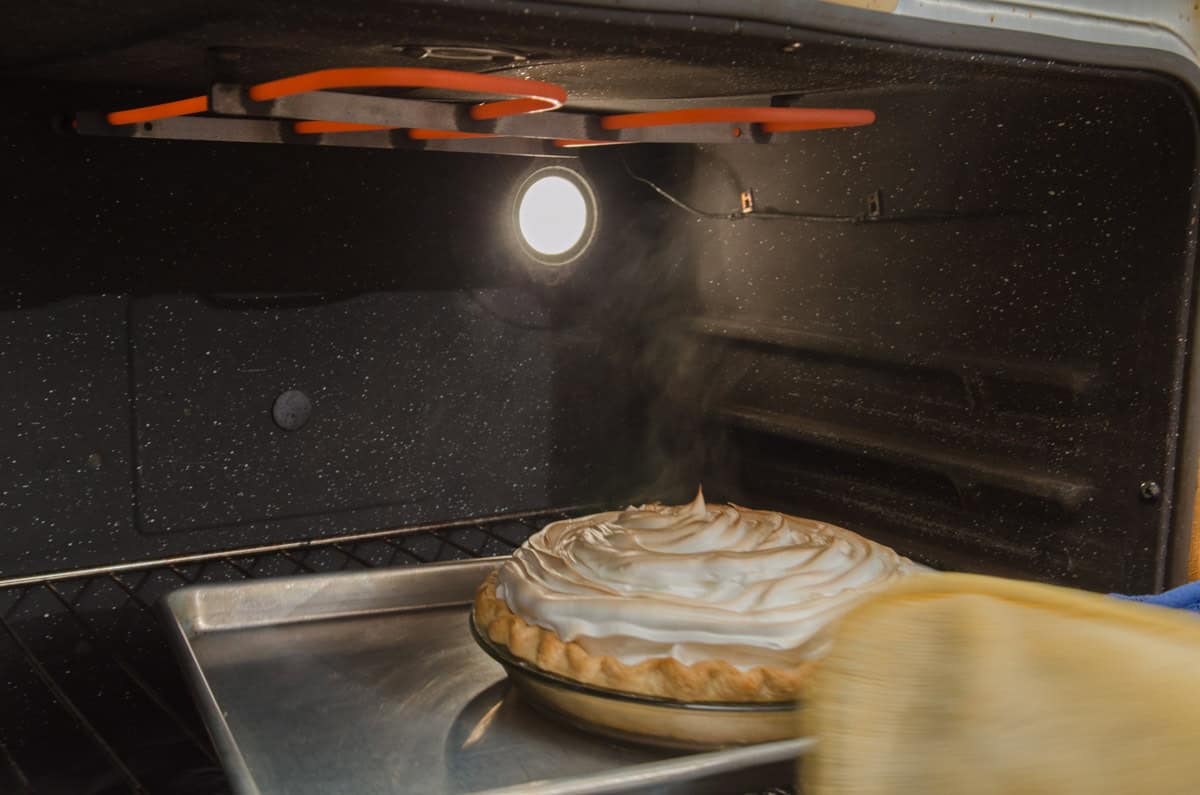
During the browning stage of the meringue, the oven will tend to cause the sugar to further absorb the moisture from the eggs and cause it to become "syrup-like" Low temps on the oven are the culprit. Pre-heat and set your oven to "broil" then place the pie on the shelf lowest to the heating source. With the door open, watch the pie brown. It only takes a minute or two to do so. If you have to, rotate the pie for even browning and quickly remove it. Allow it to cool to room temp before putting it in the fridge. In a professional kitchen, I some times use a propane torch to brown the tops, but it takes a skilled hand. Source: La vie du Boulanger, Marcel Neau cir;1984"
Test 4 - I agree with much of what he says but disagree with his egg white/sugar ratio. The meringue is simply too heavy. One of the important standards of a good lemon meringue pie is that it be topped with billows of meringue. Three egg whites and 1 cup of sugar does not produce billows. I also found the sugar would not completely dissolve in the egg whites. I beat it for over 10 minutes on medium as Takamo suggested but a grittiness from the sugar was still there.
To Sum Up
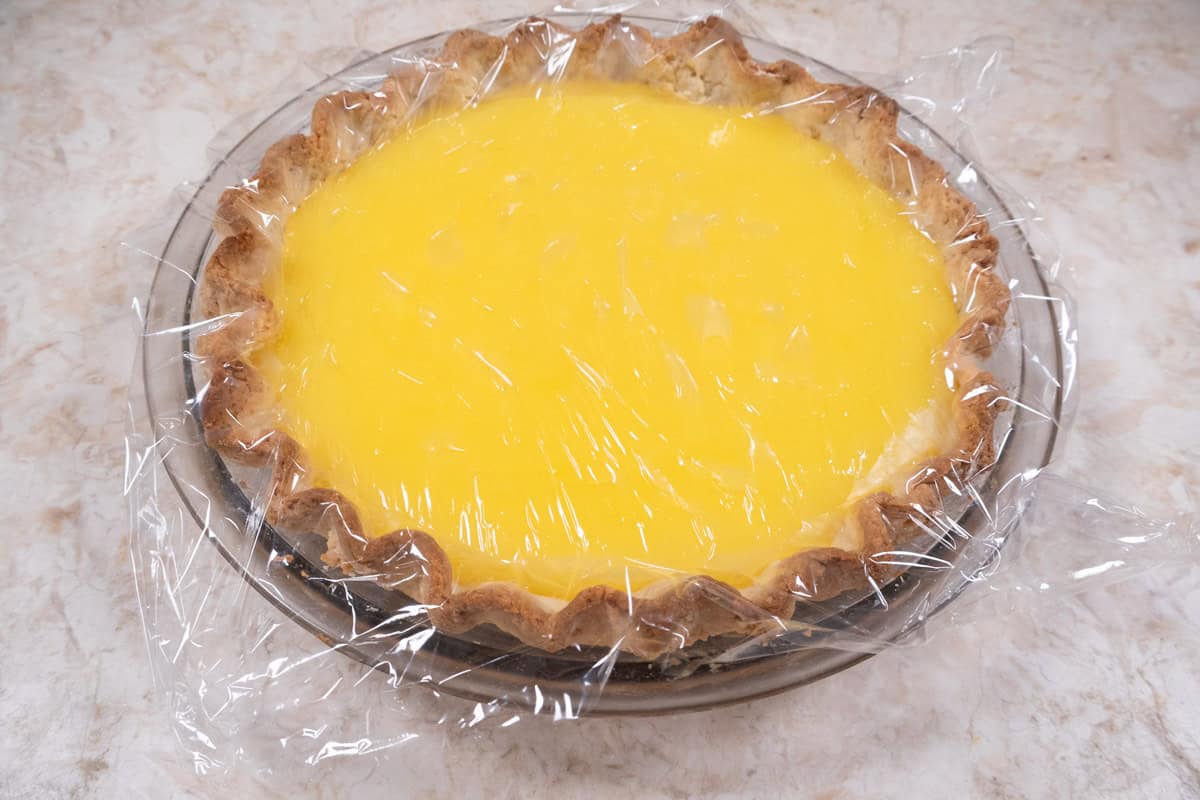
1 - It is important to cover the lemon filling with film after being made and poured into the shell. Then allow it to cool at room temperature. At this point and not before, the meringue is added.
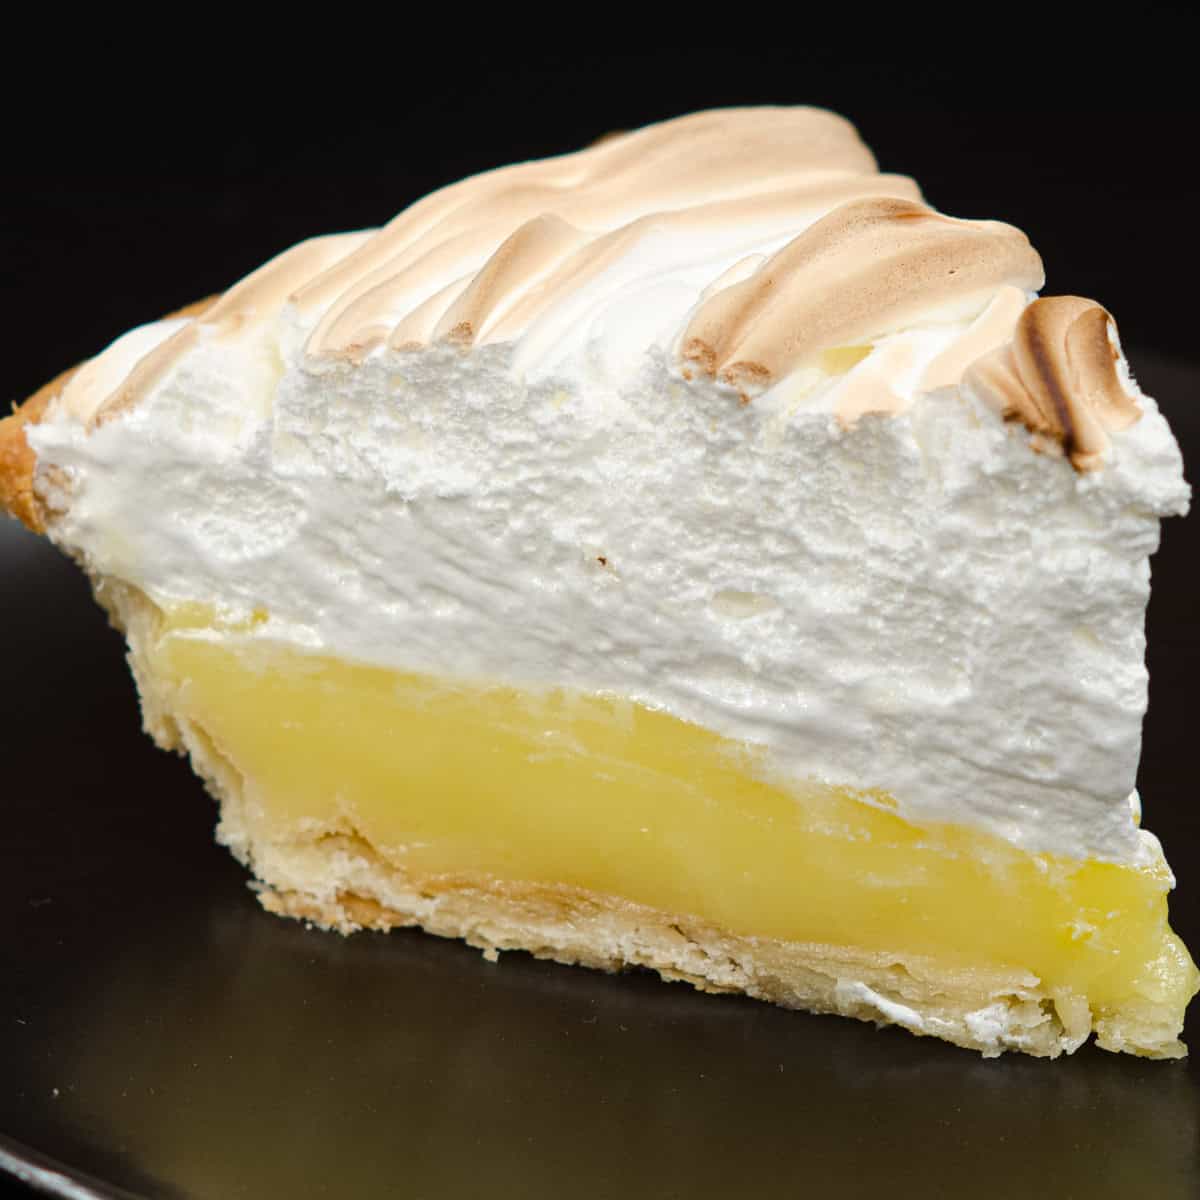
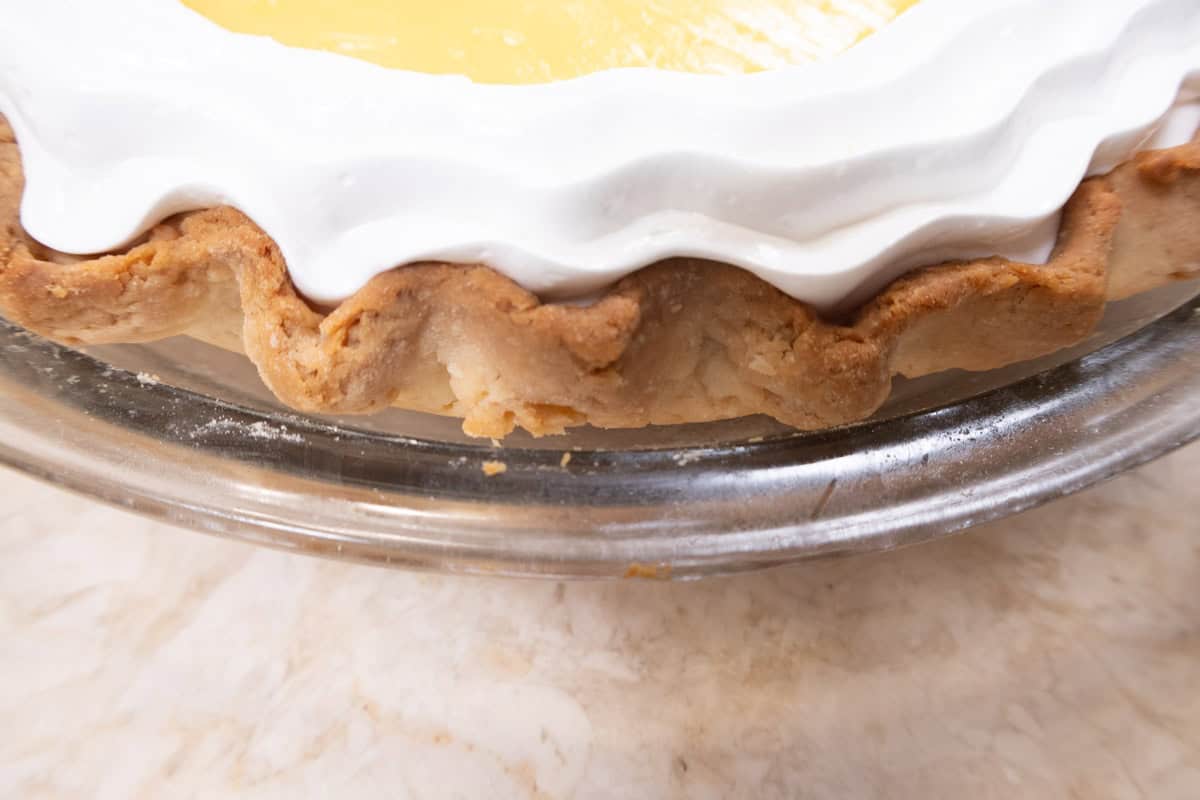
2 - using 4 egg whites (128 grams or ½ cup) from size large eggs and 1 cup of sugar (200 grams or 7 ounces) is a two to 1 ratio by volume producing the high meringue requisite to this pie. To insure the meringue does not pull away from the crust it is best to pipe it in a circular motion starting at the inside of the exposed crust. I piped several times building up the meringue for an attractive look. I know some recipes spoon the meringue onto the crust but I think that is leaving open the possibility of not attaching it to the crust all the way around.
3 - - the final important point is to brown it under a preheated broiler. This prevents the sugar in the meringue from becoming too hot and liquifying as it will in a lower temperature oven baked for a longer time.
Following these rules, the meringue will stay attached for days in the refrigerator with no weeping either on your part or the part of the meringue and without the filling becoming watery. Even after I left the pie in the refrigerator for four days the meringue did not separate nor did it "weep" which is also caused by slow browning of the crust. The filling did not become watery so the crust stayed crisp.
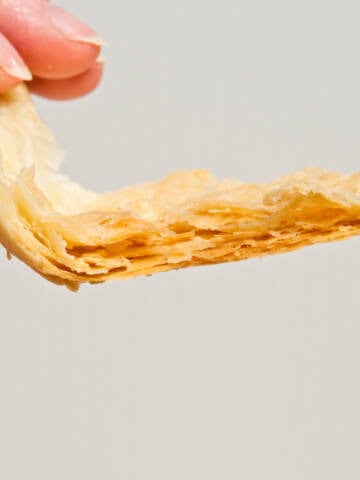
Pie Crust
Pie Crust - Please see this blog for how to photo's
1 ¾ cups sifted cake flour (6 ⅓ ounces or 180 grams)
⅓ cup sifted all purpose flour (scant 1 ½ ounces or 40 grams)
¾ teaspoon salt
6 tablespoons butter, cut into pieces and frozen until hard (90 grams or 3 ounces)
3 tablespoons shortening (like Crisco) frozen and cut into pieces (45 grams or 1 ½ oz.)
2 tablespoons beaten egg
1 teaspoon lemon juice
5 tablespoons water, chilled and divided
Place both flours and the salt in the processor bowl. Pulse several times to mix. Place the butter evenly over the flour and pulse until the butter is in large pieces. Add the frozen shortening and continue to pulse until the shortenings are pea sized.
Combine the egg, lemon juice and water. Pour in a circle over the processor contents. Pulse until it forms clumps. Pour out onto a lightly floured work surface. Push the clumps together into a ball. Knead 4 or 5 times for form a dough. Pat into a circle about 1 inch thick. Wrap in film and refrigerate a minimum of 2 hours or overnight.
Preheat the oven to 425 degrees. Place the oven rack in the lowest position.
On a lightly floured surface, roll out to a circle approximately 13 inches. Place in the pie pan and fit into corners. Cut the overhang an even 1 inch all the way around. Tuck the crust under and flute the edges. To bake blind, freeze for 30 or more minutes until hard. Line with foil, and fill with beans. Bake for 20 minutes in the oven. Remove the beans by bringing the four corners of the foil together and lifting out. Return to the oven and bake for approximately 18 to 20 minutes until lightly browned and completely baked.
Lemon Filling

4 eggs, separated
1 ¼ cups water
1 ⅓ cups sugar (265 grams or 9 ⅓ ounces)
⅓ cup cornstarch (45 grams or 1 ½ ounces)
½ teaspoon salt
3 tablespoons butter, cut in small pieces (45 grams mor 1 12 ounces)
⅔ cup lemon juice
1 tablespoon grated lemon zest
1 fully baked 9" pie shell
Separate the eggs, placing the yolks and whites in different bowls. Set aside.
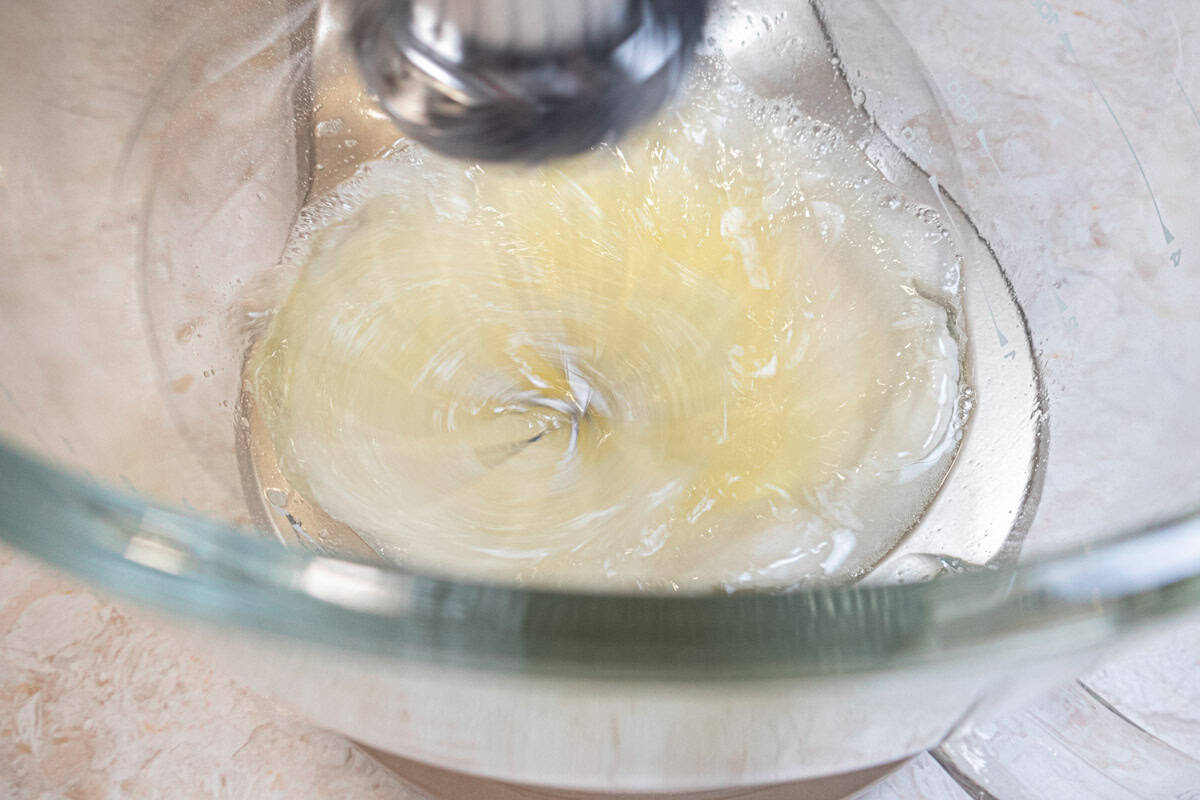
Whisk all of the ingredients in a heavy saucepan except the butter. Add the butter.
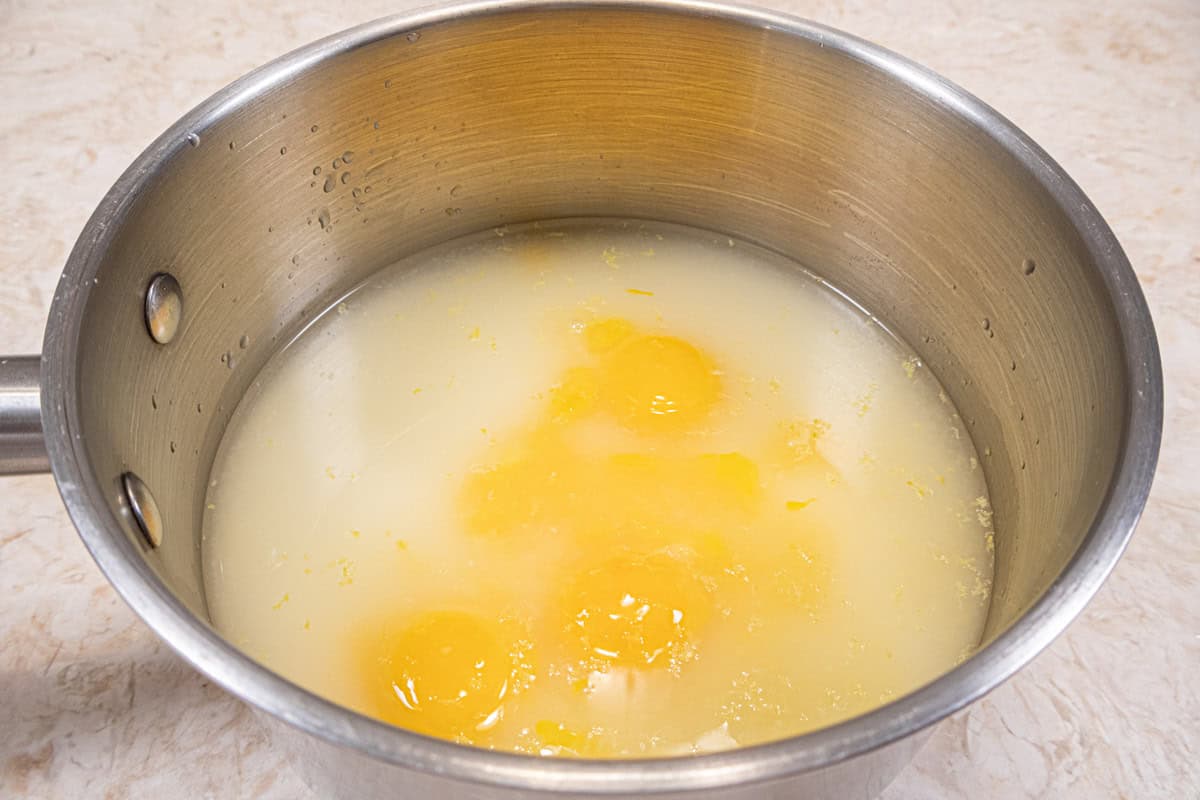
Place over medium heat and, whisking constantly, bring the mixture to a boil.
It will be foamy at first.
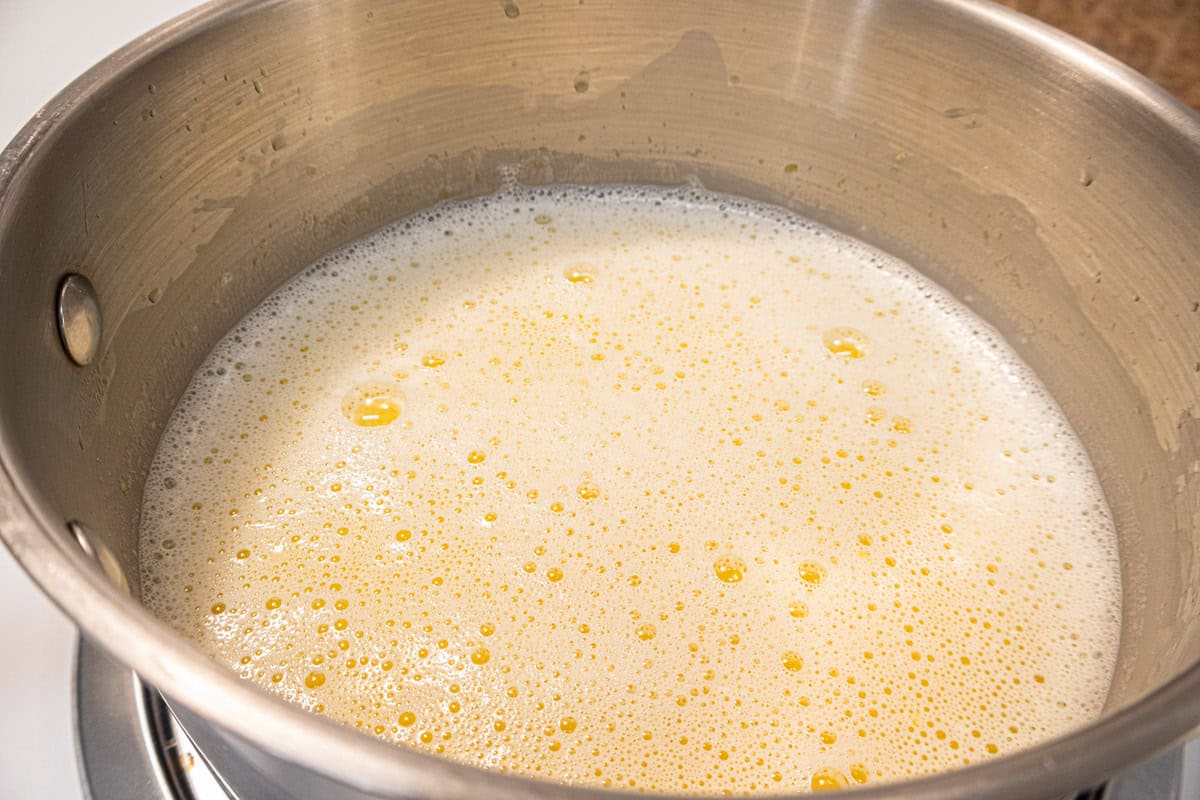
Boil for one minutes. It will be very, very thick. Remove from the heat.
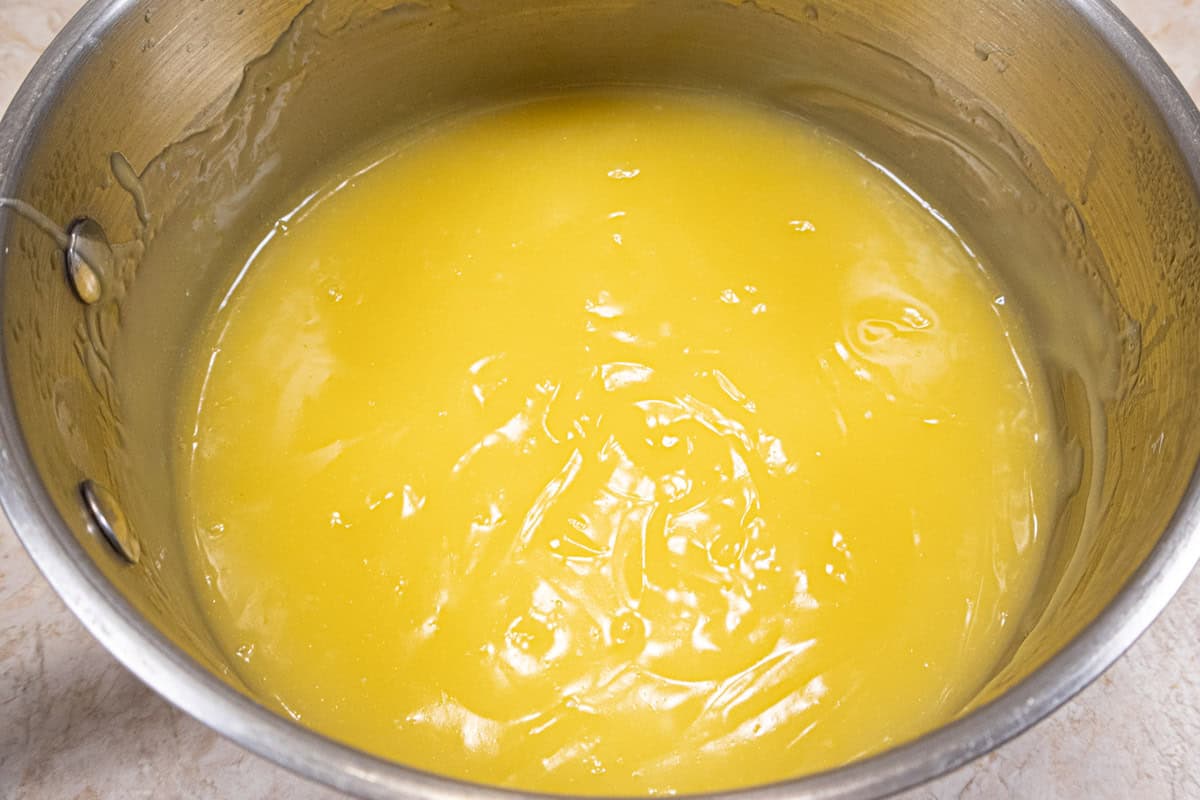
Immediately Pour it into the pre-baked pie shell.
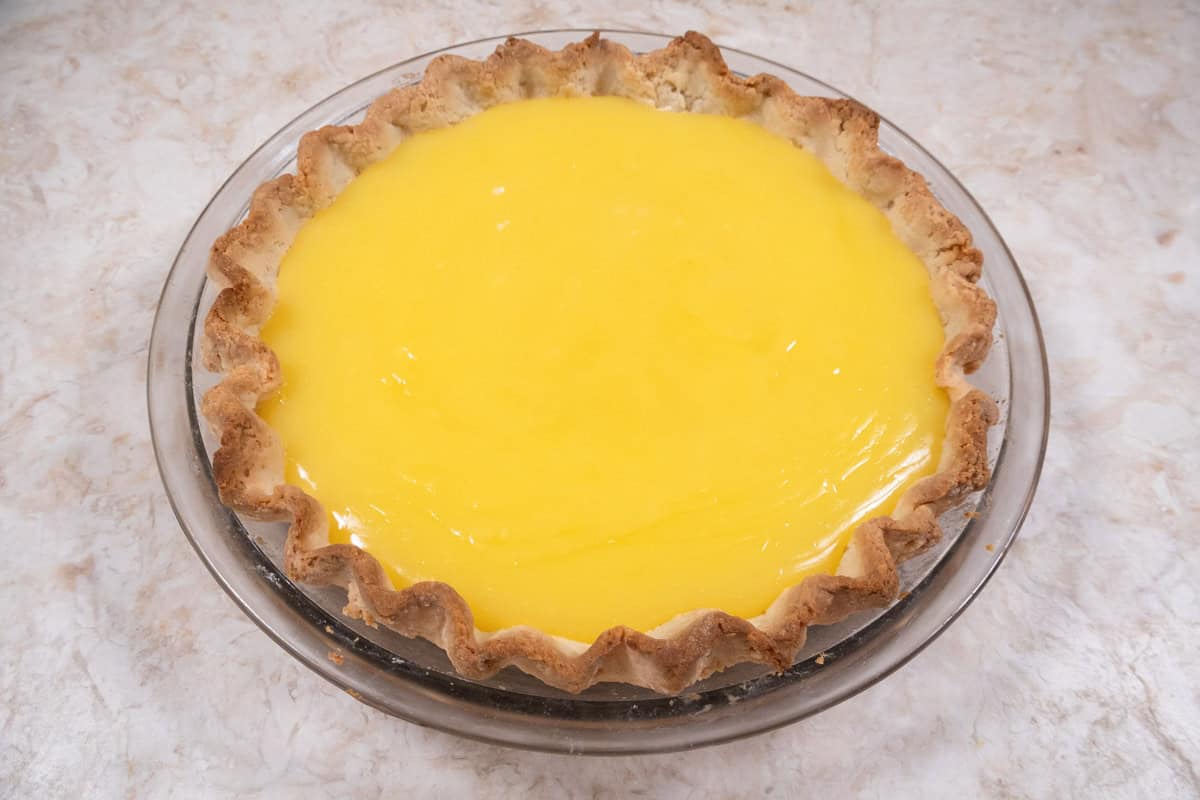
Cover directly with plastic wrap and let come to room temperature. Do not refrigerate.
Making the Meringue
When the filling is cooled to room temperatures, make the meringue.
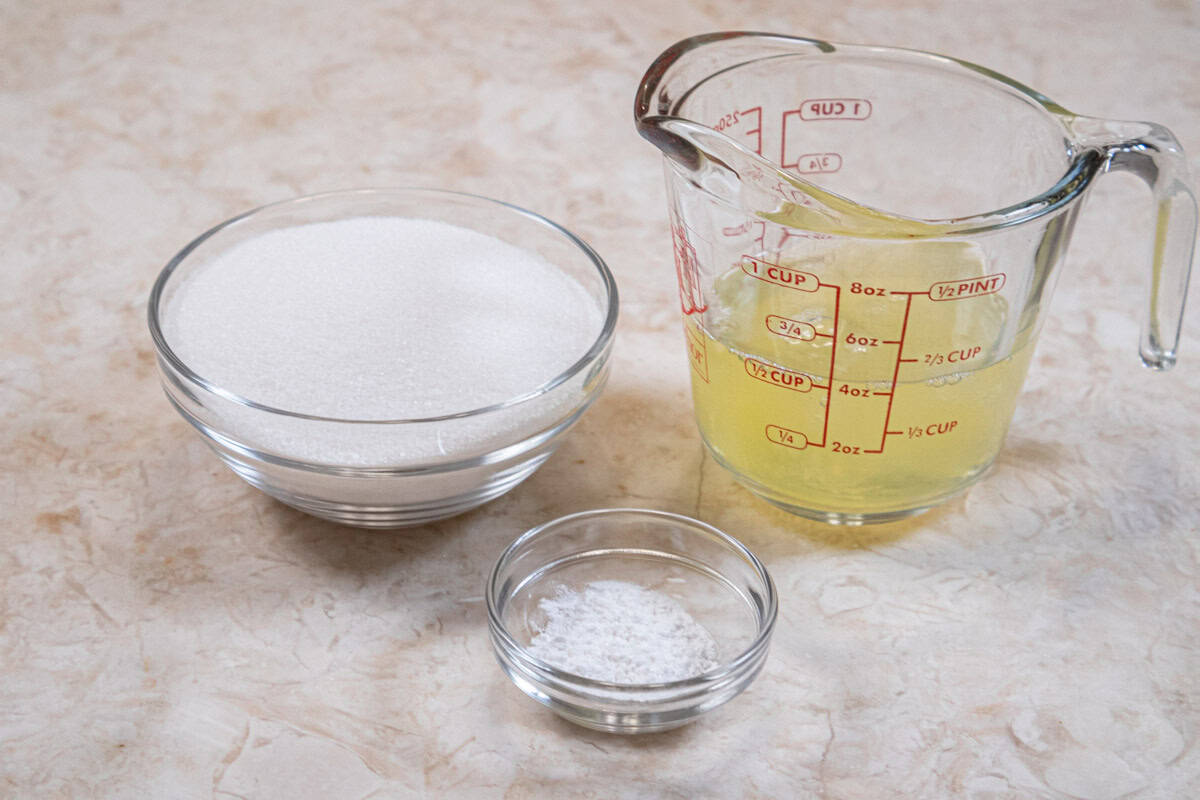
4 egg whites from above
½ teaspoon cream of tarter
1 cup sugar (200 grams or 7 ounces)
Place the oven rack to the most bottom rung. Preheat the oven to broil.
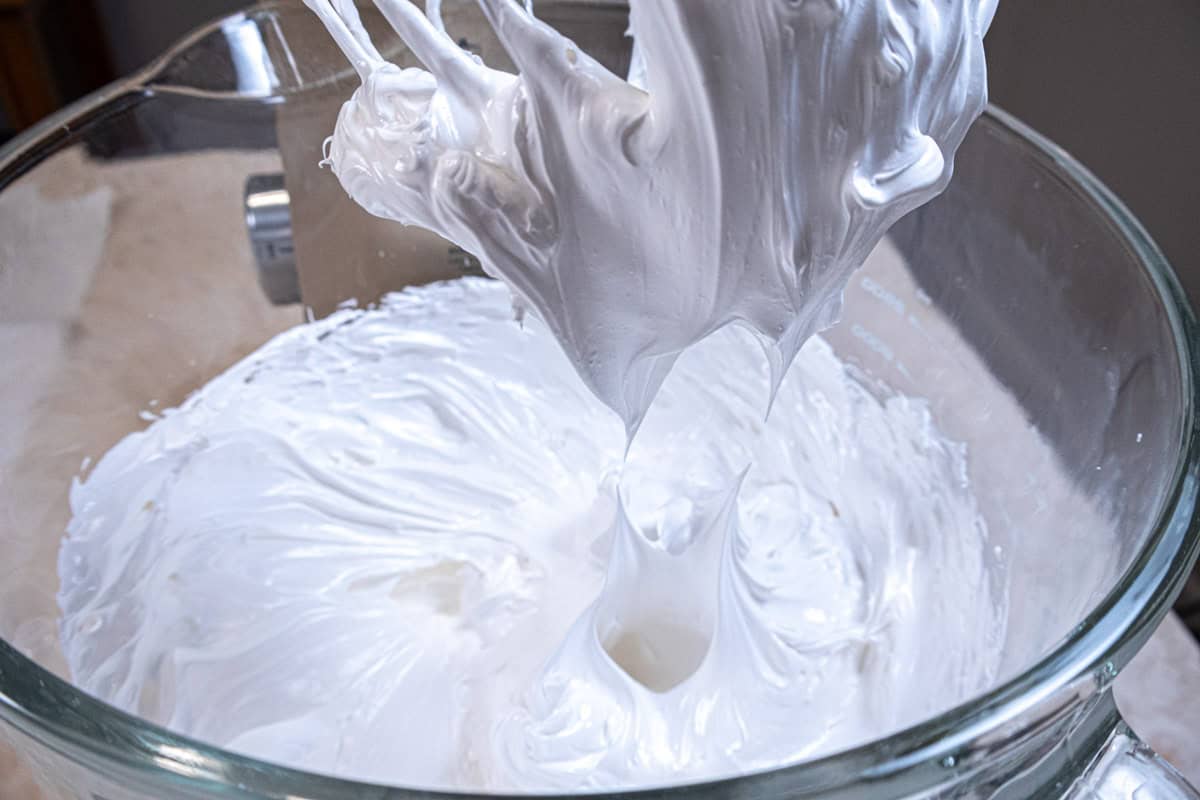
Place the egg whites, cream of tarter and sugar in the bowl of a mixer. Mix on low until the ingredients come together. Raise to medium high and last to high and mix until stiff.
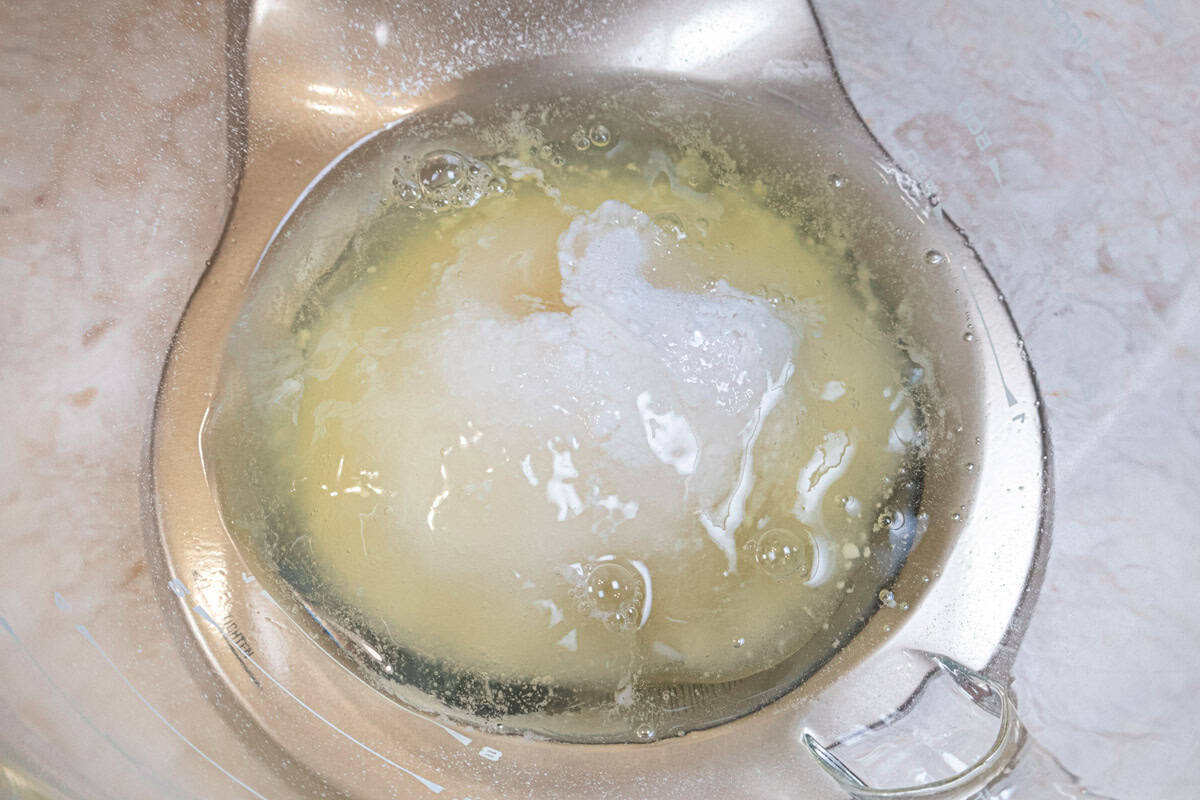
The ingredients are beginning to foam. Start raising the speed of the mixer to medium and then high.
The meringue should make stiff peaks when the whisk is raised.
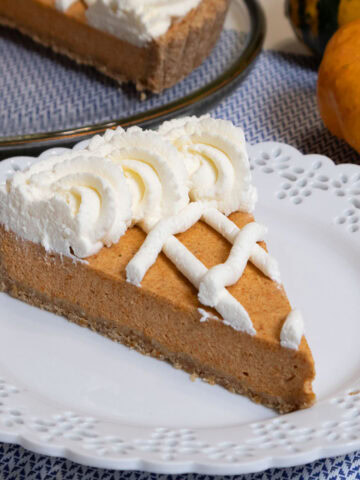
Finishing the Lemon Meringue Pie
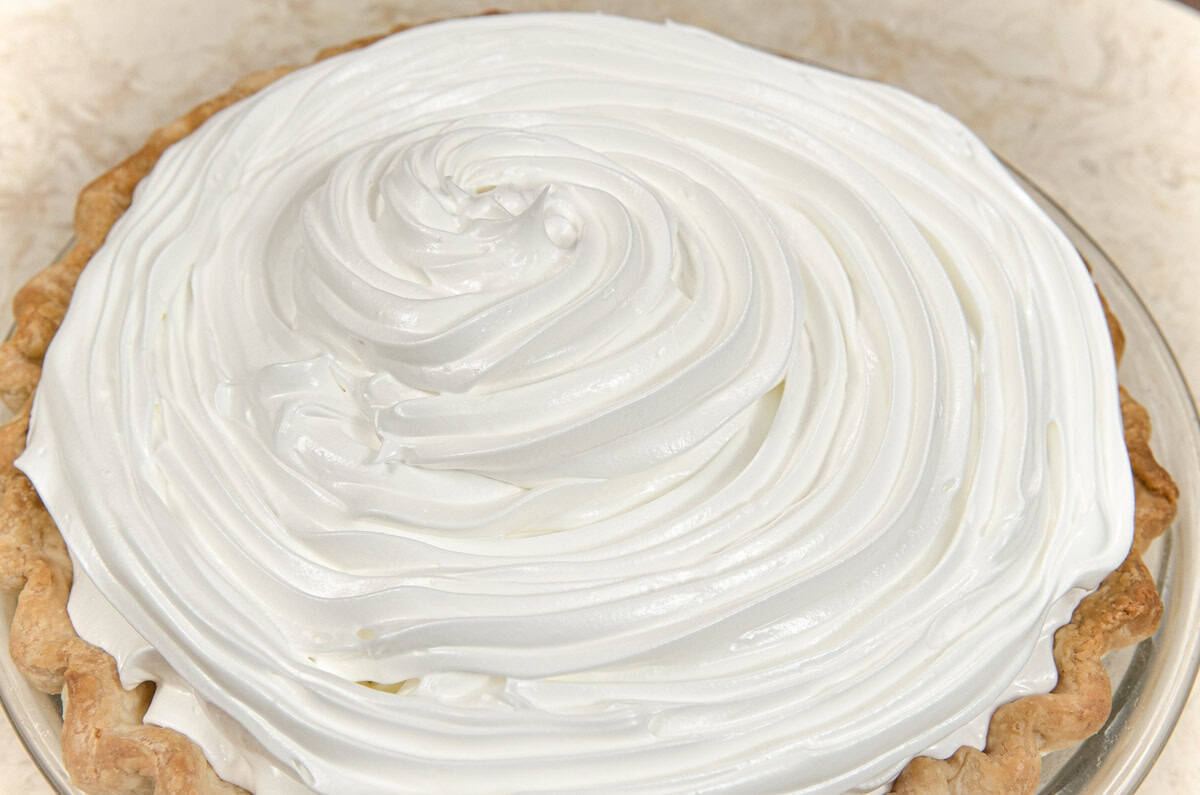
Place the meringue in a piping bag fitted with a large open star (#8 or 9 open star) and pipe the meringue onto the lemon filling starting at the inside edge of the crust.
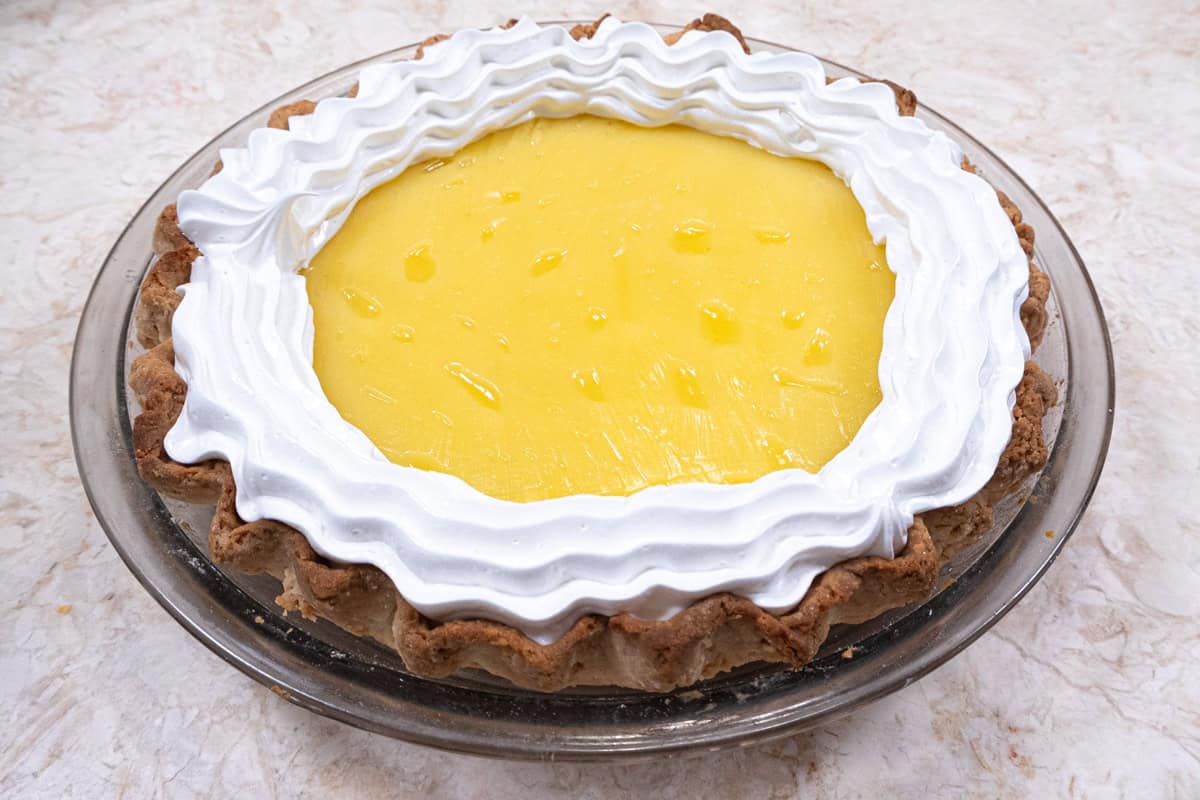
The important thing is to make sure the meringue touches every part of the inside of the crust.
Then pipe in concentric circles towards the middle. Pipe more meringue on top of the already piped meringue until it is all used. Alternately, just spoon it on and make swirls with the spoon making sure you are attaching it all the way around to the crust.
Place the finished Lemon Meringue Pie on a rimmed baking sheet. Preheat the broiler on high.
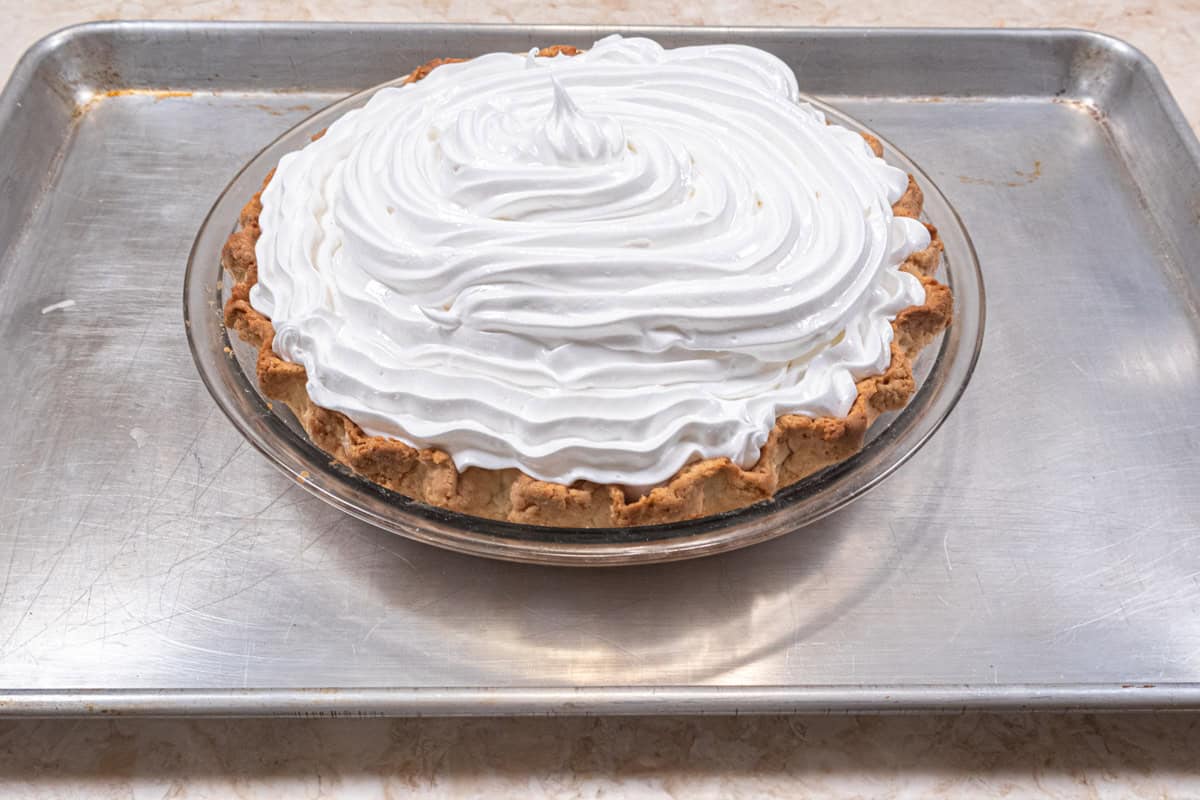
Set the oven rack to the lowest position. Place the tray into the oven for about 1 minute and 15 seconds or until lightly browned. Watch it carefully as the top most peaks of the crust will burn quickly. Cool completely before cutting. Store in the refrigerator.
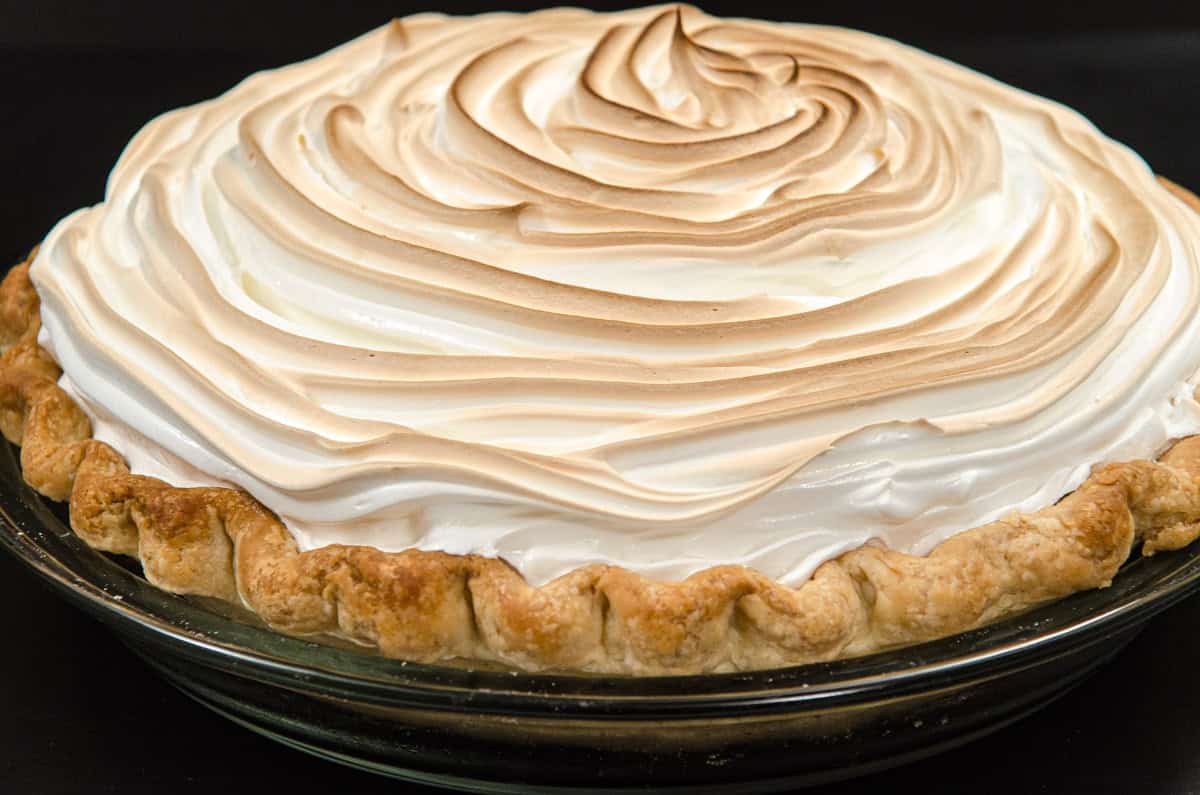
Tons of billowy meringue over a tart lemon filling and flaky pie crust. Take note of the meringue attached to the edge of the shell. Get the forks ready!!
Makes a 9" pie or 8 to 10 servings.

Kim says
Just wondering if browning the meringue under broiler cooks eggs whites enough to b safe
Helen S Fletcher says
Hi Kim, The egg whites are not cooked, just browned. See the instructions for the Swiss Meringue on the recipe card for the Triple Lemon Cake. The meringue will be denser and not as high. Whether it weeps or stays connected to the crust, I can't say. This will not cook them but will make them safe.
Kim Harnagel says
FYI- Helen your photos for how to make the pie crust opens the link but it does not open the photos of each step. I thought you would want to know. :-) Looking forward to trying this lemon meringue pie recipe this weekend! Thanks for all the ahead planning you did to make it successful for us.
Helen S Fletcher says
Hi Kim - there are two Lemon Meringue Pies - Lemon Meringue Pie and Updated Lemon Meringue Pie that has no photos. Go the original Lemon Meringue Pie (the link is here) and that has photos, etc. It is confusing and I hope to get this sorted out some day.
Helen S Fletcher says
Sorry Kim, I sent the wrong info. Go to American Pie Crust Tutorial for the crust with the photos.
Manisha says
Hi Helen,
Sooo much hard work you have put in to get us the best recipe!!! thanx a lot.
it looks stunning and tempting...will surely make it once i am out of my strawberry zone :)))
Alison Wiebe says
Thanks for all the work you put into researching this, Helen.
hfletcher says
Thanks Alison.
Shelley O'Hara Plunkett says
I am in Halleluah mode! I already make a cookie-like flaky crust and a fabulous lemon curd filling but the meringue has always eluded me. Thanks soooo much for posting this. Now my pies will be 100% perfect instead of only 66% perfect....Happy New Year!
hfletcher says
Hi Shelly - Happy New Year to you. Happy I could make it 100%.
Becky Helton says
What about making a precooked meringue. That is, cooking egg whites and sugar over water bath to a temp of 145. Then whip in mixer to stiff peaks and brown quickly in oven. That works for me.
hfletcher says
A Swiss Meringue which is what you are making will work as will an Italian Meringue. I just wanted to stay as close to the classic Lemon Meringue Pie as I could. Thanks for the comment.
Connie Weis says
Helen, I so appreciate your due diligence in conquering lemon meringue pie. I can't wait to try it!
hfletcher says
Thanks Connie - I sure got tired of it, but it was well worth getting it to work.