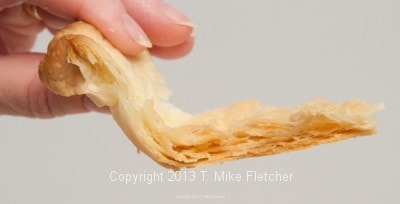
Several years ago, Midwest Living magazine asked me to provide a “no fail pie crust”. The results elicited this comment from the food editor: “We share a test kitchen with Better Homes and Gardens, Traditional Home, Successful Farming, Diabetic Living and more. The staff is educated in food science or through a culinary school. We used your crust for all the pies and they were blown away with the recipe. Not only does it taste great, it was easy to work with. You became a sensation! One of the staffers refuses to make any other crust at home and she’s been on staff for almost 20 years. I hope you feel the love!” I think you will too after making this melt in your mouth crust.
Purpose and Kinds of Flour Used
Many elements go into a pie crust and an understanding of how they work will help allay any misgivings you have. First of all, let’s talk about flour. The type of flour used will determine, almost completely, the outcome of the crust due to the protein count of the gluten. In making pastry dough, the fat is cut into the flour so that the two proteins in flour, which make up the gluten, cannot come together to link up and form a chain or strand. On the other hand, bread dough is worked vigorously by kneading in order to link the two proteins to form a chain. Whereas the elasticity gained by working the dough is desirable in bread, it is not in pastry, which is why pastry dough is handled and worked as little and as quickly as possible.
Bread flour has the highest percentage of gluten followed, in descending order, by all purpose flour, pastry flour and cake flour which has the very least. It would seem reasonable that if the lowest amount of protein is desired then cake flour would be the choice. Using all cake flour does make a very tender crust, however it is rather mealy and without good texture.
Because pastry flour is not commonly available to the consumer, many recipes combine two thirds all purpose flour with ⅓ cake flour. While this yields a better crust, reversing it and using a larger amount of cake flour with just a little all purpose yields the requisite tenderness and flakiness without sacrificing the crispness, texture or strength. In addition, it can stand a little more handling than crusts made with other flours – a boon to beginners.
Which Fats Work Best
The most important item is the fat used. The colder and harder the fat, the flakier the crust. At every point while and after adding the fat, the pastry should be worked quickly and kept cold. Lard, a very hard fat, is advocated by die hard pie crust makers as providing the flakiest crusts. This is true, but its very definite flavor along with its very high cholesterol and the difficulty of finding it in the supermarkets make this the least used choice.
The second flakiest crust will be obtained with vegetable shortening, as it is 100 percent fat, although not as hard as lard. Butter, with a fat content of 75 to 80 percent, will not produce as flaky a crust, but the taste is superior. To maximize flavor and retain flakiness a combination of butter and shortening is used in this recipe. Both the butter and the shortening are frozen. Under no circumstances use butter substitutes such as I Can’t Believe it’s Not Butter, etc. They have a lot of water in them that alters the proportions of fat and water.
Liquids
Liquids make the dough cohesive. Water, although the main liquid usually used in pie crusts, is not the only one to be considered. Egg and lemon juice play an important part also. Ice cold water is used to slow down the formation of the gluten strands. Several ice cubes placed in a cup of water 5 to 10 minutes before using are sufficient to chill it. Egg in the crust adds firmness, crispness and color and is particularly good when making pies with juicy fillings. When less than a whole egg is called for, beat a whole egg with a fork until the yolk and white are completely mixed, then measure the amount called for. Lemon juice, because of its acid content, acts as a tenderizer on the gluten. Vinegar can be substituted.
Measuring
Measuring the flours is very important to the finished pastry. As a professional baker, I weigh everything and recommend home bakers do also. If you don't, stir the flour in the bag or canister lightly, dip the cup in and fill to overflowing. With the back of a knife or anything flat, sweep the excess flour off. Be sure to use a dry measure – one that has no lip on the top.
Mixing
At this point you are ready to mix. There are several ways to mix the dough. But my favorite is using the food processor. The only caveat is you mustn’t over mix – use pulses as they are easy to control. Frozen butter and shortening are cut into the flours with pulses. You want the pieces to remain the size of peas so when the pastry is rolled out the fat gets trapped between the layers of flour. When it bakes, the fat melts and the steam causes the pastry to puff and become flaky. After the fat is cut in, the liquids are combined and pulsed in until large crumbs are formed.
Rolling the Pastry Out
To roll the pastry, use as little flour as possible. You may think a photo of "lightly floured surface" is ridiculous but I have had students that use so much flour you can't see the surface of the table. Extra flour rolled into the dough at this point will only serve to toughen it.
To keep a round shape, roll from the middle out to the edges. If, no matter what you do, the shell does not form a good circle you can help it along. Cut away the bulging part of the pastry, moisten the edge of the pastry that needs help with water and patch it with the cut piece overlapping to make a seam. Sprinkle lightly with flour and roll lightly. The seams will not adhere to each other without the water.
Roll the pastry into a circle about 12 ½ to 13 inches round. To make sure the pastry fits into the corner of the pan and is not being stretched, ease about one eighth of the pastry at the side of the pan gently toward the middle. Now bring the pastry back to the rim and slide it down the side of the pan so you can see it fits the angle at the bottom. Continue around the pan in this manner. Trim the overhang a uniform 1 inch, turn under and flute the edges if making a single crust. Both a single and double crust are shown below.
Baking the Pie Crust
Baking an empty shell is called “blind” baking the shell. The biggest obstacle here is the tendency towards shrinking when baking. To forestall this, it is necessary to freeze the shell first then weight it. I am always amused by the pictures of a few aluminum weights on the bottom crust or something that looks like a string of beads. These will do nothing to help your cause.
Line the frozen pie crust with foil that has been sprayed with a releasing agent (do not use waxed paper – it doesn’t have enough strength when removing), pressing it, sprayed side to the crust, against the sides and letting it stick up over the top. Fill the crust completely to the top with dried beans – limas are my favorite because they are big and heavy. It will take two pounds of beans for a nine inch crust. Follow the times in the recipe and you will have a perfectly baked, beautiful, tall empty shell waiting for whatever filling you choose. It is important for the finished shell to have color so it remains crisp and flaky. Cool the beans completely and store in a covered container to use over and over. I have had mine for years.
Cover the Edges Before Baking
If you are baking a pie longer than 45 to 50 minutes, the edges need to be covered or they will become overly brown. It is much safer to do this before baking instead of waiting until it is halfway or more done then trying to cover it hot. After the top is put on the pie, simply tear off strips of foil about 3 inches wide and cover the edges. These are left on for about half the baking time and then removed so these edges can bake also.
Choice of Pie Pans or Plates
The color of the pans will alter the baking times. I see mostly dark ware for consumers these days, very little aluminum. Dark metal or glass pie pans require a twenty five degree reduction in heat in order not to over brown or burn.
Amount of Filling
To figure out how much filling you need, a standard pie pan requires about 6 cups of fruit, plus sugar and thickeners. The deep dish pie pans require about 8 cups of fruit plus sugar and thickeners.
By following the steps you see here, you will be assured your pie crusts will be fast, flaky, fantastic and fail-proof.
Pie Crust Ingredients
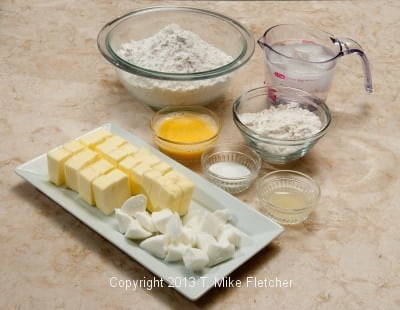
Single Pie Crust
1 ¾ cups cake flour (6 ⅛ ounces or 175 grams)
½ cup all purpose flour (2 ½ ounces or 70 grams)
¾ teaspoon salt
6 tablespoons butter (85 grams or 3 ounces)
3 tablespoons shortening (like Crisco) (45 grams or 1 ½ ounces)
2 tablespoons beaten egg
1 teaspoon lemon juice
5 tablespoons ice water
Double Pie Crust
9 tablespoons butter (130 grams or 4 ½ ounces)
4 tablespoons vegetable shortening (60 grams or 2 ounces)
2 ¼ cups cake flour (280 grams or 10 ounces)
⅔ cup all purpose flour (95 grams or 3 ⅓ ounces)
1 ½ teaspoon salt
3 tablespoons beaten egg
1 ½ teaspoons lemon juice or vinegar
7 to 8 tablespoons ice water
Cut the butter in pieces and freeze until rock hard. Freeze the vegetable shortening also.
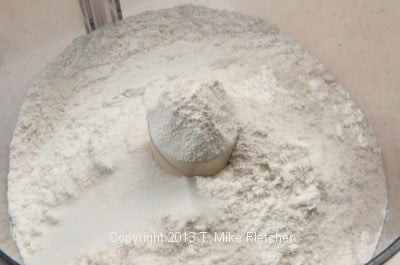
Place both flours and the salt in the processor bowl. Pulse several times to mix.
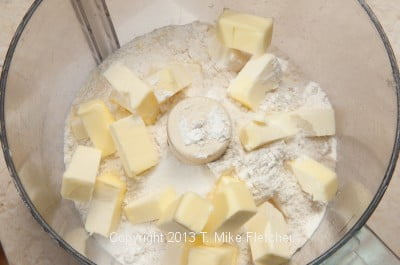
Place the butter over the flours.
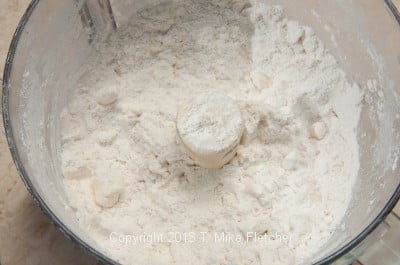
Pulse the processor to cut the butter into large chunks.
Add the frozen shortening.
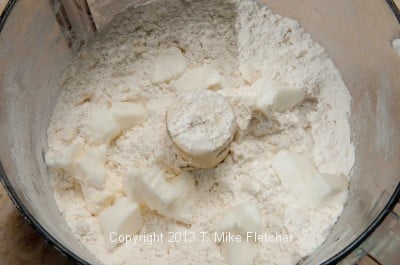
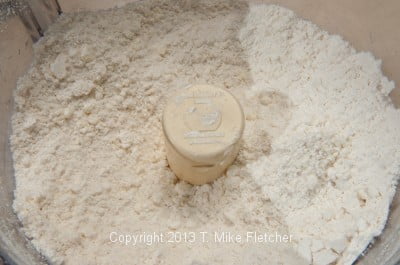
Pulsing the processor, cut in until the butter and shortening are the size of peas. Do not over process. Use short bursts.
Combine the egg, lemon juice and water.
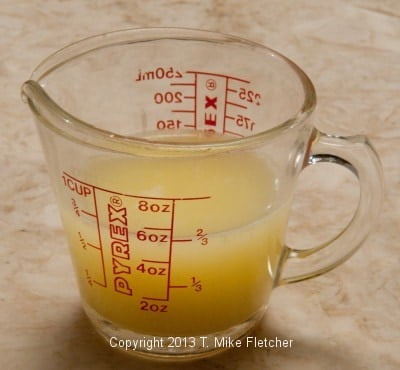
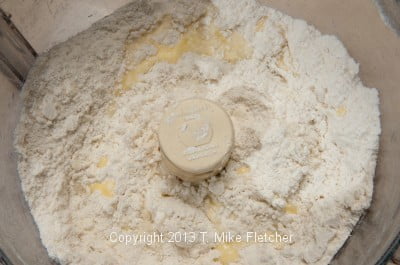
Pour in a circle over the processor contents.
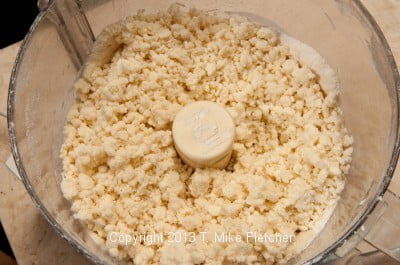
Pulse until it forms small clumps in the bowl.
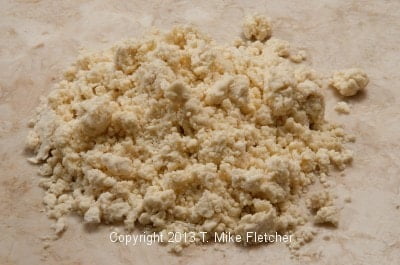
Pour onto a lightly floured work surface.
Push the clumps together to form a cohesive mass.
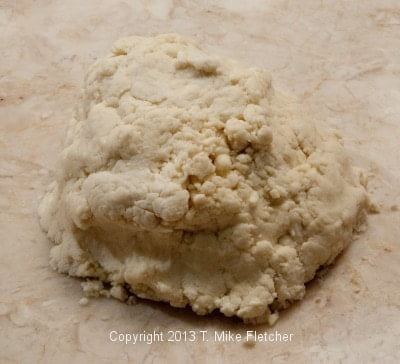
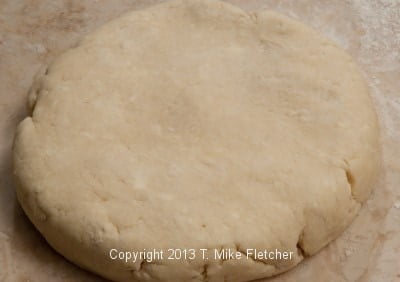
Knead 4 or 5 times for form a dough. Pat into a circle about 1 inch thick.
Wrap in film and refrigerate a minimum of 2 hours or overnight.
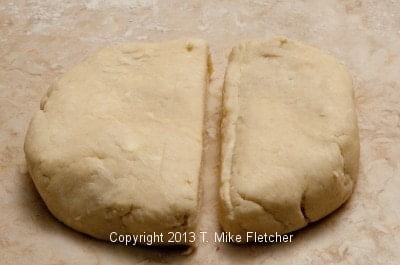
If making a double crust, divide the circle into two pieces, one a generous ⅓ of the dough. Form each into a round about 1 inch thick.
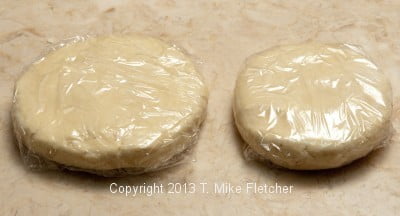
Wrap in film and refrigerate.
Preheat the oven to 425 degrees.
On a lightly floured surface, flatten the cold dough with a rolling pin,
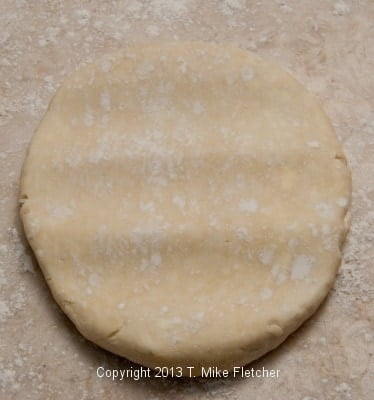
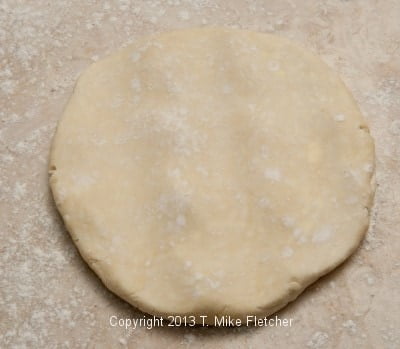
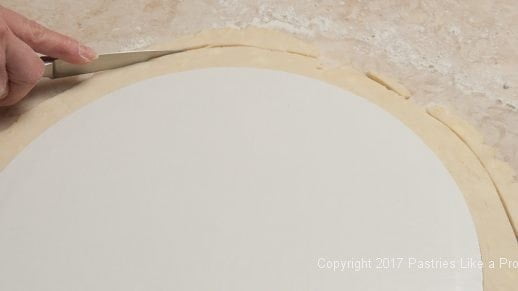
Roll the dough into a circle approximately 13 inches for a 9 inch pie pan. Here I am using a 12 inch cardboard round as a guide cutting a bit larger to get 13 inches.
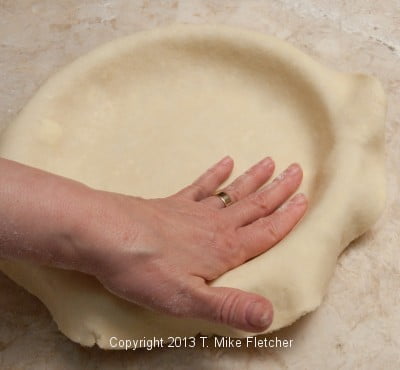
Place in the pie pan by sliding hands under the crust and lifting into the pie pan. It can also be rolled up on the rolling pin and unrolled in the pan.
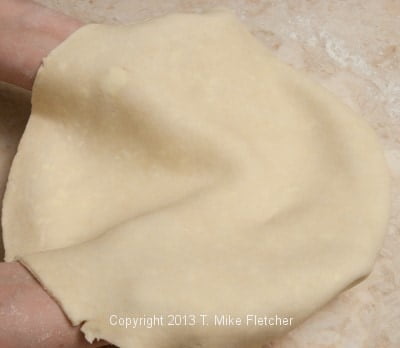
and fit into edges by pulling the dough gently away from the side of the plate and then fitting it securely into the edge and patting in place
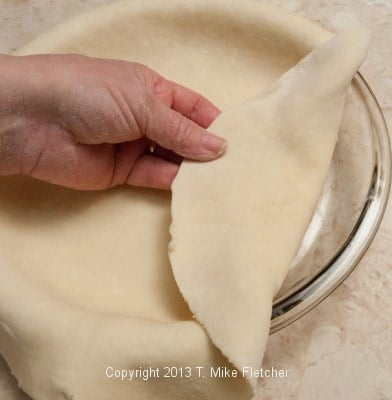
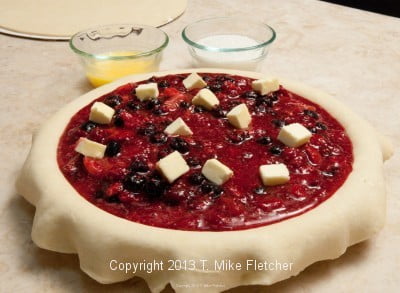
Fill the pie as desired. (See below for this Very Berry Pie filling.)
Brush the bottom overhang with water after the crust is rolled beforeplacing the top crust on.
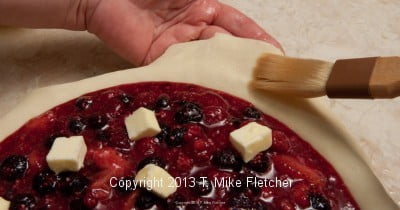
Roll the top crust approximately 12 inches and place it over the filling.
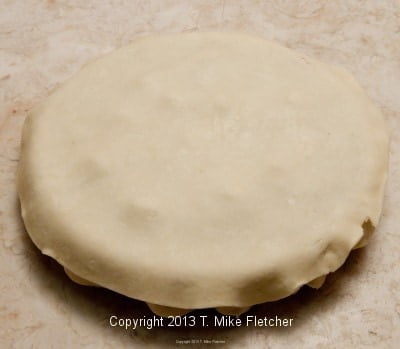
Cut the overhang an even 1 inch all the way around.
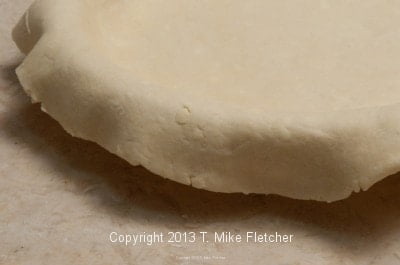
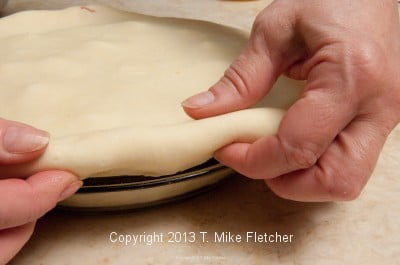
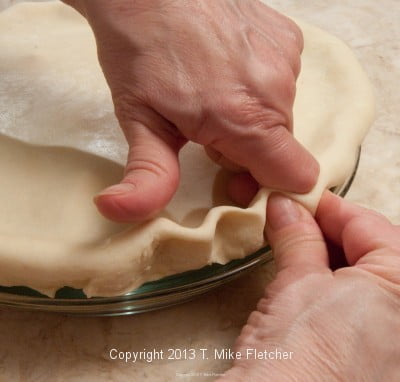
Tuck the crust under. The wet bottom crust will seal them together when you flute. and flute the edges.
Although this is optional, it gives a beautiful finish to the pie and makes a crunchy top crust. Brush the top with a beaten egg.
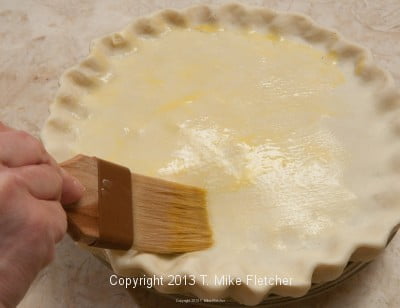
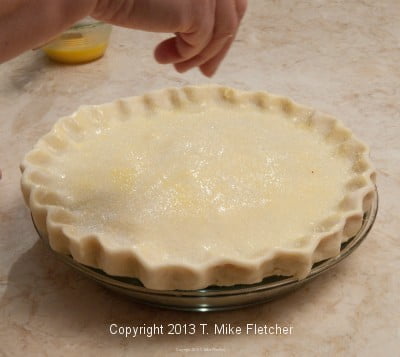
and sprinkle with sanding sugar (which is a coarse sugar much like the texture of coarse salt).
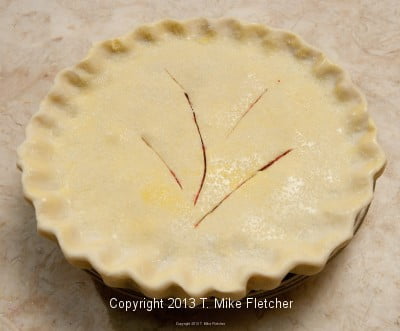
Cut vents into the top for the steam to escape. You can cut any shape you wish.
Line a rimmed baking sheet with foil. Place the pie on it. This will make clean up easy if the filling goes over the edge while baking.
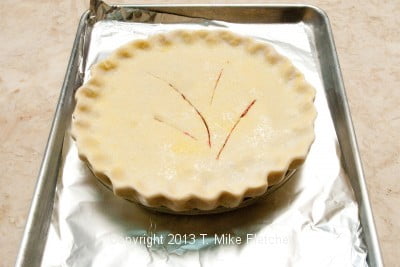
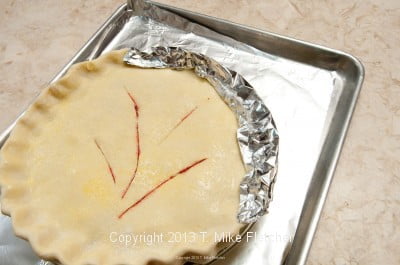
To prevent the edges from browning too much or burning it is easier to cover them with foil before you bake than half way through when it is hot. We did this at the bakery. Half way through baking we removed the foil and the edges, after baking, were the same color as the rest of the crust.
Bake as called for.
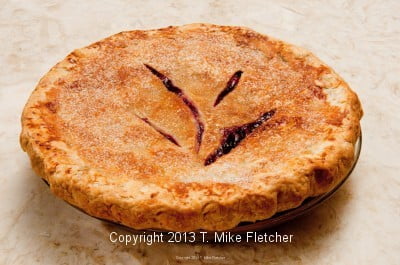
Baked Pie. Notice the edges.
Blind Baking a Crust - This refers to baking an empty crust to be filled with a non baked filling.
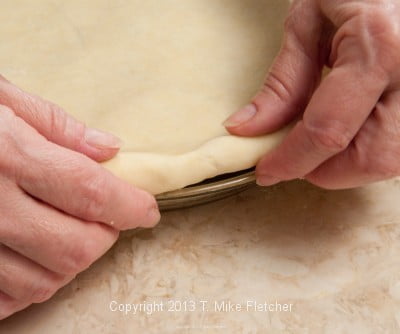
Roll the bottom crust as directed above. Place it in the pan, adjust it to fit into the edges and turn the overhang underneath as above.
Flute the crust as above. Freeze the crust until it is hard, about 45 minutes or longer.
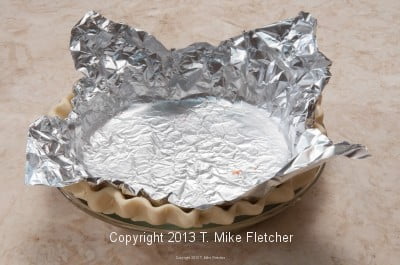
Spray a piece of foil large enough to extend over the top of the crust with baking spray. Place the sprayed side down to cover the frozen crust and sides and extend over the top.
Fill with beans. Any kind of bean can be used. I prefer lima beans because they are big and heavy. Be sure to fill the pan to the top with beans.
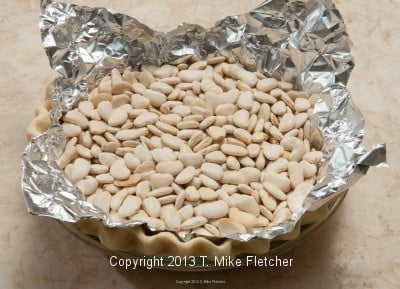
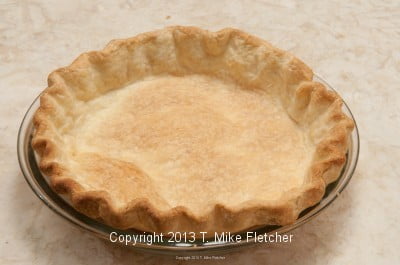
Bake for 20 minutes with the beans. Remove the beans by bringing the four corners of the foil together and lifting out. Return to the oven and bake for approximately 18 minutes until lightly browned and set.
Very Berry Pie - At the bakery we used unsweetened frozen fruit for our pies as, out of season, the fruit is very expensive and not always the best. Because the fruit has been frozen it will have more juice than fresh fruit. Consequently, there is more thickener in the frozen fruit version that would be used with fresh fruit
All of the fruit should be thawed but still cold.
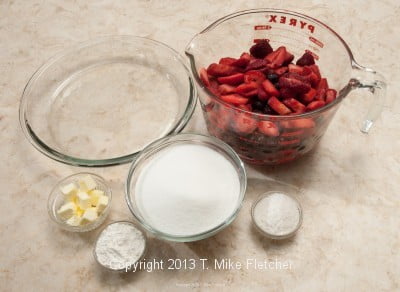
If you wish to use fresh fruit, reduce the flour and tapioca to 2 tablespoons each and follow the directions.
12 ounces frozen blueberries
12 ounces frozen red raspberries
24 ounces frozen sliced strawberries
1 ¾ cups sugar (375 grams or 13 ounces)
3 tablespoons instant tapioca
3 tablespoons flour
2 tablespoons butter, cut in small pieces
1 egg, well beaten, optional
Sanding sugar, optional
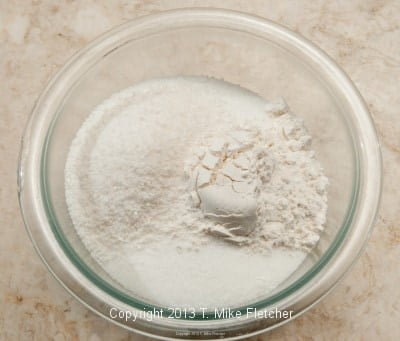
Thirty minutes before filling the pie, combine the sugar, tapioca and flour.
Mix together well to distribute the flour and tapioca in sugar
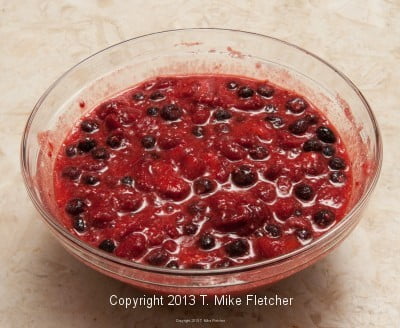
Stir in the fruit with the juice.
Let sit for 30 minutes.

Pour the filling into the prepared pie shell and dot with the butter.
Continue as above including wrapping the edges with foil.
Bake for about 25 minutes; remove foil and finish baking for about 35 minutes more until browned and the filling is bubbly.

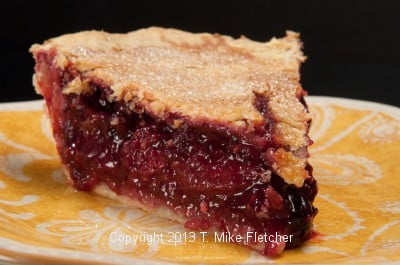
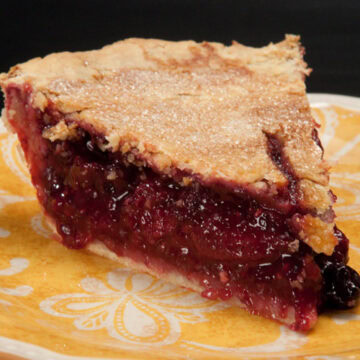
American Pie Crust & Very Berry Pie
Ingredients
Single Pie Crust
- 1 ¾ cups cake flour (6 ⅛ ounces or 175 grams)
- ⅓ cup all purpose flour (1 ½ ounces or 40 grams)
- ¾ teaspoon salt
- 6 tablespoons butter (85 grams or 3 ounces)
- 3 tablespoons shortening like Crisco (45 grams or 1 ½ ounces)
- 2 tablespoons beaten egg
- 1 teaspoon lemon juice
- 5 tablespoons ice water
Double Pie Crust
- 9 tablespoons butter (130 grams or 4 ½ ounces)
- 4 tablespoons vegetable shortening (60 grams or 2 ounces)
- 2 ¼ cups cake flour (280 grams or 10 ounces)
- ½ cup all purpose flour (70 grams or 2 ½ ounces)
- 1 ½ teaspoon salt
- 3 tablespoons beaten egg
- 1 ½ teaspoons lemon juice or vinegar
- 7 to 8 tablespoons ice water
Very Berry Pie
- 12 ounces frozen blueberries
- 12 ounces frozen red raspberries
- 24 ounces frozen sliced strawberries
- 1 ¾ cups sugar (375 grams or 13 ounces)
- 3 tablespoon instant tapioca
- 3 tablespoon flour
- 2 tablespoon butter, cut into small pieces
- 1 egg, well beaten optional
- sanding sugar optional
Instructions
Pie Crust
- Cut the butter in pieces and freeze until rock hard. Freeze the vegetable shortening also.
- Place both flours and the salt in the processor bowl. Pulse several times to mix. Place the butter over the flours. Pulse the processor to cut the butter into large chunks.
- Add the frozen shortening. Pulsing the processor, cut in until the butter and shortening are the size of peas. Do not over process. Use short bursts.
- Combine the egg, lemon juice and water. Pour in a circle over the processor contents. Pulse until it forms small clumps in the bowl.
- Pour onto a lightly floured work surface. Push the clumps together to form a cohesive mass.
- Knead 4 or 5 times to form a dough. Pat into a circle about 1 inch thick. Wrap in film and refrigerate a minimum of 2 hours or overnight.
- If making a double crust, divide the circle into two pieces, one a generous ⅓ of the dough. Form each into a round about 1 inch thick. Wrap in film and refrigerate.
- Preheat the oven to 425 degrees.
- On a lightly floured surface, flatten the cold dough with a rolling pin,
- Roll the dough into a circle approximately 13 inches for a 9 inch pie pan. Here I am using a 12 inch cardboard round as a guide cutting a bit larger to get 13 inches.
- Place in the pie pan by sliding hands under the crust and lifting into the pie pan. It can also be rolled up on the rolling pin and unrolled in the pan.
- Picking dough up and fit into edges by pulling the dough gently away from the side of the plate and then fitting it securely into the edge and patting in place
- Fill the pie as desired. (See below for this Very Berry Pie filling.)
- Brush the bottom overhang with water after the crust is rolled beforeplacing the top crust on.
- Roll the top crust approximately 12 inches and place it over the filling.
- Cut the overhang an even 1 inch all the way around.
- Tuck the crust under. The wet bottom crust will seal them together when you flute. and flute the edges.
- Although this is optional, it gives a beautiful finish to the pie and makes a crunchy top crust. Brush the top with a beaten egg and sprinkle with sanding sugar (which is a coarse sugar much like the texture of coarse salt).
- Cut vents into the top for the steam to escape. You can cut any shape you wish.
- Line a rimmed baking sheet with foil. Place the pie on it. This will make clean up easy if the filling goes over the edge while baking.
- To prevent the edges from browning too much or burning, it is easier to cover them with foil before you bake than halfway through when it is hot. We did this at the bakery. Halfway through baking we removed the foil and the edges, after baking, were the same color as the rest of the crust. Bake as called for.
- Roll the bottom crust as directed above. Place it in the pan, adjust it to fit into the edges, and turn the overhang underneath as above.
- Flute the crust as above. Freeze the crust until it is hard, about 45 minutes or longer.
- Spray a piece of foil large enough to extend over the top of the crust with baking spray. Place the sprayed side down to cover the frozen crust and sides and extend over the top.
- Fill with beans. Any kind of bean can be used. I prefer lima beans because they are big and heavy. Be sure to fill the pan to the top with beans.
- Bake for 20 minutes with the beans. Remove the beans by bringing the four corners of the foil together and lifting out. Return to the oven and bake for approximately 18 minutes until lightly browned and set.
Very Berry Pie
- Thirty minutes before filling the pie, combine the sugar, tapioca, and flour. Mix together well to distribute the flour and tapioca in sugar. Stir in the fruit with the juice. Let sit for 30 minutes. Pour the filling into the prepared pie shell and dot with the butter.
- Continue as above, including wrapping the edges with foil. Bake for about 25 minutes; remove foil and finish baking for about 35 minutes more until browned and the filling is bubbly.



Kathleen says
Hello! I want to use your dough recipe to make two galettes. Do you recommend a double batch and dividing it in half *or* a double batch for each galette? I’m aiming for the size to be 9-10” once pleated.
Helen S Fletcher says
Hi Kathleen - Please see my Cranspple Pie with a Pleated Crust. It addresses what you are looking for.
Cathi says
Question about the directions in the posting. In the "Which Fats Work Best" section, it states that the butter is used directly out of the refrigerator. However, in the recipe directions, it states to freeze the butter until rock hard. Can you confirm which is correct, use refrigerated butter in the food processor or frozen solid butter?
Helen S Fletcher says
Hi Cathi, either will work, depending upon your skill with baking. However, the safest way is to freeze the butter and the shortening.
Emily Sheridan says
Have you ever used the butter flavored Crisco for pie crust? My mother always used butter and Crisco but did not have a recipe and I have never been able to make my pie crust taste as good as hers. I am going to try this recipe.
Thanks,
Em
hfletcher says
Hi Emily:
I have not tried the butter flavored but I can't see that it would make a big difference except add a bit more flavor - which is always good. Hopefully this will come close to your mother's.
All best,
Helen
Hillary says
Fantastic recipe and tutorial. I can't wait to try it. I really appreciated the pictures of the food processor step because it is nice to know that it isn't supposed to form a ball of dough in the food processor - but you form it into a ball on the counter by pushing it all together. I roll out my pie crust on a silpat to help prevent sticking and reduce the flour that I need. Still not an easy task. Thanks for the recipe, details and photos!
hfletcher says
Hi Hillary - Thanks so much for the comment. It's helpful to have an in house photographer that capture my every move. It is important to me to be able to help inexperienced as well as experienced bakers. I am still learning and plan to for a very long time. Let me know how it goes.
Brent Kornblum says
I am an above average cook who is not fond of baking, mostly because my pie crusts have been terrible. I look forward to trying this recipe. What do you recommend if I can't use dairy - no butter at all? Can I use straight shortening?
hfletcher says
Hi Brent - Thanks for reading the blog. Yes, go with all shortening. You might try the butter flavored to up the taste a little.
Let me know how it goes. Be sure to freeze the shortening for hours, as it needs time to get hard but it never gets as hard as butter. Use quick pulses as the shortening will go in very fast. I hope I can get you to bake a bit more. I have a great blog coming up next Thursday on my Whisk and a Bowl series where you don't need much more equipment. And the recipe uses oil - no butter! This blog is all about making baking not so scary. A lot of it is really easy
Kim says
Helen, finding your website on pastries was like finding a gold mine! Thanks for your willingness to share your knowledge with us common bakers!
I am anxious to try your pie crust recipe. For years I have used the oil and milk method because it was easier to roll out but I'm up for a challenge and would like to see if I can tell the difference from the two different crusts.
Thanks again for sharing.
hfletcher says
Hi Kim:Sharing brings so much pleasure to me Kim. So I guess it is rather selfish! I think it was why I loved the bakery so much. I had marvelous clients and I loved sharing my products with them and they in turn loved the products.
kitchenriffs says
Really nice, thorough post - great job. Pie crust is one of those things that requires a bit of practice until you get the "feel" - or at least it did for me. But your explanation is so through - and anticipates questions people might have - that you're kind of intuitively giving us that feel. Really nice - thanks.
Helen S. Fletcher says
Thank you for letting me know you read this and got what I wanted to convey. I feel strongly that if you help people understand what is going on in a much feared recipe, it will give them confidence to try...at least I hope so.
Barb says
Thanks very much for a good pie crust recipe. I have been looking for one. And I am going to definitely try this one.
Helen S. Fletcher says
Thanks for letting me know. I was concerned it was such a long post but I really wanted to explain everything to try to help with this much feared pastry basic.