
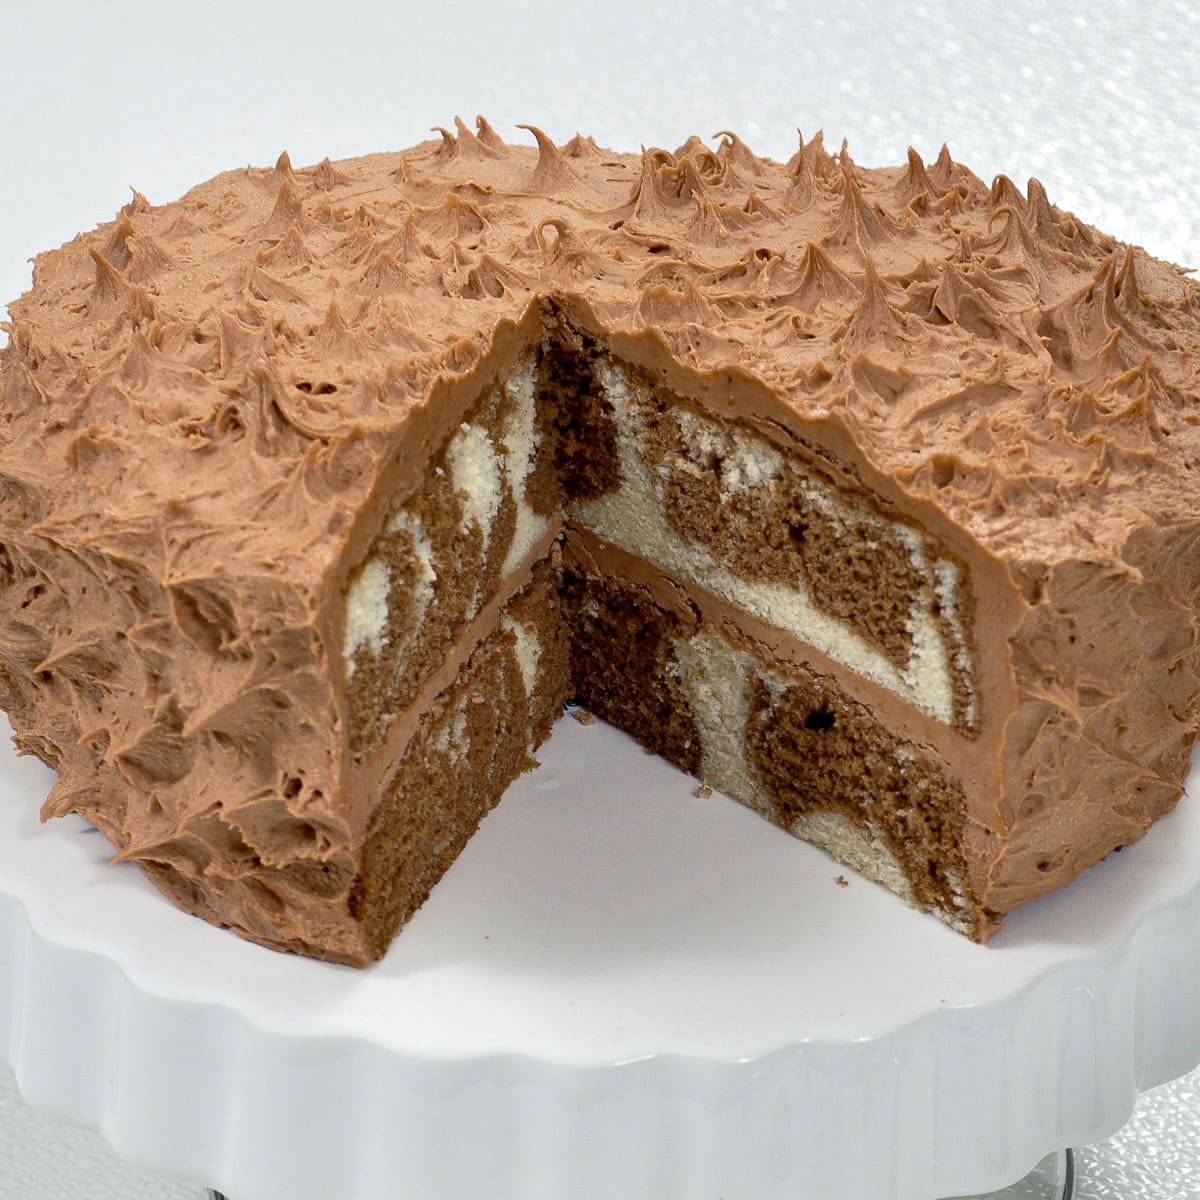
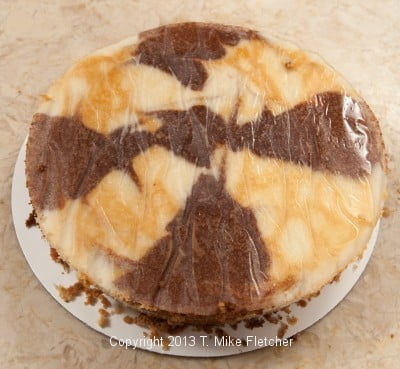
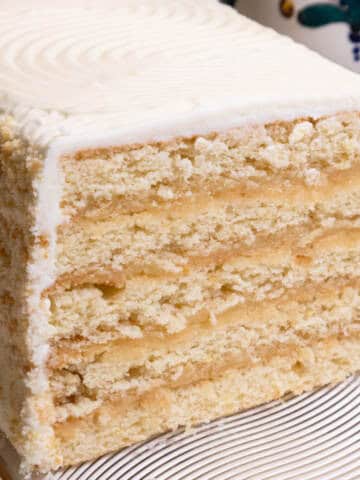
This Spirited Marble Cake is one of my favorite cakes that dates back to my boys childhood, some forty years ago. I've updated the cake to eliminate the need to beat the egg whites separately and fold them in. Marble cakes for some reason have gone by the wayside in recent years, but I love the way they look and the bite of chocolate and white cake together.
This is considered to be two step cake and I love the ease of putting it together. I remember the creme de cocoa being a rather racy ingredient at the time.
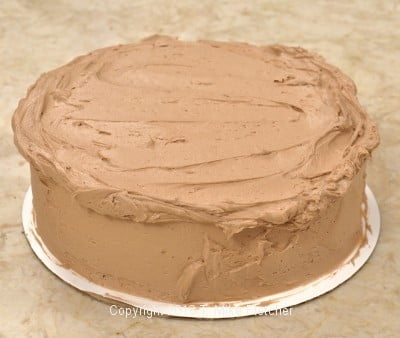
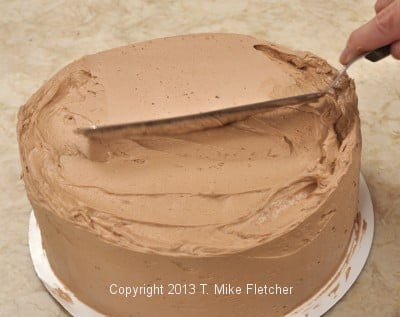
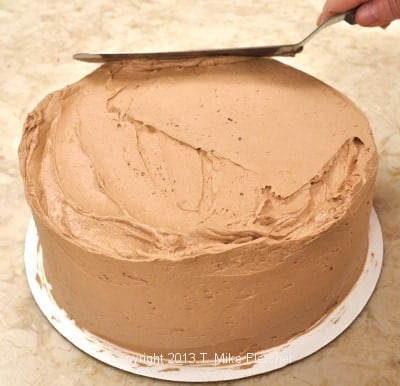
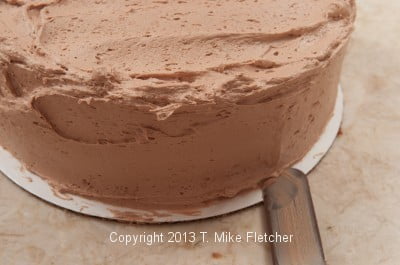
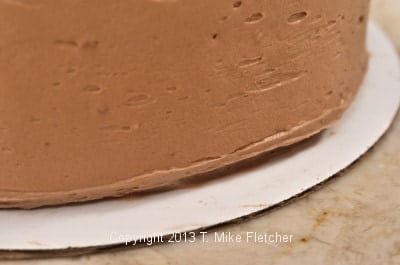
I call this finish a porcupine finish and it as easy as can be to execute but gives the cake a unique look. The only caveat concerns beating the frosting. It's a simple American buttercream but doesn't have the grittiness of some of the powdered sugar based frostings. Just be careful not to over-beat it. If it is too aerated, it won't spread smoothly or pull out when you go to finish it. You will know as soon as you start to finish the cake. Just put the unused portion back on the machine, add a bit of milk and beat it again on medium. That should solve the problem.
This cake does not call for undercoating as some do, especially if you freeze the layers before putting the cake together. They are much easier to fill and finish.
Spirited Marble Cake
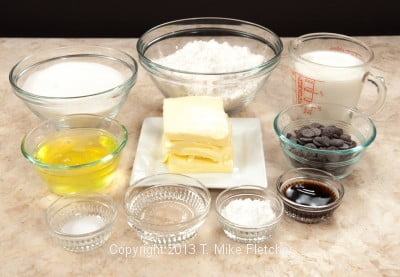
4 large egg whites (135 grams or 4 ¾ ounces)
1 cup milk
2 tablespoons vanilla
3 cups cake flour (300 grams or 10 ½ ounces)
1 ½ cups sugar (300 grams or 10 ½ ounces)
1 tablespoon + 1 teaspoon baking powder
¼ teaspoon salt
12 tablespoons unsalted butter, softened (170 grams or 6 ounces)
3 ounces semisweet chocolate, melted (85 grams)
¼ cup crème de cocoa
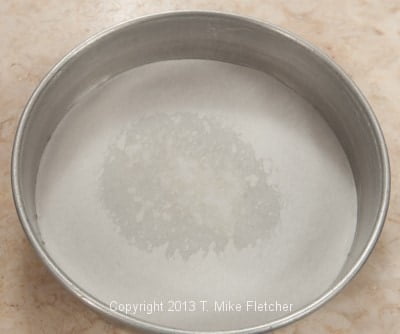
Preheat oven to 350 degrees. Line 2 nine inch round cake pans with parchment. Spray center only of each parchment. See Cake Pan Prep.
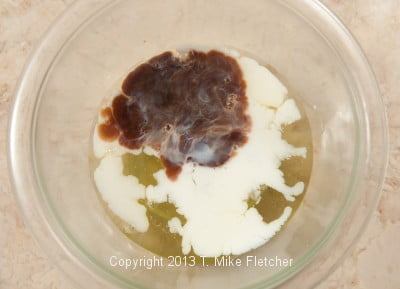
In a bowl, lightly combine the egg whites, ¼ cup milk and vanilla.
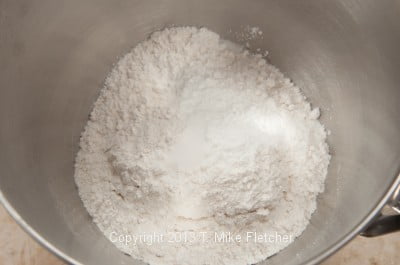
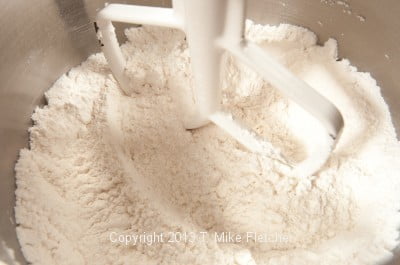
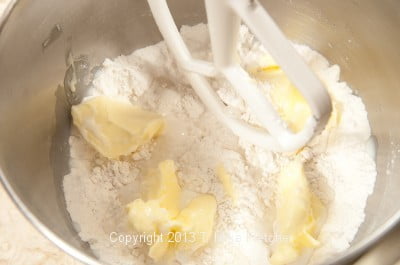
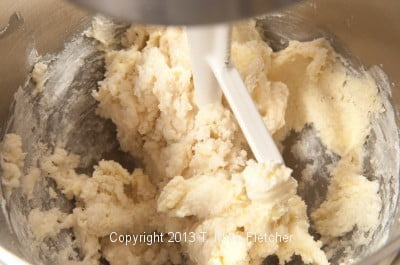
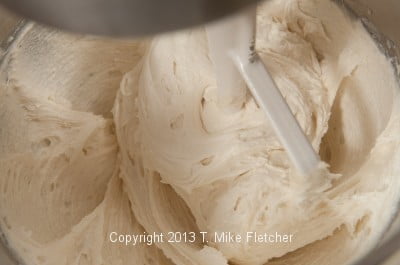
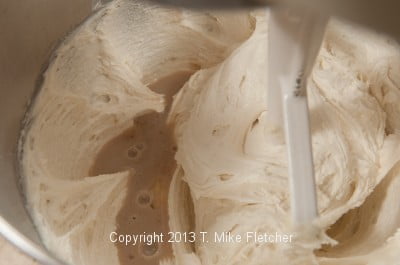
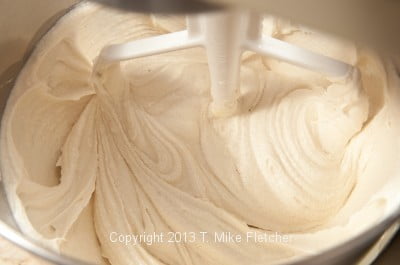
In a large mixing bowl combine the dry ingredients and mix on low speed for 30 seconds to blend. Add the butter and remaining ¾ cup milk. Mix on low speed until the dry ingredients are moistened. Increase to medium and beat for 1 ½ minutes. Gradually add the egg mixture in thirds, beating about 30 seconds each time.
Batter weights 1110 grams or 38 ½ ounces.
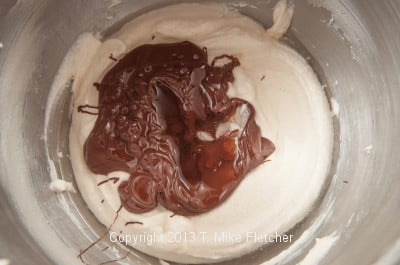
Divide the dough in half (555 grams or 19 ⅓ ounces). Into one half of the batter whisk in the chocolate and crème de cocoa until combined.
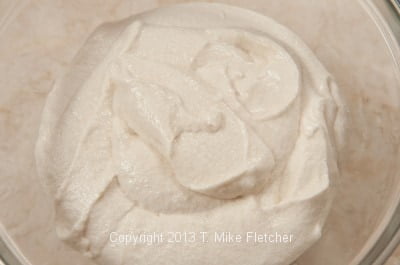
Leave the second half plain.
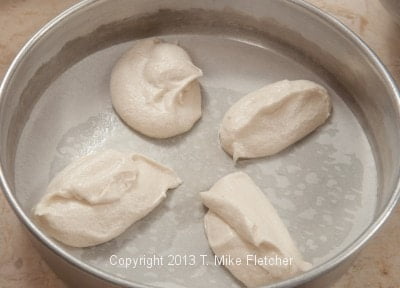
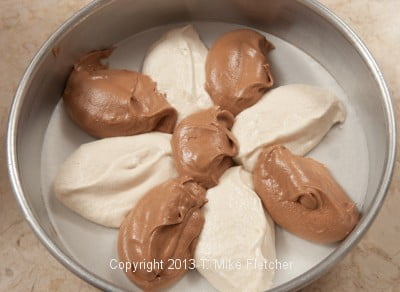
In each of the two pans, place 4 dollops of white batter in a north, south, east and west design in the pan. Place 4 dollops of dark batter between the white ones and one dollop and one in the center.
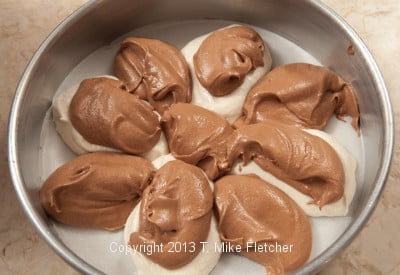
Place a second layer of dollops on top of the first. Place four chocolate dollops on top of the white dollops.
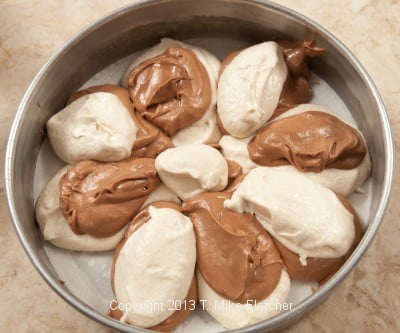
Place the remaining four dollops of plain batter on top of the chocolate dollops and one in the middle.


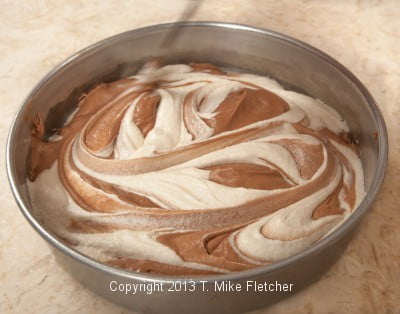
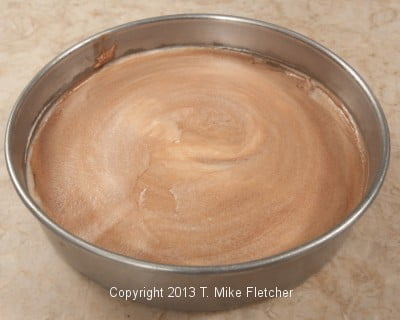
With a small spatula, carefully swirl the batter to mix them somewhat.Smooth the top carefully to maintain the differences. Repeat with the second layer. Bake for 18 to 20 minutes until the center springs back. Cool completely.

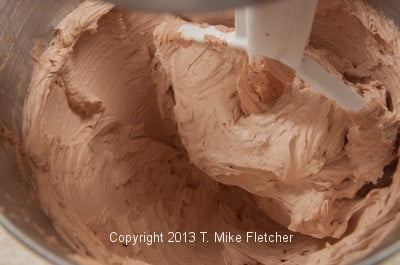
Spirited Chocolate Buttercream
2 sticks butter, softened (225 grams or 8 ounces)
3 ounces semisweet chocolate, melted (85 grams)
1 ½ tablespoons crème de cocoa
2 teaspoon vanilla
½ teaspoon salt
4 cups unsifted powdered sugar (500 grams or 17 ½ ounces)
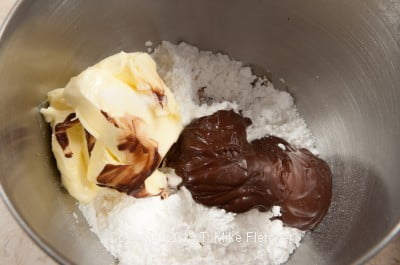
Place all in a mixing bowl and beat on low to combine. Raise mixer to high and beat until light and airy.


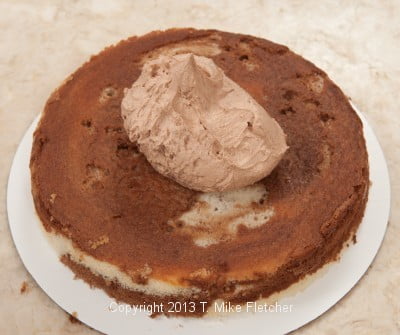
Place one layer of cake on a cake board or cake plate. Brush all crumbs from the side of the layer.Place about 1cup of frosting in the middle of the layer.
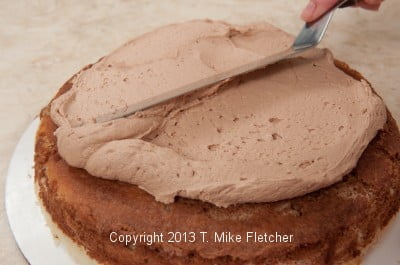
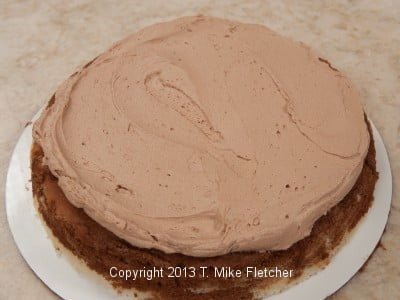
Spread to the edge of the layer.

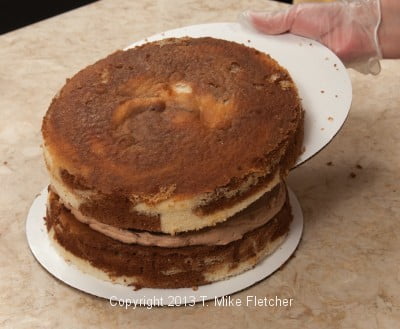
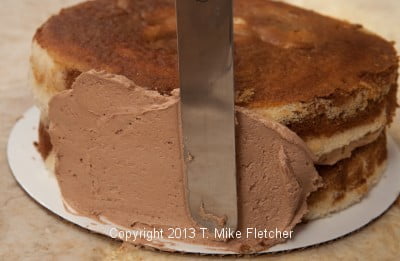
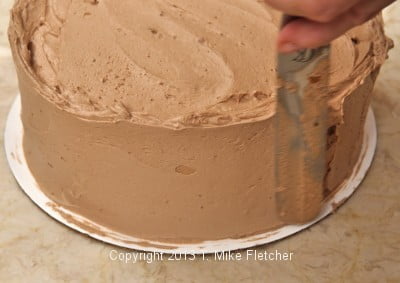
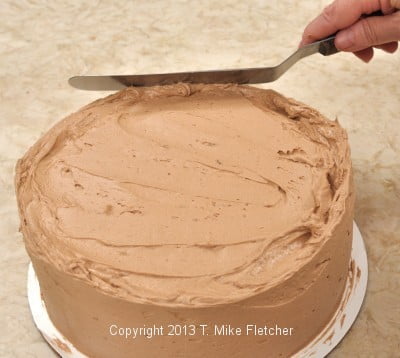
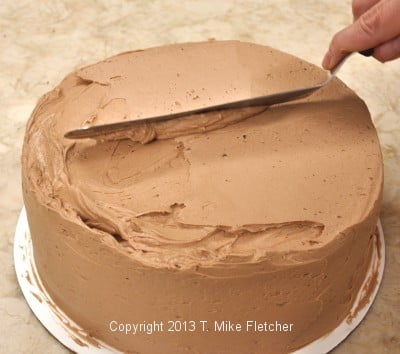
Release the second layer, remove the parchment. Brush crumbs off side.Using a cake board as an aid, place the second layer on top. Frost the side of the cake,then the top with the frosting overhanging the top. With a flat spatula, smooth the side of the cake, allowing the frosting to extend above the top of the cake. With an offset spatula, pull the frosting at the side edges into the middle, raising the spatula gradually as you approach the center.
Scrape the excess frosting off the spatula. Continue all the way around until the frosting on top is smooth.
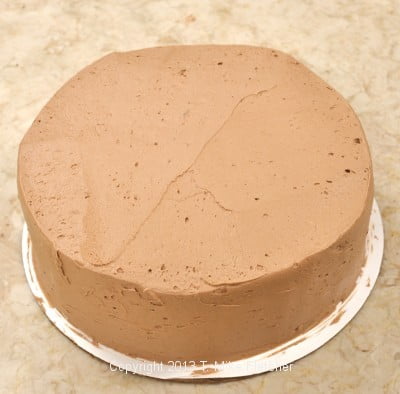
At this point, clean the bottom of the board. If you are going to move the cake off the cake board, channel the bottom so the cake can be lifted without disturbing the finish. With a flat spatula, simply remove the barest amount of frosting from the bottom where it touches the board.
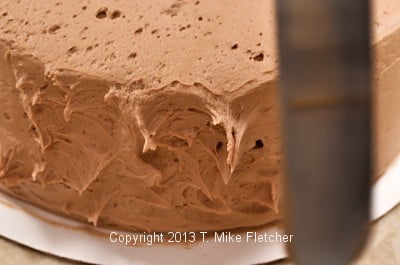
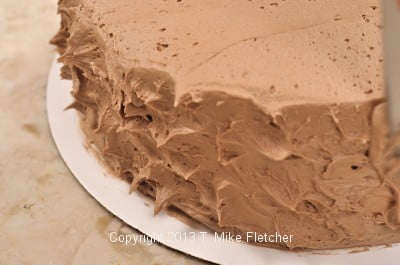
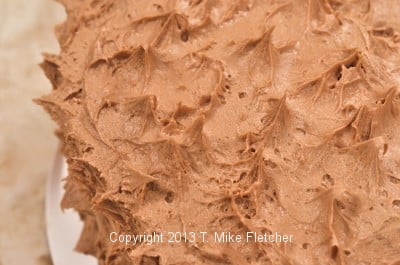
Place the flat side of the spatula on the frosting on the side of the cake. Pull the spatula straight out so the frosting peaks out. Continue around the side and then do the same thing on the top.
This cake can be stored at room temperature or frozen if desired.
Yield: 9" cake - 12 to 16 servings

Lisa Alexander Neri says
Great tutorial. One simple question, do you cool the cake layers completely in the pans?
Helen S Fletcher says
Hi Lisa, One of my favorite cakes. Cool them about 15 minutes and then release. Be sure to keep the metal spatula to the side of the pan if you prepared the pans as I suggest.
apricotsilk says
Another brilliant recipe..and great photo tutorial. Have done this with other colours....just for the fun of it!! Thank you
hfletcher says
Hi Janet - thanks for letting me know you are still looking in.
Ginny @ Vegan In The Freezer says
I really enjoy your posts and this one is amazing too. Thanks so much.
hfletcher says
You are so welcome Ginny. I love writing about pastry, baking and my business. Lots more coming.
Renee Marton says
Great photos-- they are really educational.
hfletcher says
Thanks Renee. I'll pass this along to my husband who is a professional photographer.