
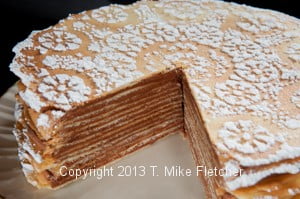
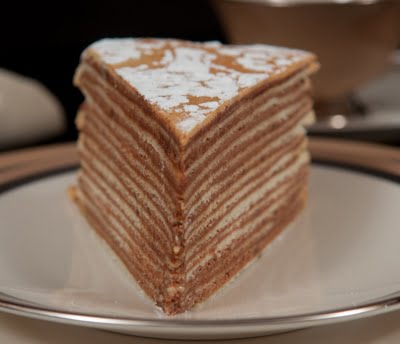
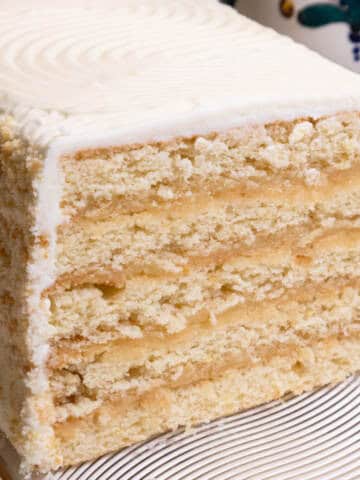
A variation of this magnificently layered Tuile Torte appeared in my first book, "The New Pastry Cook". It is actually easy to make, but it is time consuming. The fact that most of it can be done ahead makes it very possible. Fourteen layers of tuile and 13 layers of mousse are a show stopper anyway you look at it. There is another view of a slice of the torte in the slide show above on my banner.
A series of tulle layers made on the bottom of an upside down 9" round cake pan is the time consuming part. How fast it goes depends upon how many pans you have and how fast you can spread the batter.
When I first went into business, there was one caterer who loved this so much, he served it at every upscale party they had. When I had to make 20 of them, I pulled this from the list of available desserts. I heard about it on the day I closed. But 280 layers isn't fast, no matter how many pans you have or how fast you are.
When you first make this, don't be concerned if you come up with less than 14 layers of the tulle batter. My notes indicate I started with 12 a long time ago. If you find the batter too difficult to spread, use a little more. Just keep in mind you want as many layers as possible. As you assemble this, save the best looking layer for the top. If the layers break (they are fragile) when you assemble the cake, just put them back together on top of the mousse like a puzzle. It won't matter when it is cut.
If you are making the layers ahead, which you certainly can, try to make them on a day with no humidity and store them in an airtight container like a cookie tin. This will ensure they remain crisp.
The mousse is perfect for this and is based on one from Julia Child's "Mastering the Art of French Cooking". What makes it perfect is the fact that it has no cream. It is mounted on egg whites alone. The cream would cause the thin layers to become soggy, especially if making it the day before. This mousse is a bit stiffer than one with whipped cream, and I love it.
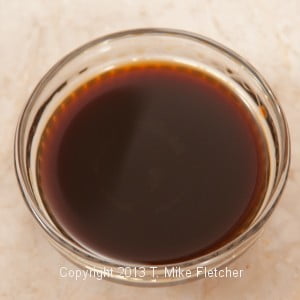
The raspberry sauce really adds another dimension to this torte. Because it is acidic, it cuts the richness of the torte, making it easy to finish the very last bite.
The entire torte can be assembled and refrigerated the day before serving. Just bring it out an hour or so ahead to get to room temperature. Besides, displaying it with a pitcher of sauce next to it will wow your guests - guaranteed.
As an added bonus, decorating the top is a snap. All you need is a doilie, a sifter, and some powdered sugar. I have a list of no talent finishes, and this is at the top. Just my style!! For even more baking tips, we want to share this post!
Torte Layers
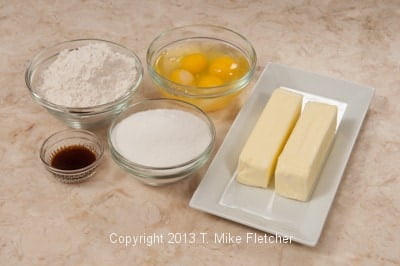
1 cup unsalted butter, room temperature (2 sticks)
1 cup sugar (200 grams or 7 ounces)
1 teaspoon vanilla
4 eggs
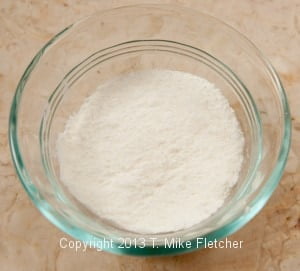
1 ¼ cups sifted all purpose flour (170 grams or 6 ounces)
Preheat the oven to 350 degrees.
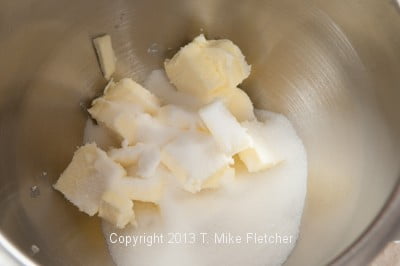
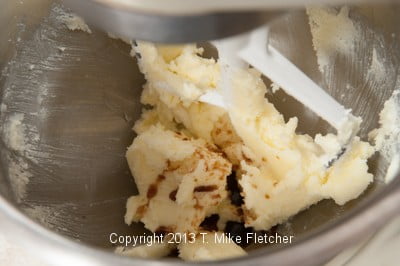
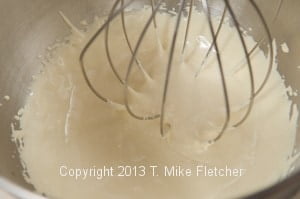
Cream butter and sugar until light and fluffy.
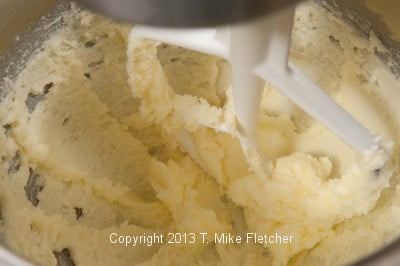
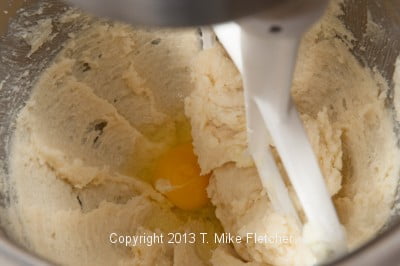
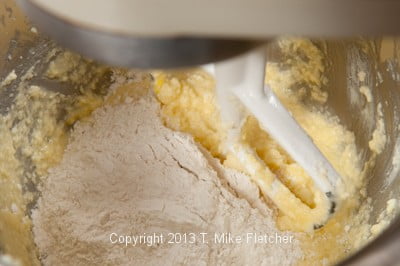
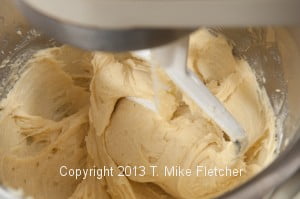
Add the vanilla.Add eggs one at a time, beating well after each addition. The mixture should be very light and fluffy. Mix in the flour just until smooth.
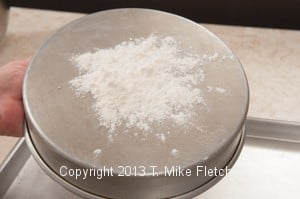
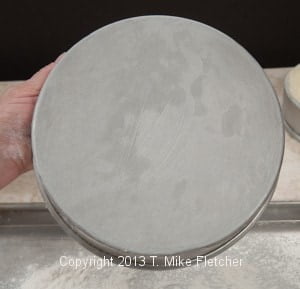
Turn a 9” layer cake pan upside down and grease and flour it. Tilt the pan to cover the entire surface with flour.
Tilt the pan to cover the entire bottom with flour.

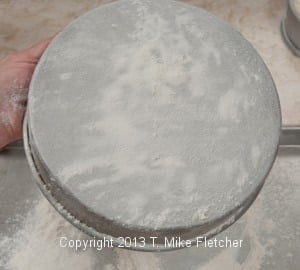
Knock off any excess flour.
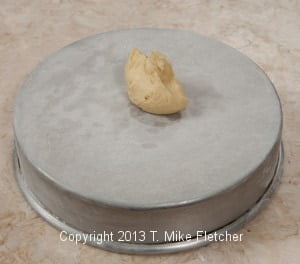
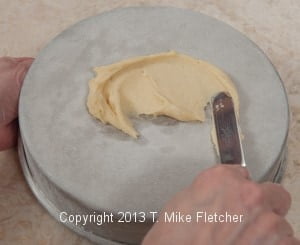
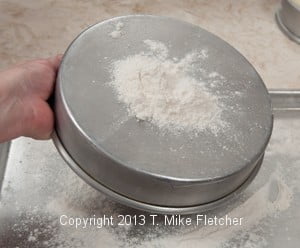
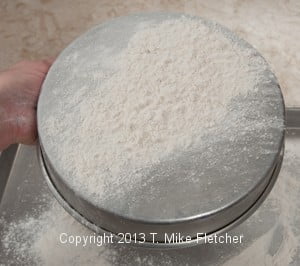
Spread ¼ cup of the batter to the edge of the pan with a small offset spatula.
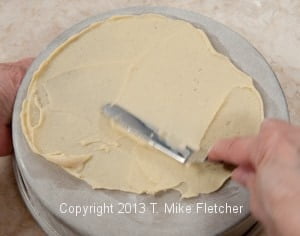
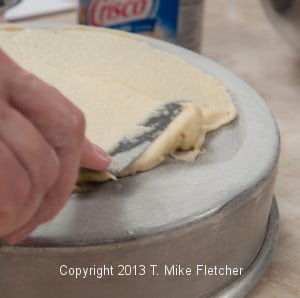

It will be very, very thin. The batter itself should not be more than ⅛” thick. Prepare as many pans as you have.
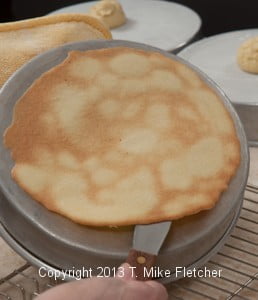
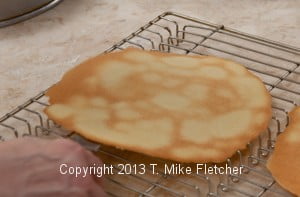
Bake for 8 to 10 minutes until the layers are golden brown. To remove from pans, let cool for about a minute. Run a flexible spatula under the layers and lift off to cool completely on a rack. Upon cooling, they will become very crisp.
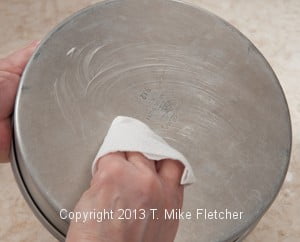
To reuse pans, simply wipe with a paper towel, cool completely, re-grease, and re-flour. If you are in a hurry to cool them, put the pans in the freezer after you have wiped them.
Continue making torte layers until all of the batter has been used. This yields 12 to 14 layers, depending upon the thickness of each layer. These can be made a week in advance by storing them in an airtight container. They may be made even further in advance by freezing. To defrost, spread on racks. To crisp if they are soft, heat the oven to 350 degrees. Put layers on cookie sheets and heat for 60 to 90 seconds. Remove to cooling racks.
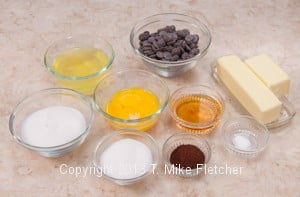
Chocolate Mousse Filling
6 ounces semisweet chocolate
¾ cup unsalted butter (170 grams, 6 ounces or 1 ½ sticks)
2 teaspoons instant coffee
¼ cup orange liqueur
4 eggs, separated
¾ cup sugar, divided
¼ teaspoon cream of tarter
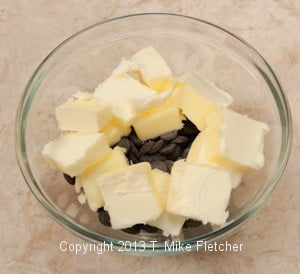
Melt the chocolate and butter in the top of a double boiler or in the microwave.
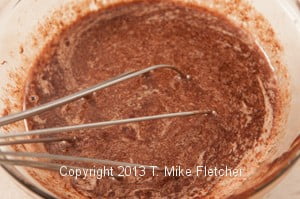

Combine coffee and orange liqueur.
Add to the chocolate mixture and keep it hot over the double boiler.
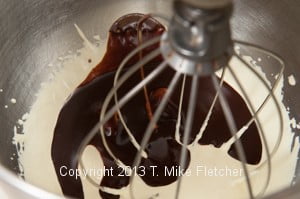
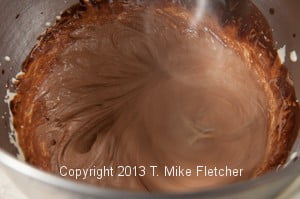
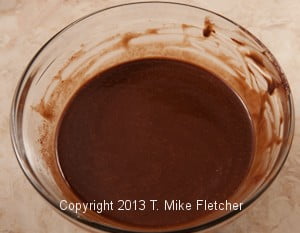
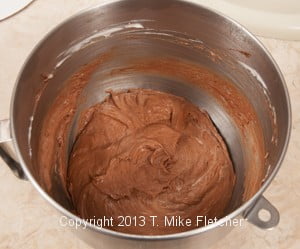
Beat egg yolks and ½ cup sugar until thick and pale yellow. This may take several minutes, at which time they will form a ribbon. Add the hot chocolate mixture, very slowly at first, to warm the egg yolks. Beat until the mixture is cool, about 5 minutes.
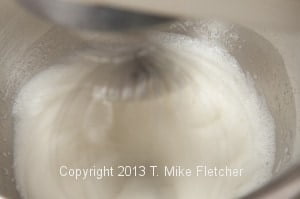
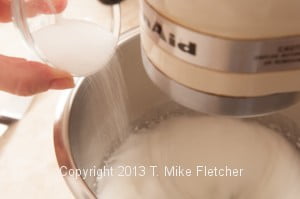
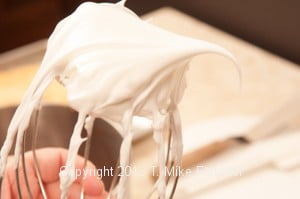
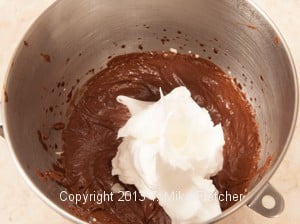
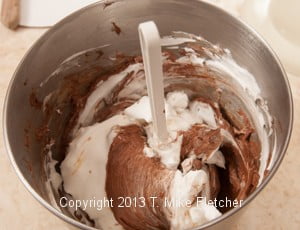
Beat egg whites with cream of tarter until soft peaks form. Add ¼ cup sugar gradually. Beat until stiff and glossy. Mix ¼ of the egg whites with the chocolate mixture to lighten it.
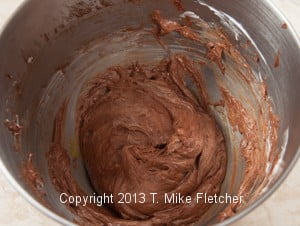
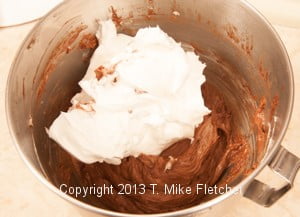
Fold in the rest.
Assembly
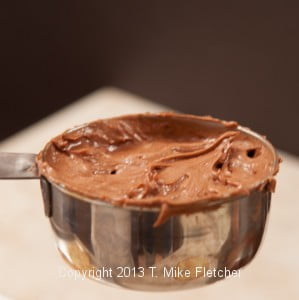
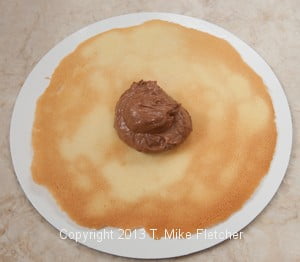
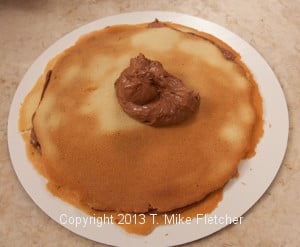
Select the best layer for the top. Set it aside. Spread scant ⅓ cup (55 grams or scant 2 ounces) of the mousse between the layers of the torte,
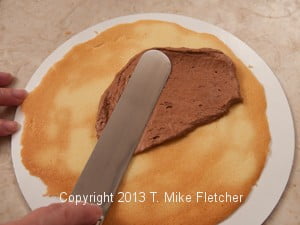
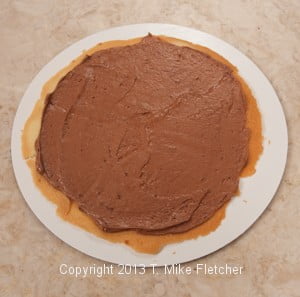
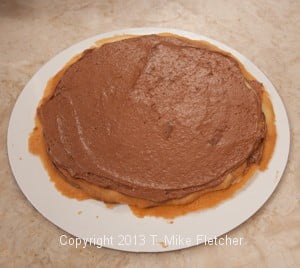
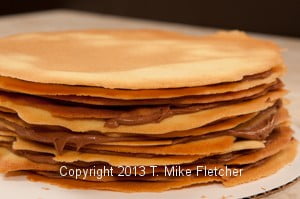
ending with a plain torte layer. If a layer breaks, simply put it back together on top of the mousse as you would a puzzle. Refrigerate for 3 or overnight.

Place a doilie on the top layer and sprinkle heavily with powdered sugar. Carefully remove the doilie, leaving the design intact. Cut into very thin wedges and allow it to come to room temperature. Serve with raspberry sauce below.
Raspberry Sauce
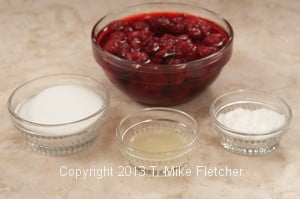
1 – 10 ounce package frozen, sweetened raspberries
¼ cup sugar
2 teaspoons lemon juice
1 tablespoon cornstarch
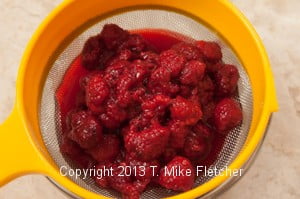
If you prefer the sauce without seeds, sieve the raspberries before combining with the remaining ingredients.
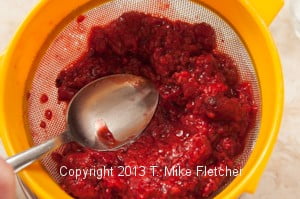
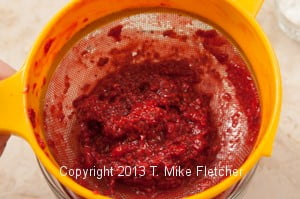
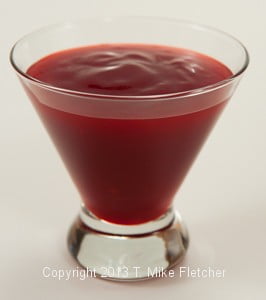
Puree raspberries in a food processor. Mix the cornstarch and the sugar. Combine all the ingredients in a small saucepan and bring to a boil. Cook for 1 minute. Remove from the heat and cool. This may be made days ahead and brought to room temperature before serving.
Serves: 12 to 14
27 Layer Tuile Torte
Ingredients
Torte Layers
- 1 cup unsalted butter, room temperature (2 sticks)
- 1 cup sugar (200 grams or 7 ounces)
- 1 teaspoon vanilla
- 4 eggs
- 1 ¼ cups sifted all purpose flour (170 grams or 6 ounces)
Chocolate Mousse Filling
- 6 ounces semisweet chocolate
- ¾ cup unsalted butter (170 grams, 6 ounces or 1 ½ sticks)
- 2 teaspoon instant coffee
- ¼ cup orange liqueur
- 4 eggs, seperated
- ¾ cup sugar, divided
- ¼ teaspoon cream of tartar
Raspberry Sauce
- 10 ounces frozen, sweetened raspberries
- ¼ cup sugar
- 2 teaspoon lemon juice
- 1 tablespoon cornstarch
Instructions
Torte Layers
- Preheat the oven to 350 degrees.
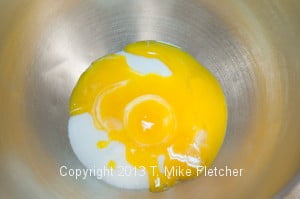
- Cream butter and sugar until light and fluffy. Butter and Sugar in bowl
- Add the vanilla. Add eggs one at a time, beating well after each addition. The mixture should be very light and fluffy. Mix in the flour just until smooth.
- Turn a 9” layer cake pan upside down and grease and flour it. Tilt the pan to cover the entire surface with flour.
- Tilt the pan to cover the entire bottom with flour. Knock off any excess flour.
- Spread ¼ cup of the batter to the edge of the pan with a small offset spatula. It will be very, very thin. The batter itself should be not more than ⅛” thick. Prepare as many pans as you have.
- Bake for 8 to 10 minutes until the layers are golden brown. To remove from pans, let cool for about a minute. Run a flexible spatula under the layers and lift off to cool completely on a rack. Upon cooling they will become very crisp.
- To reuse pans, simply wipe with a paper towel, cool completely, re-grease and re-flour. If you are in a hurry to cool them, put the pans in the freezer after you have wiped them.
- Continue making torte layers until all of the batter has been used. This yields 12 to 14 layers, depending upon the thickness of each layer. These can be made a week in advance by storing in an airtight container. They may be made even further in advance by freezing.
- To defrost, spread on racks. To crisp if they are soft, heat the oven to 350 degrees. Put layers on cookie sheets and heat for 60 to 90 seconds. Remove to cooling racks.
Chocolate Mousse Filling
- Melt the chocolate and butter in the top of a double boiler or in the microwave. Combine coffee and orange liqueur. Add to the chocolate mixture and keep hot over the double boiler.
- Beat egg yolks and ½ cup sugar until thick and pale yellow. This may take several minutes, at which time they will form a ribbon. Add hot chocolate mixture, very slowly at first, to warm the egg yolks. Beat until the mixture is cool, about 5 minutes.
- Beat egg whites with cream of tarter until soft peaks form. Add ¼ cup sugar gradually. Beat until stiff and glossy. Mix ¼ of the egg whites with the chocolate mixture to lighten it. Fold in the rest.
Assembly
- Select the best layer for the top. Set it aside. Spread scant ⅓ cup (55 grams or scant 2 ounces)of the mousse between the layers of the torte, ending with a plain torte layer. If a layer breaks, simply put it back together on top of the mousse as you would a puzzle. Refrigerate for 3 or overnight.
- Place a doilie on the top layer and sprinkle heavily with powdered sugar. Carefully remove the doilie, leaving the design in tact. Cut into very thin wedges and allow it to come to room temperature. Serve with raspberry sauce below.
Raspberry Sauce
- If you prefer the sauce without seeds, sieve the raspberries before combining with remaining ingredients.
- Purée raspberries in food processor. Mix the cornstarch and the sugar. Combine all the ingredients in a small saucepan and bring to a boil. Cook for 1 minutes. Remove from the heat and cool. This may be made days ahead and brought to room temperature before serving.Serves: 12 to 14
Nutrition

Gilly says
I made this torte for a birthday celebration recently, delighted to say that it was a huge success. I was reluctant to assemble it a day ahead of time for fear of it turning 'soggy', as it was I assembled it a few hours ahead of the event and all was fine, it also tasted wonderful the following day. The raspberry sauce proved to be a wonderful counterpart to the torte .... I'm already thinking of other flavors that might work the next time I make it,that and how to gather up enough pans in order to reduce the tuille baking time. It's so nice to follow a recipe and have the end product turn out exactly as described. Thanks for sharing, huge fan.
hfletcher says
Hi Gilly: You have made me so happy! I know the recipes I write are doable, but sometimes the sheer look or sound of something makes people skeptical. Having you validate this particular recipe is huge to me. Lemon curd would be a great filling. Use the raspberry sauce with it. But you would have to assemble this one at the last minute I think. Borrow pans from your friends and trade a piece of cake for them! Thanks for reading.
Kim says
Helen, that looks spectacular! I now know why you asked me if I had seen this post. It is involved but probably not difficult. Thanks for sharing. I'll look for a special occasion to give it a try.
hfletcher says
Happy to hear you are up for giving it a whirl. You won't be sorry.
Br. Paul Richards says
Helen, 27 Tuile Torte. I'm thinking of trying to transfer the spread mixture that is on the floured inverted pan onto a piece of parchment paper that will then bake on a sheet pan. So you see any problems with this? If it works I can use only one pan and make more than a few at the same time.
Helen S Fletcher says
Hello Brother Paul - You can't make too many at a time because they cool quickly and can shatter when you try to get them off. That is why I did 2 at a time. If you do this, lightly spray the circles to make sure they release well. It's worth a try. You can always go back to the way I did it if it isn't successful. This is a great dessert. I'm happy your going to make it. Let me know if it works - I can mention it in the article. Happy Holidays to you.
sorina says
very interesting your recipe!
many thanks for sharing....
I will try to made soon
hfletcher says
Thanks so much Sorina. The layers are a bit time consuming, but, if you take this in steps, it is really easy.