
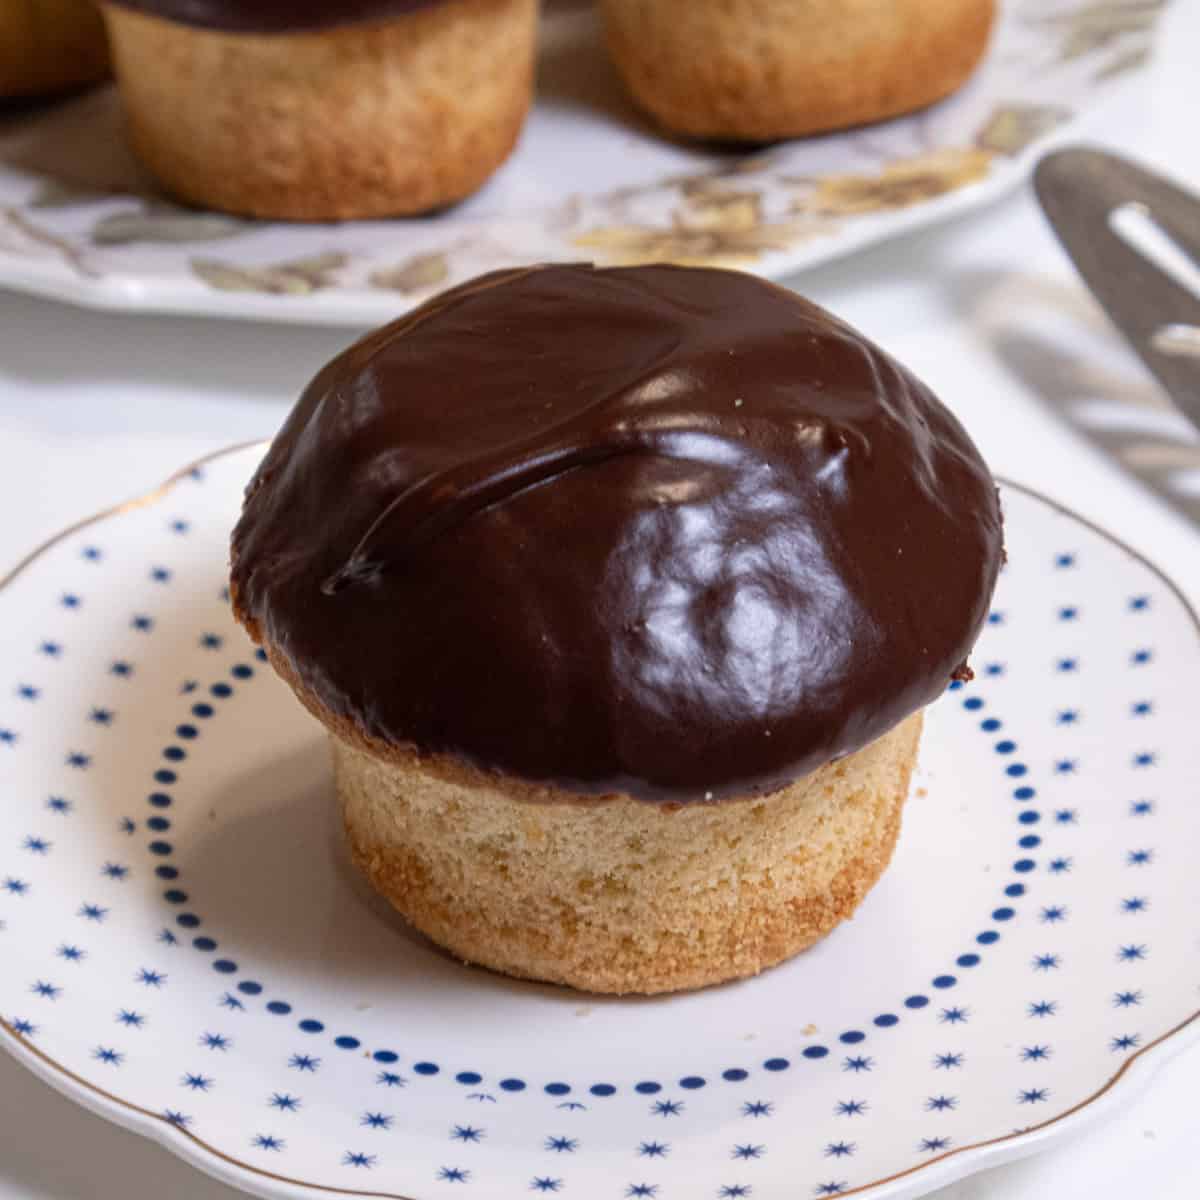
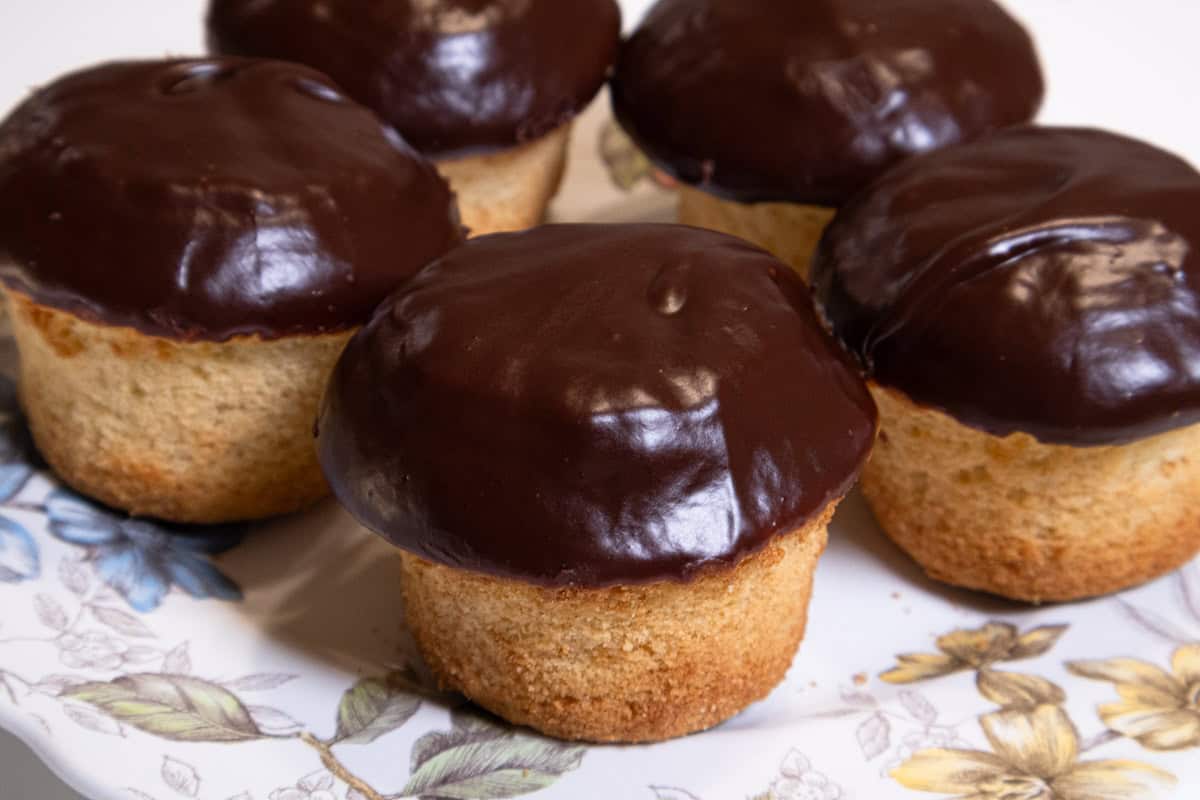
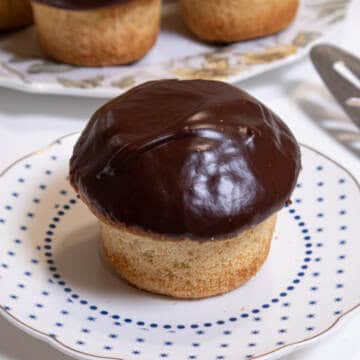
These Boston Cream Cupcakes with a slight twist are the perfect miniature replica of that wonderful Boston Cream Pie (which is actually a cake)! Just imagine a tender yellow cake, stuffed with a creamy homemade pastry cream (the instant pudding just doesn't do the job) and finished with a hot honey ganache or leave the hot out if that's your preference. And yes, I have a pastry cream that freezes - the same one we used at the bakery.
Don't be put off by the number of collages. This goes fast and every step can be made ahead of time.
Stressed for time? Aren't we all? Every part of these miniature wonders can be made ahead of time and assembled when needed. How much easier can this get? I know they don't get better.
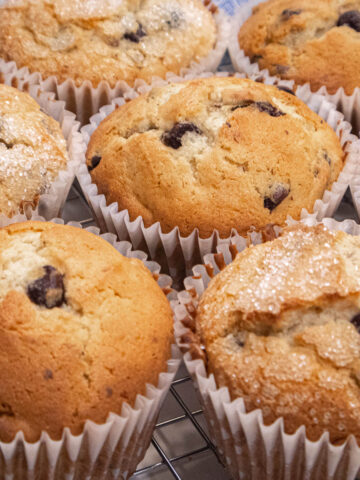
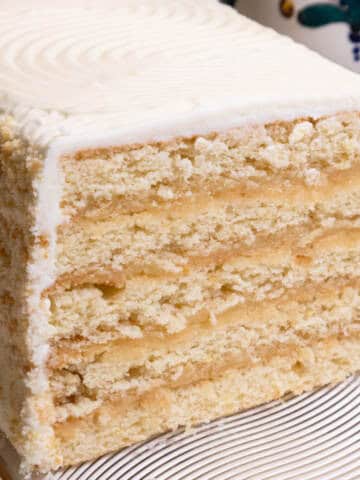
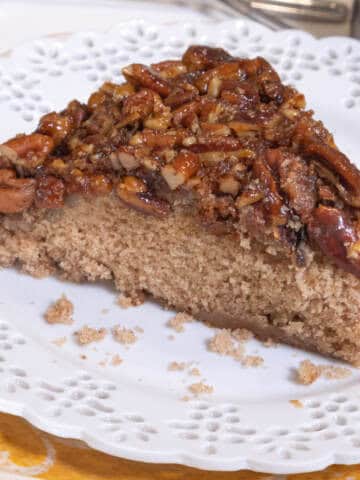
A few more filled cupcakes include the Strawberry Surprise Cupcakes, Banana Split Cupcakes and the Double Chocolate Truffled Muffins which are much more of a cupcake!
Jump to:
These Boston Cream Cupcakes are truly Amazing!
- Each component part can be made ahead of time and frozen.
- Yes, the pastry cream can be frozen because it doesn't use cornstarch which loses it ability to thicken when thawed.
- While I prefer jumbo size cupcakes, the regular size works just as well and you get twice as many.
- Each of the parts takes 20 to 25 minutes to make (not counting the baking time) so they can be fit in whenever.
- Last but not least - these are worth any amount of time - they are that good.
Recipe Ingredients
Pastry Cream (Creme Patissiere)
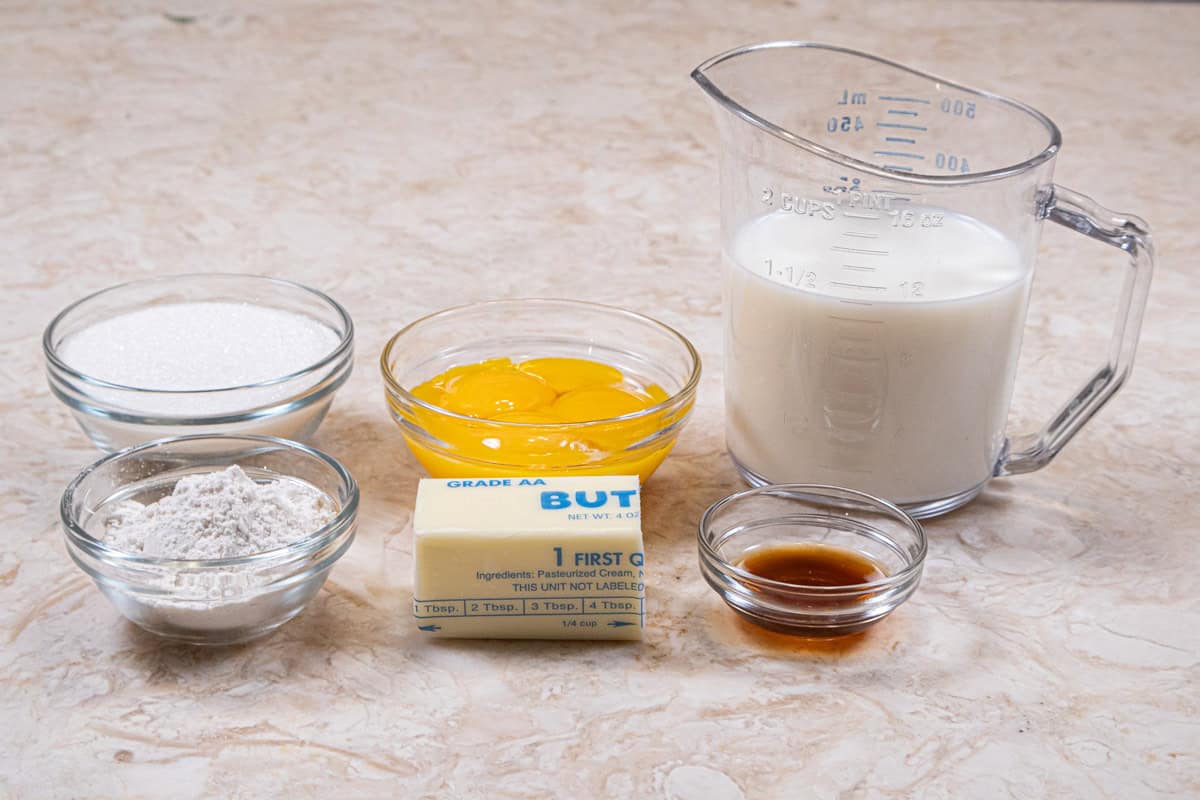
FRONT ROW: All-purpose flour, unsalted butter and vanilla extract
BACK ROW: Granulated sugar, egg yolks and milk
Yellow Buttermilk Cake
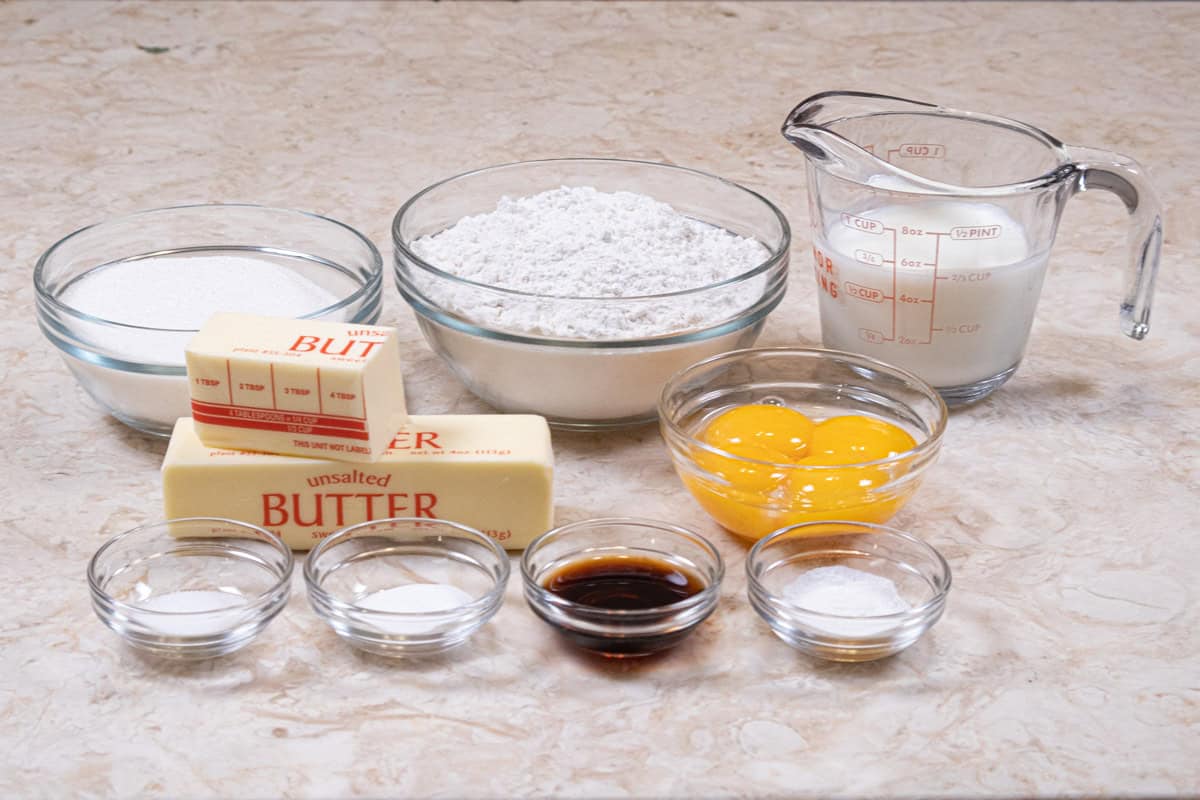
FRONT ROW: Salt, baking soda, vanilla extract, baking powder
MIDDLE ROW: Unsalted butter, egg yolks
BACK ROW: Granulated sugar, cake flour, buttermilk
Hot Honey Ganache
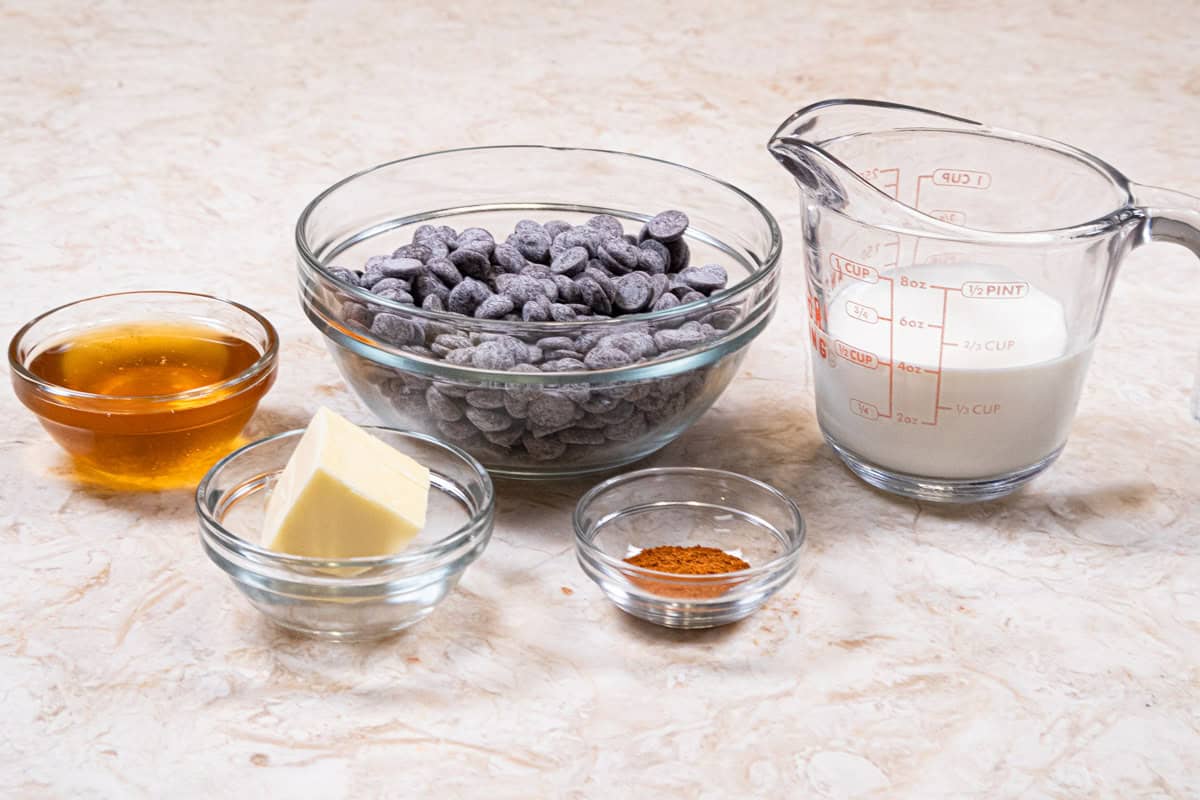
FRONT ROW: Unsalted butter, cayenne pepper
BACK ROW: Honey, semisweet chocolate, heavy cream
Key Ingredients
- Egg yolks are used not only for taste but also for their ability to thicken.
- The butter must be very soft (about 74° to 76°F but not runny for this recipee to work.
- All-purpose flour is used as an additional thickening agent. Cornstarch breaks down if frozen and can become watery if held in the fridge.
- Buttermilk adds tenderness to the cake and helps keep it moist.
- Cake flour with its lower protein count, keeps the cake tender and light.
- Both baking soda and baking powder are used as leavening agents. The baking soda neutralizes the acid in the buttermilk aiding the baking powder in helping the cake to rise.
- The vanilla - here I use pure Tahitian Vanilla for its unmatched taste. It can be found in various places on the web. For the bakery, I bought it from Olive Nation as they had the best price. See below for more information on this vanilla.
- My chocolate of choice has always been Callebaut #811 Chocolate Callets but I have switched to Trader Joe's pound plus. It is a superb semisweet chocolate made in Belgium which is known for their chocolates. The price difference per pound is huge due in large part to the tariffs. Pictured above is the Callebaut.
Be sure to see the recipe card below for the full ingredients and instructions.
Why Tahitian Vanilla?
I am a huge fan of tahitian vanilla - but only for certain recipes. While Madagascar Bourbon vanilla is the most used pure vanilla, tahitian vanilla is preferred by pastry chefs for its floral, fruity, sweet etheral and delicate flavor.
As such it is best used when vanilla is the upfront flavor such as pastry cream, butter cookies, whipped cream and creme brulees. While many say it is best used for cold desserts, I used it at the bakery for all of those listed above. There was a noticeable difference in taste when other vanillas were used and despite its high cost, we always went back to it.
It can be found in various places on the web. For the bakery, I bought it from Olive Nation as they had the best price. Neilson Massey is fine but they are always more expensive in all of their products. This is one of the most expensive and sought-after types of vanilla, due to their unique flavor profile and rarity. It is also produced in smaller batches.
About This Pastry Cream
This is a variation of my normal pastry cream that is set with flour and gelatin. This insured that the pastry cream would hold an edge if piped and could sit for a bit at room temperature when catered without softening and druping. This combination also ensures that the pastry cream can be frozen and thawed without breaking down as cornstarch does.
For this pastry cream, I wanted something softer to fill the cupcakes so I omitted the gelatin and added butter. This pastry cream can also be frozen.
Most pastry cream recipes call for straining the pastry cream after it is cooked. It is far easier to strain it before cooking it.
Step by Step Instructions
Pastry Cream
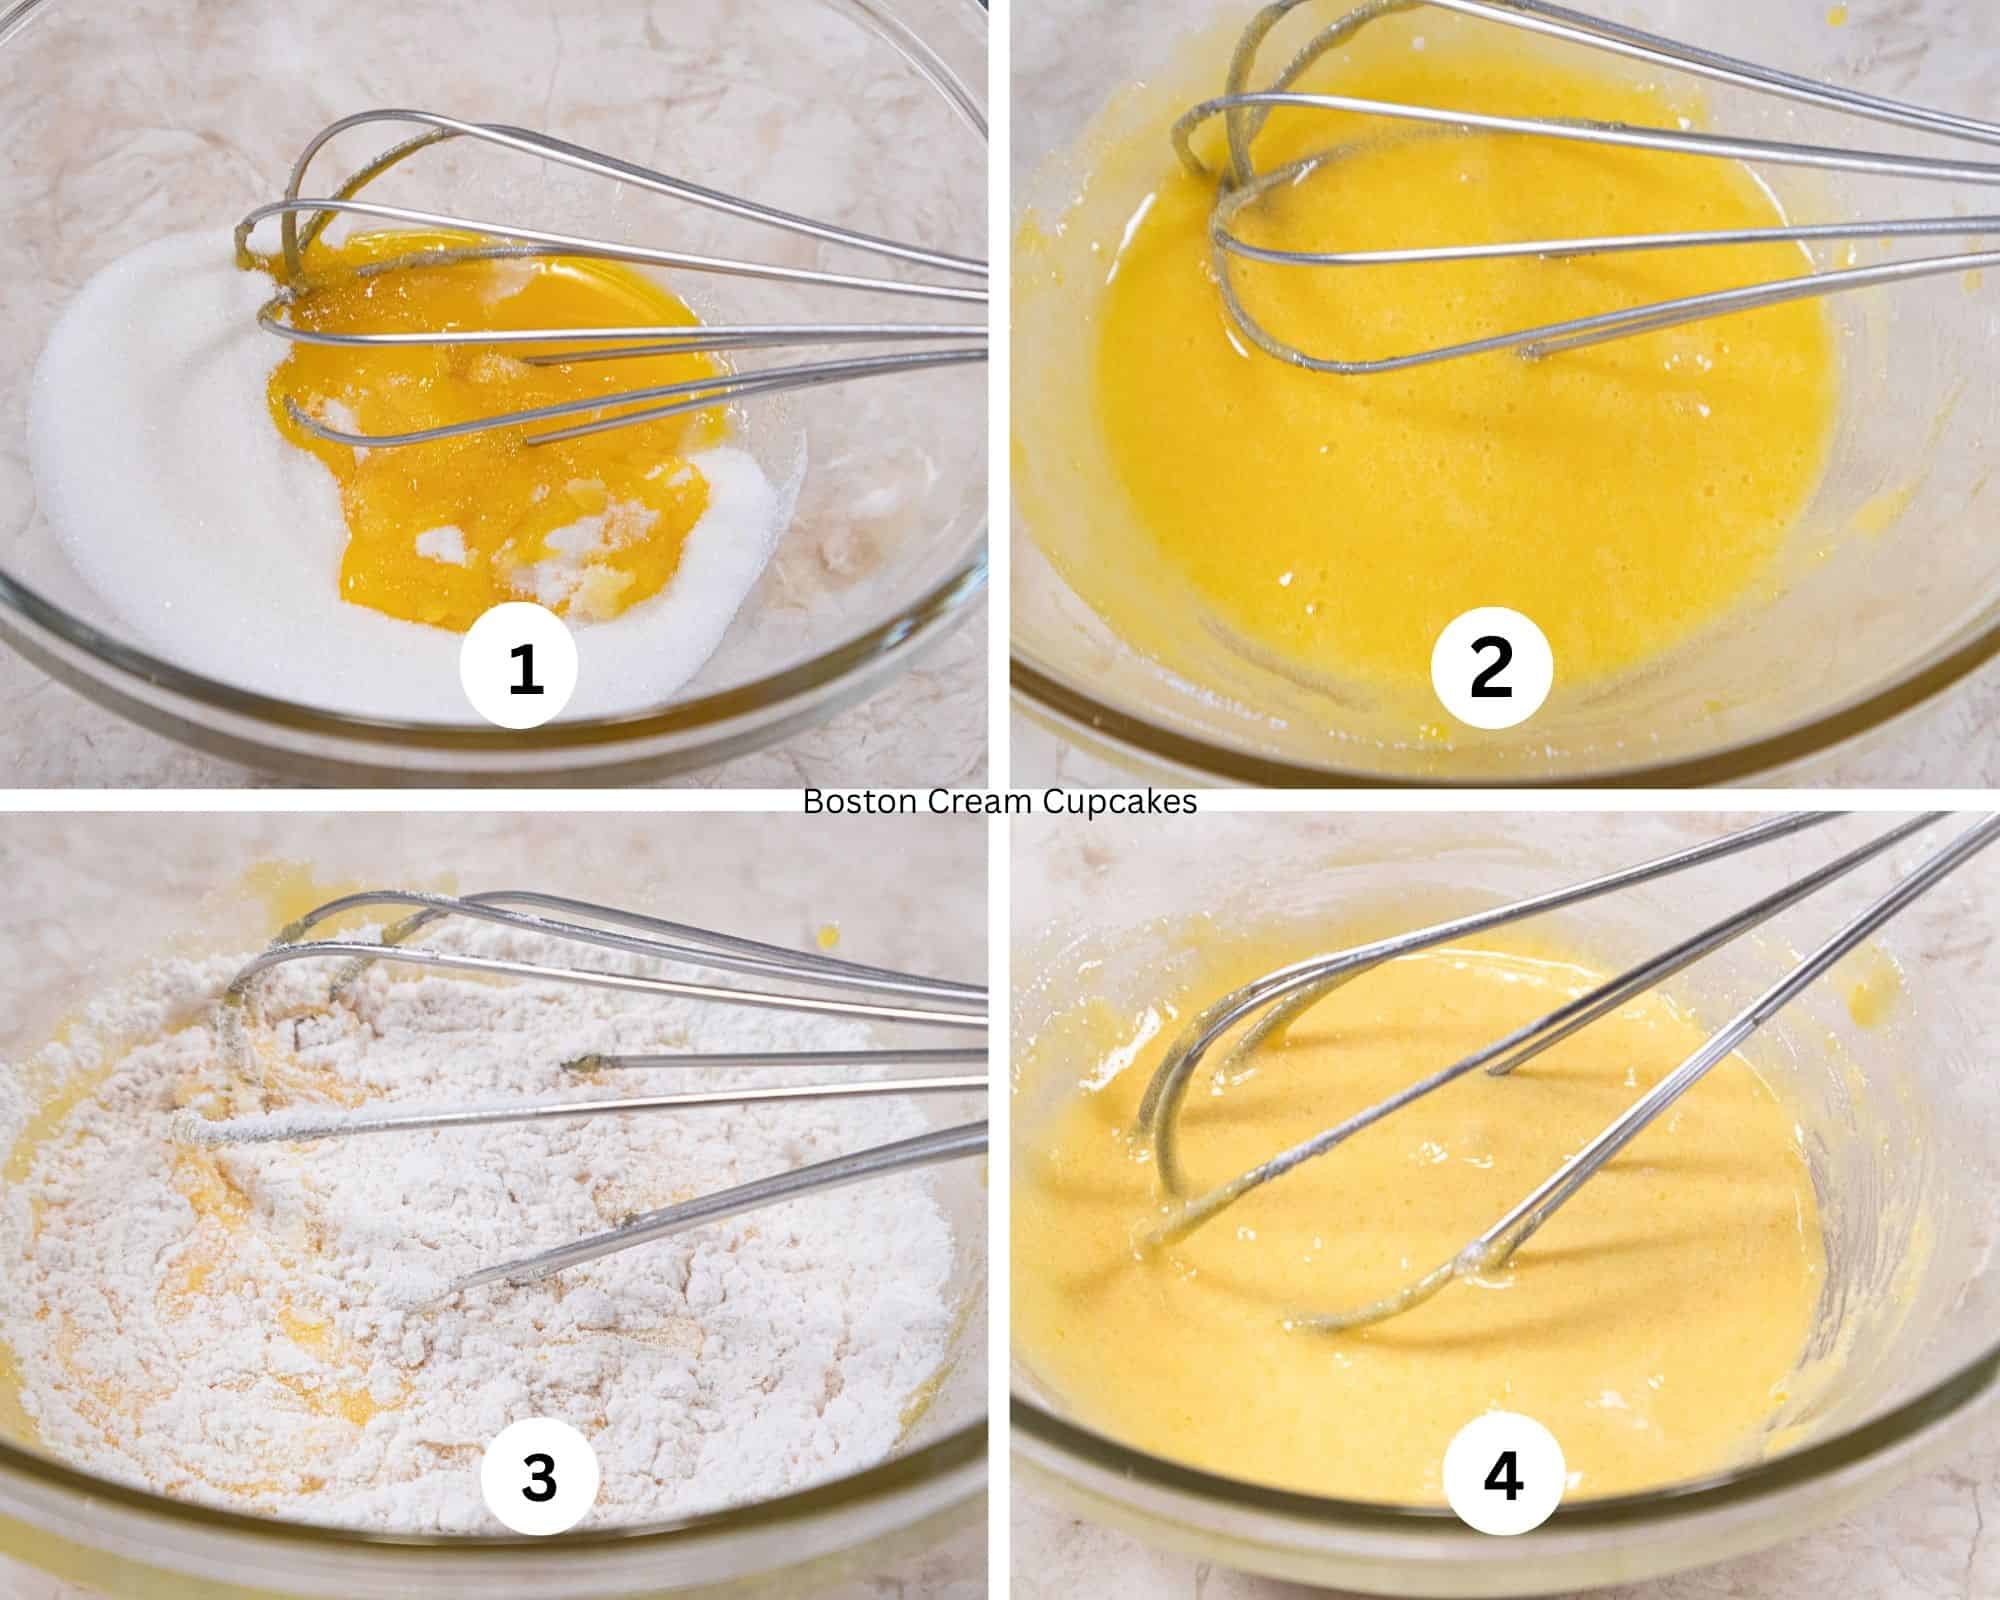
Step 1. Place the egg yolks and sugar in a bowl. Step 2. Whisk together until combined. Step 3. Add the flour. Step 4. Whisk together.
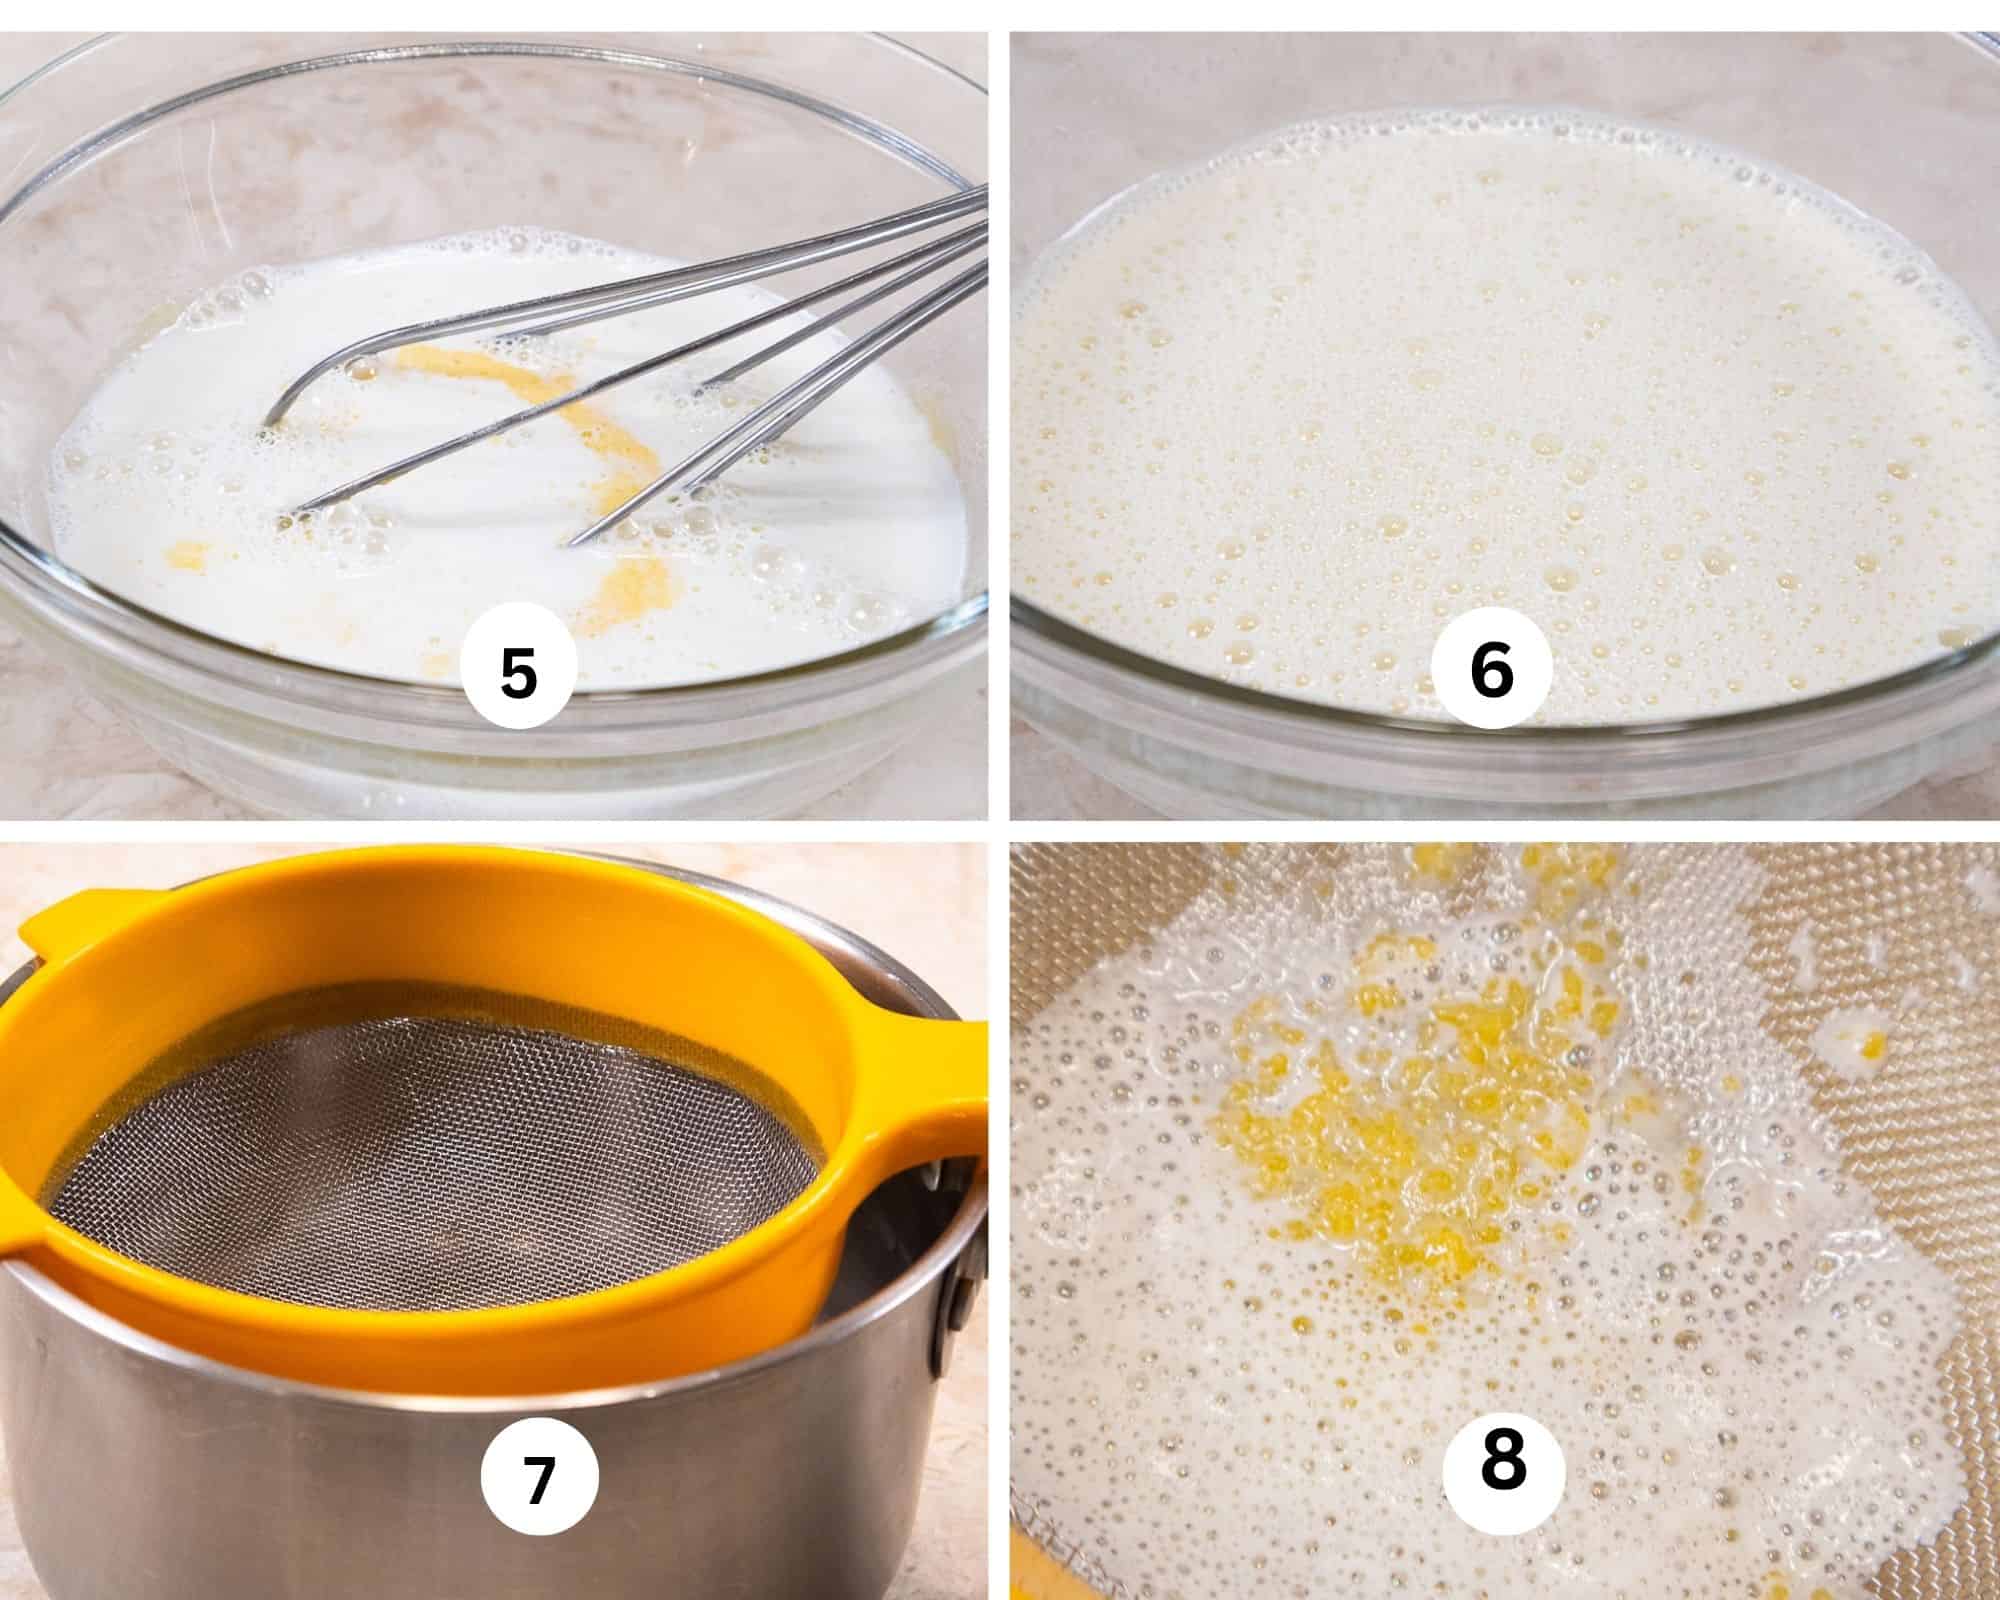
Step 5. Add the hot milk. Step 6. Whisk the ingredients so they are completely combined. Step 7. Place a strainer over the pot this will be cooked in. Step 8. Pour the mixture through the strainer to catch all the little lumps that would ruin your pastry cream.
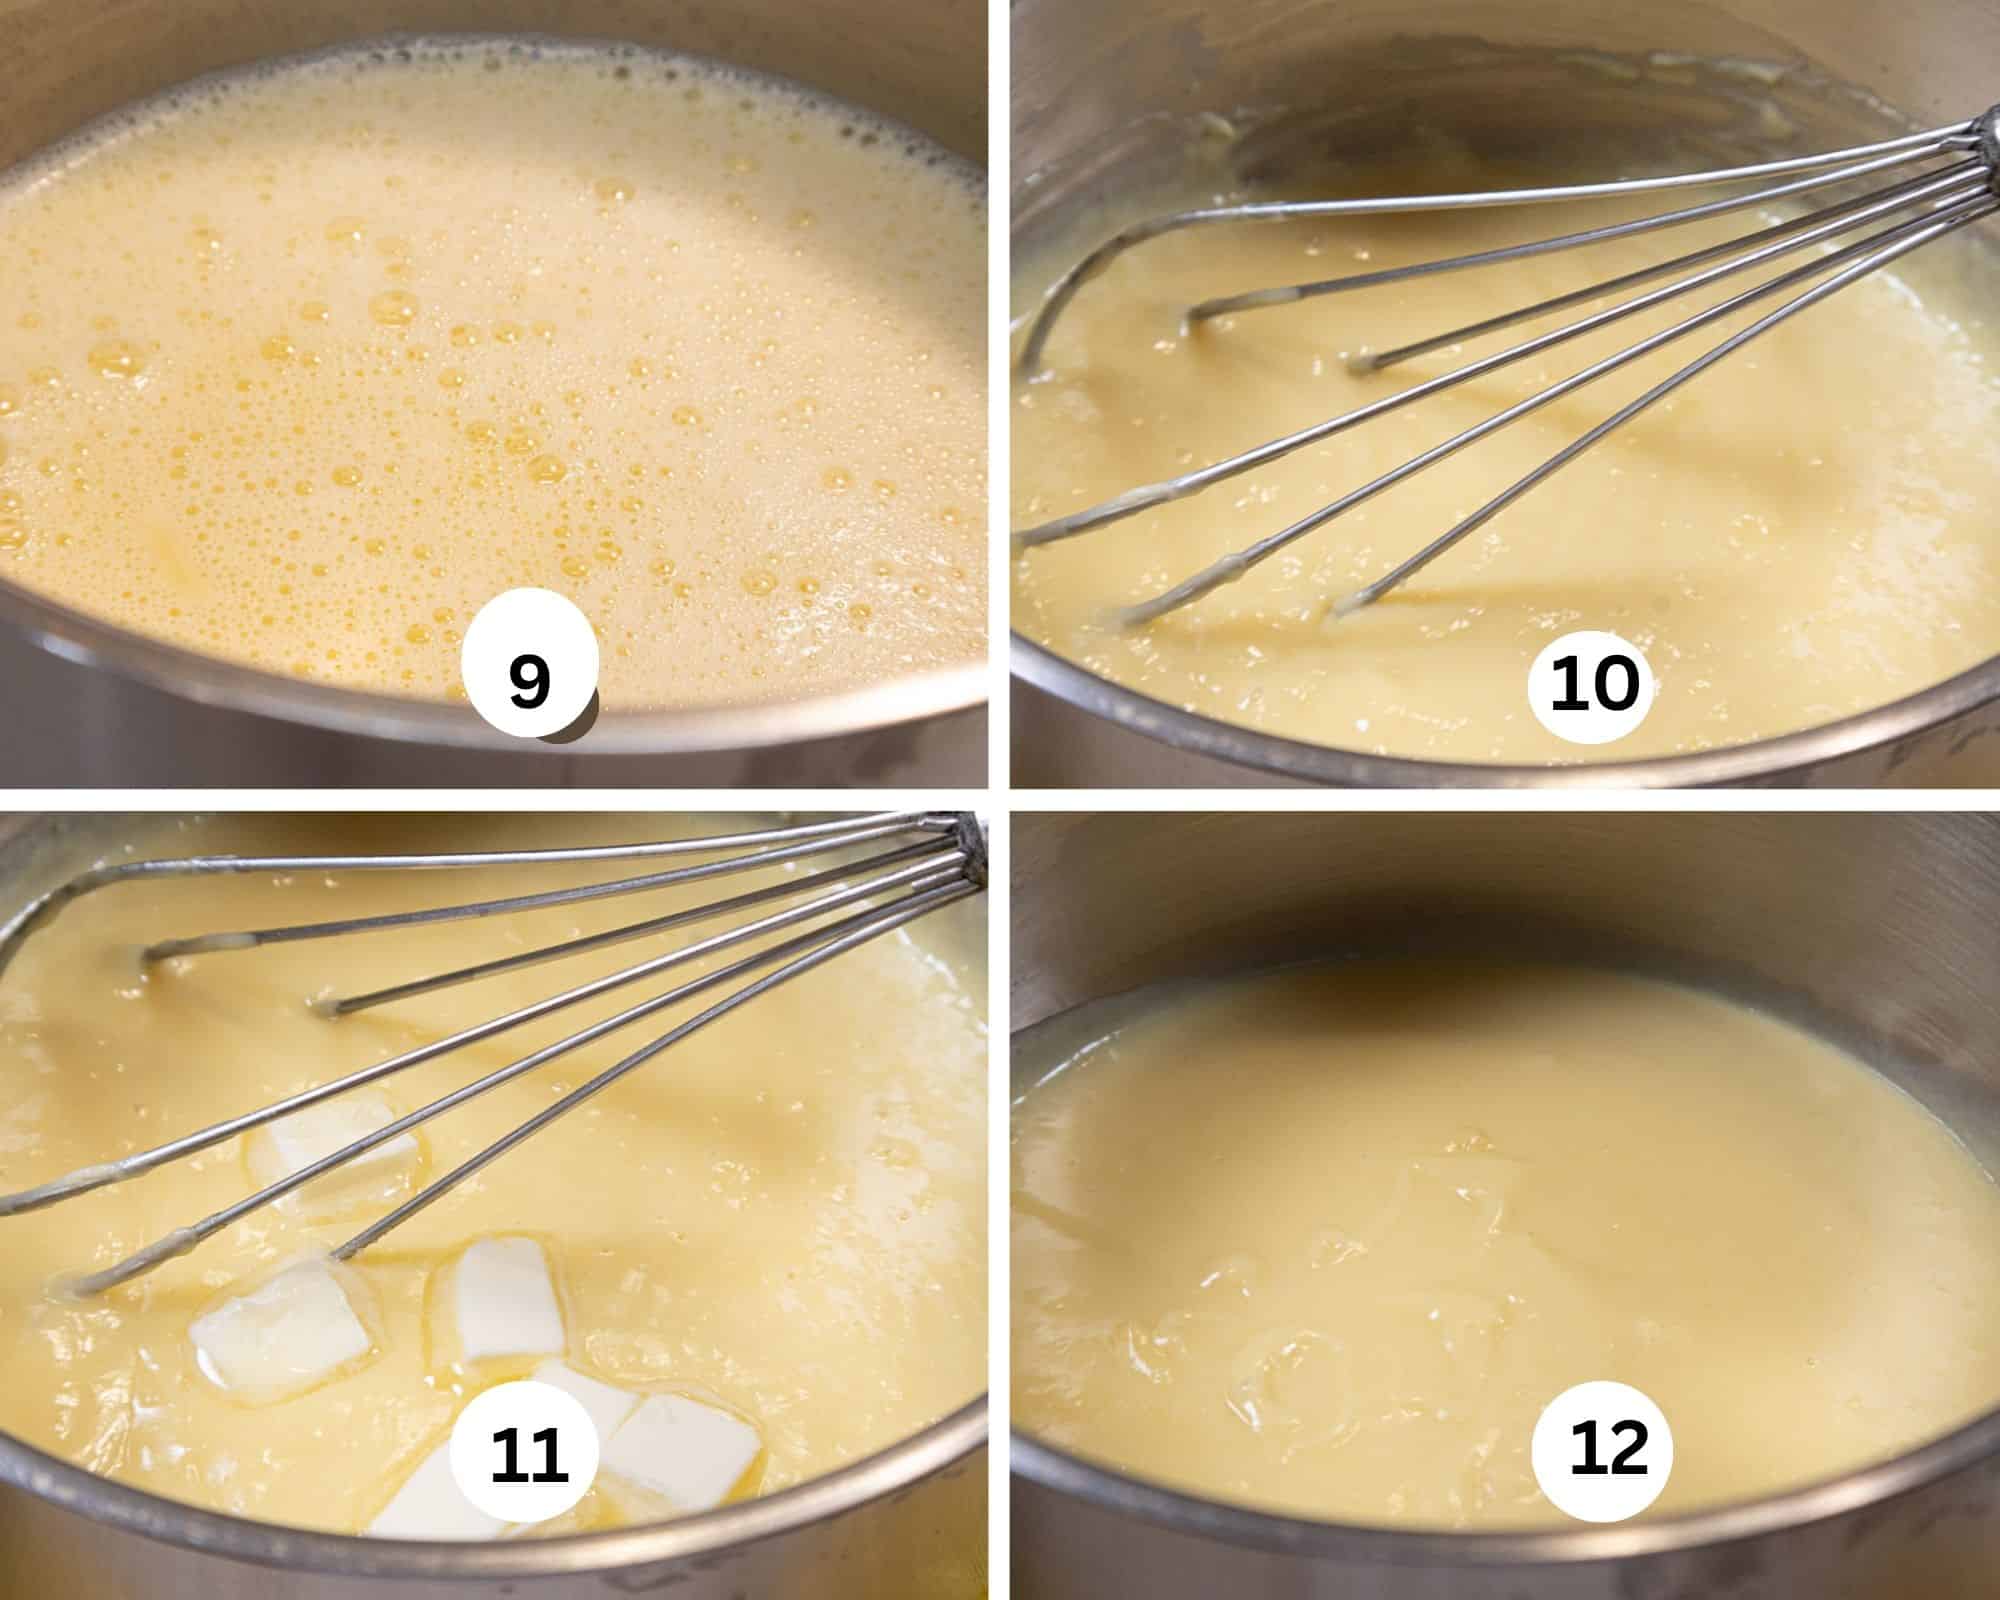
Step 9. The strained pastry cream in a saucepan. Step 10. Stirring constantly, bring the pastry cream to a boil and boil for 1 minute to thicken it. Step 11. Remove the pan from the heat and add the butter. Step 12. Whisk in the butter, pour the cream into a storage container, cover the top directly with plastic wrap and let it cool to near room temperature. Refrigerate up to 3 days or freeze for several months. Thaw in the cooler to use.
Cake
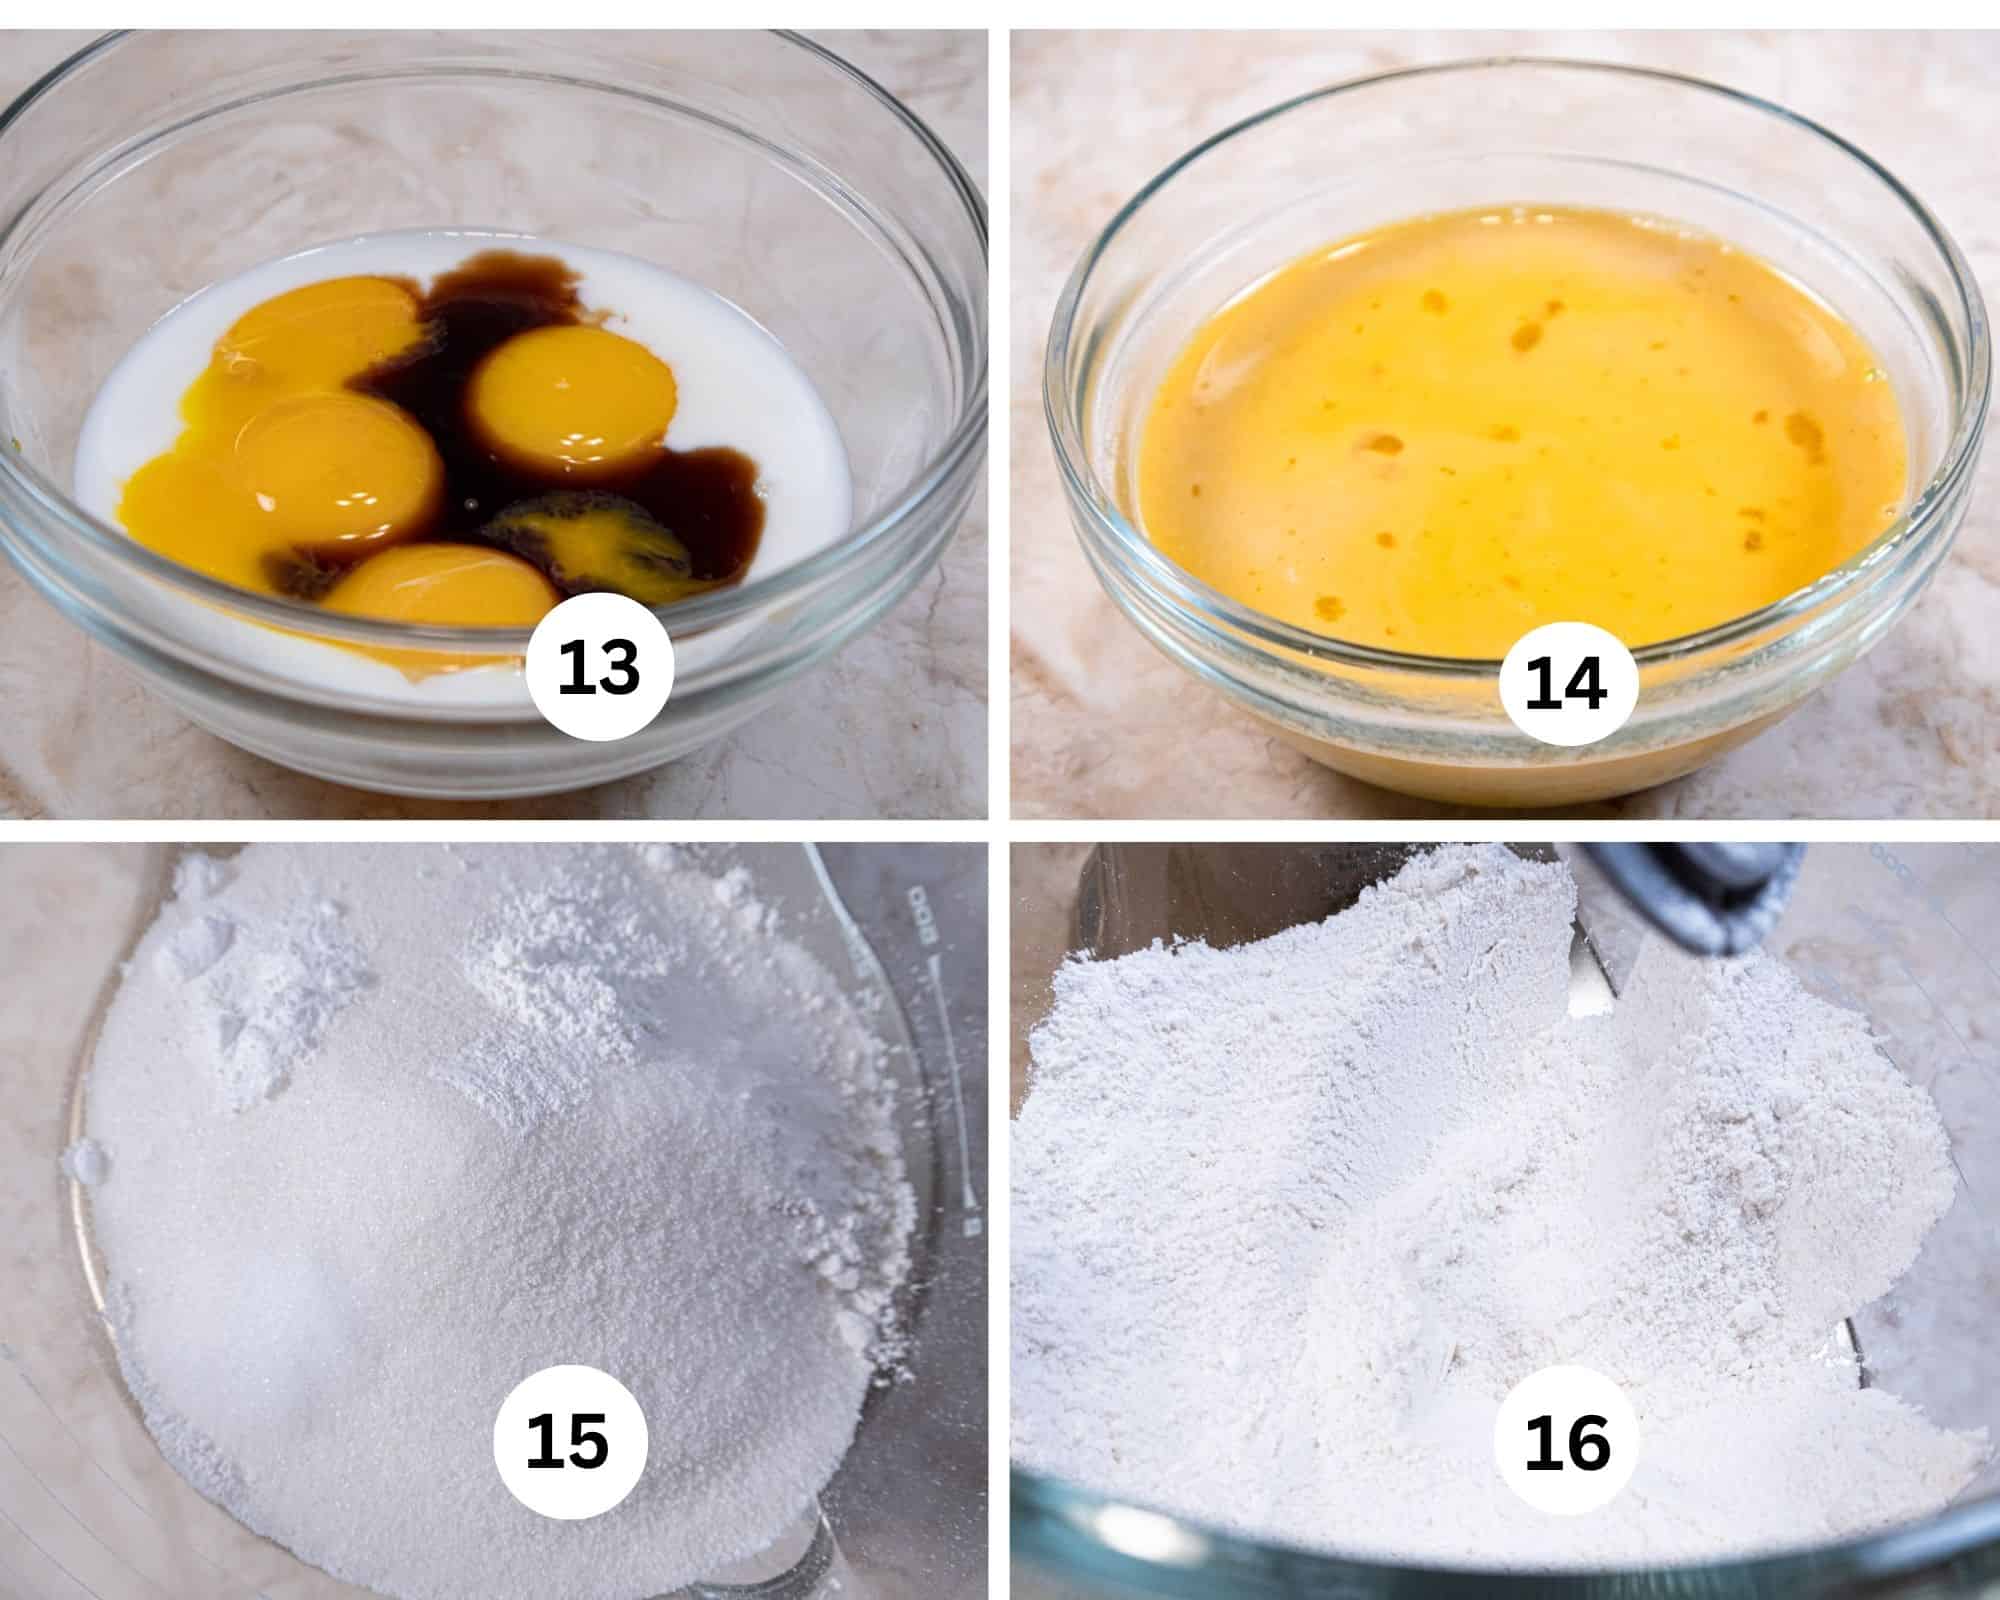
Step 13. Place the egg yolks, ¼ cup of buttermilk and vanilla in a small bowl. Step 14. Whisk together. Step 15. Place the cake flour, sugar, baking powder and baking soda in the bowl of a mixer. Step 16. Mix briefly to combine.
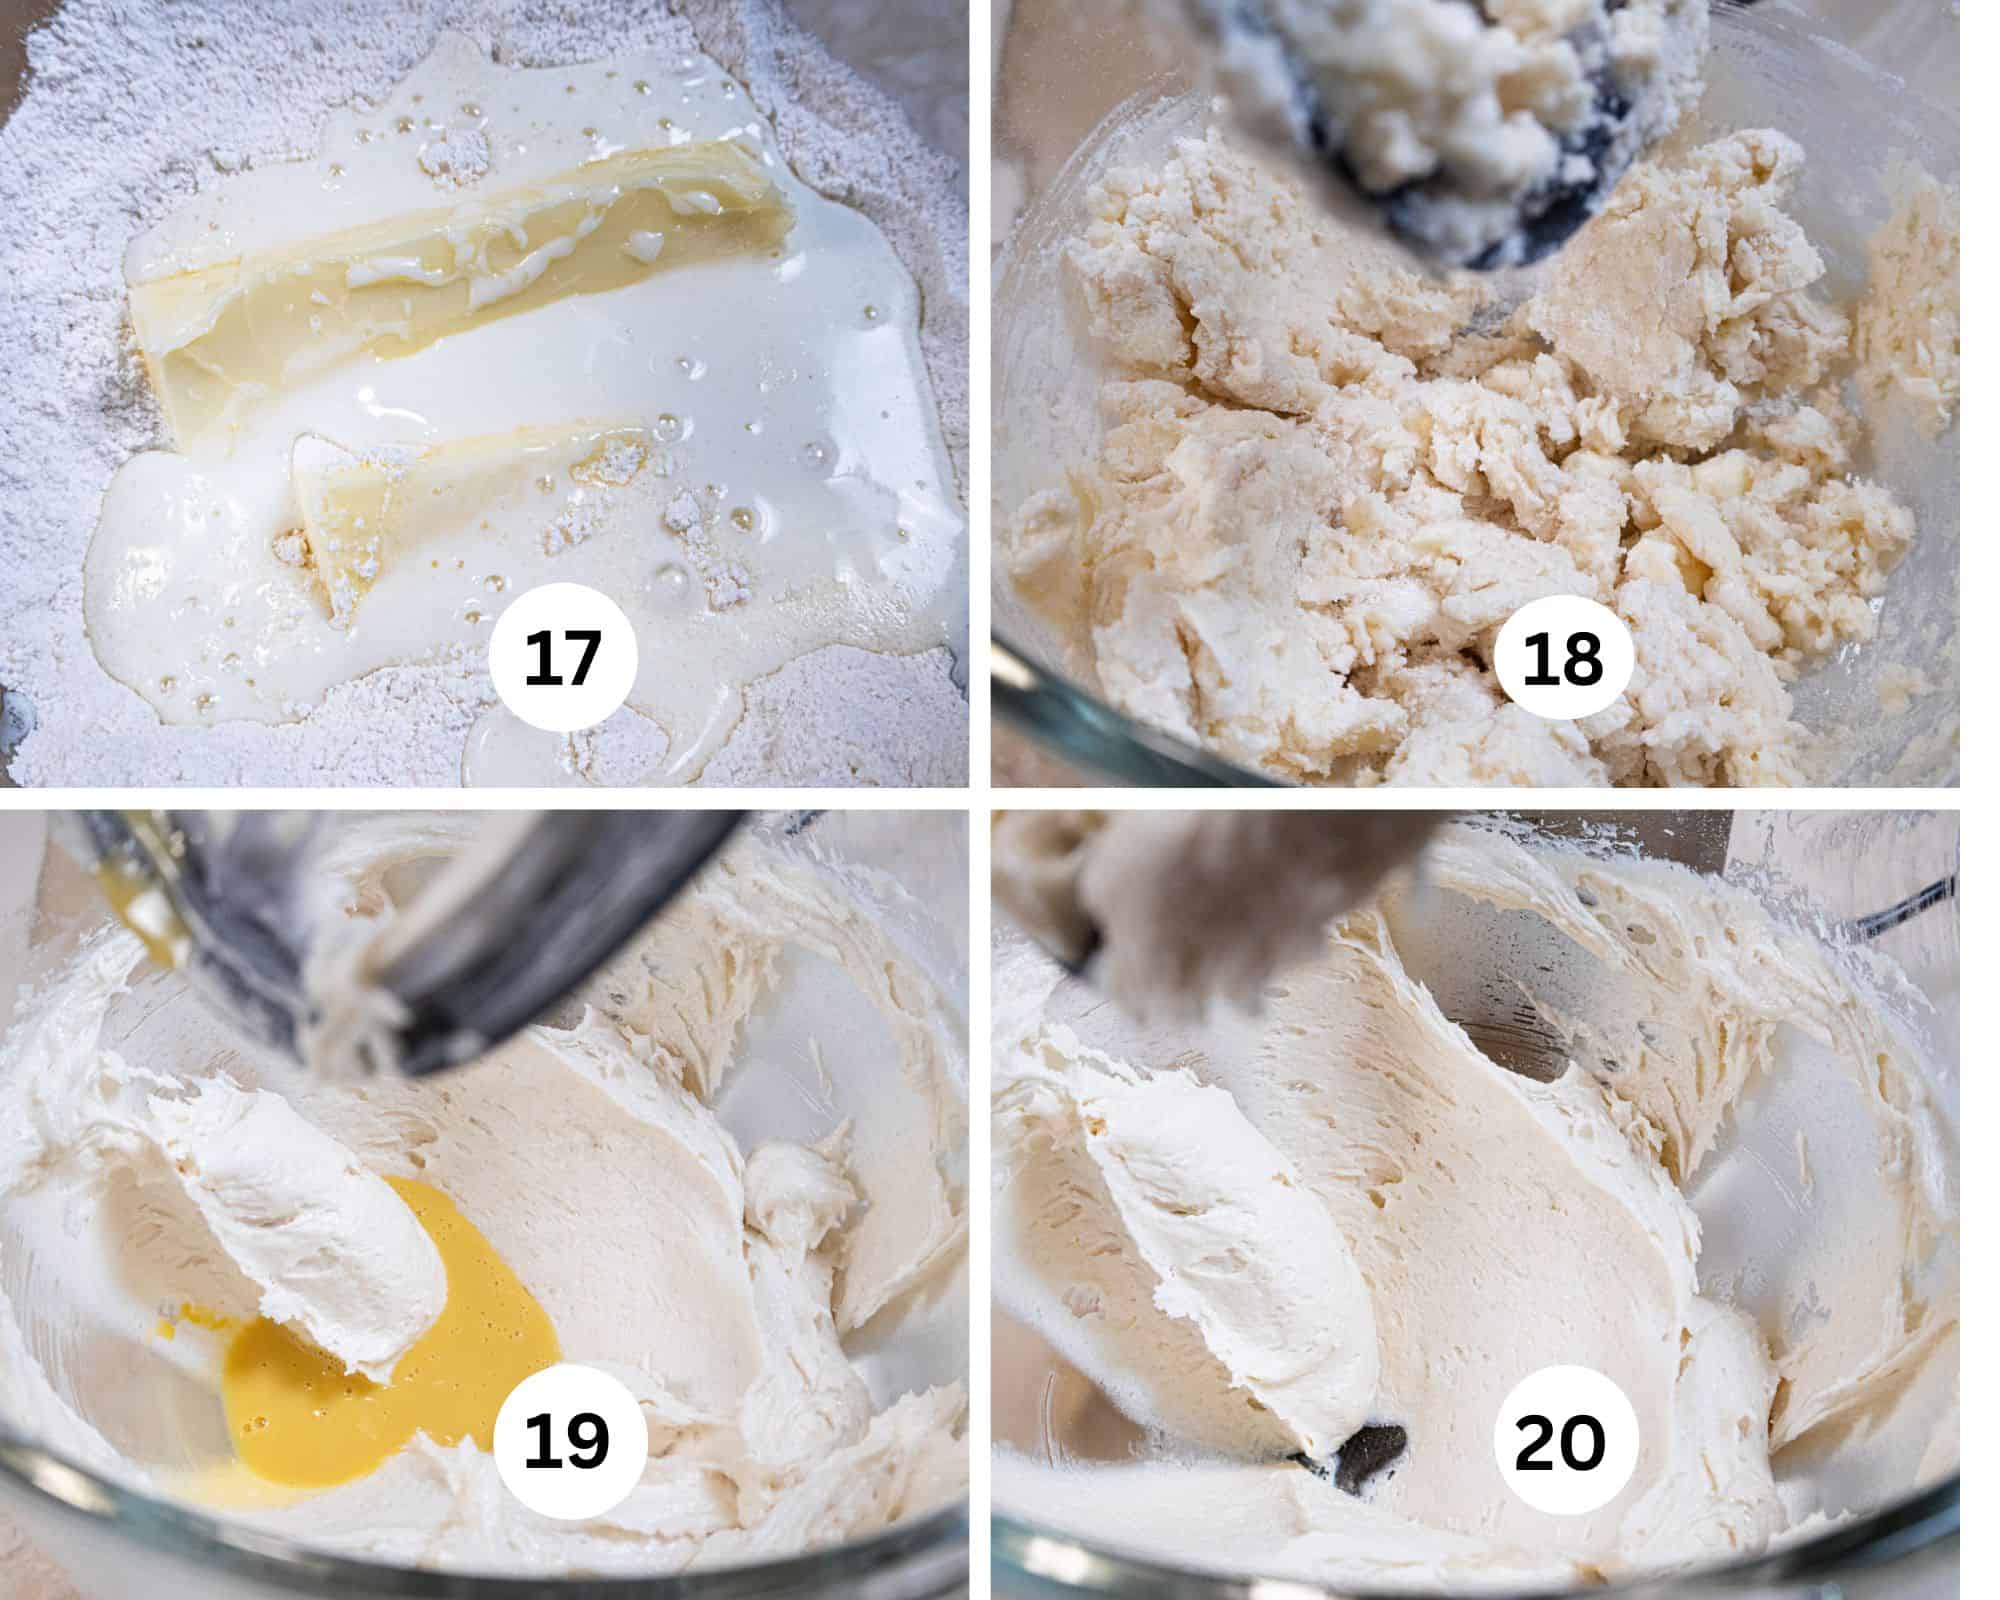
Step 17. Add the very soft butter and remaining buttermilk to the dry ingredients. Step 18. Mix on low to medium to moisten the ingredients. Then raise to medium and beat for 2 minutes. Scrape down. Step 19. Add ⅓ of the egg mixture, beating for 30 seconds on medium after each addition.
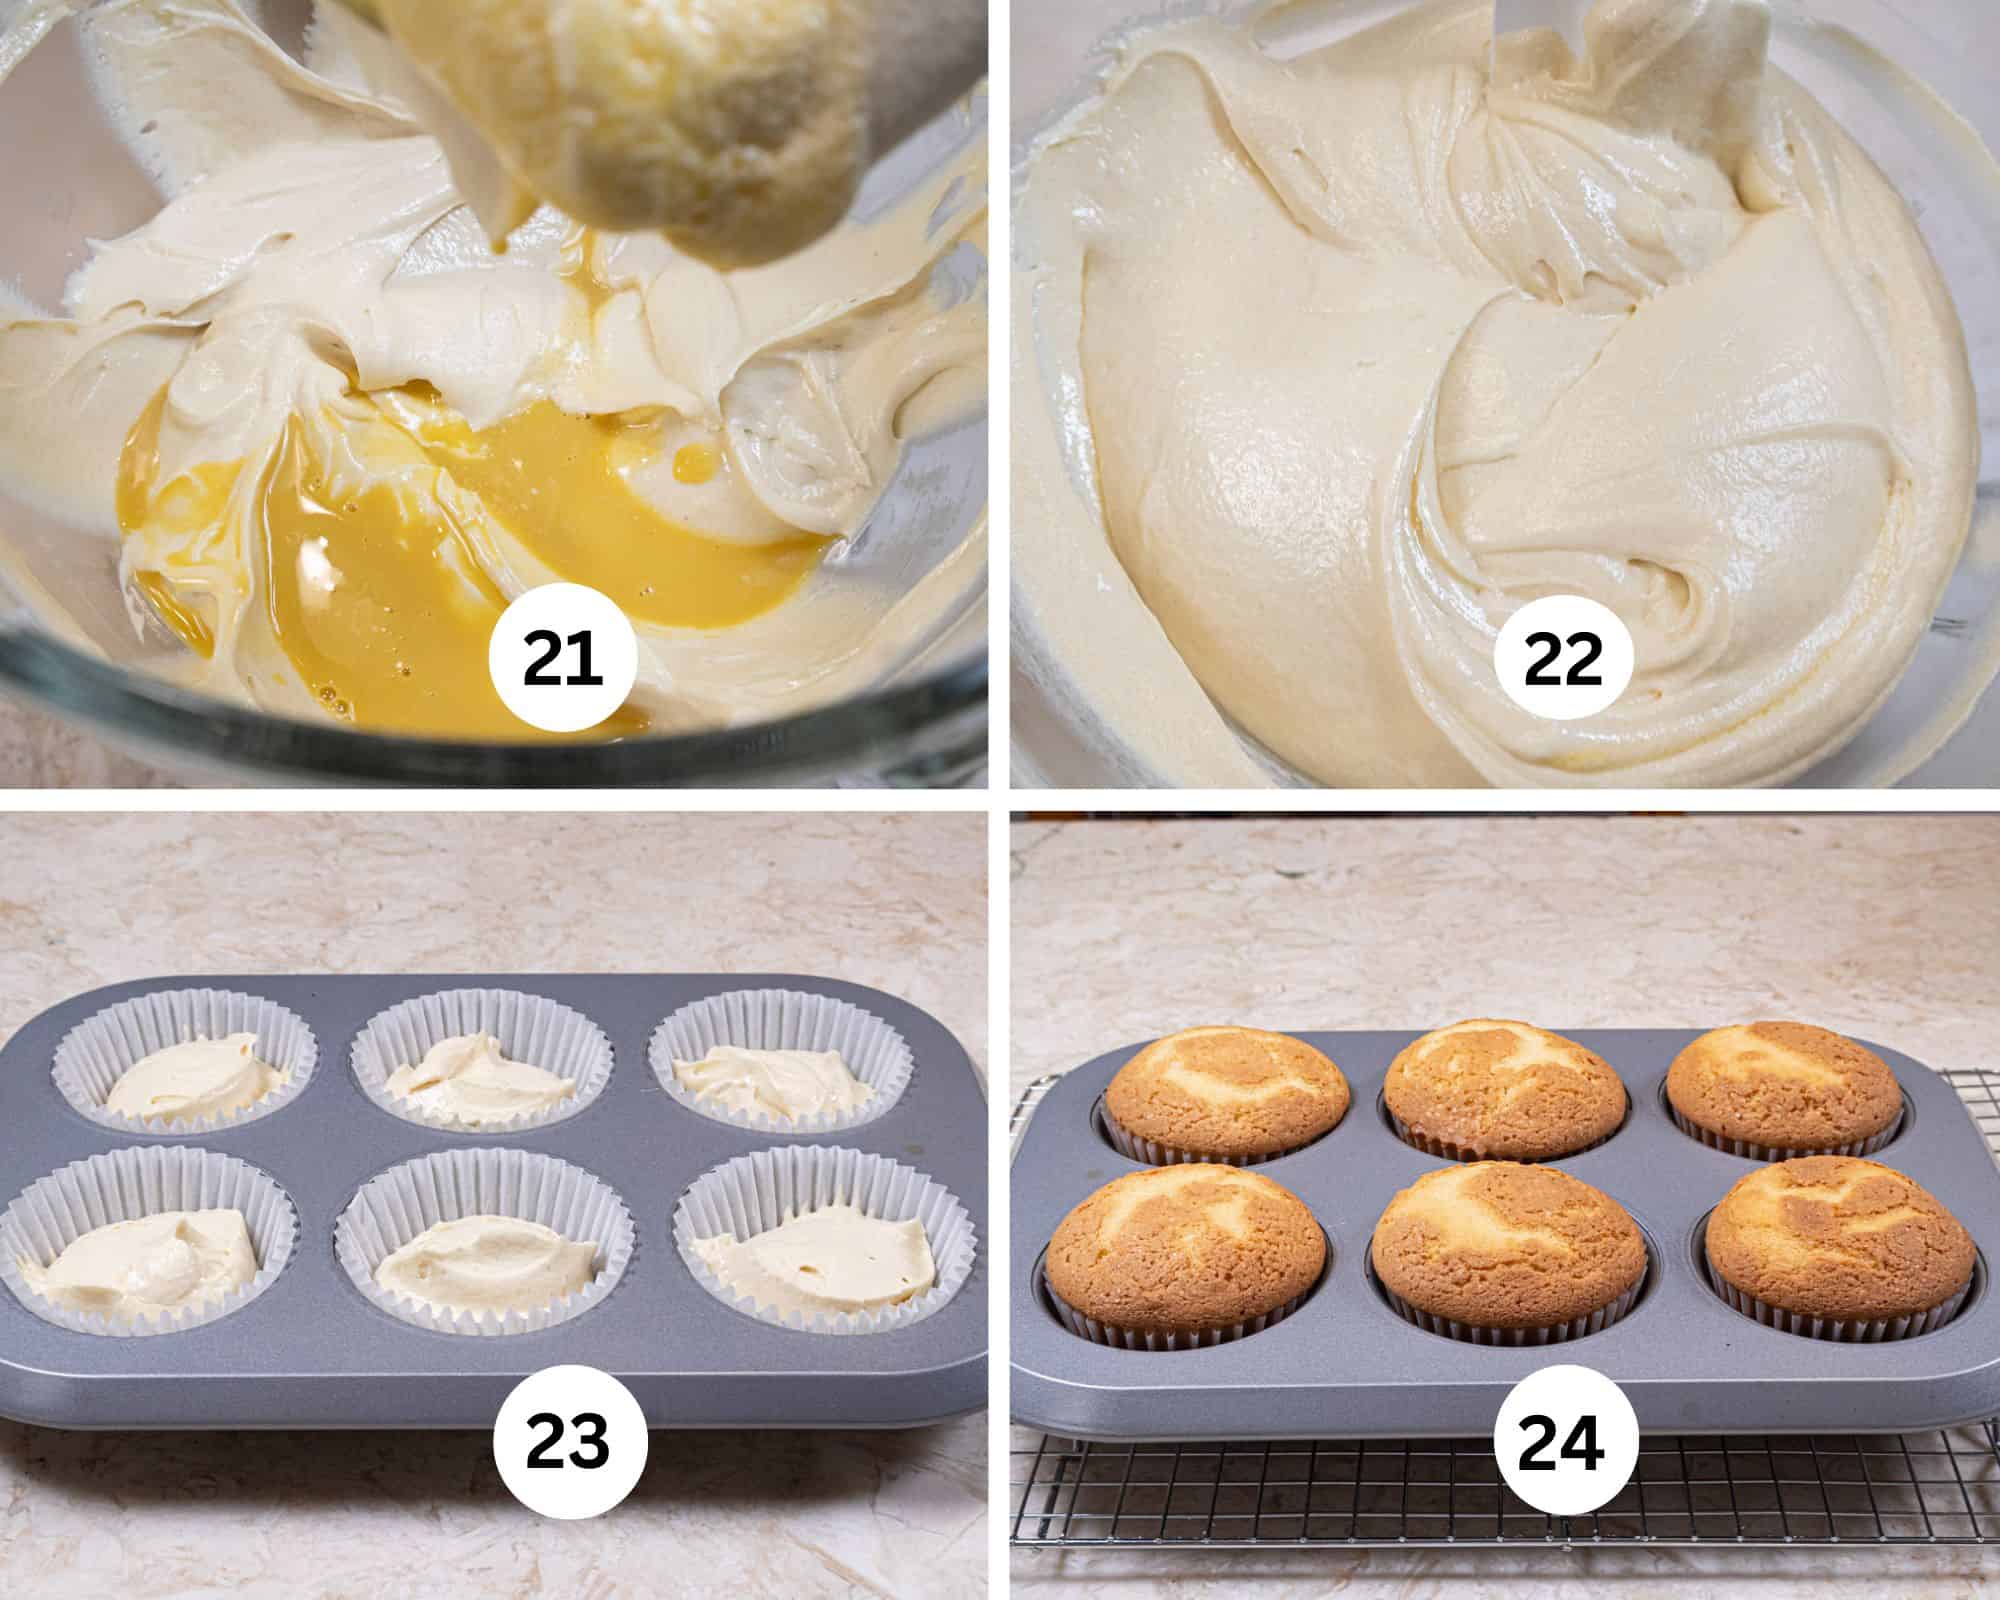
Step 21. This is the last third of the egg mixture added. Step 22. Beat for 30 seconds to complete the batter. Step 23. Fill the cupcake papers ¾ full. A number 6 disher/scooper works well here. There will be 7 or 8 cupcakes. Step 23. Bake as directed. Cool on a rack. Use immediately or freeze for several months, wrapping well in foil.
Assembly
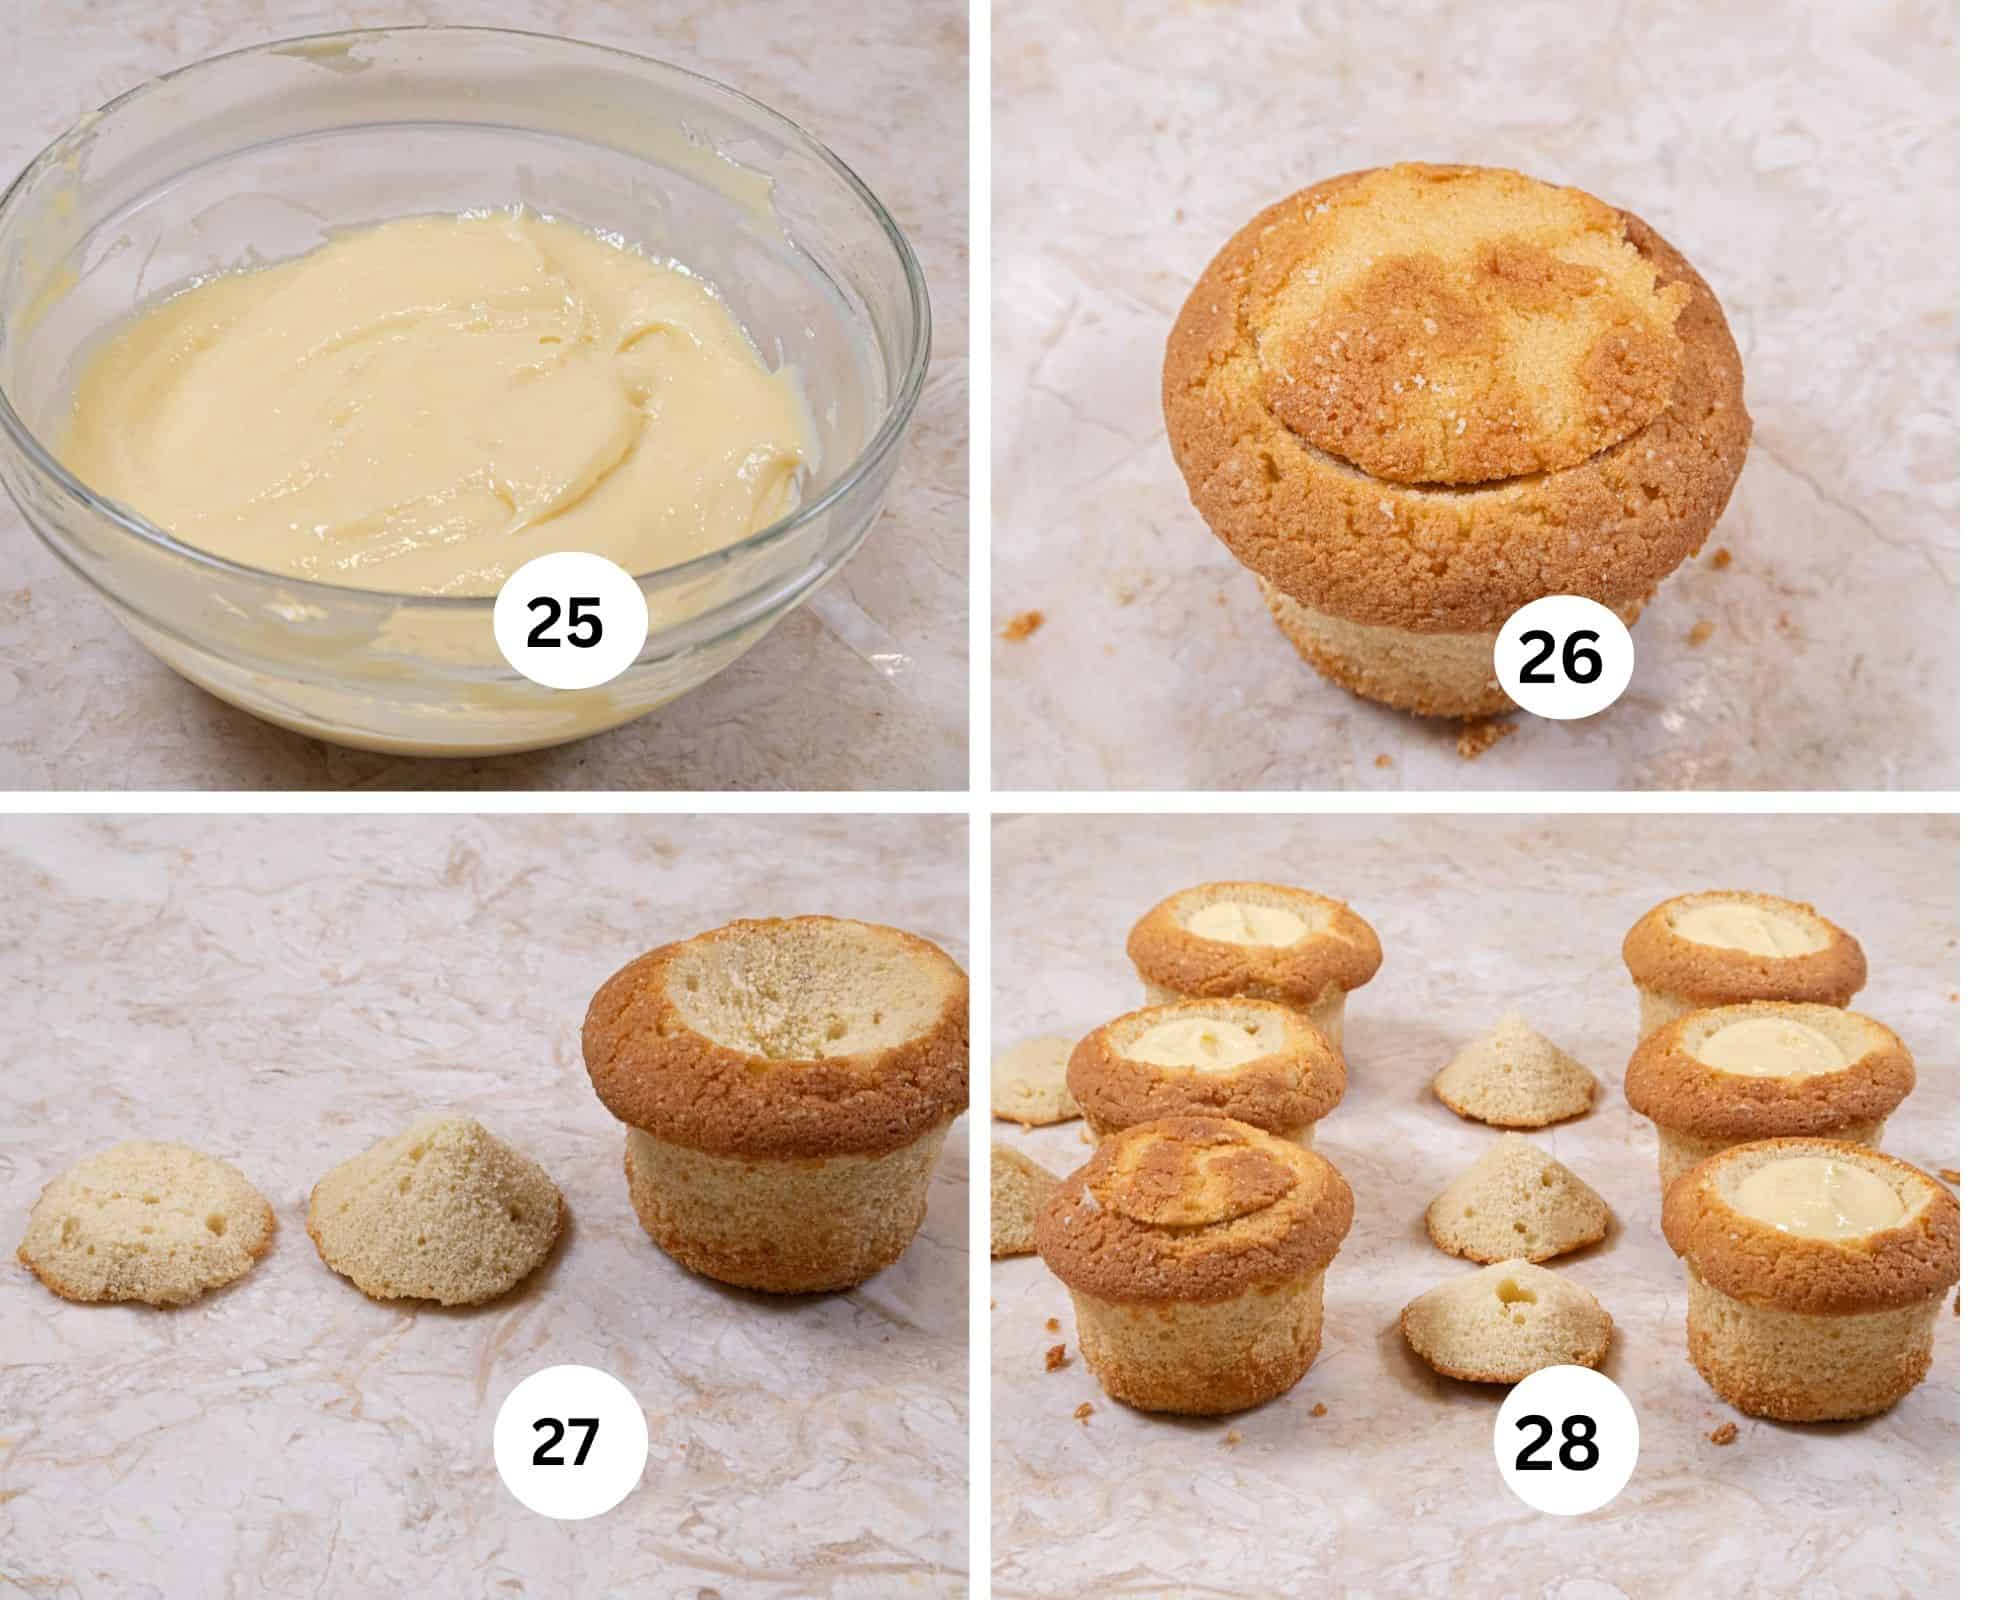
Step 25. Whisk the pastry cream to loosen it. Do not over whisk. It should still be stiff. Step 26. Remove the papers from the cupcakes. Brush off all of the crumbs on the sides and bottom. I did this with my hand. Make a hole for the pastry cream by cutting the top at an angle to hold the filling. Step 27. Remove the insert and cut the pointed edge off so it is about ¼" deep. I should have cut almost to the bottom but not through it and taken more of the cake out so more pastry cream could be piped or spoon in. Step 28. Fill the cupcakes to within ¼ inch deep and replace the top. Freeze the cupcakes at this point while preparing the ganache. It is easiest to dip the cupcakes if they are partially frozen so the top stays in place. 15 to 20 minutes usually does the job.
Hot Honey Ganache
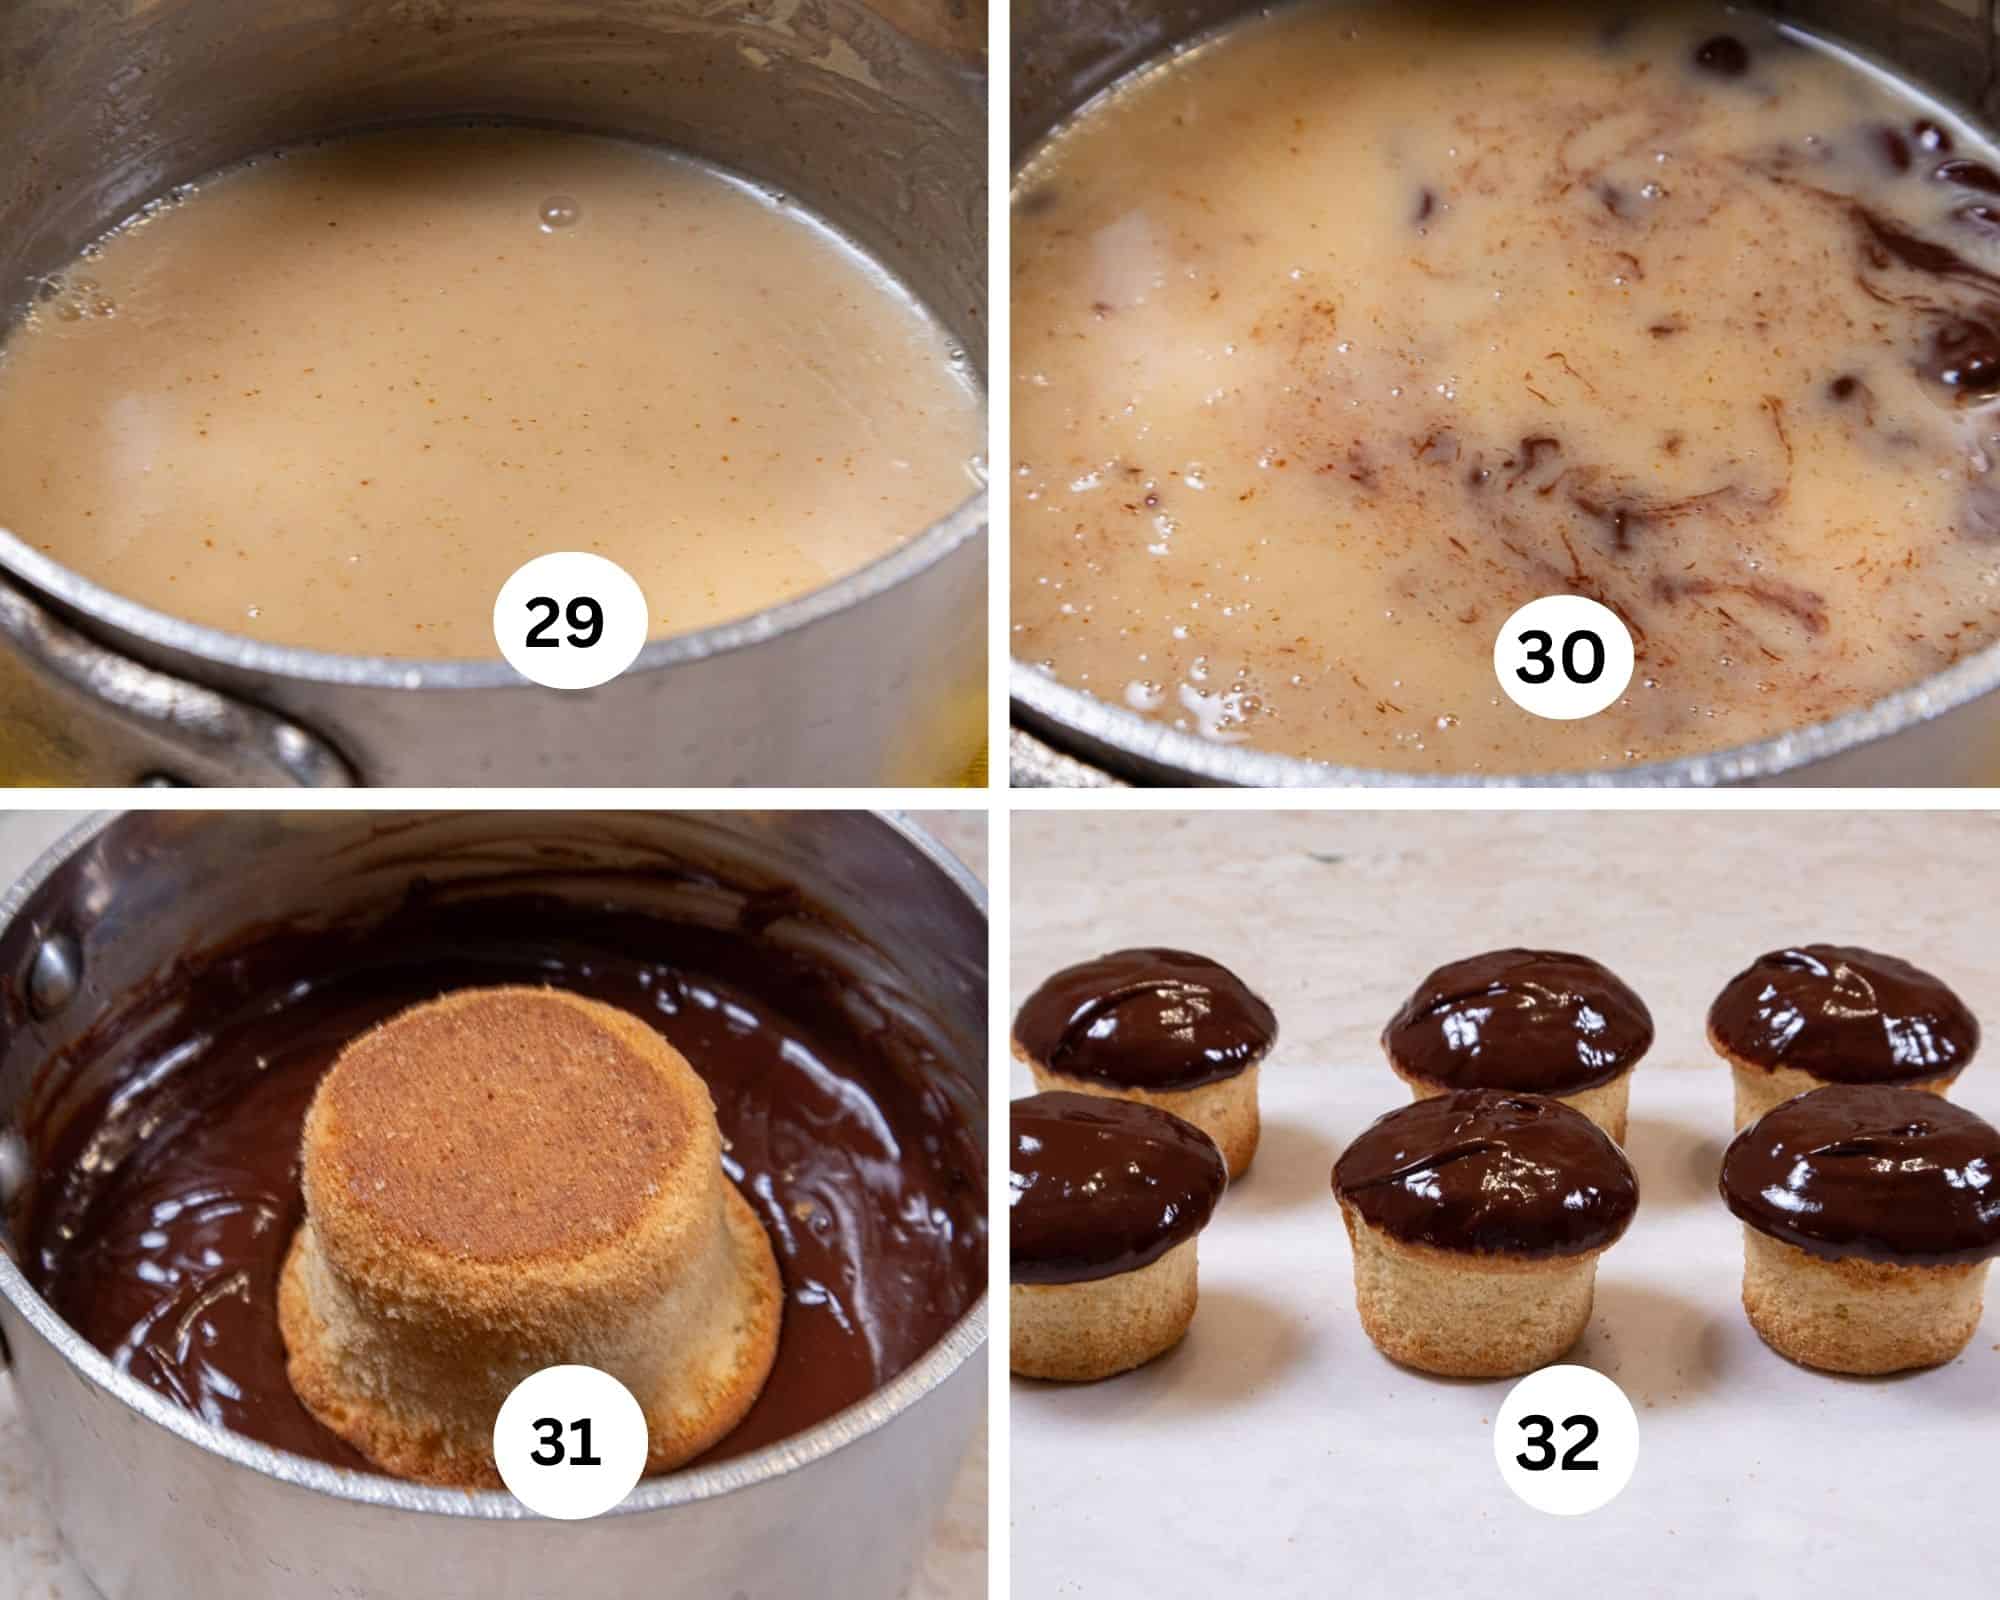
You will be making more ganache than is needed in order to be able to dip the seven or 8 cupcakes. The remainder is excellent when warmed and thinned slightly with more cream as a sauce for ice cream, pound cake or anything needing a chocolate sauce.
Step 28. Place the ingredients in a saucepan.Heat just until steamy hot but not boiling. Step 30. Submerge the chocolate under the hot mixture and let it sit for about 4 to 5 minutes. Step 31. Stir or whisk gently to avoid air bubbles until smooth. Let the ganache sit for about 5 minutes. Remove the cupcakes from the freezer and brush off all the crumbs again to keep the ganache crumb free. Then dip each cupcake, upside down, into the ganache. Step 32. Place it on a parchment paper to set up.
A lot of work goes into each of my recipes and my only ask is that if you like the recipe or even the looks of it, please leave me a star rating to help me rank better. It’s important and I appreciate it and I appreciate you.
Recipe FAQ'S
Yes. Because they contain pastry cream filling. Boston Cream Cupcakes should always be refrigerated after assembling. Let them sit at room temperature for about 15 minutes before serving for the best flavor and texture.
Yes — and they’re often even better the next day. The pastry cream has time to set and the cupcake becomes extra moist. Store them covered in the refrigerator for up to 3 days for the best texture and flavor.
Semi-sweet chocolate is the classic choice because it balances the sweetness of the pastry cream and cake. Dark chocolate creates a more elegant flavor.
Storage and Freezing
The cupcakes must be refrigerated after being made. They can sit out for 15 or 20 minutes prior to serving to take the chill off.
All of the component parts for this recipe can be frozen separately. The pastry cream should be thawed in the fridge while the cupcakes and ganache can be thawed at room temperature.
Additionally, the entire cupcakes can be frozen, well wrapped and thawed in the fridge.
Expert Tips
- The pastry cream should come to a boil and cook for 1 full minute to ensure it's thickness when done.
- Either whole or 2% milk may be used. Whole milk makes a slightly thicker pastry cream and is more luxurious.
- It is important to put the liquid mixture through a strainer to catch the hard, white chalazae which is two strands of protein that anchors the yolk in the middle of the egg. When cooked they are hard. Straining the liquid mixture before it is cooked is not only important it is easier than the old fashioned method of straining it after it is cooked and thickened.
- Once the sugar and egg yolks are combined in a bowl, whisk them immediately or a chemical reaction takes place causing the sugar to absorb the moisture out of the raw egg yolks, causing them to dehydrate, congeal, and form hard, irreversible lumps which is irreversible. As soon as they are combined, add the milk.
- Use the mixing times given when making the cake batter. It is important to the texture of the baked cake.
- When cutting the center out of the cupcakes, go close to the bottom but not through it. Make the hole large enough to hold a generous amount of filling. Fill to within ¼" of the top.
- The very top of the cupcake that has been cut out should be cut to ¼" and replaced over the pastry cream.
- It is easiest to dip the cupcakes if they are frozen for 20 to 25 minutes so the top stays in place when they are dipped into the ganache.
- For the best looking cupcakes, remove the paper cups and brush off all of the crumbs. I just used my hand to go around the edges and bottom. This is key to keep the crumbs from contaminating the ganache.
- Refrigerate the completed cupcakes after dipping them or freeze them for longer storage. Freeze until hard, then wrap in plastic wrap and foil where they will last a couple of months. Thaw in the fridge.
- There will be ganache left over. It is the nature of the beast that it takes a lot to be able to dip them. Great uses for the leftover ganache is to heat it briefly if cold, add a bit more cream and you have the greatest chocolate sauce ever to use on ice cream, cake or anywhere you want.
More Tasty pick up treats
A lot of work goes into each of my recipes and my only ask is that if you like the recipe or even the looks of it, please leave me a star rating to help me rank better. It’s important and I appreciate it and I appreciate you.
Amazing Boston Cream Cupcakes
Equipment
- Jumbo or regular cupcake pans
Ingredients
Pastry Cream
- 1 ⅓ cup milk, hot
- 4 large egg yolks
- ½ cup granulated sugar
- ¼ cup all-purpose flour
- 4 tablespoons unsalted butter
- 1 teaspoon Tahitian vanilla or other pure vanilla
Yellow Buttermilk Cake
- 4 large egg yolks
- ⅔ cup buttermilk
- 2 teaspoons vanilla
- 2 ¼ cups cake flour (225 grams)
- 1 ¼ cup granulated sugar (225 grams)
- 1 teaspoon baking powder
- 1 teaspoon baking soda
- ½ teaspoon salt
- ¾ cup unsalted butter, softened (170 grams)
Hot Honey Ganache
- ½ cup heavy cream
- ¼ cup honey
- 2 tablespoons unsalted butter
- ¼ teaspoon cayenne pepper, optional
- 10 ounces semisweet chocolate (280 grams)
Instructions
Pastry Cream
- This must be made at least a day ahead or several days ahead. It can also be frozen and thawed in the fridge overnight.
- Whisk the egg yolks and sugar together in a non-reactive bowl. Whisk in the flour.
- Add the hot milk making sure they are completely combined.
- Pour the mixture through a strainer over a medium size saucepan. Place over medium heat and, stirring constantly, bring to a boil. Boil for 1 minute, stirring constantly to avoid lumps.
- Remove from the heat and add the butter and vanilla, whisking them into the hot pastry cream. Pour into a storage container, cover with plastic wrap and bring to near room temperature. Refrigerate immediately.
Yellow Buttermilk Cake
- The butter must be very soft but not runny for this recipe. A temperature of 74°F to 76°F is ideal.
- Preheat the oven to 350°F. Line 7 to 8 jumbo muffin cups with paper liners or 14 to 16 regular size muffin cups. Set aside.
- Whisk the yolks, ¼ of the buttermilk and the vanilla in a small bowl. Set aside.
- In the bowl of a mixer, place the cake flour, sugar, baking powder and baking soda. Mix to combine.
- Add the butter and the remaining buttermilk. Mix on low to moisten the ingredients, then raise the speed to medium and beat for 2 minutes. Scrape down.
- Add the egg yolk mixture in thirds, beating 30 seconds after each addition. Scrap down between additions.
- Fill the muffin cups ¾ full. Bake the jumbo cups for 20 to 22 minutes. Bake the regular size for 15 to 18 minutes. The cupcakes will be golden brown, spring back when lightly touched or when a tester comes out clean. Cool for about 10 minutes or until they can be safely handled. Remove them to cooling racks to cool completely.
- if not using immediately, freeze until hard and wrap well in foil where they will keep for a couple of months. Thaw on cooling racks.
Assembly
- Hollow out the cupcakes by cutting almost to the bottom being careful not to go through the bottom. Hold the knife at an angle while cutting. Remove the cake that has been cut out, keeping the top intact. Trim the top to ¼" deep.
- Remove the pastry cream from the fridge and whisk it smooth it out. Do not over whisk as you want this to remain firm but smooth. Place it in a pastry bag fit with a ½" plain tip and fill the cupcakes to within ¼" from the top. Place the trimmed top on top, pressing down to even it with the top of the cupcake.
- Remove the cupcakes from their liners and brush off all the crumbs on the side and bottom. I just used my hand to go around the outside edges several times. This will keep crumbs from contaminating the ganache when they are dipped.
- Place them in the freezer while you make the ganache.
Hot Honey Ganache
- Combine all of the ingredients except the chocolate in a small saucepan and heat until steamy hot but do not let it boil. Remove it from the heat and add the chocolate.
- Let it sit for 4 or 5 minutes, then stir or whisk very gently until completely combined. Do not be too enthusiastic if using a whisk or you risk getting air bubbles in the ganache.
- For the easiest way to dip the cupcakes, make sure the top is frozen in place. Go around the cupcakes again to make sure there are no crumbs.
- Pick up a cupcake and dip it into the ganache upside down. Place it on parchment paper to set.
- Store in the refrigerator until serving. Pull them out 15 to 20 minutes prior to serving to take chill off. Keep any remaining in the refrigerator for up to 3 days.
Notes
Nutrition

Mark says
A fantastic suggestion! All the times I’ve made pastry cream or Boston Cream Cake, I’ve never seen a suggestion to strain beforehand. Your idea makes a lot of sense. A lightbulb went off in my head similar to the first time chocolate seized because I poured the cream over it instead of the other way around. Bravo!
Helen S Fletcher says
Hi Mark, I know. I can't be the only one in the world who thought of it! Also, save a dish and just add the chocolate to the bowl or pan in which you heated the cream. I never had the chocolate seize because I poured the cream over it. But I have had it seize if there wasn't enough liquid in which to add the chocolate. That will do it for sure.
JR says
Helen is the best! I would she was my mother as what a gift it would be to have someone cooking fantastic cupcakes like these!. I have tried her recipes and they are all great!
Helen S Fletcher says
Thank you so much. I appreciate your kind words.
Janet Woodward says
Hello Helen, trust you and your family are fit and well.
Another lovely recipe. So very tempted. Just dont tell my GP.
Janet & the fur assistants
Helen S Fletcher says
Hi Janet - So happy to hear from you....and your furry friends. We are fine as I hope you are. Take care of yourself!