
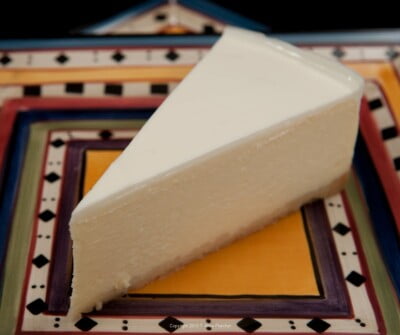
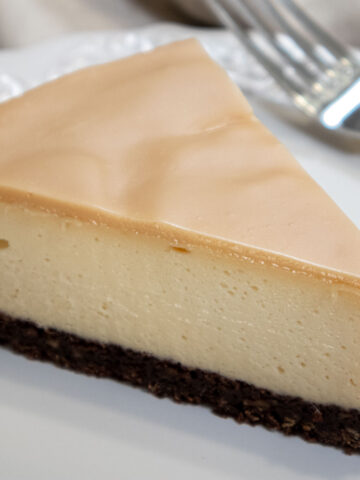
This Sour Cream Cheesecake is the basic cheesecake we sold at the shop with many variations. It is one of the most elegant desserts to be found. For the holidays, we topped it with a candied cranberry sauce that added the perfect contrast to the richness of this cheesecake. We also used this as the base for our Eggnog Cheesecake.
Cheesecake is the number one dessert in the country. There are literally hundreds of different flavors. Most cheesecakes have a graham cracker crust. However, this one is so delicate I used a shortbread crust in order not to overpower the cheesecake. It is important not to over bake the crust in the initial step as it will bake for about 90 minutes and then cool in the oven for another 60 minutes.
Because we made 18 cheesecakes at a time at the bakery, we made them in one of our large mixers. Since this is a single recipe, I have included the processor and mixer method of making it which is preferable as it makes a creamier cheesecake.
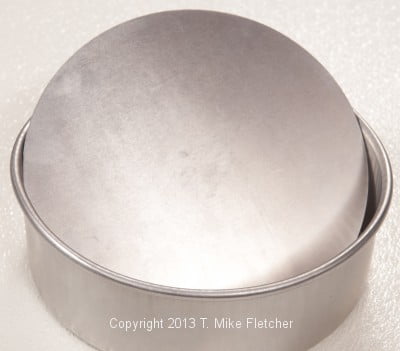
My preference for a cheesecake pan over a springform pan is explained in https://pastrieslikeapro.com/2015/06/triple-chocolate-cheesecake/
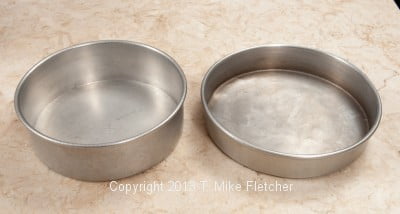
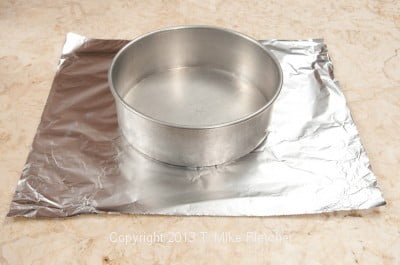
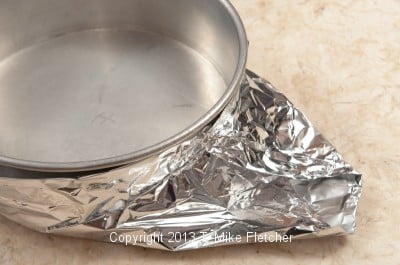
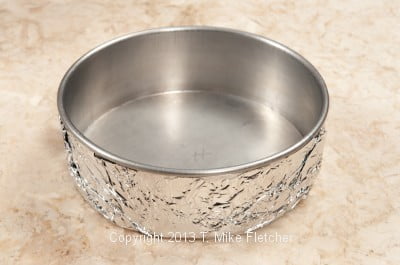
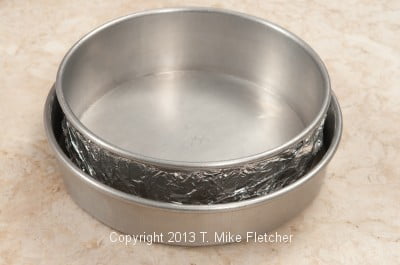
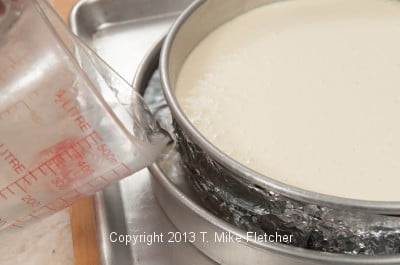
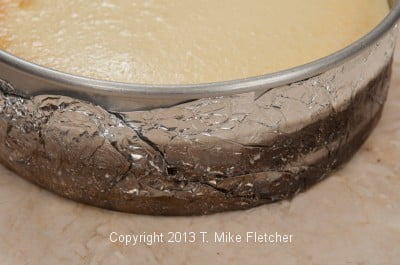
This cheesecake requires a water bath and that requires the cheesecake pan to be wrapped in foil to keep the water away from the crust. At the shop we put the 9 inch wrapped pan in a 10 inch pan. However, wrap the pan tightly or it won't fit in the 10 inch pan. If you don't have a 10 inch pan, any pan that will hold water and the cheesecake pan will do.

Sour Cream Cheesecake
Preheat the oven to 350 degrees. Spray the bottom of a 9x3 inch cheesecake pan really well.
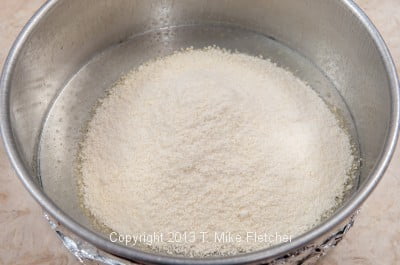
Crust
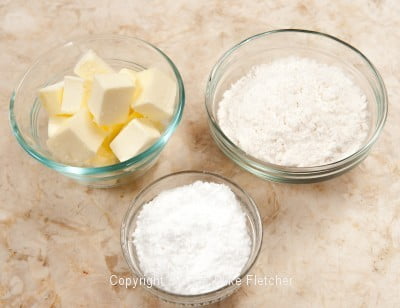
½ cup + 1 tablespoon flour (85 grams or 3 ounces)
6 tablespoons butter (90 grams or 3 ounces), cold and cut into small pieces
¼ cup sifted powdered sugar (25 grams or 1 ounce)
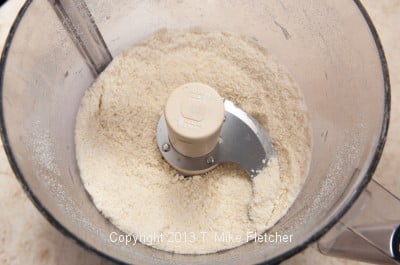
Place the flour and butter in the bowl of a food processor.
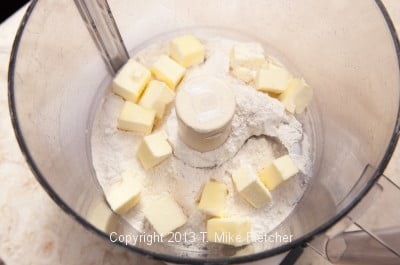
Process until the butter is indistinguishable.
Add the powdered sugar and pulse in.
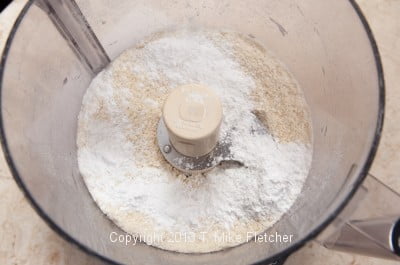
and pulse in.
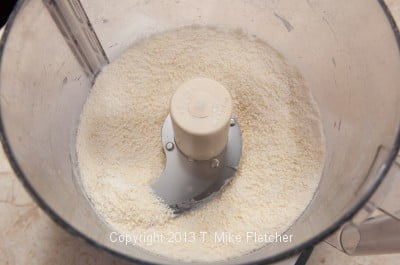
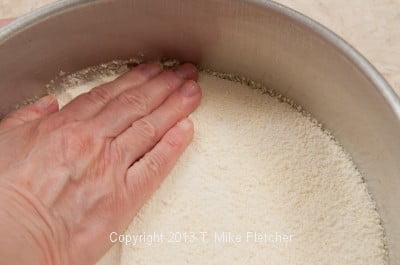
Pour it into the cheesecake pan
Press the crust firmly into the bottom of the pan.
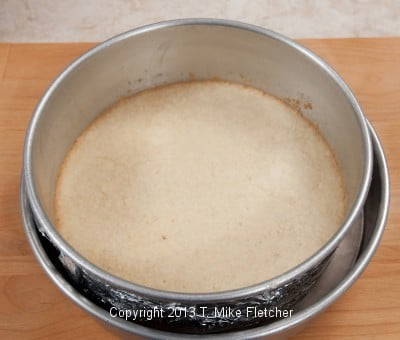
Bake for about 20 to 25 minutes until light brown. I have found (after posting this article) that baking the crust to a medium brown helps the cheesecake to release much easier. The crust should be browned all the way - not just the edges.
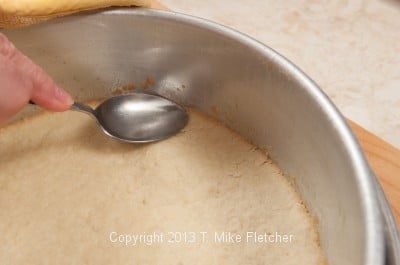
With a spoon, press the edges of the crust lightly against the sides of the pan to prevent any gaps.
Mixer Method
Place the flour and butter in the mixer bowl. It is important the butter is very cold. Beat until the butter is cut into the flour as above. Add the powdered sugar and mix briefly. You want to keep this very powdery. If it does go too long it will form a dough. While not ideal, it can still be pressed in.
Cheesecake Layer
1 pound of cream cheese (454 grams)
1 cup sugar (200 grams or 7 ounces)
1 tablespoon cornstarch
1 ½ teaspoons vanilla
1 ½ cups sour cream (340 grams or 12 ounces)
3 eggs
1 ½ cups 40% cream
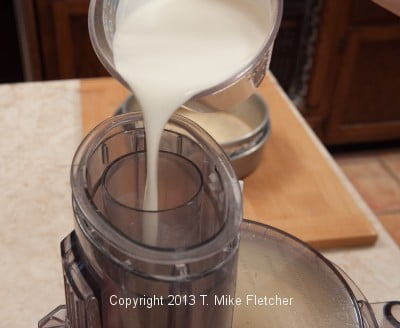
Place the cream cheese, sugar, cornstarch and vanilla in the food processor. Process to mix well.
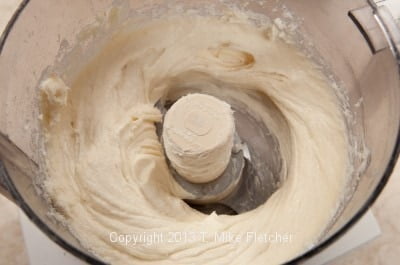
Scrape down. Add the sour cream; process.
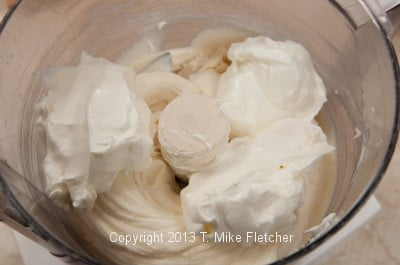
Process until smooth, scraping down as necessary,
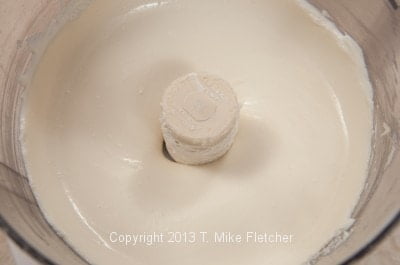
Add the eggs and process. Make sure to scrape the sides and bottom so there are no lumps.
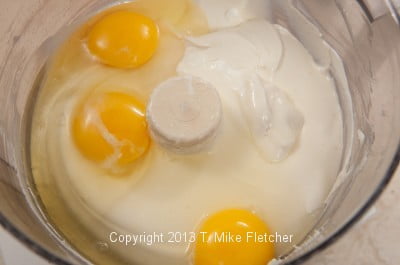
Pour it down the feed and process until completely mixed.
Mixer Method: Place the cream cheese and sugar, cornstarch and vanilla in the bowl of a mixer. Beat until smooth and softened. Add the sour cream, mixing well. Next the eggs; beat to completely combine and last, the cream.
Assembly
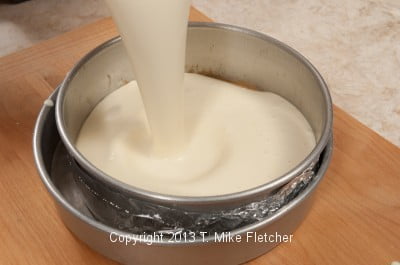
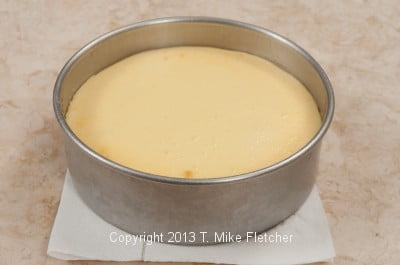
Pour the cheesecake over the baked base
To safely add really hot water to the water pan, place the two pans on a rimmed baking sheet. Carefully pour the water into the bottom pan.
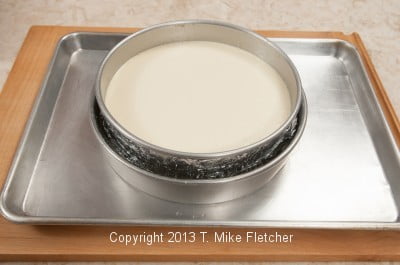
Place the cheesecake pans on a rimmed baking pan and put it in the oven, Bake for an hour,
Carefully remove the pan with the cheesecake from the water pan. I usually place it on a couple of paper towels as the bottom of the cheesecake pan will be wet.
Chill before adding the sour cream topping. I usually put in the refrigerator overnight before adding the topping as it is more stable.
Sour Cream Topping
8 ounces sour cream (225 grams)
3 tablespoons sugar (40 grams or 1 ¼ ounces)
Preheat the oven to 350 degrees.
Mix together. Allow the cheesecake to sit for a few minutes and remix. It will then be smooth as the sugar has dissolved.
If the top of the cheesecake has condensation on it, blot with a paper towel. Spread the sour cream topping over the cheesecake evenly and bake for 10 minutes. Refrigerate until cold. I usually make this a day ahead.
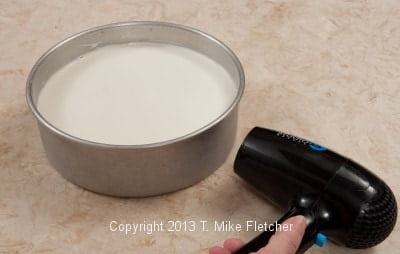
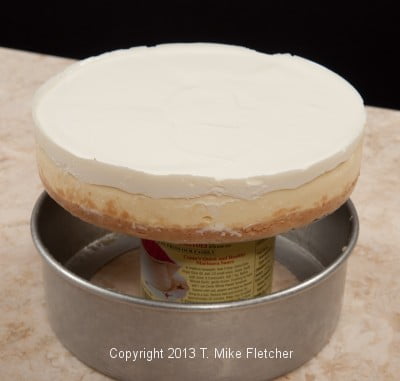
To release the cheesecake, have a fat can at the ready. A 28 ounce can of tomatoes is perfect. Go around the outside of the cheesecake pan with a hair blower set to high.
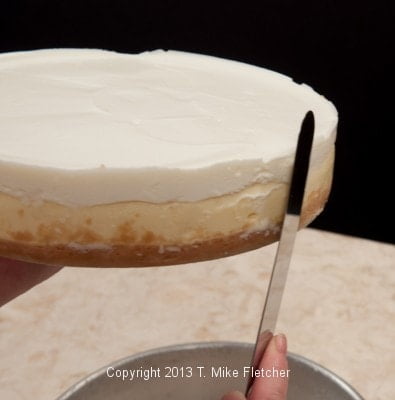
Place the cheesecake on the can and slide the side of the pan down. If it doesn't come down easily, reheat.
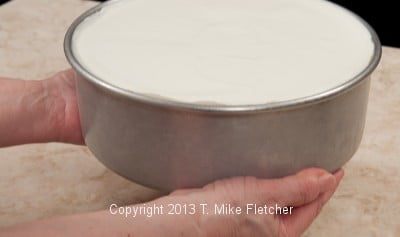
Smooth the side of the cheesecake with a spatula.
After the side has been removed, place the cheesecake on a flat surface. With a metal spatula, go under the crust to release it.
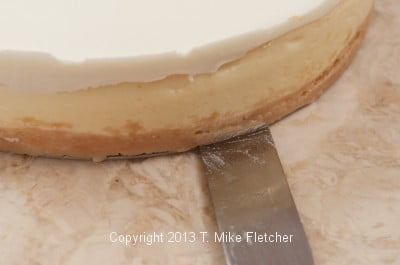
Place two pancake turners under the crust, lift up the cheesecake and place it on a board or serving plate.
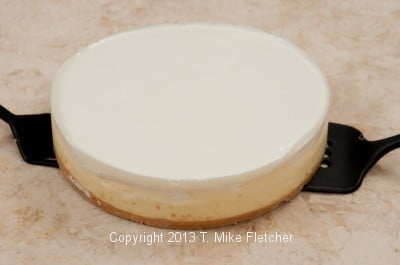
After the side has been removed, place the cheesecake on a flat surface. With a metal spatula, go under the crust to release it. Place two pancake turners under the crust, lift up the cheesecake and place it on a board or serving plate.
Serves 12 to 16

diane says
Hi Helen, I'm so happy to have discovered your blog. I found it via LinkedIn! Anyway, I make a lot of cheesecakes and have taken the habit of cooking them for a longer time, at lower temperature. I understood this was the way to avoid the need for a water bath. What are your thoughts on the imortance of the water bath? What purpose does it serve, in your opinion? Thanks much, love what you're doing here! diane
hfletcher says
Hi Diane and welcome. If you go to https://pastrieslikeapro.com/2013/10/one-cheesecake-easiest-ever/#.U24yfF4T2EM you will find another cheesecake that does not require a water bath. It takes 2 1/2 hours @ 200 degrees and comes out perfectly. In my experience with cheesecakes, and we made a lot every week, it depends upon the formula. Also, the water bath provides moisture in the oven as well as providing a gentle heat as the pan is not subjected to direct heat. These two things help prevent cracking. But as importantly, there can be textural change to the finished product without a water bath - think creme brûlées and custards which become rubbery without a water bath. If you are making a lot of cheesecakes, another consideration is the length of time in the oven. We had 4 large convection ovens but because of our work load, we had to plan on how to tie them up for a couple of hours which was all the time we could afford. You will notice this recipe has the cheesecake baking for an hour and then the heat is turned off and it stays in the oven for another hour where it continues to bake but at a much lower heat. Also, when it comes from the oven, I remove the foil wrap, place it on a sheet pan and put it directly in the cooler without allowing it to come to room temp. There is no problem with allowing it to come to room temp, I just don't have the space in the restaurant to do this. This particular cheesecake is one of the richest, creamiest I ever found. Be sure to check out the Apple Crisp Cheesecake also - it was a huge fall hit! Let me know if you have anymore questions. Happy to help.
Kim says
I have a question. I don't own and don't want to buy a cheesecake pan. (I already have too many pans!) If I only own spring form pans can I still follow the directions as you have written them or do I need to make changes to allow for the different pan? Thanks.
hfletcher says
Hi Kim: You can make it with a springform mold. Follow the directions including wrapping and the water bath as written. You may or may not have trouble getting off the bottom pan because it has a lip on it and the cheesecake pan is perfectly flat. But it will work just fine.
Kim says
Anxious to try this one. Sounds delish!
hfletcher says
Hi Kim: Hope you do - it's worth it.
Ilan Freed says
Hello Helen,
Thank you again for sharing your recipe and for taking the effort to show all the details during the preparation. The photos help a lot to visualize exactly what to expect in every step. The technical tips for using the various tools help with achiving great results in a professional way. Thanks!!
Harriette says
Thanks for sharing. Do you have a gluten free version? Or dairy and gluten free one?
hfletcher says
Hi Harriette - I would imagine that using a gluten free all purpose flour would work. Bob's Red Mill probably has one. The cake is entirely dairy, so I don't know what to tell you there. Hope this helps.
Paula says
Hi, Helen, I love cheesecake and I will certainly try this one! What is your advise in case you didn´t have sour cream available (I live in Brazil and here you can only find cream cheese, heavy cream and yogurt).
hfletcher says
As long as the yogurt is the consistency of sour cream, that should work. Let me know how this works.
Leanne says
I too would like to know the trick to not having cracks. It seems to happen at random so I can never figure out what I do differently.
I make sure my cream cheese is room temperature, very minimal beating, slow beating after each egg, water bath... etc. I noticed that you put the eggs in all at once. I also usually make the cheesecake where you put the sour cream right into the batter and bake. The typical New York Style. Is this the difference?
hfletcher says
Hi Leanne and Stephanie: Thank you both for your comments. Here is what I know about cheesecakes. Because this cools in the oven for an hour, it is far less likely to crack. However, in an earlier post, https://pastrieslikeapro.com/2013/10/one-cheesecake-easiest-ever/#.U2QMb14T2EM, this cake bakes for a longer period of time at a very low temperature and usually doesn't crack.
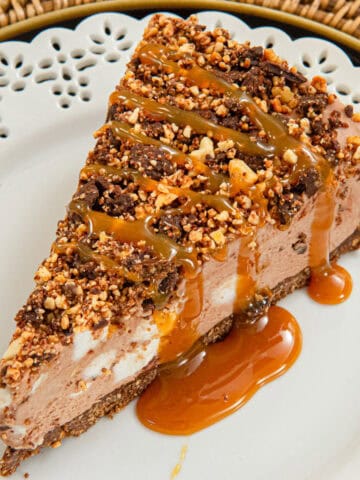
Allow your cake to cool away from a draft - that helps. Also, I have been told if you go around the top edge with the tip of a sharp knife that may help. But, in fairness, I must tell you I had fantastic cheesecake recipes at the bakery that did indeed crack. My Caramel Pecan Cheesecake was a different formula made with brown sugar. It cracked like crazy - deep cracks. But it was so good, I simply put a caramel pecan topping on top and we sold it like it was the last one on earth. From there I turned it into a Turtle Cheesecake by drizzling the edge with a rich chocolate ganache. Two popular cheesecakes with an imperfect base.
I always went for taste. If it was really good, I'd figure out how to work around the visible imperfections.
I used the Sour Cream Cheesecake with a lot of variations but it didn't work for everything.
Beauty is a lot, but taste trumps it every time. And if someone says anything about your cracked cheesecake, let them do better. I can truthfully say I am proud of you for making one. Some things in baking were easy, some things took me years to perfect. Just keep at it and one day, lo and behold - it happens! At least that is how it worked for me. Perfection is over rated!
Stephanie says
Hi Helen. Great post as always. I love cheesecake. It's one of my many favorite desserts. Lol. I have only baked a cheesecake once because it cracked. I was so disappointed. I will try this on as I am eager to try cheesecake with a different crust. Thank you for sharing with us.
Laraine Byrne says
Not a crack in the surface. Can't wait to try this.
hfletcher says
Make sure the water is deep enough so it doesn't evaporate during baking which I use a 10 inch pan and fill it to the top. There will still be a smudge of water left after the 2 hours in the oven.