Today was TV day on KMOV TV's Great Day St. Louis. This was my 4 minute segment.
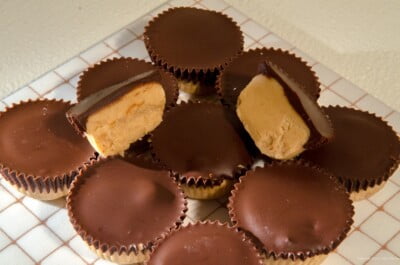
Every once in a while I get a hankering for a Reese's Peanut Butter Cup. So recently I had one. I don't know if it was me or if the formula was changed but it seemed gritty and not at all smooth like I remembered it.
So I set out to capture the taste I remembered and low and behold, I think it's better! And not only better, but really, really easy. For ingredients for the peanut butter and two for the chocolate. So there's no excuse for not making these Peanut Butter Cups.
Baking gets better when you subscribe to receive this PDF on getting the most out of baking including information on equipment, ingredients and baking equipment.
The small paper liner cups can be found in grocery stores, party stores, and kitchen stores. They need to be small and just fit the cups. It is ok if they rise slightly above the cups.
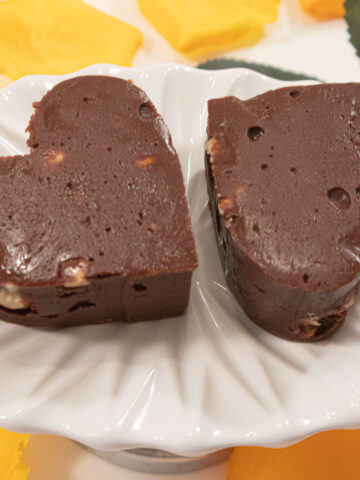
If you're looking for another really quick candy that's sure to please, check out the Nutella Fudge Hearts. Five ingredients and 20 minutes.
Helen's Reese's Peanut Butter Cups
¾ cup cream peanut butter
¼ cup (½ stick) butter, very, very soft but not runnky
½ pound powdered sugar
1 teaspoon vanilla
Line 18 mini muffin cups with small paper liners. Set aside.
Place the peanut butter, butter, powdered sugar and vanilla in the bowl of an electric mixer. Beat until very smooth.
For each PB cup, take 1 ½ tablespoons of the mixture and roll it into a ball. Place it in a cup and flatten it into the cup. Continue until all of the mixture is used.
Chocolate Topping
5 ounces semisweet chocolate
1 tablespoon Crisco or like shortening (Do not use butter or oil)
Place in a small bowl and microwave at half power for about 2 minutes. Stir until smooth. If it won't smooth out, microwave at half power for 5 to 10 seconds more. Wait for a minute and then stir again.
Using a coffee spoon and working fairly quickly, drop a heaping spoon of chocolate on 6 of the peanut butter candies. Pick up the pan and tilt it around slightly to fill the tops with the chocolate. Repeat for the rest of the candies.
Freeze until hard. Remove each of the candies from its mold and remove the papers. Serve at room temperature.
Makes about 18 Peanut Butter Cups (if you don't eat any of the peanut butter part while shaping!).
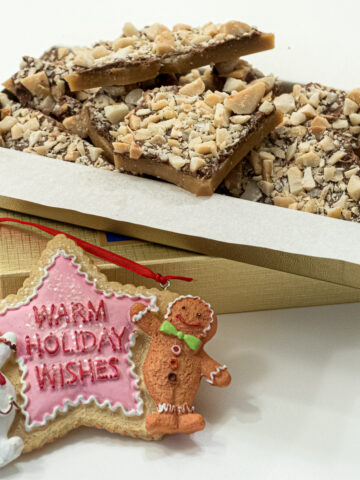
Other Recipes You'll Love
Sweet and Hot Macadamia Brittle

sylvieamesee says
Peanut butter and chocolate is one of my favorites combo. Love these amazing little cups, I'll probably have 5 of them on my own, before I share them with my family...
hfletcher says
Love your comment - my problem is I eat the peanut butter balls before they ever get the chocolate!
Laurie says
My peanut butter mix isn't as dry as yours! Impossible to roll in a ball, I used 8oz. Of packed powder sugar. What do you think went wrong? Will it get harder the longer it sits? Or do you think I can fix it, and if so how? Thank you :) Laurie
hfletcher says
Did you weigh the powdered sugar or measure by volume? Just add more powdered sugar until you can roll a firm ball.
Irene says
Hi Helen. My husband is a huge fan of peanut butter cups but agrees with you that the commercial candies just don't taste as good anymore. So, I'm anxious to try your recipe. I'm wondering if the appearance of the chocolate will suffer after a day or so since the chocolate isn't tempered. Should the finished candies be stored in the fridge? We live in Florida. Also, what do you think about putting a little chocolate in the bottom of the paper or foil liners before placing the peanut butter ball in? Thanks very much for sharing your expertise.
hfletcher says
Hi Irene: The crisco is used as a quick tempering method. However, if your area is ware, keep them in the refrigerator. They are good from there also. I would not put chocolate on the bottom because it will squash around when you press the ball of pb filling in. You need to press those in quite firmly. If you do want chocolate on the bottom, freeze the chocolate before pressing in the ball.
Kim says
Oh my! Must make these for my grown children for Easter. Yes, I'm a crazy woman who still enjoys creating an Easter basket for her over 20 children!! Thanks Helen, I'll add this to the homemade marshmellow I hope to try too.
hfletcher says
Good for you Kim. Your children are very lucky.
martine says
Hi what did you mean by use a double pan in your oatmeal cookie recipe? Thank you
hfletcher says
Please go back to the recipe and click on the link, double pan. It will send you to a full explanation. Basically it is just, as it says, doubling the pans so the cookies don't burn. Place one pan on top of another before baking.
Manisha says
Hi Helen,
I have been making a similar recipe for years and they turn out really good. My son's bday is on the 6th and he has asked for peanut butter cake. I think I will try you recipe this time and put these peanut butter cups on top of the cake as decoration and extra more, a treat for him :)
Regards
hfletcher says
Great idea Manisha. You truly do have a passion for baking.