
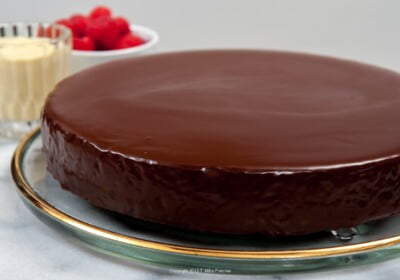
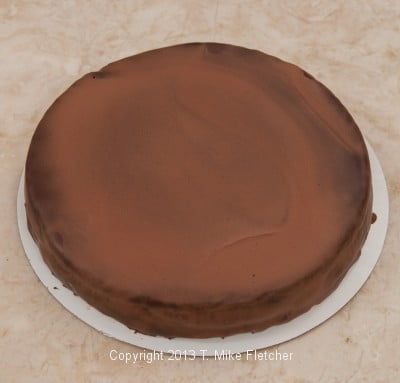
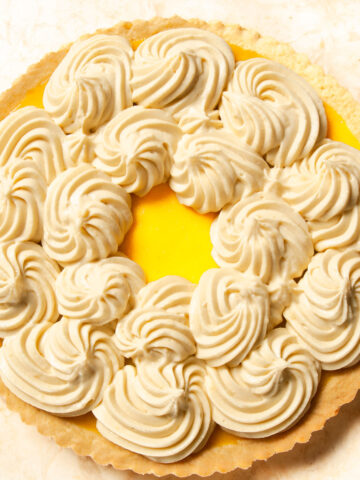
Last week the Ultimate Chocolate Fudge Cake used a glaze. This week I want to go more in depth as the glaze is one of the important techniques in pastry making and quite easy once it has been mastered. This liquid brown coating has an intense flavor since it has no sugar other than that in the chocolate. We glazed small single layers or individual cakes to four layer wedding cakes as seen below. After setting it has a beautiful sheen and the glaze itself is set softly but firmly. However, if you touch it a fingerprint will be left. It cannot be used as a coating for chocolates as it is too soft. For this discussion, we are using a dark chocolate glaze.
The glaze is dark chocolate and cream to which other ingredients such as cornsyrup, butter and flavorings can be added. Our Cream Glaze, consisting of cream and chocolate, was used for almost everything we glazed with the exception of one cake that required a butter instead of cream. The glaze can also be set out at room temperature to firm up. We did this often and used it as a filling for cakes as well as to undercoat cakes that were to receive no other finish, such as decoratifs, vermicelli or sprinkles - all the same by different names. Once set up, the finished item can be held at room temperature. See sprinkles blog.
When glazing a cake it is necessary to have more glaze than will actually be needed for the cake, since it flows over the cake and is not applied with a spatula unless using it to undercoat or filling a cake.
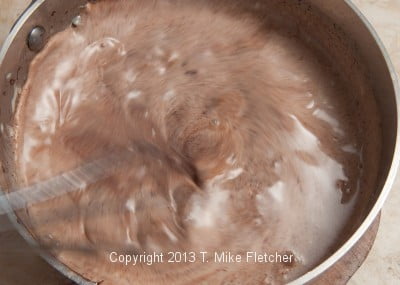
When making the glaze, it is important to heat the cream or butter only until steam can be seen when stirred or whisked. If the cream or butter become too hot, the glaze can turn an ugly, dull reddish brown when set. The chocolate can be submerged under the hot cream or the hot cream can be poured over the chocolate. Since it is well known, I dislike cleaning dishes, I use the former method as it requires one dish. It’s interesting what I base my baking decisions on, don’t you think? The ingredients are left for a few minutes and then gently whisked or stirred to complete the glaze. If using a whisk, be careful not to whisk so vigorously that you create a lot of air bubbles which will not look good in the finished glaze.
The glaze can be used immediately or held in the refrigerator and gently reheated when needed.
At the shop, we made huge batches of glaze and poured it onto sheet pans. The glaze was covered directly with film. In the morning when we got there, we would pull one or more pans out and set them on racks to be used as fillings, for piping or undercoating. When we needed to glaze a cake, or a bunch of cakes, we would scoop it into a pan and heat it gently to get it to the right consistency. We would use it immediately, then scrape up the excess and store it to be used again.
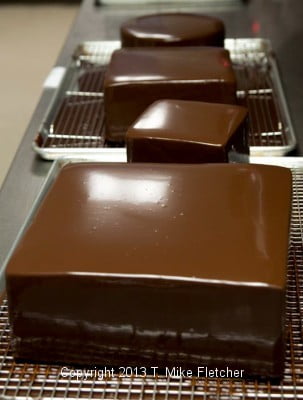
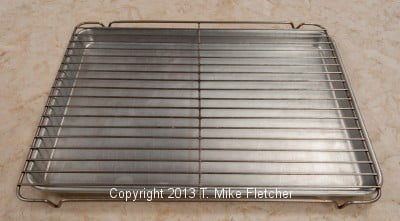
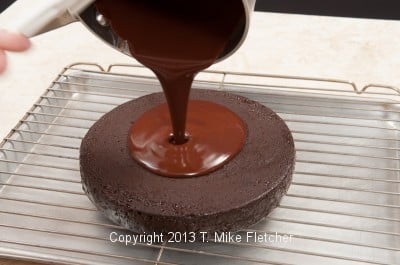
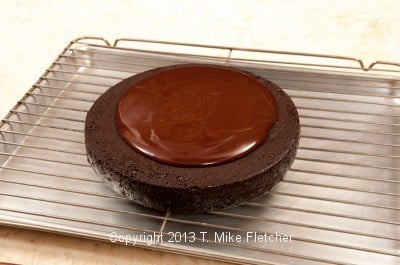
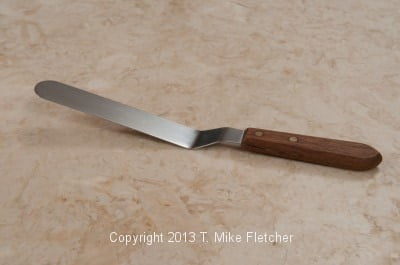
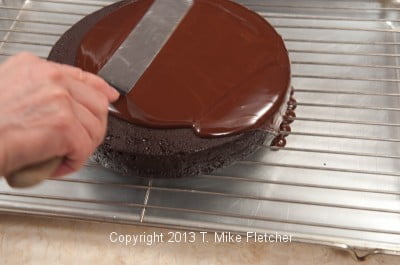
We kept special sheet trays and racks for glazing a cake. The rack would sit inside of the sheet pan. The item to be glazed would be placed on the rack and the glaze poured in the middle. With an offset spatula, the glaze would be pushed out and over the edges of the cake. This is where practice comes in. You need to make sure you covered the entire side of the cake. The easiest way to do this is to use plenty of glaze so there is enough to push over the entire side of the cake. As soon as the glaze was no longer drippy, we removed it from the rack. There are a couple of ways to do this.
To get the cake off the rack, we used what I referred to as “picker-uppers”. In case you wonder, I had no formal training and was making this up as I went long. These consisted of two sturdy but flexible pancake turners placed one on each side under the item. The cake or whatever was lifted up and placed on a cake round.
Base Recipe for Cream Glaze - This recipe can be multiplied as needed.
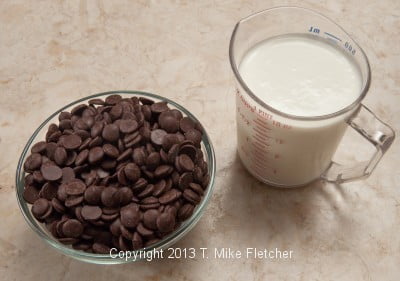
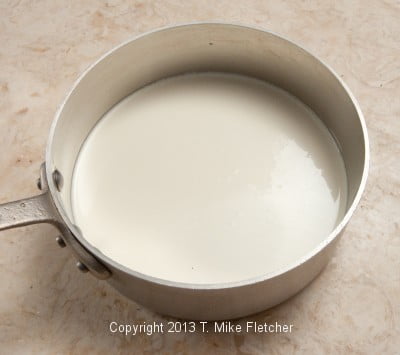
1 ½ cups 40% or heavy cream
12 ounces bittersweet or semisweet chocolate (340 grams)*
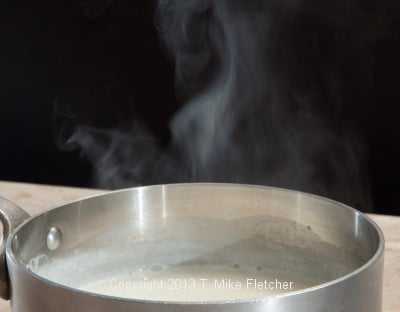
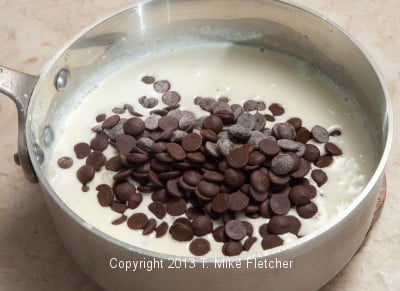
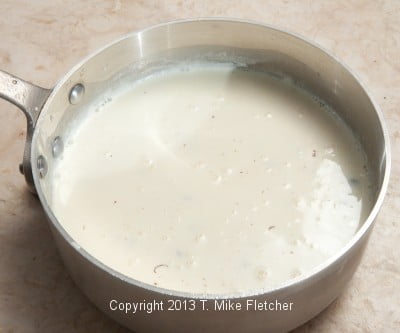
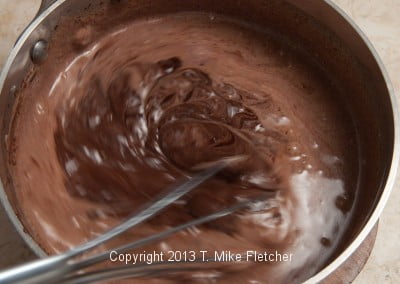

Place the cream in a pan large enough to hold the cream and the chocolate. Heat the cream until steamy, around 170 degrees. Remove it from the heat and submerge the chocolate, pushing it under the cream. Let it sit a few minutes, then gently whisk to combine. Go around the bottom edge with a rubber spatula to make sure all of the chocolate has been incorporated.
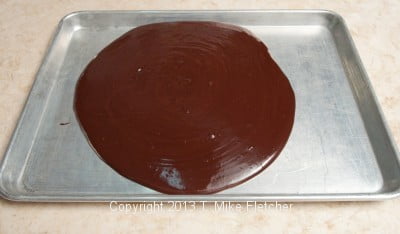
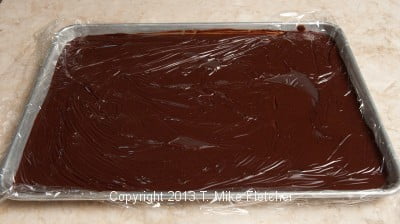
Use immediately. Alternately, pour the glaze into a rimmed baking tray - this is a ½ sheet tray. Cover the top with film and allow to come to room temperature to use.
Alternately, place it any container and store in the refrigerator


Glazing
Place a rack over a rimmed pan. Place your item on the glazing rack. Pour the glaze in the center and, with an offset spatula, push the glaze over the edge. Make sure the entire edge is covered with glaze. This should be done quickly and with a few strokes. Pick the tray up and rap it really hard on the table several times to even out the glaze.
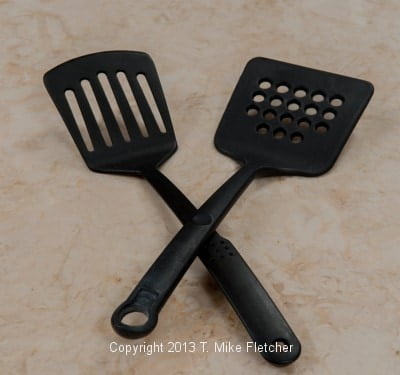
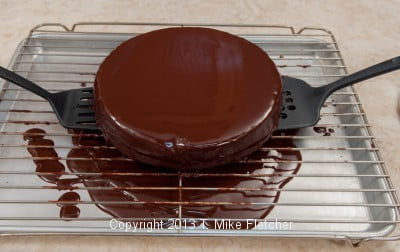
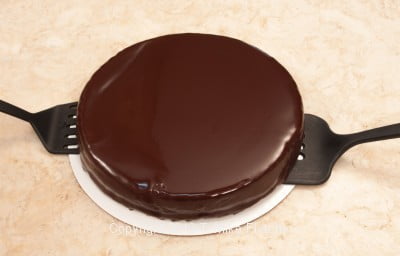
Insert one "picker-upper" under each side of the item

David Stong says
When the glaze cools a bit, but hasn't stiffened, you can put it in the bowl of your mixer and whip it. The result makes a simple mousse and a pipe-able topping. We called it ganache, though I guess ganache is more complex? Always equal ounces, chocolate to cream. Of course it was weight to liquid, but it was easy to remember.
Helen S Fletcher says
Hi David - thanks for the tip. The glaze is a ganache, just used as a glaze. I'm anxious to try this.
Stephanie says
Hi Fletcher. I noticed that you don't have a Pinterest button on your site. Is it okay that to pin your blog and pictures there? Thank you.
Stephanie says
I apologize. I meant Mrs. Fletcher.
hfletcher says
No need to apologize. I prefer Helen anyway. Thank you so much for bringing to my attention the Pintrest button that I don't have. I am having it corrected. Please feel free to pin. Thanks for reading.
Stephanie says
Thank you, Helen.
hfletcher says
You're very welcome.
Manisha says
Helen is there a particular temperature at which the cake to be glazed should be? I feel that the glaze sets too quickly even before it can be pushed outwards towards the sides.
hfletcher says
Hi Manisha - I have never taken the temperature of the glaze, but that is a great idea. If it is setting up too quickly, it is too cold. Warm it up. I think I have some in the refrigerator and I will let you know today if I have it. Otherwise, I will temp it when I use it at the restaurant.
Thanks for asking - it will help all of us.
Manisha says
thank you soo much Helen...very helpful writeup.