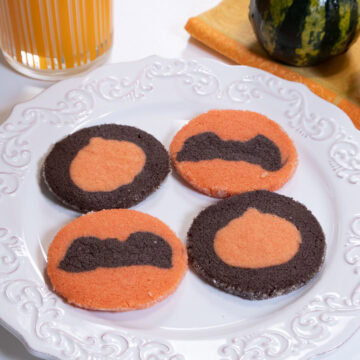
These Halloween Cookies are easier than they might appear and add that special touch to his popular holiday. The fact the rolls can be made ahead and frozen at your leisure makes these even more appealing. Just slice and bake for a cookie sure to please. An added bonus is there is no colored icing or piping to apply.
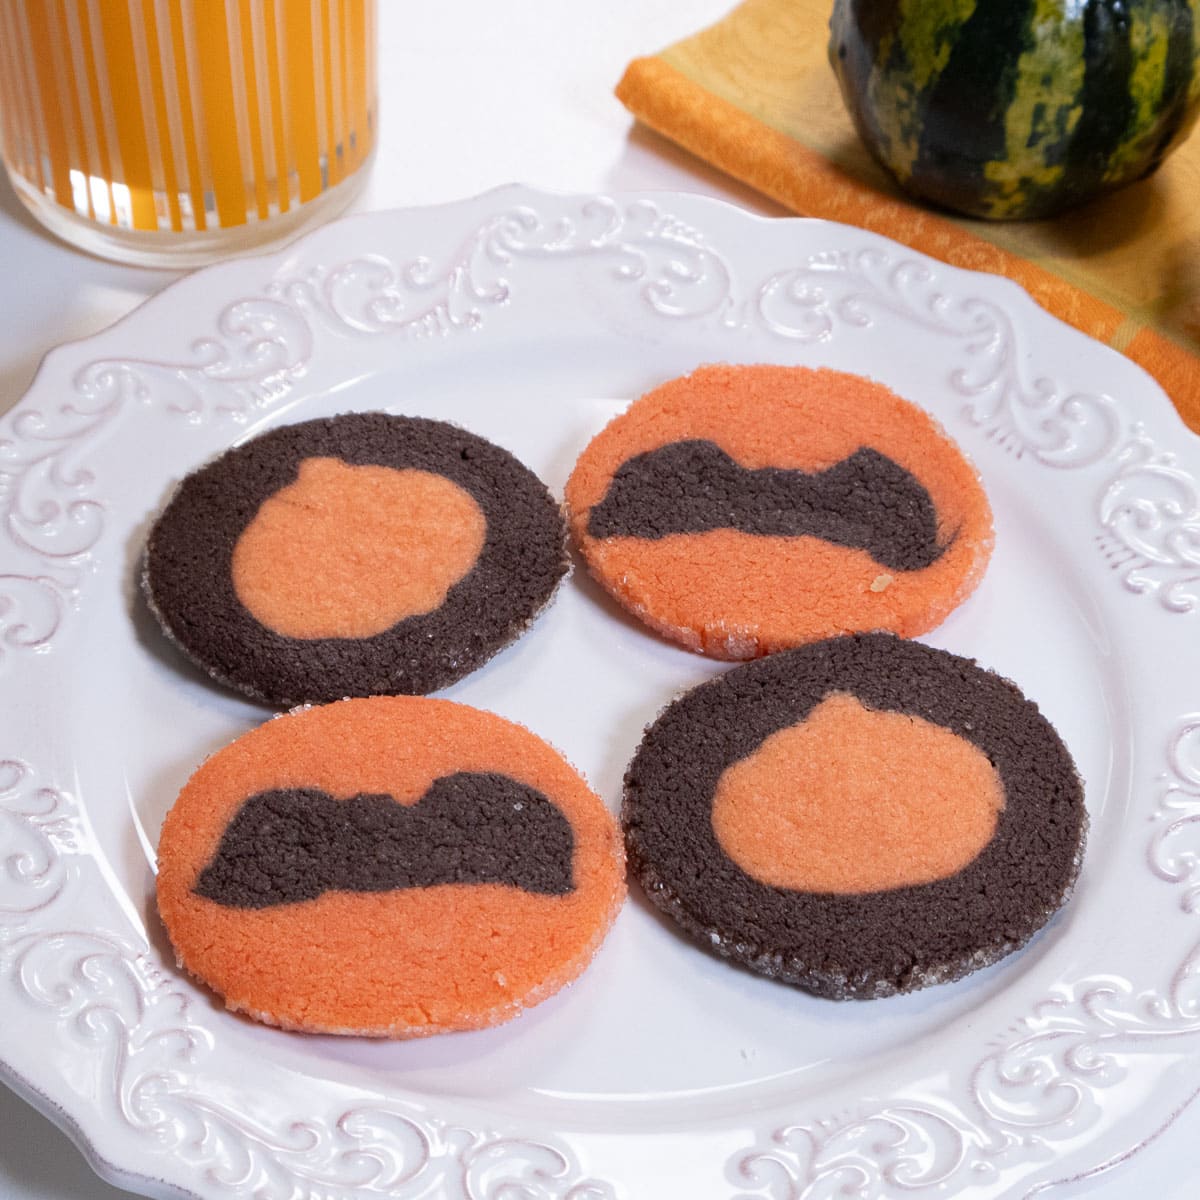
I used my simple shortbread recipe because it's not only buttery but really easy to make. Because this is butter forward, European butter is a good choice here. When I first saw this idea on Smitten Kitchen's site I knew I had to try it. Two doughs are used - a full portion of the outer cookie and a half portion of the inner cookie that makes the design.
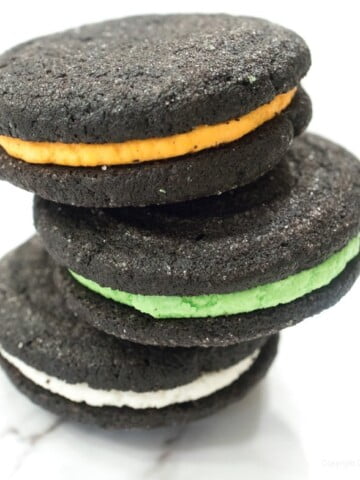
Be sure to check out the Neapolitan Cookies, substituting orange for the red in the cookie and the Almost Oreo's which I made for another Halloween.
Jump to:
Why You'll Love This Recipe
- It's a stunner of a cookie sure to elicit praise
- Everyone will wonder how you got the cookie inside of the cookie
- The cookie isn't difficult to make - it just looks that way
- It can be made way ahead and frozen, thawed, cut and baked. Or, it can be baked and held in an airtight tin for a week. Either way, it's one less thing to do on Halloween.
- Besides their interesting look, they really are tasty.
Variations
The great thing about this recipe is that it can be used for any holiday by changing out the colors and the inside cookie. For instance, white and a green shamrock for St. Patrick's Day, a red heart inside a pink, white or chocolate outer cookie for Valentine's day, a Christmas tree or Santa for Christmas - you get the idea.
Recipe Ingredients
Orange Dough
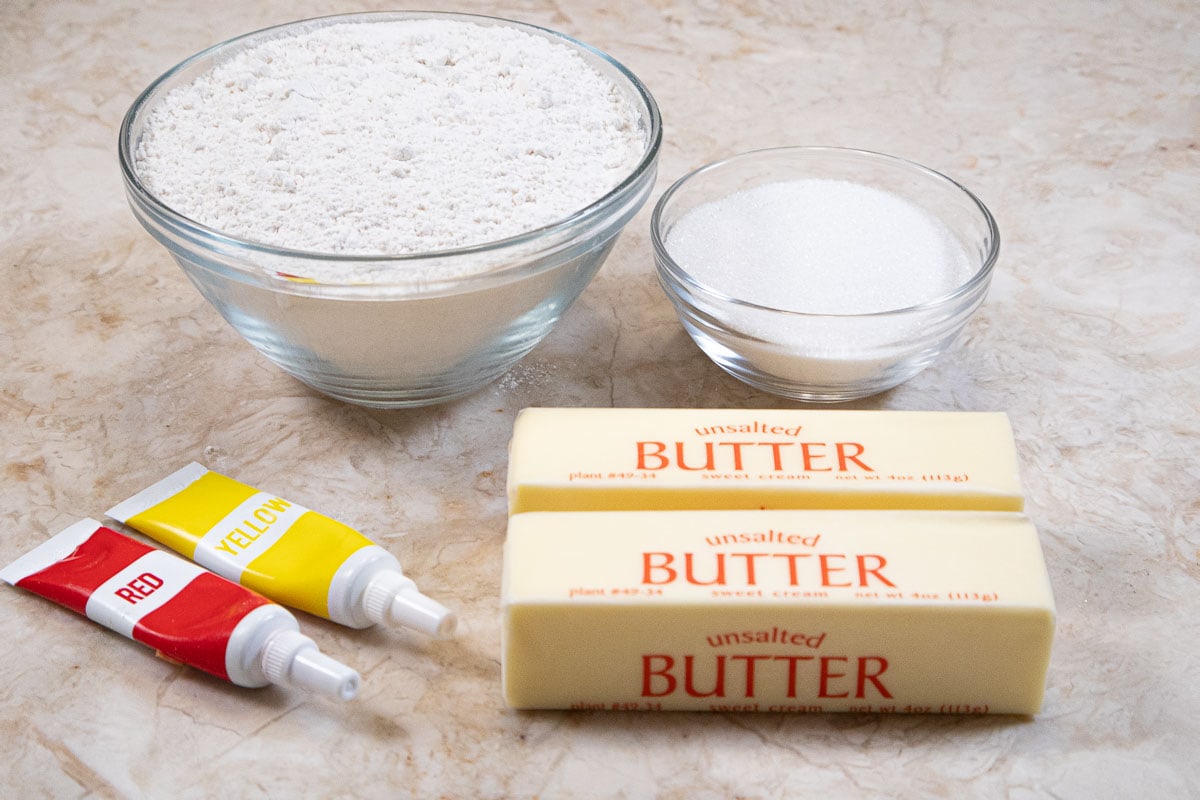
FRONT ROW: Red and yellow gel colors, unsalted butter
BACK ROW: All-purpose flour, granulated sugar
Chocolate Dough
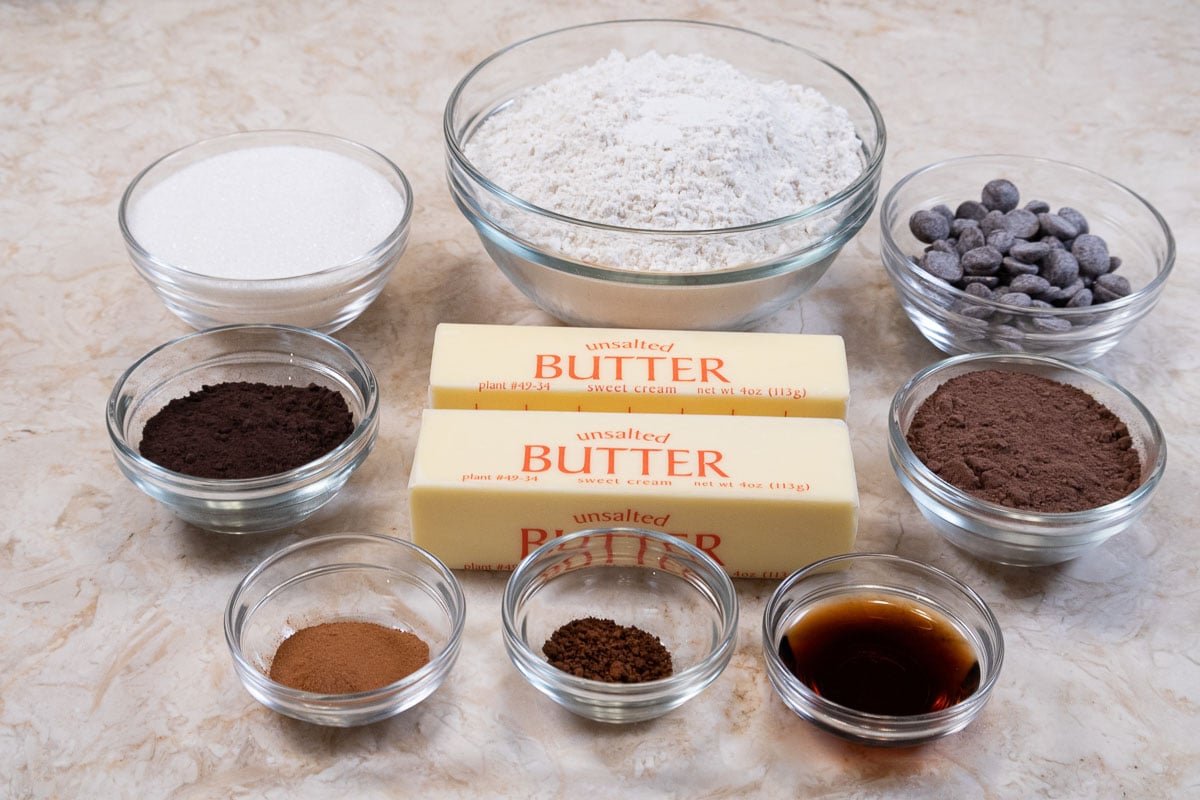
FRONT ROW: Cinnamon, instant coffee or espresso, vanilla extract
MIDDLE ROW: Black cocoa, unsalted butter, Dutch cocoa
BACK ROW: Granulated Sugar, All-purpose flour, semisweet chocolate
Applying the Sugar
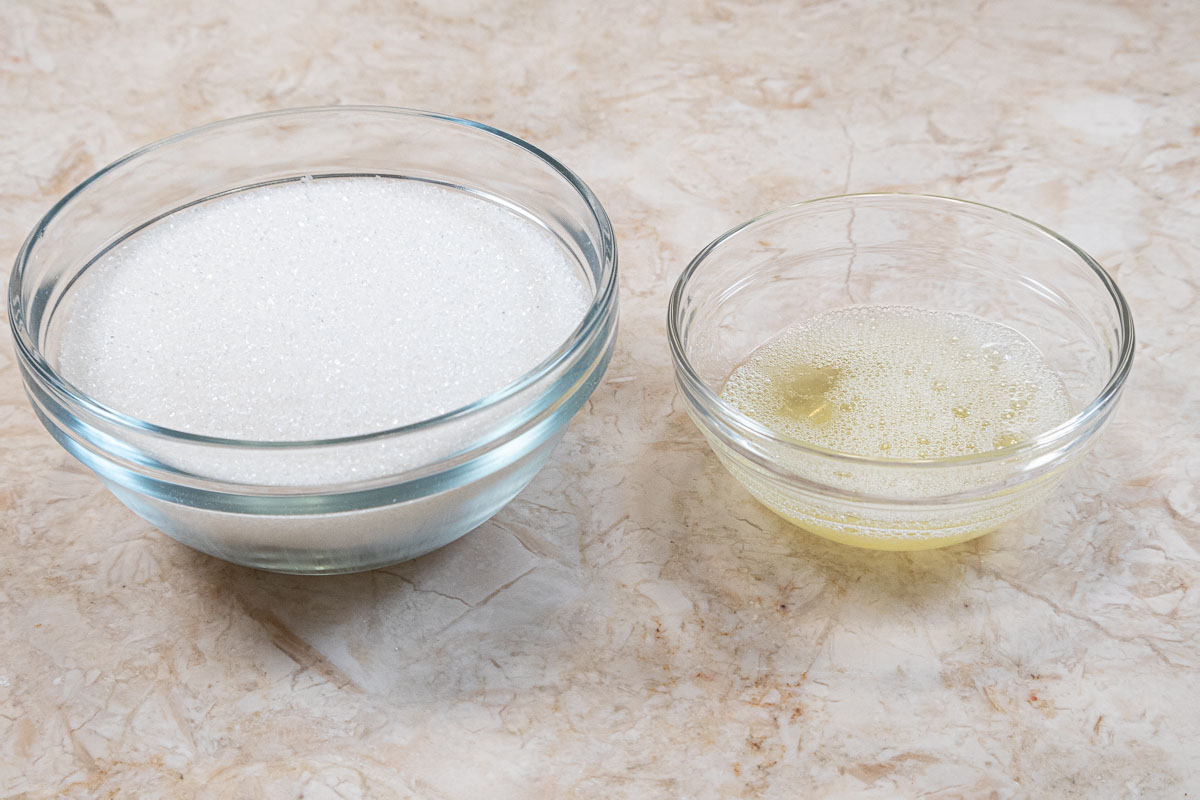
Left to Right: Sanding Sugar and beaten egg white
Key Ingredients
European Butter is a good choice here for it's added butterfat which makes it more "buttery" and a firmer butter. Regular American butter is fine also. In either case it should be unsalted.
Instant Coffee or Espresso adds a depth of flavor to chocolate which I almost always include it in chocolate recipes.
The Vanilla Extract can be McCormick imitation as it is a waste to use pure vanilla in a heavily chocolate or spiced item. See my post on The Making of Vanilla for an indepth discussion of vanilla, the different types, pure or imitation, which imitation and much more.
Black Cocoa is the most extreme Dutch cocoa there is. It's what makes Oreo cookies so black. However, it's best not to use all black cocoa as it can impart a bitter taste. It is usually used ¼ to ⅓ black to ¾ or ⅔ Dutch cocoa for the best effect. There are several online, I use Black Onyx but any good black cocoa is fine.
My preferred chocolate is Callebaut #811 Semisweet chocolate callets. It can be found online.
When using dyes for coloring food, it is best to use Gel Dyes as they are thicker, less runny, and the color are more intense. Also, when using a lot of color such as making the orange which requires both red and yellow, they don't add another liquid to the batter.
Sanding Sugar is a special type of larger sugar crystals that won't melt in heat or cold. They come in different colors and are used for decoration.Be sure to see the recipe card below for the exact ingredients & instructions.
Be sure to see the recipe card below for exact ingredients and instructions.
Step by Step Instructions
The photographs show each of the doughs being made. The mini orange pumpkins inside the chocolate dough are shown in the step by step photographs. A whole recipe of chocolate dough is needed + ½ of the orange dough. To make the mini chocolate bats inside the orange dough the doughs are reversed but the same technique is followed. A whole recipe of orange dough + ½ recipe of chocolate dough is needed. The exact amounts are in the recipe card. Each of these combinations makes 45 cookies.
Orange Dough
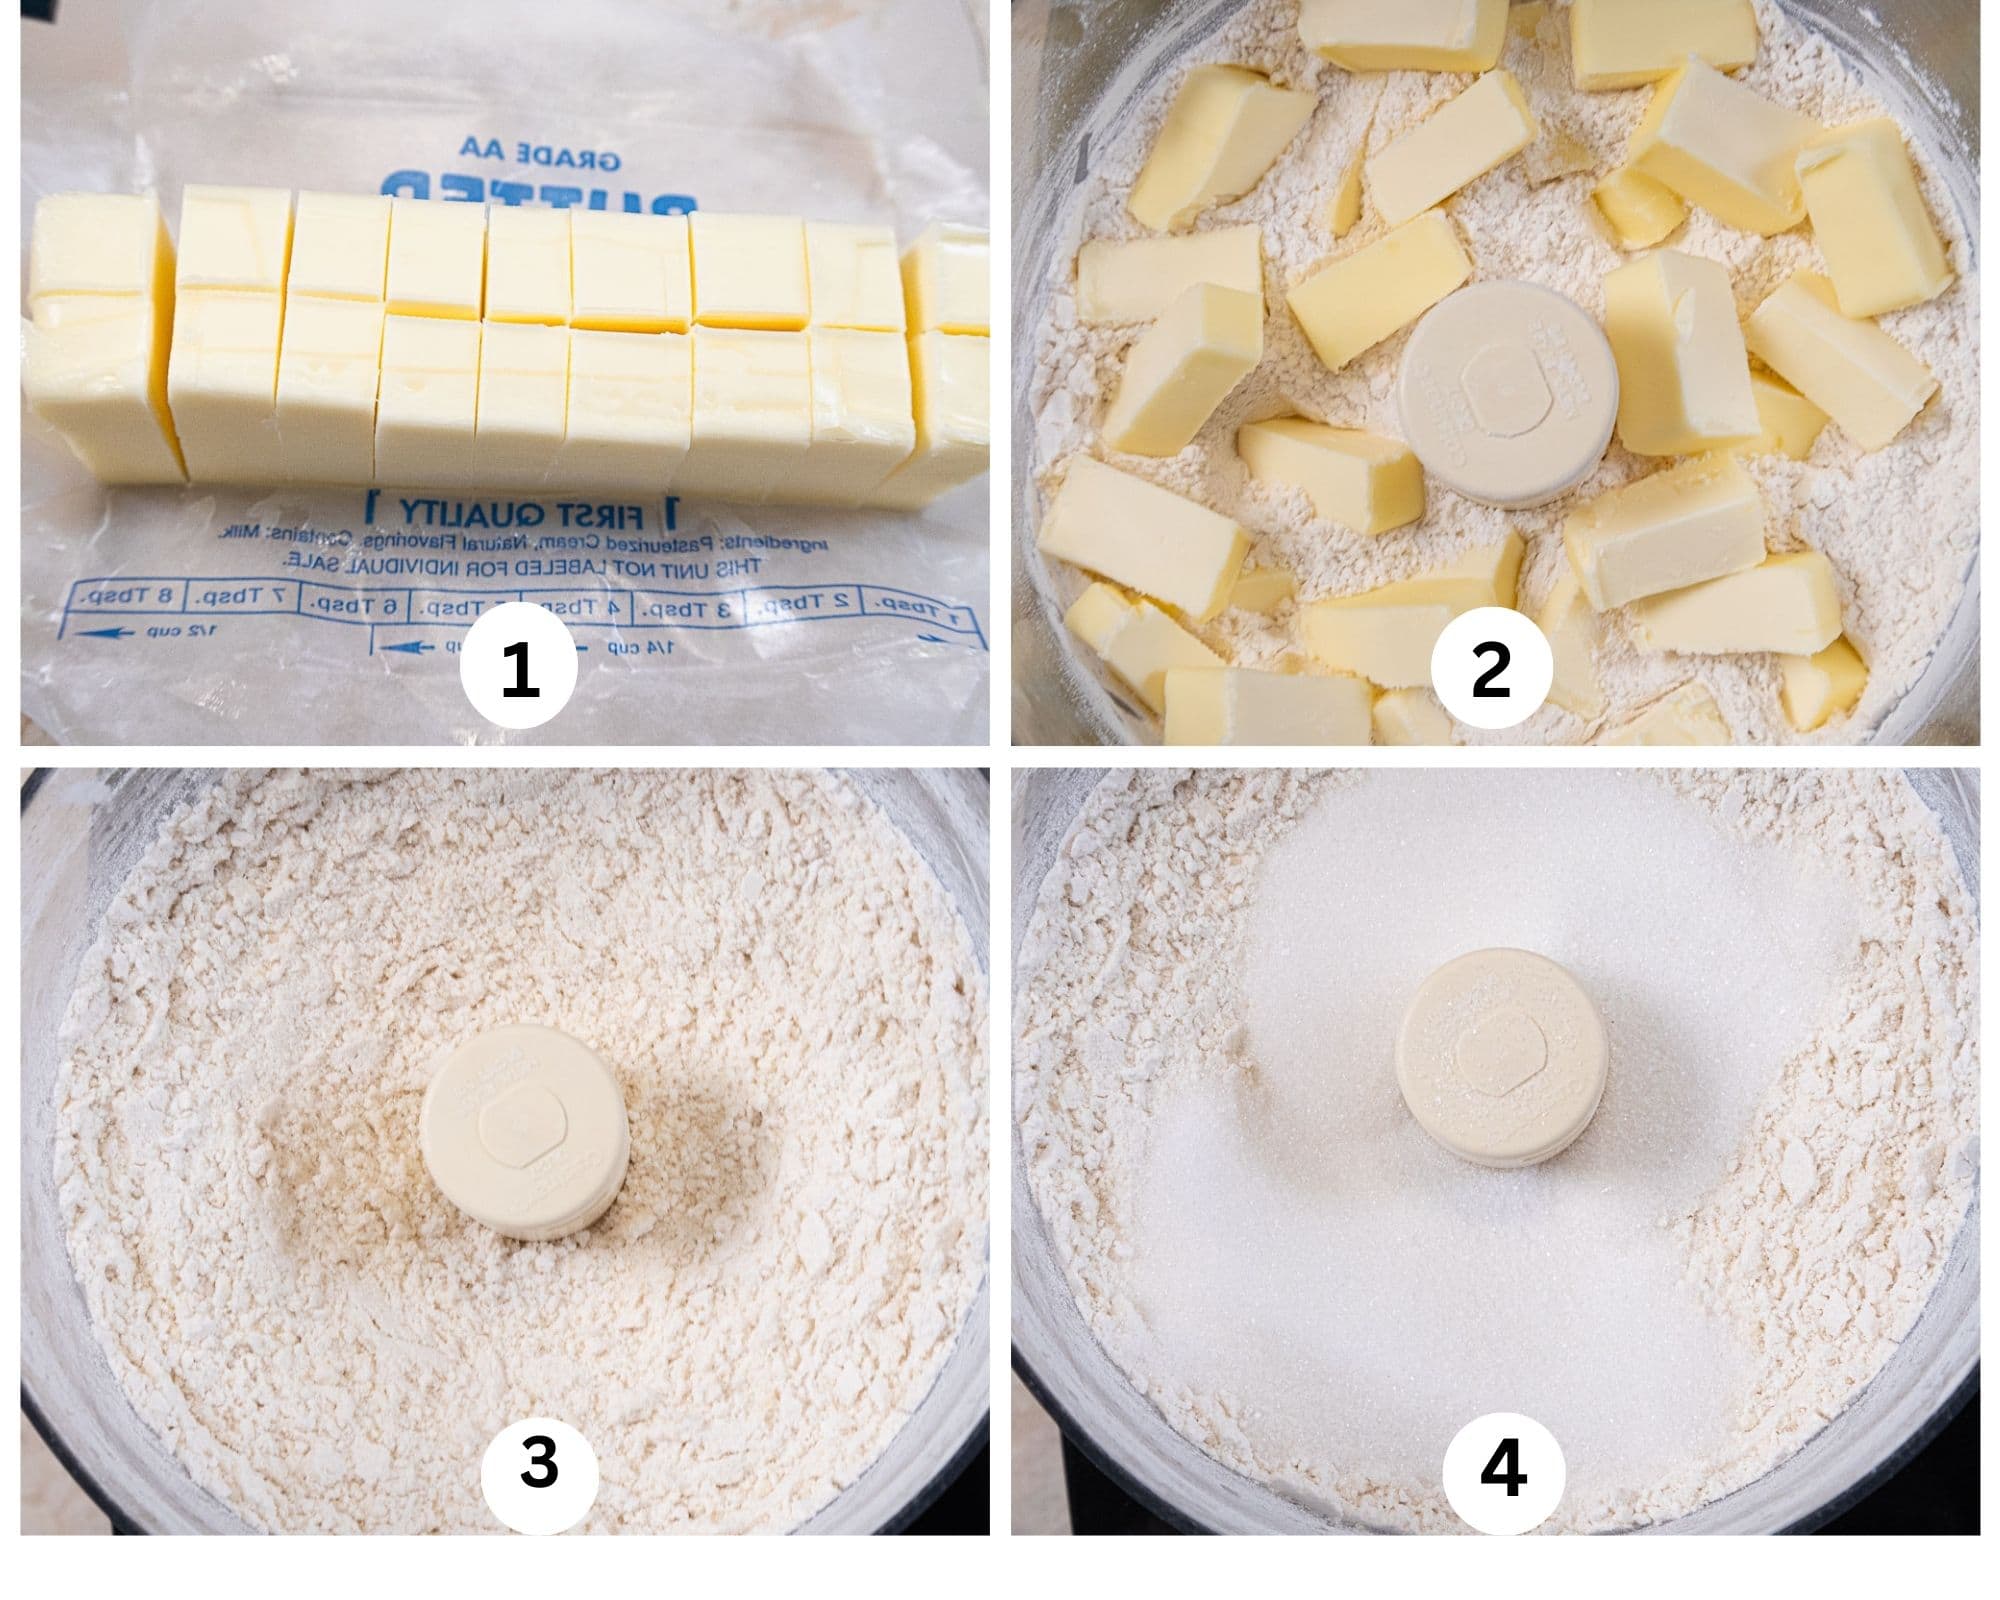
Step 1. The butter should not be rock hard from the refrigerator but slightly softened to the point that it leaves an indentation when your finger is pressed in. It can be cut before or after it is slightly softened. The easiest way to cut the butter is to cut it in half legnthwise. Then cross cut it 8 or 9 times. Step 2. Add the flour to the processor bowl. Add the cut butter. Step 3. Process until the butter is indistinguishable. Step 4. Add the sugar.
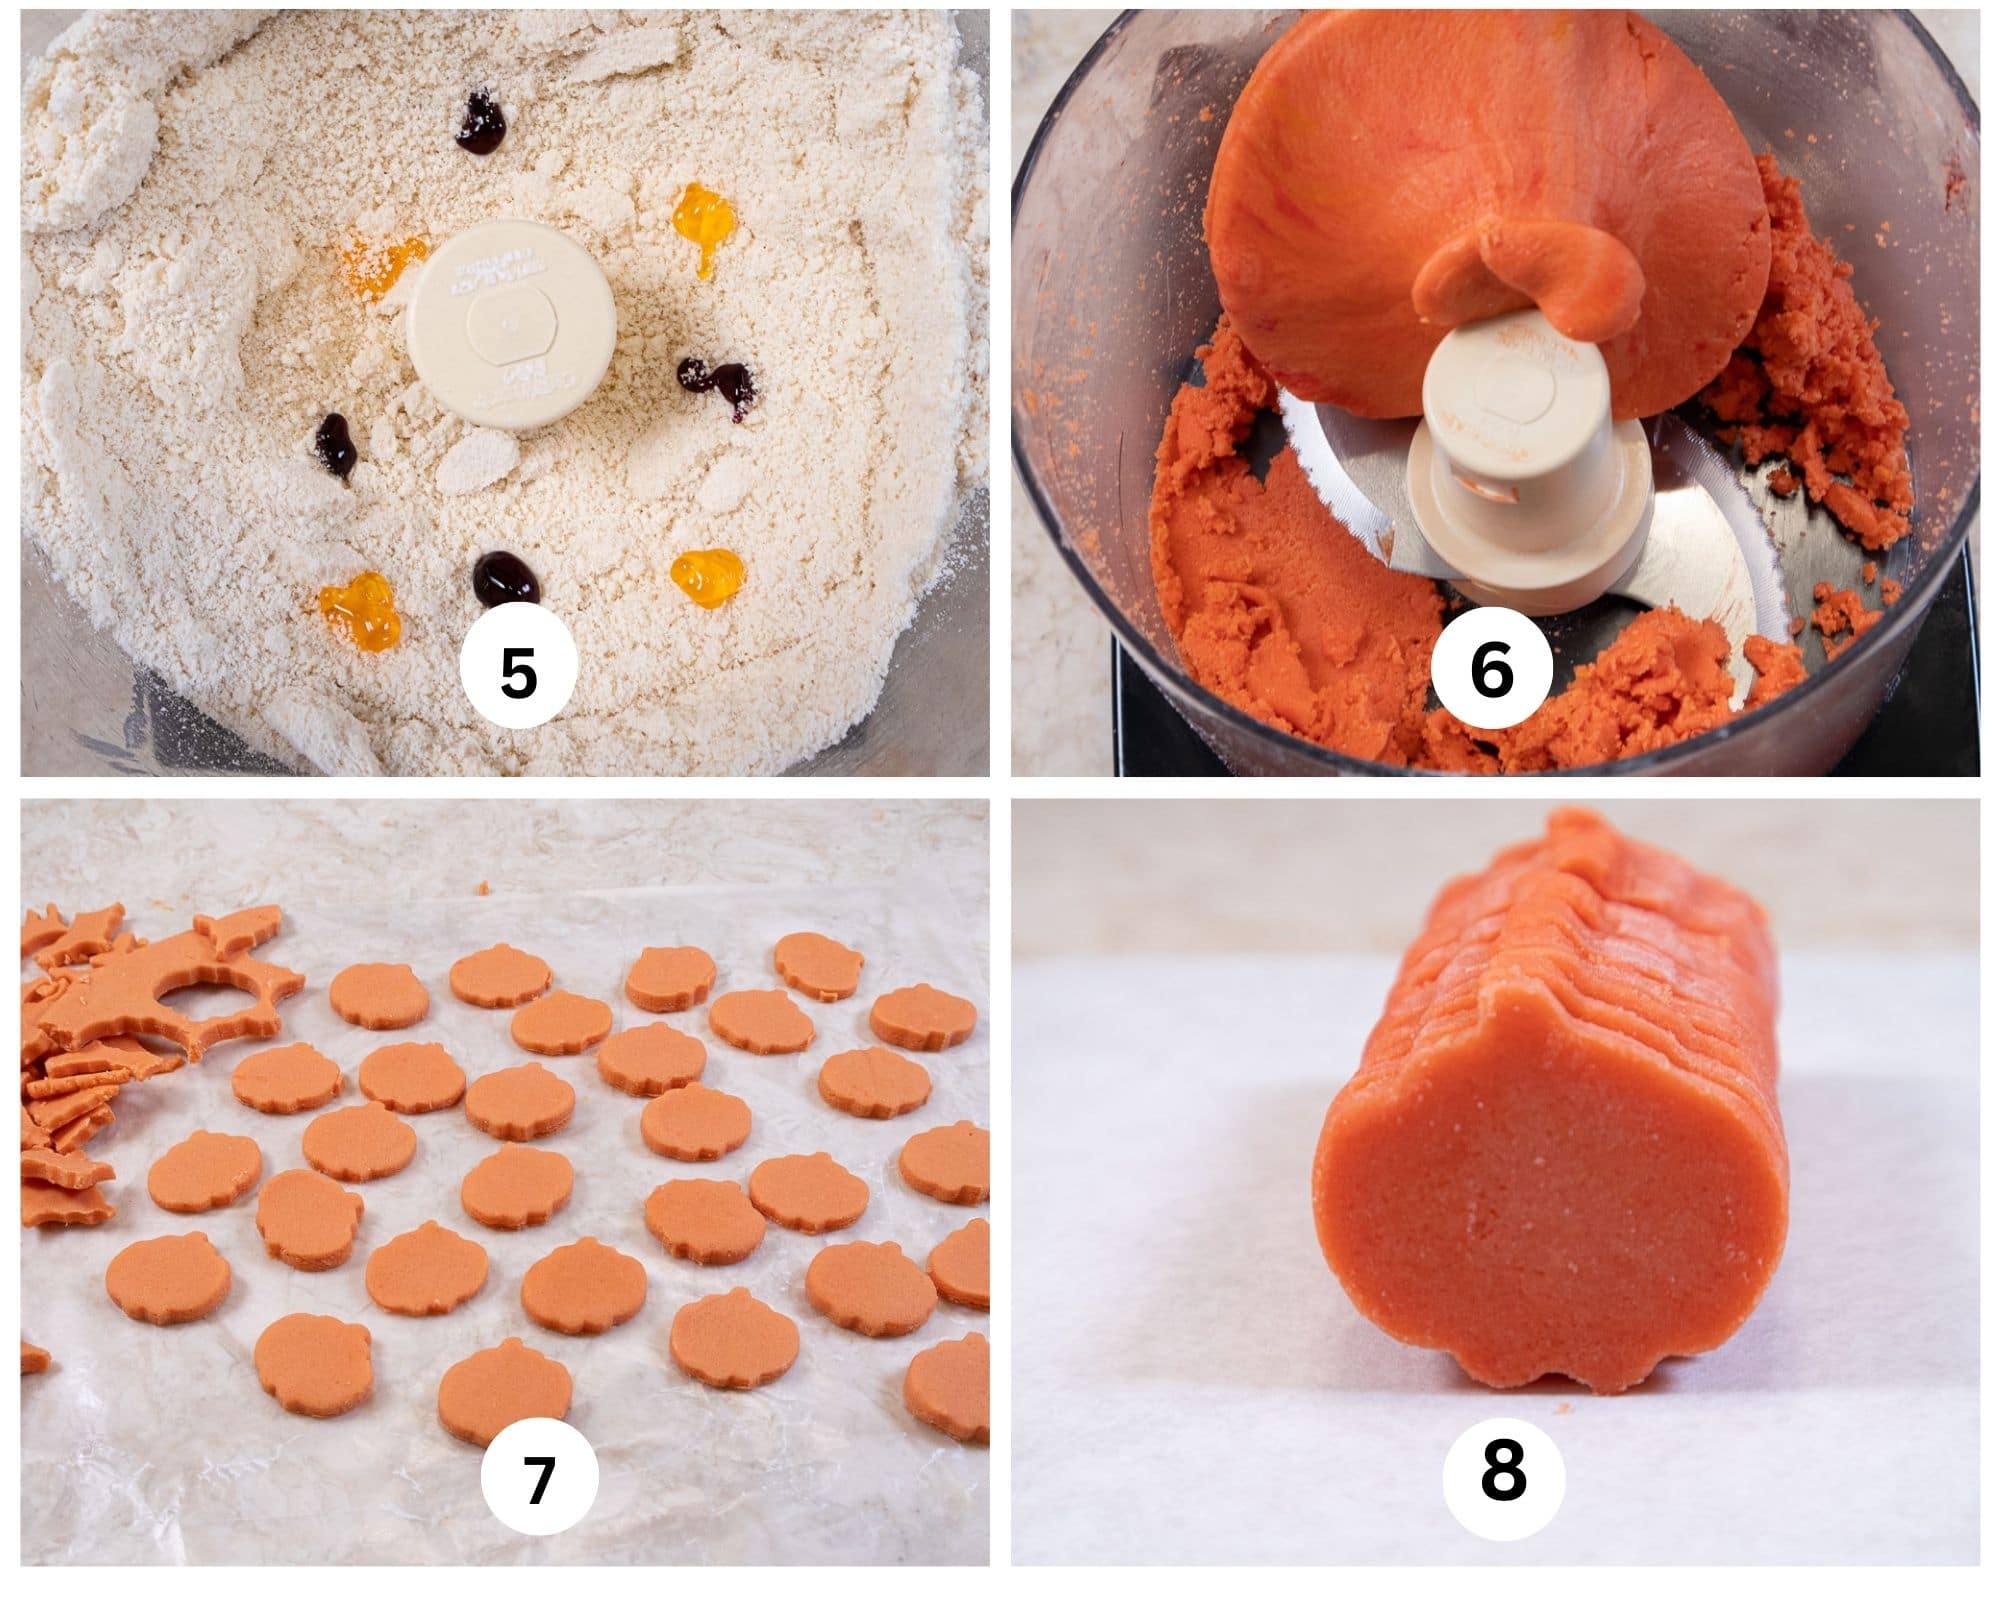
Step 5. Add red and yellow gel dyes to the ingredients in the processor. Step 6. Process to complete the dough. If it is not orange enough add more dye and reprocess. Step 7. Roll the dough out. The depth doesn't make a difference as long as your cutter is a bit deeper. Cut the mini pumpkins out. Chill the dough in the fridge or freezer. The pumpkins should pop out if you press on them. Step 8. Line them up so they match and press them together so they stick. It is important to do this while they are cold and hard so they don't get out of shape. Press from each end. They should make a solid block of pumpkin shaped dough. Freeze until hard while making the chocolate dough. If using the mini bat cutter, do the same thing.
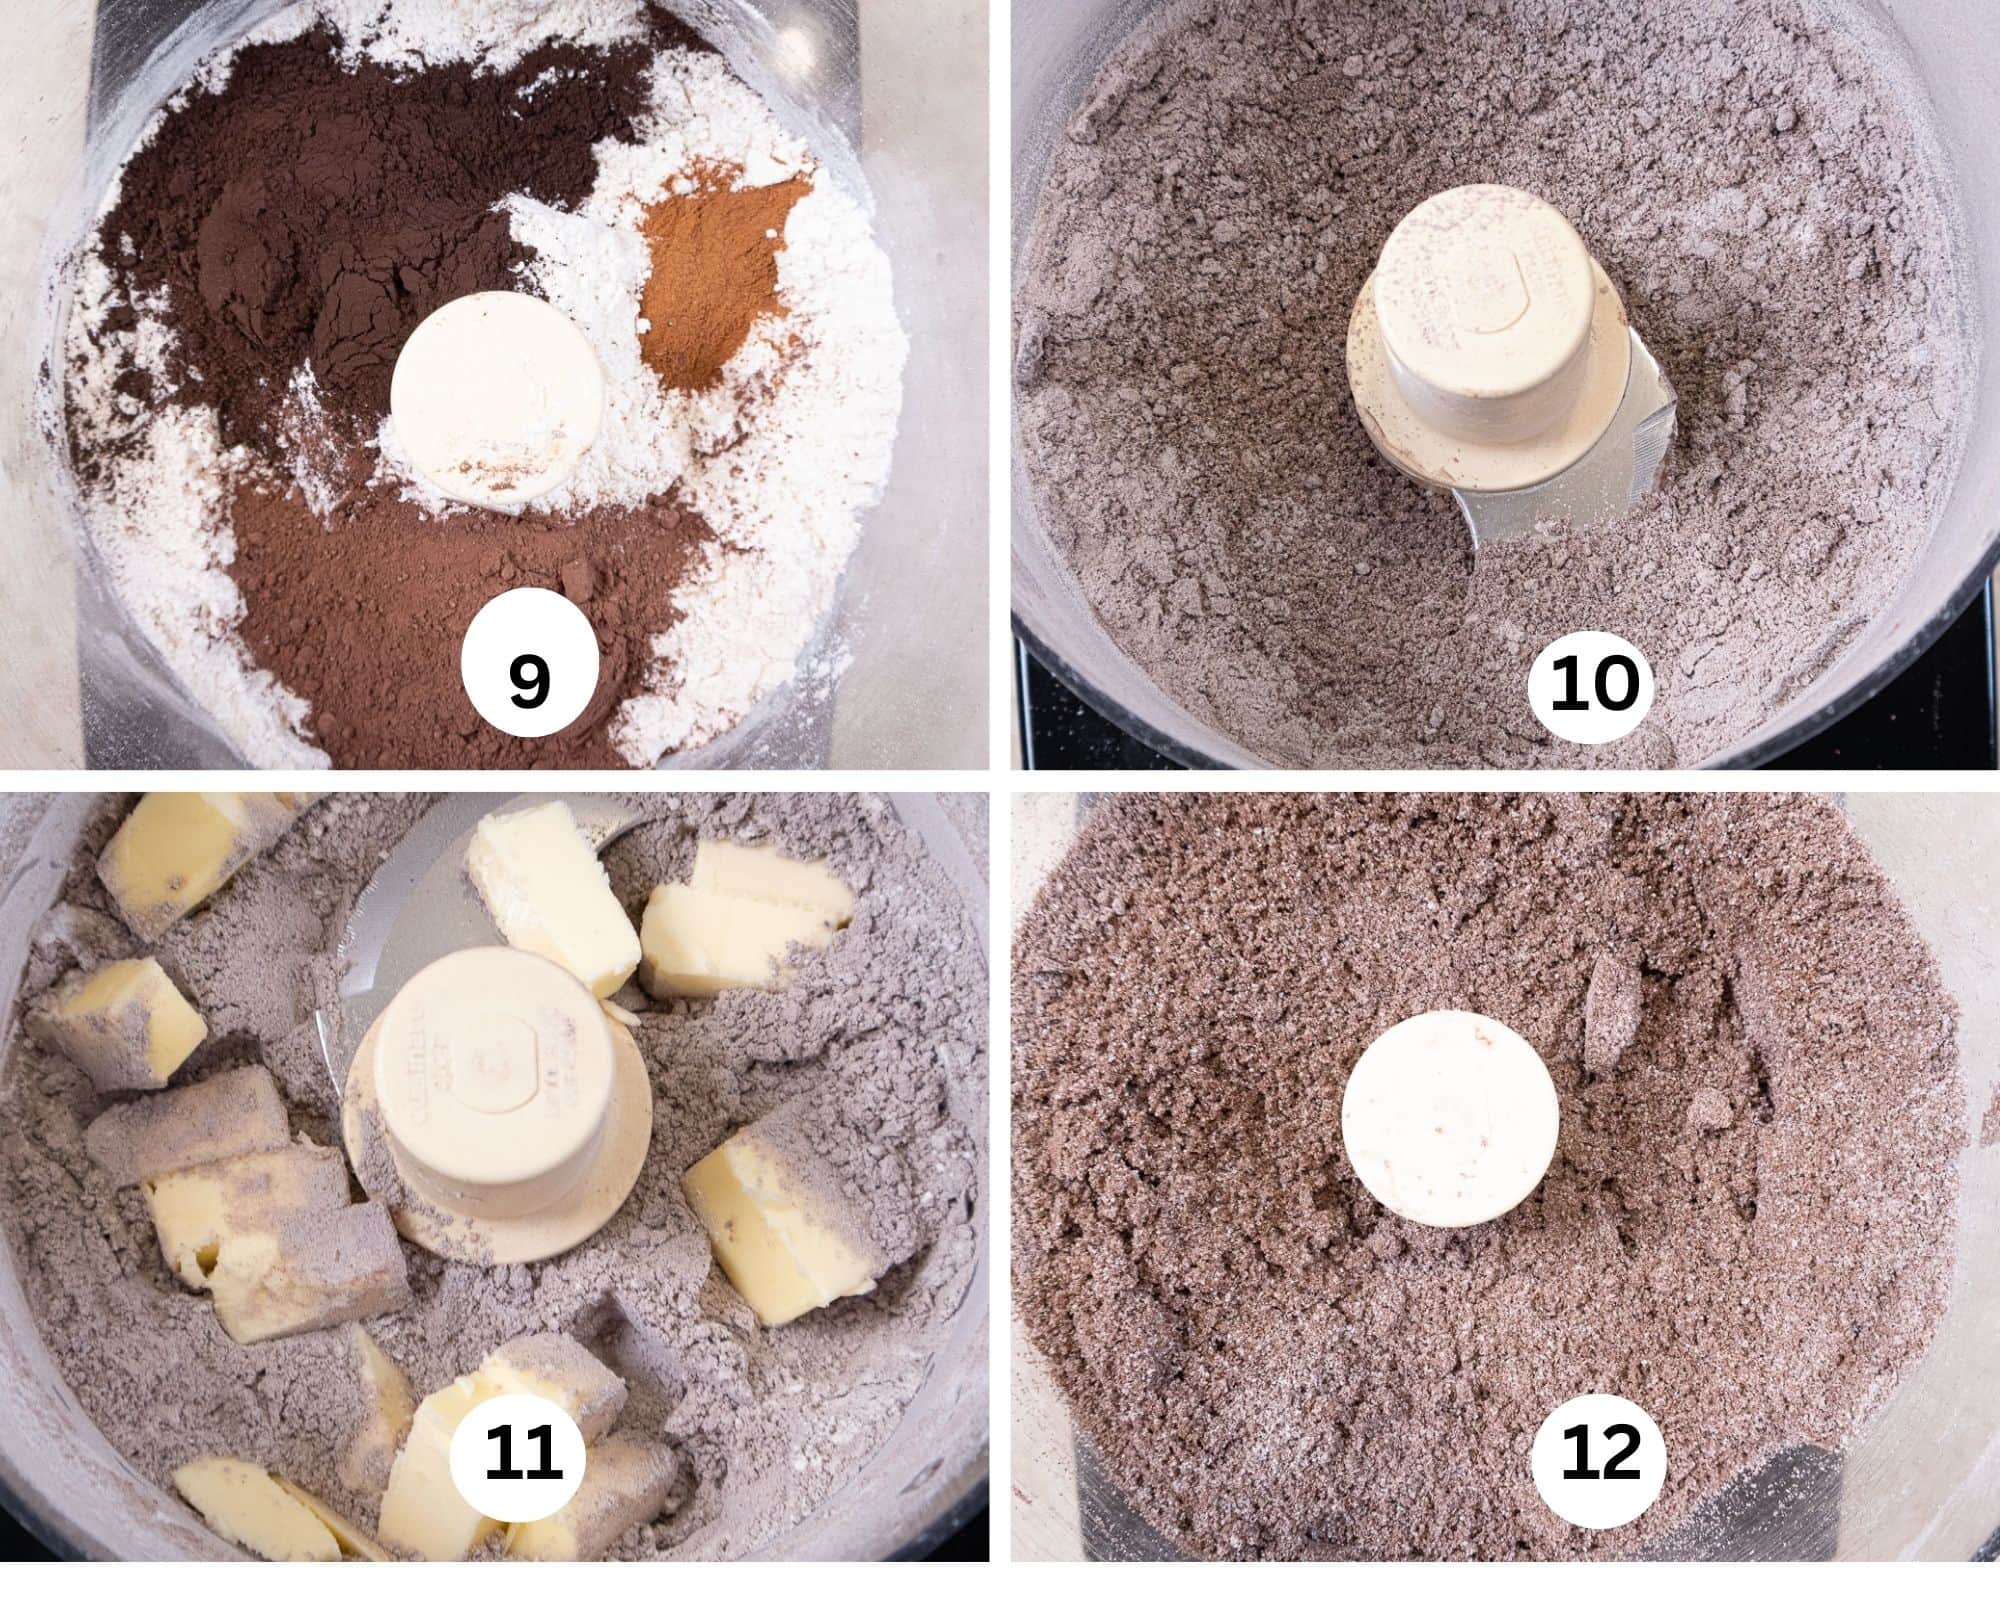
Step 9. Add the dry ingredients to the processor bowl. Step 10. Process to mix. Step 11. Add the slightly softened butter (see above Step 1). Process until it is indistinguishable.
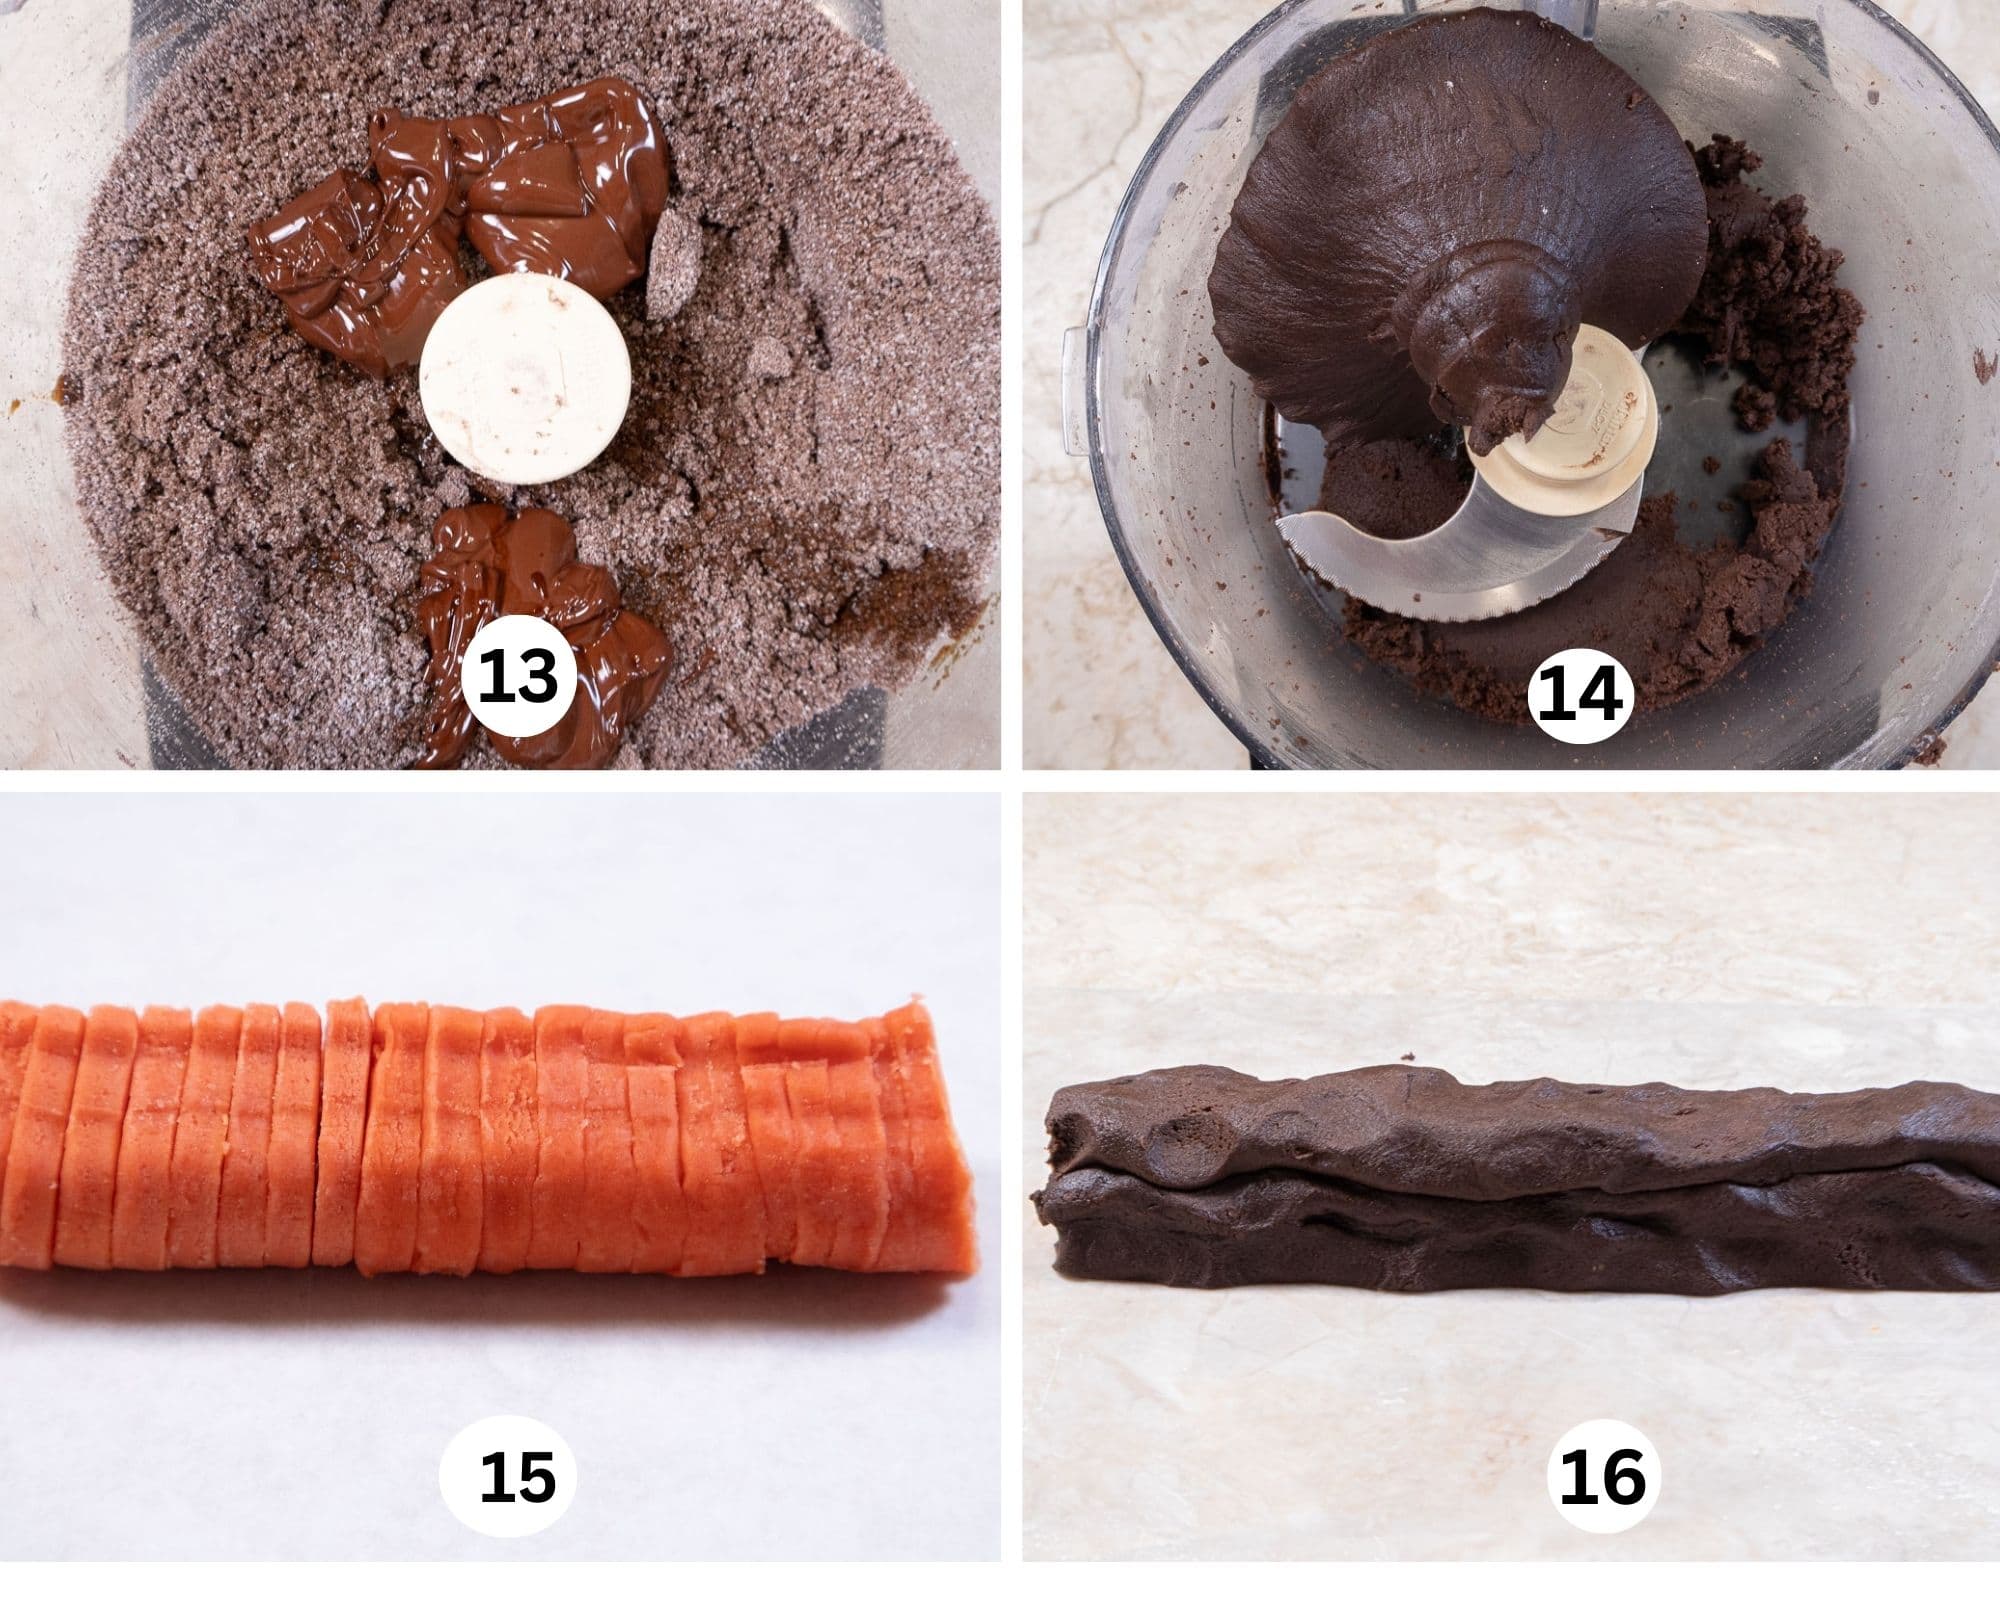
Step 13. Mix the coffee and vanilla together. Melt the chocolate but do not let it get really hot. Cool it if it does. Add these to the dry ingredients. Step 14. Process until the dough mostly forms a ball. Empty the processor and knead the dough into a solid ball. Step 15. Remove the log of frozen pumpkins. Step 16. Shape a rope of chocolate dough about 1" to 1 ½" round the length of the pumpkin roll. Press it onto the side of the pumpkins. Repeat for the top and other side of the dough, pressing the ropes together to cover the pumpkin log.
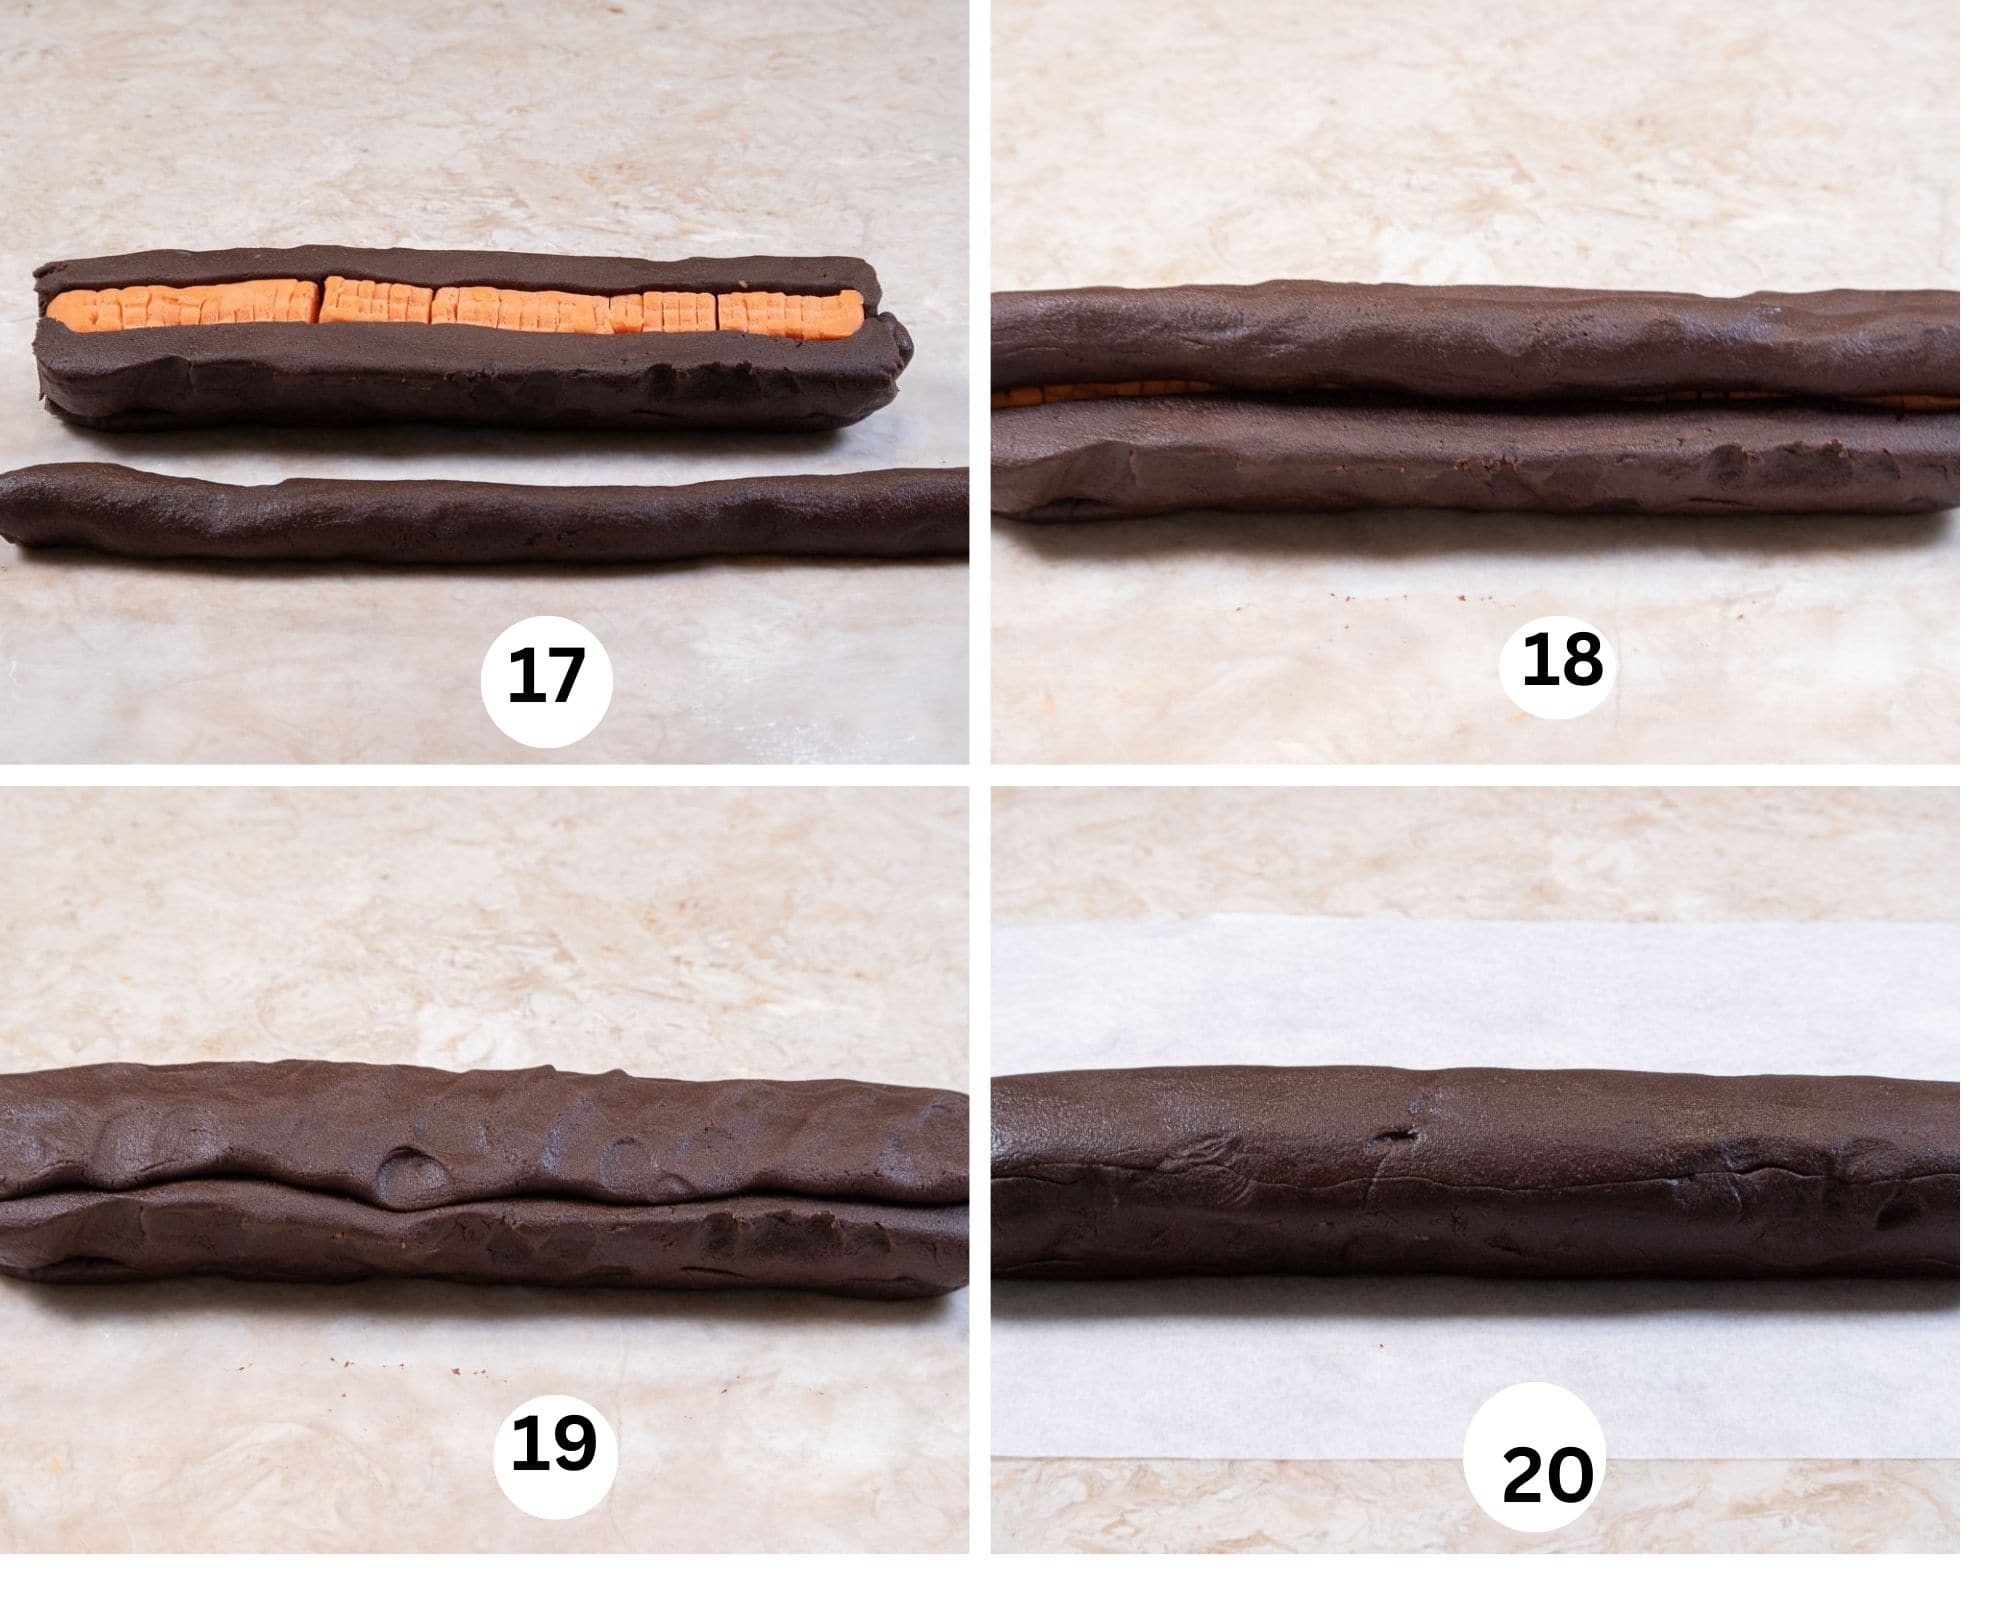
Step 17. Gently turn the chocolate encased pumpkins over. Roll another rope of dough, cutting it to the length of the roll. Step 18. Place the roll on top of the pumpkins. Step 19. Press it down to cover the bottom, pressing the pieces of chocolate dough together. Step 20. Roll the dough back and forth lightly to smooth it out.
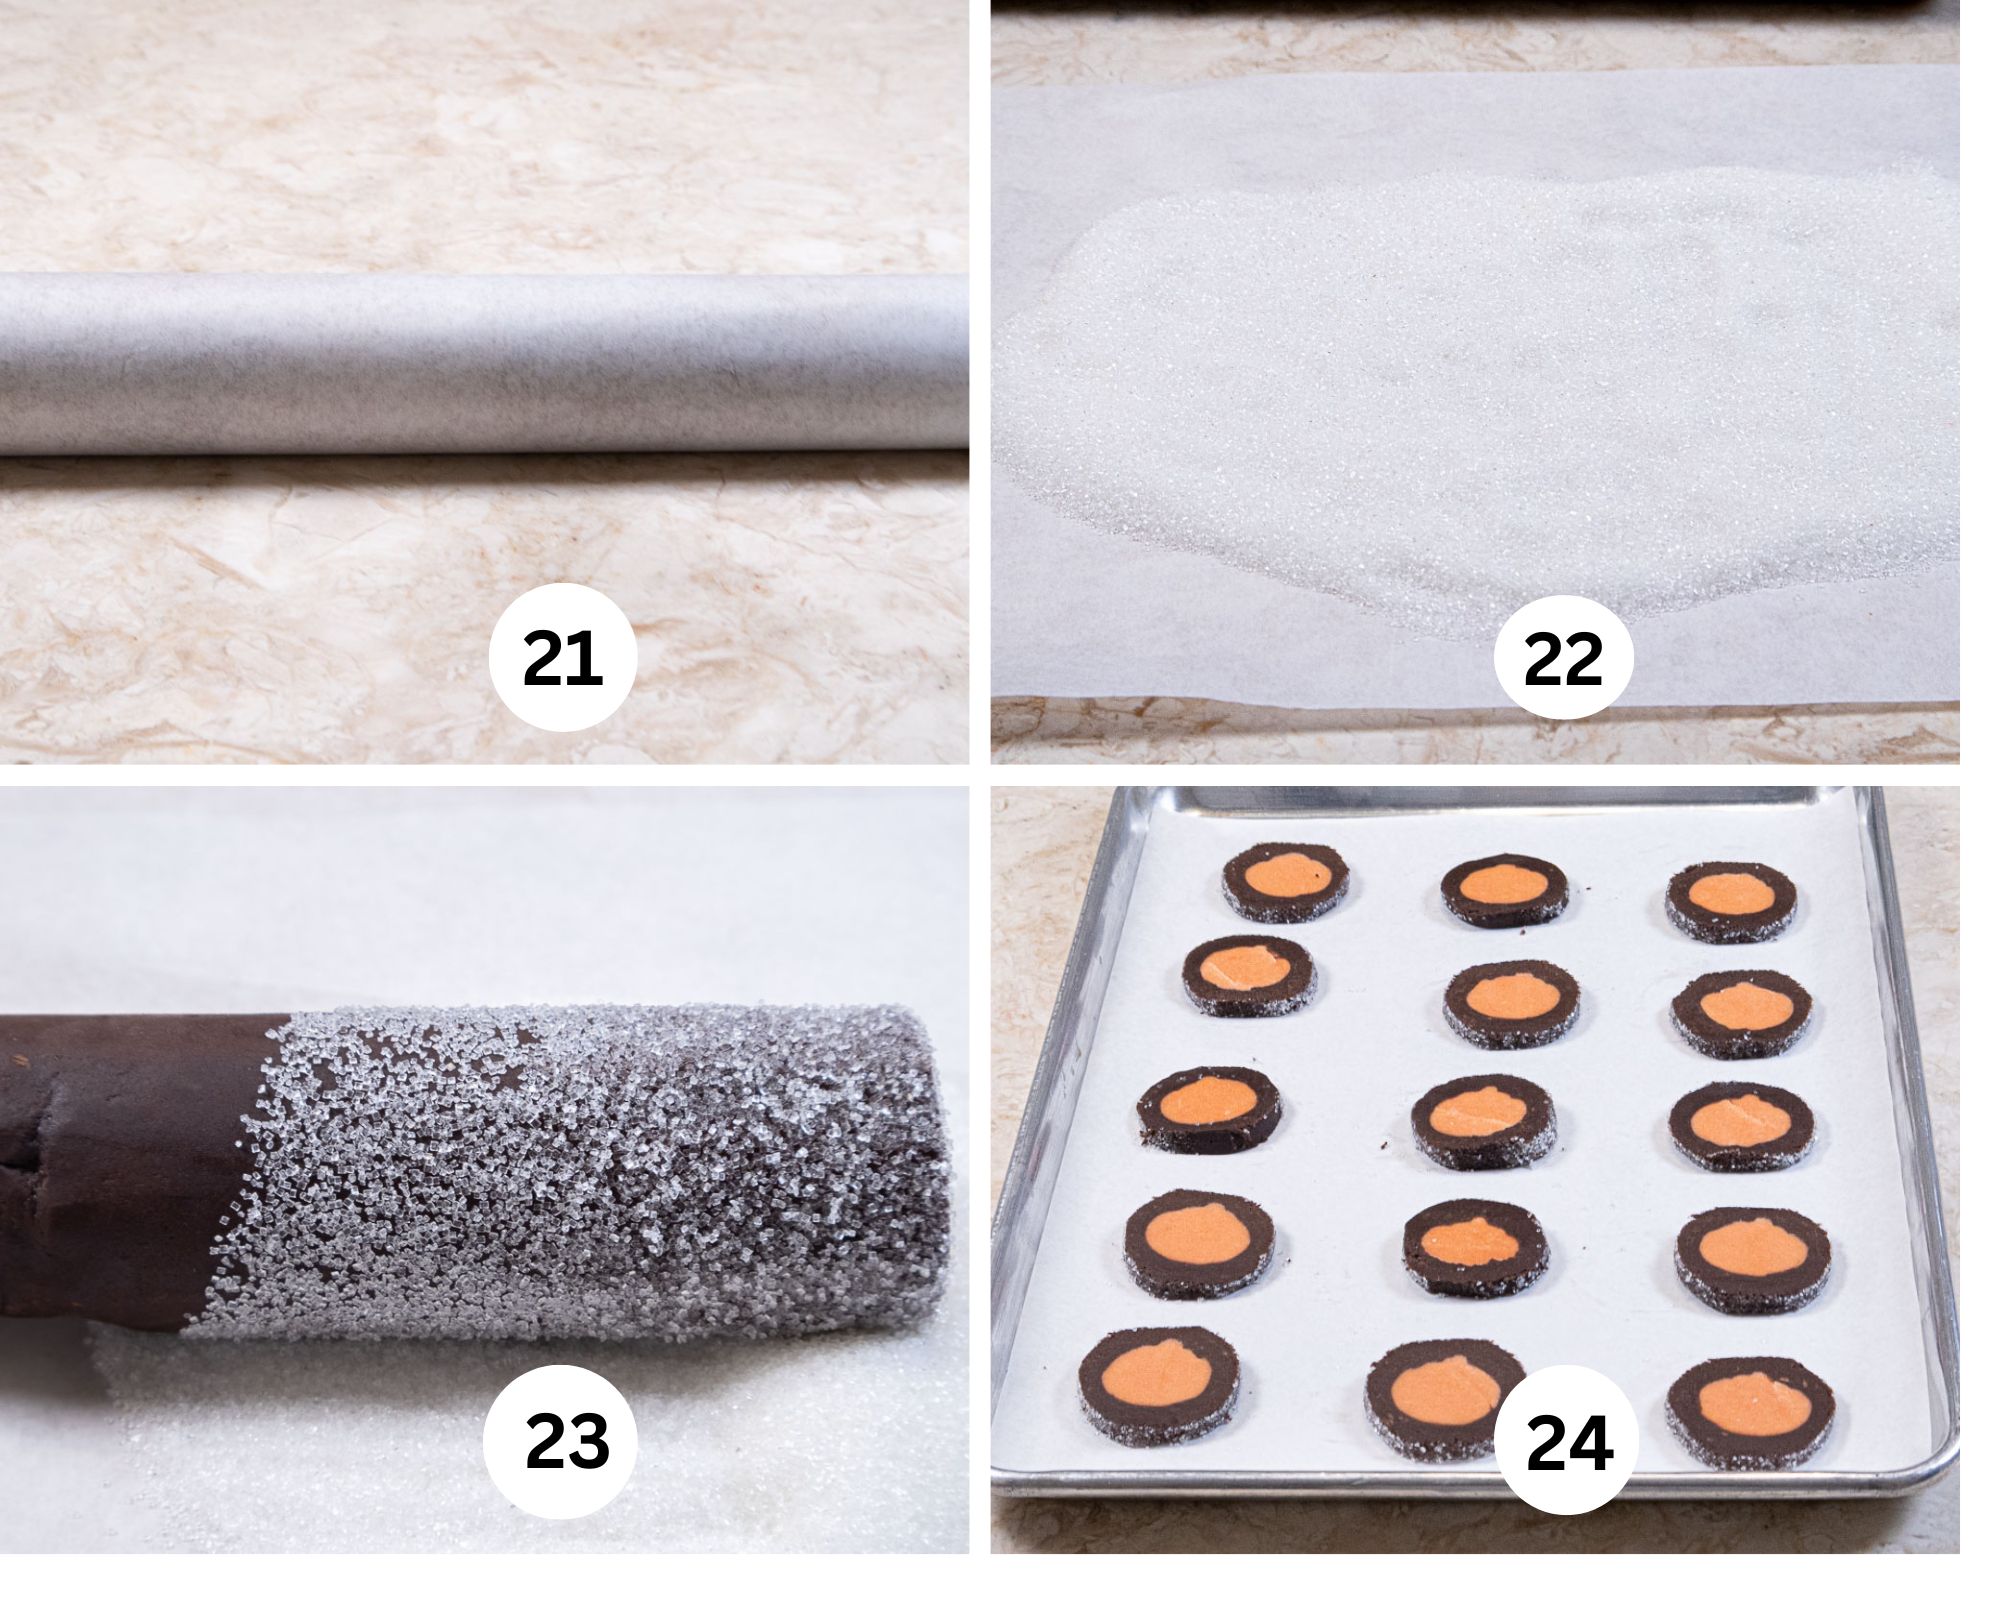
Step 21. Place the shaped dough at the end of a piece of parchment paper. Roll the shaped dough back and forth gently to further smooth out. Place on a baking sheet and chill until hard if baking immediately or wrap well in several pieces of foil and freeze. Step 22. When ready to bake, place sanding sugar on a large piece of parchment paper. Step 3. Beat the egg white with a fork until broken up and frothy. Lightly brush egg white onto all sides of the cold chocolate roll and roll in the sanding sugar. Step 24. Slice the rolls into ¼" to ⅓" cookies and place on a parchment lined baking sheet. If using a half sheet pan place 3 across and 5 deep on the tray. Bake as directed.
Recipe FAQS
"Short" refers to the texture of the pastry or cookie - it has a tender, crumbly texture and will break apart into chunks Wbecause a high volume of fat in the pastry keeps the gluten strands short, creating a flaky or crumbly item.
Unsalted butter. It provides the fat that coats the gluten strands to keep them from stretching - hence short. The higher the fat content, the more crumbly and tender the cookie.
One, two, three by weight not volume. One part sugar, two parts butter, three parts flour.
Expert Tips
- When making the whole batch of dough, it can be a lot for a normal size processor. Be sure to follow the instructions for the butter. Slightly soft but not completely softened. Also, rearrange the dough in the processor if it stalls. It will take several minutes to completely mix it.
- Make the orange whole and half recipe of dough first and then the chocolate. No need to clean the bowl in between.
- If you don't have black cocoa, just use all Dutch cocoa for the darkest color.
- Be sure to work the doughs cold when rolling, cutting and stacking the pumpkins and bats.
- Make sure the rolls of pumpkins and bats are frozen when wrapping them in the outer dough.
- When applying the sanding sugar, do not use a lot of egg white. A light brushing should be enough for the sugar to stick.
- The rolls can be frozen without the sanding sugar, well wrapped, for up to 3 months. Thaw in the refrigerator overnight, then slice and finish with the sugar. Bake as called for.
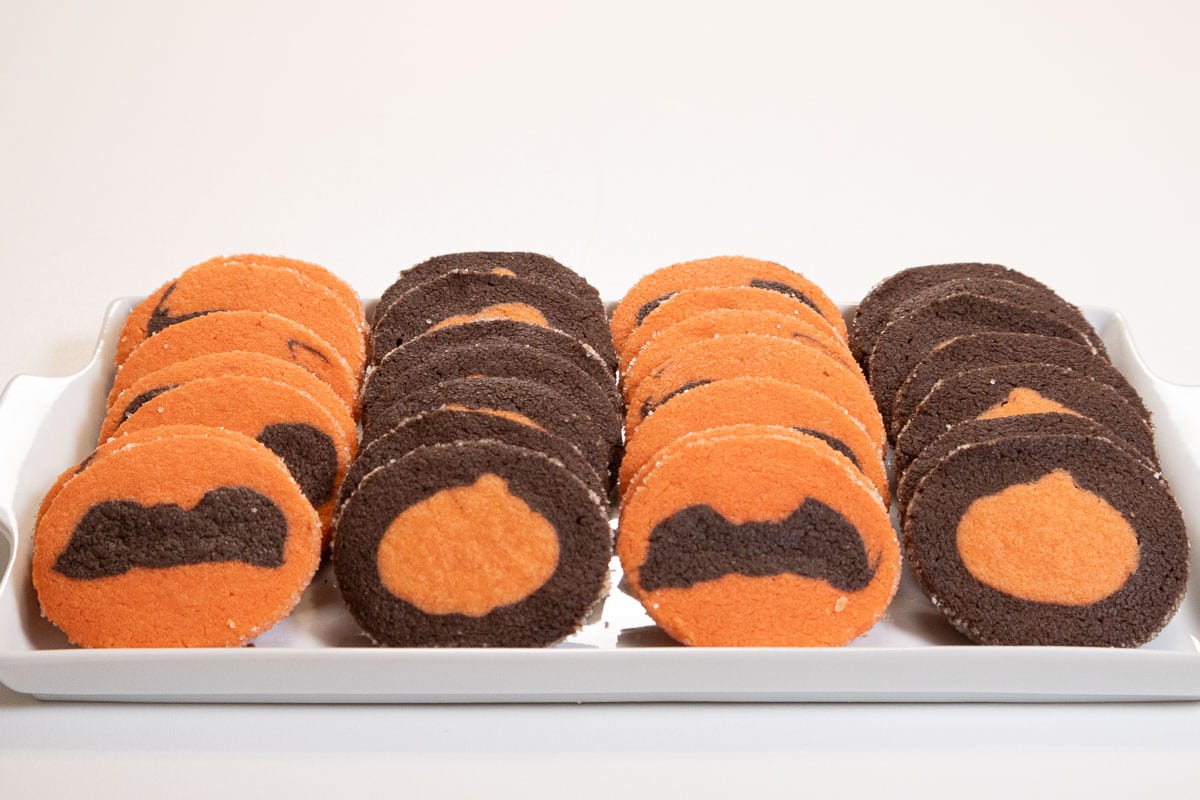
If you love this Halloween Cookie Recipe, It would be hugely helpful and so appreciated it if you would take a moment to leave a rating below. Thank you.
Some other Cookies for your Consideration
Halloween Cookies
Equipment
- Food Processor
- Mini Cookie cutters
Ingredients
Orange Dough - Whole Batch
- 1 cup unsalted butter (225 grams or 2 sticks)
- 2 ¼ cups all-purpose flour (315 grams)
- ½ cup granulated sugar (100 grams)
- Yellow gel food color
- Red gel food color
Orange Dough - Half Batch
- ½ cup unsalted butter (114 grams or 1 stick)
- 1 ⅛ cup all-purpose flour (155 grams)
- ¼ cup granulated sugar (50 grams)
- Yellow gel food color
- Red gel food color
Chocolate Dough - Whole Batch
- 2 ounces semisweet chocolate (60 grams)
- ½ teaspoon instant coffee or espresso
- 2 teaspoons vanilla extract
- 2 cups all-purpose flour (280 grams)
- ¼ cup Dutch Cocoa (22 grams)
- 2 tablespoons Black cocoa (11 grams)
Chocolate Dough - Half Batch
- 1 ounce semisweet chocolate (30 grams)
- ¼ teaspoon instant coffee or expresso
- 1 teaspoon vanilla
- 1 cup all-purpose flour (140 grams)
- 2 tablespoons Dutch cocoa
- 1 tablespoon Black cocoa
Instructions
Orange Dough
- Roll the half batch of which dough goes in the center, cut out the mini cookies, form into a roll and freeze first. Make the opposite color dough for the outside of the cookie while it is freezing. The proceed as below.
- Both the whole and half batch are made the same. The half batch will go together quicker than the whole batch. The whole batch may stall when processing. Break it apart into smaller pieces and re-process. It will take several minutes to completely mix.
- The butter should be slightly softened but not as much as when creaming. Cut the butter in pieces as shown in the photos.
- Place the flour in the bowl of a food processor. Pulse 2 or 3 times to mix
- Add the butter to the processor and process until it is indistinguishable. Add the red and yellow gel food colorings.
- Process until the dough comes together in a ball or at least large chunks that are evenly colored. The color should be more intense than desired as some of it will lighten when it is baked. Add more color as necessary.
Chocolate Dough
- There is no reason to clean the processor between the two doughs. Just wipe it out with a paper towel.
- Both the full batch and half batch are made the same.
- The butter should be slightly softened but not as much as when creaming. Cut the butter in pieces as shown in the photos.
- Place the chocolate in a small bowl and microwave at half power until most of it is melted. Stir and set aside. The rest should melt. If it doesn't in a few minutes, microwave again briefly. The chocolate should be cooled before adding it.
- Combine the instant coffee and vanilla in a small bowl and set aside.
- Place the dry ingredients in the bowl of the processor. Pulse several times to mix.
- Add the butter and process until it is indistinguishable.
- Add the melted chocolate and vanilla and coffee mixture. Process to form a ball.
Shaping the Cookies
You need 1 full recipe of the dough for the outside + ½ recipe of the opposite color for the inside of the cookie. Please refer to the photos which makes this easy to understand. Each of these combinations makes about 45 cookies.
- Each cookie takes a larger amount of dough for the outside of the cookie and a smaller amount of the opposite color for the inside.
- Roll the smaller amount of dough out between wax paper. It doesn't matter how thick it is as long as it doesn't come to the top of the cookie cutter. I rolled mine about ¼" to ⅓". Chill the dough if it is really soft, otherwise continue.
- Cut the mini cookies out. Freeze them. When they are hard they will pop out with a gentle push. Make sure they stay frozen. Stack the up as you go along making sure the match perfectly. Once in a stack, push them together to make a solid cookie roll. Freeze solid before proceeding.
- Shape a rope of the outside dough about 1" to 1 ½" round the length of the inside frozen cookie roll. Press it onto the side of the frozen cookie roll,. Repeat for the top and other side of the dough using as many ropes as needed to cover it, pressing the ropes together to cover the frozen inside cookie log.
- Gently turn the whole thing over and cover the bottom with another rope or as necessary. Briefly roll the log to smooth it out.
- Place it on parchment paper and roll it in the parchment to further smooth it. place it on a baking sheet and chill it if cutting immediately or chill it, wrap it well in foil and freeze for up to 3 months. Thaw overnight in the fridge before preparing for baking.
- Pour sanding sugar on a piece of parchment paper the length of the log of dough. Beat the egg white until foamy. Very lightly brush it onto the whole of the cookie roll. Roll the log in the sugar.
- Cut the cookies ¼" thick and place on parchment line baking sheets. If using a half sheet pan place them 3 across the short side and 5 down the long side.
- Bake at 350°F for 10 to 12 minutes. Cool on the parchment before removing. Store in an air tight container for 7 to 10 days.



Leave a Reply