
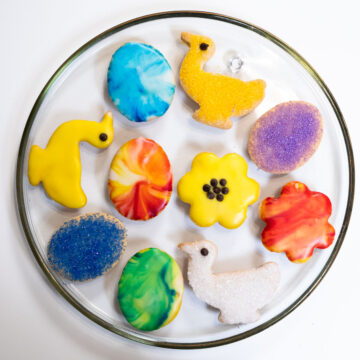
These Easy Decorated Shortbread Cookies came about when I was asked to appear on a TV program to decorate Easter cookies. Many years ago when I had my bakery, decorated cookies were all the rage. The trouble was, I have limited talent in this area so came up with the Painted Cookies technique. And easy it is!

I used two techniques - the first is painted cookies, either solid colors or the very simple swirly, marbelized ones. The second is even easier since you simply cover the unbaked cookie with colored sugar and bake. That's it. Easy enough for the kids to help and maybe more fun than coloring Easter eggs. For a naturally gluten free cookie see my Viennese Lemon Valentine's Cookies.
For the ins and outs and the easiest way to roll out the cookie dough see Cut Out Cookies Using The Wax Paper Technique.
Jump to:
What Makes This Recipe so Intriguing
- These easy shortbread cookies require only 3 ingredients. The glaze only 2.
- They are incredibly easy to make and decorate.
- Packed with flavor under estimates how incredible they are.
- The butter gives them a rich flavor, especially if you use European type butter.
- These are definitely show stoppers that will have your family and friends think you bought them at a high end bakery.
Recipe Ingredients
Shortbread Cookies
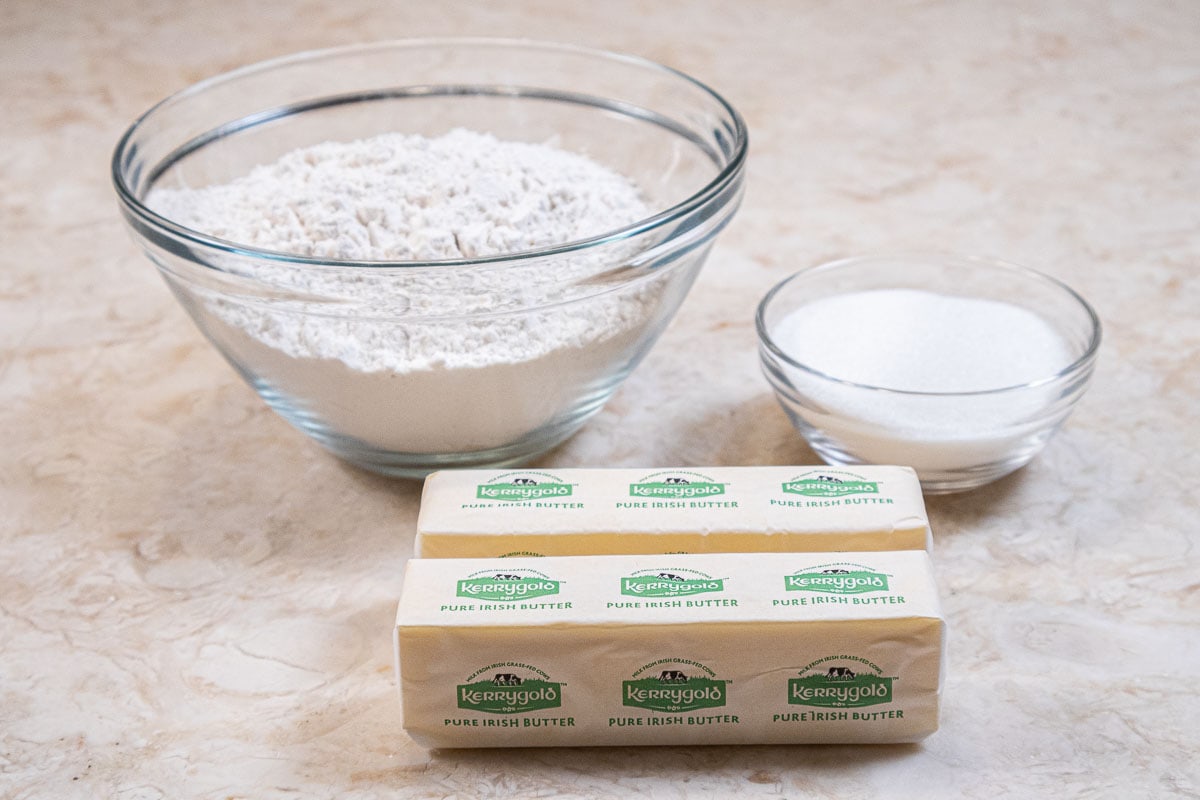
FRONT ROW: Unsalted European Butter
BACK ROW: All-purpose flour, granulated sugar
Lemon Glaze
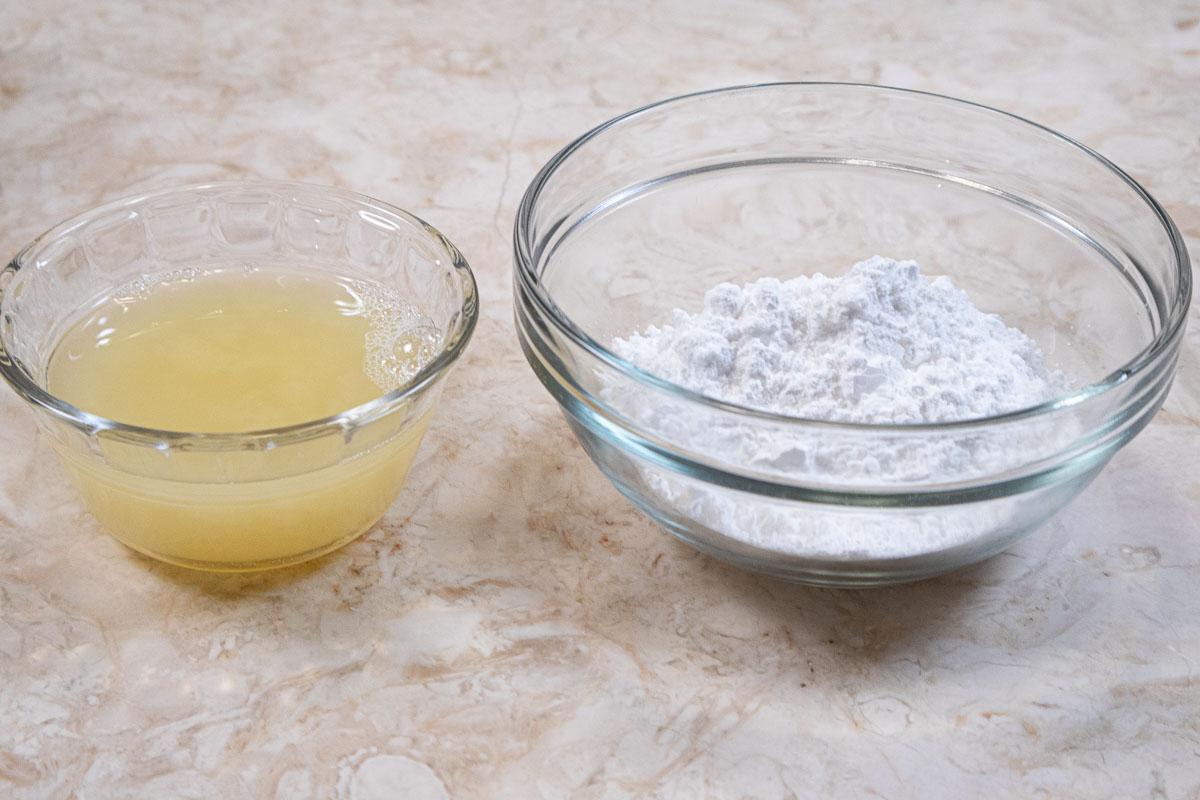
LEFT: Lemon Juice RIGHT: Powdered sugar
Unsalted European butter such as Kerry Gold or Plugra among other brands gives these cookies a deeper flavor that American butter. However, it is important to use unsalted butter here for maximum taste.
Freshly squeezed lemon juice is a must for the glaze. You can squeeze it a day or two ahead and refrigerate it just don't take a shortcut and use bottled lemon juice. I use all lemon juice for a punch of flavor. However, it can be watered down to be less aggressive. It can also be omitted completely and flavored with vanilla, almond or any other extract as your taste dictates.
Be sure to see the recipe card below for the exact ingredients and instructions.
Step by Step Instructions
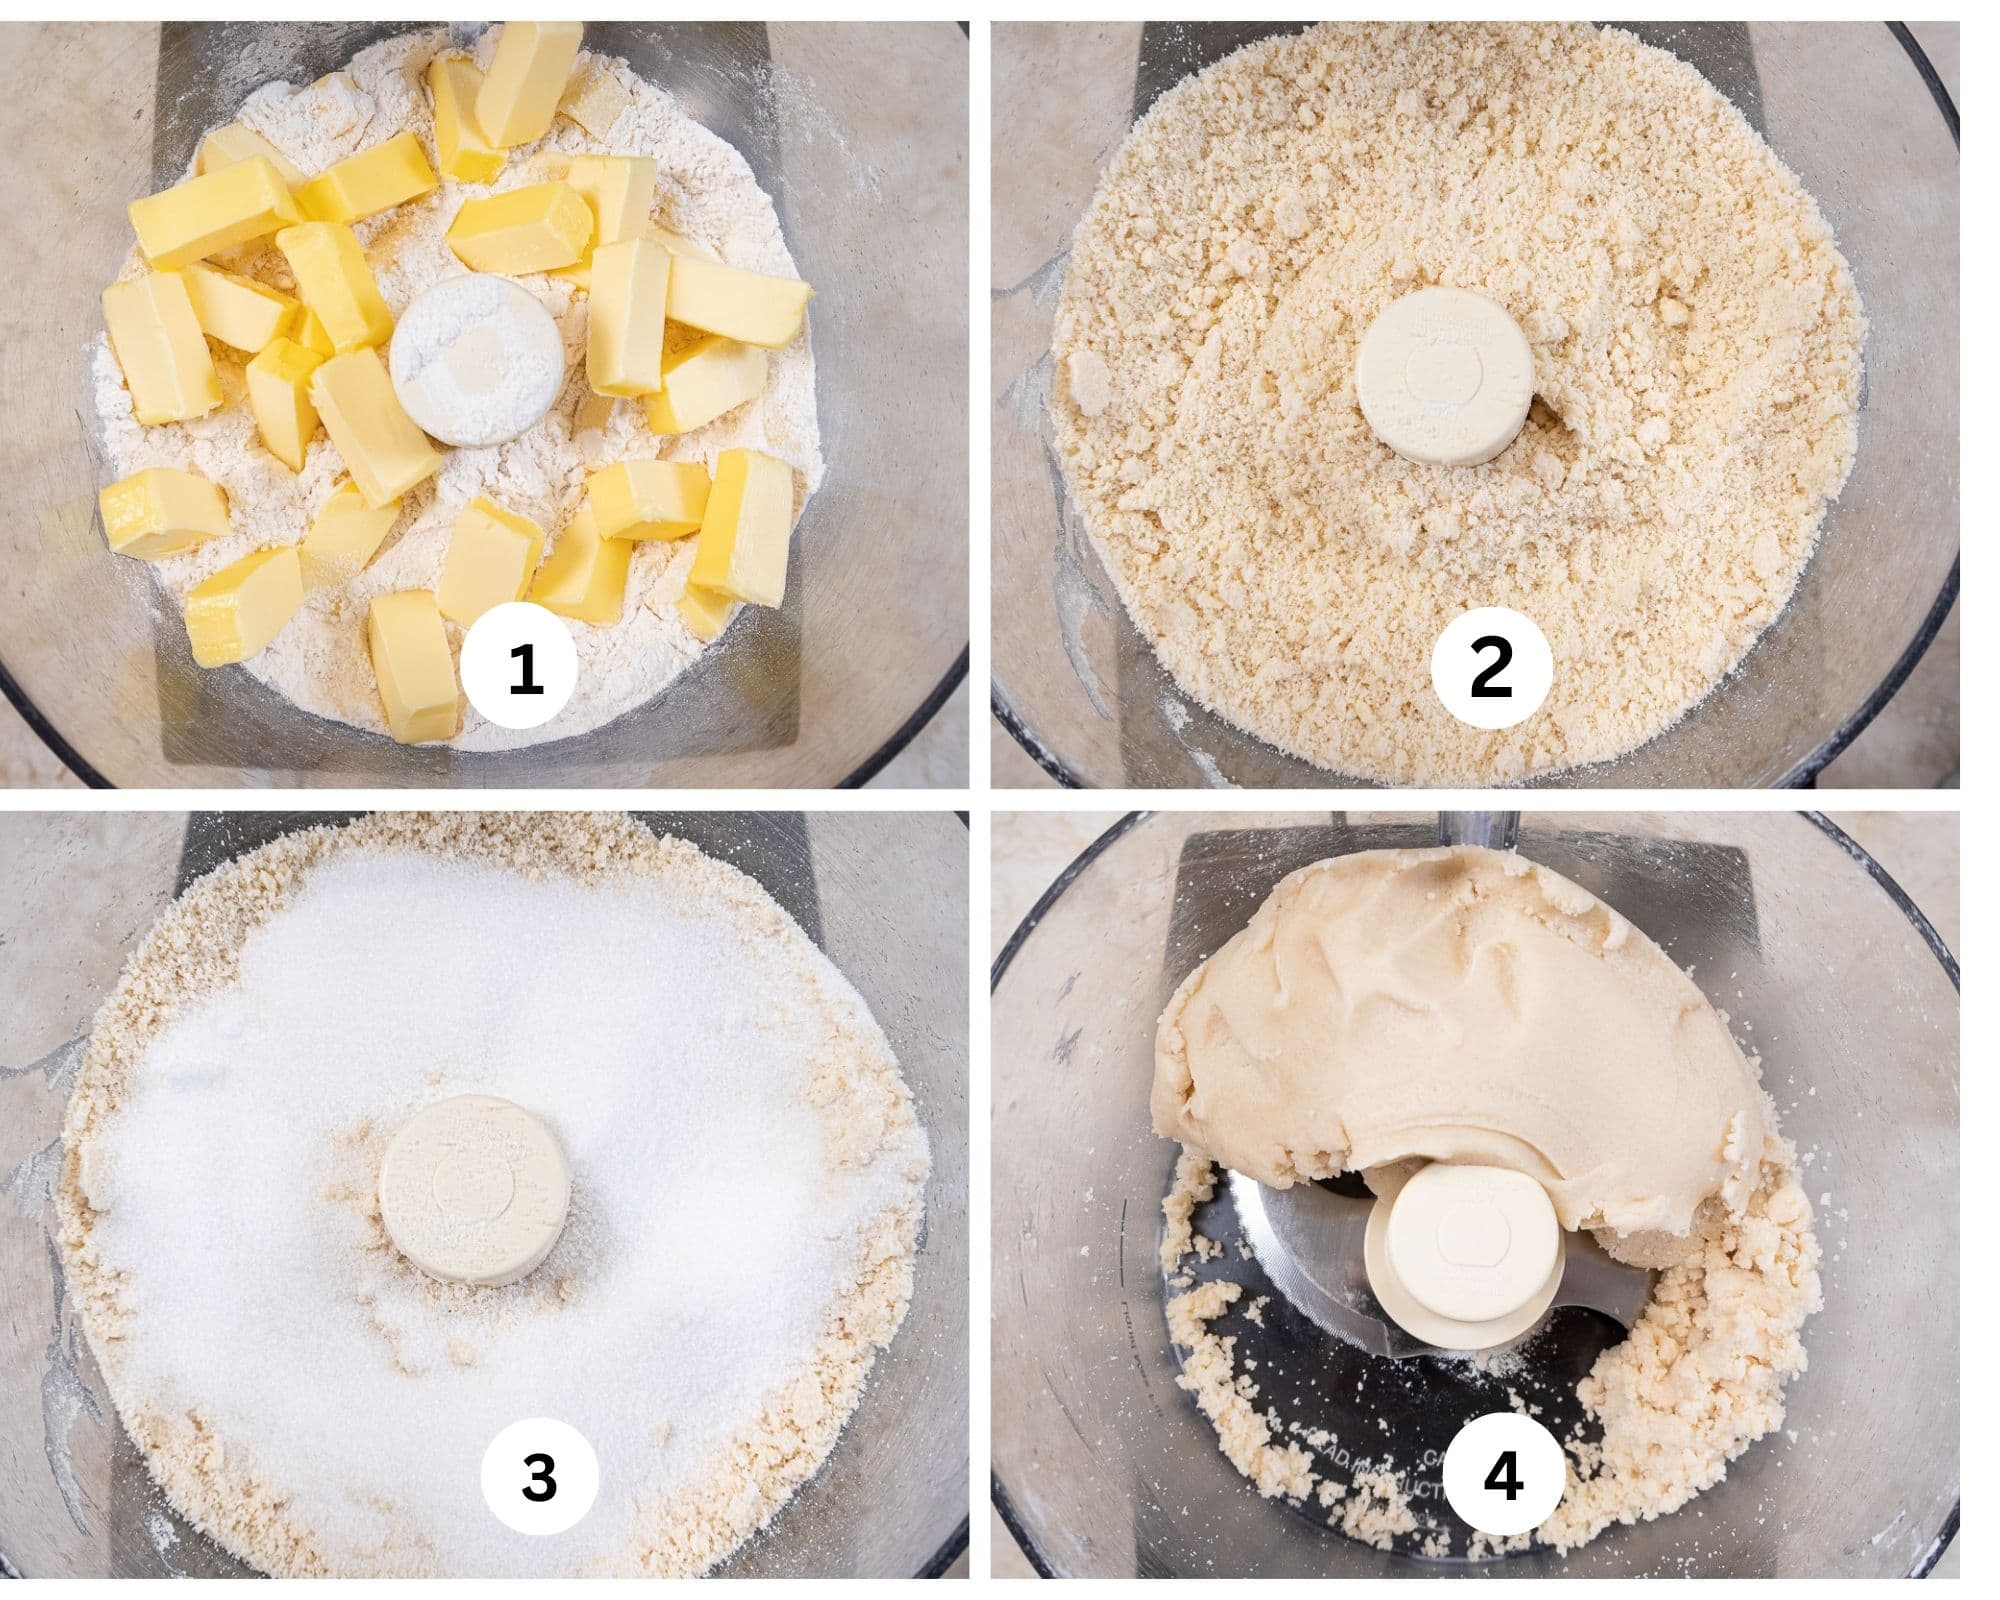
Step 1. Cut the cold butter into pieces and place over the flour in the processor bowl. Step 2. Process until the butter is indistinguishable. Step 3. Add the sugar to the processor. Step 4. Process until it comes together in large pieces. It most likely will not form a ball, that's fine.
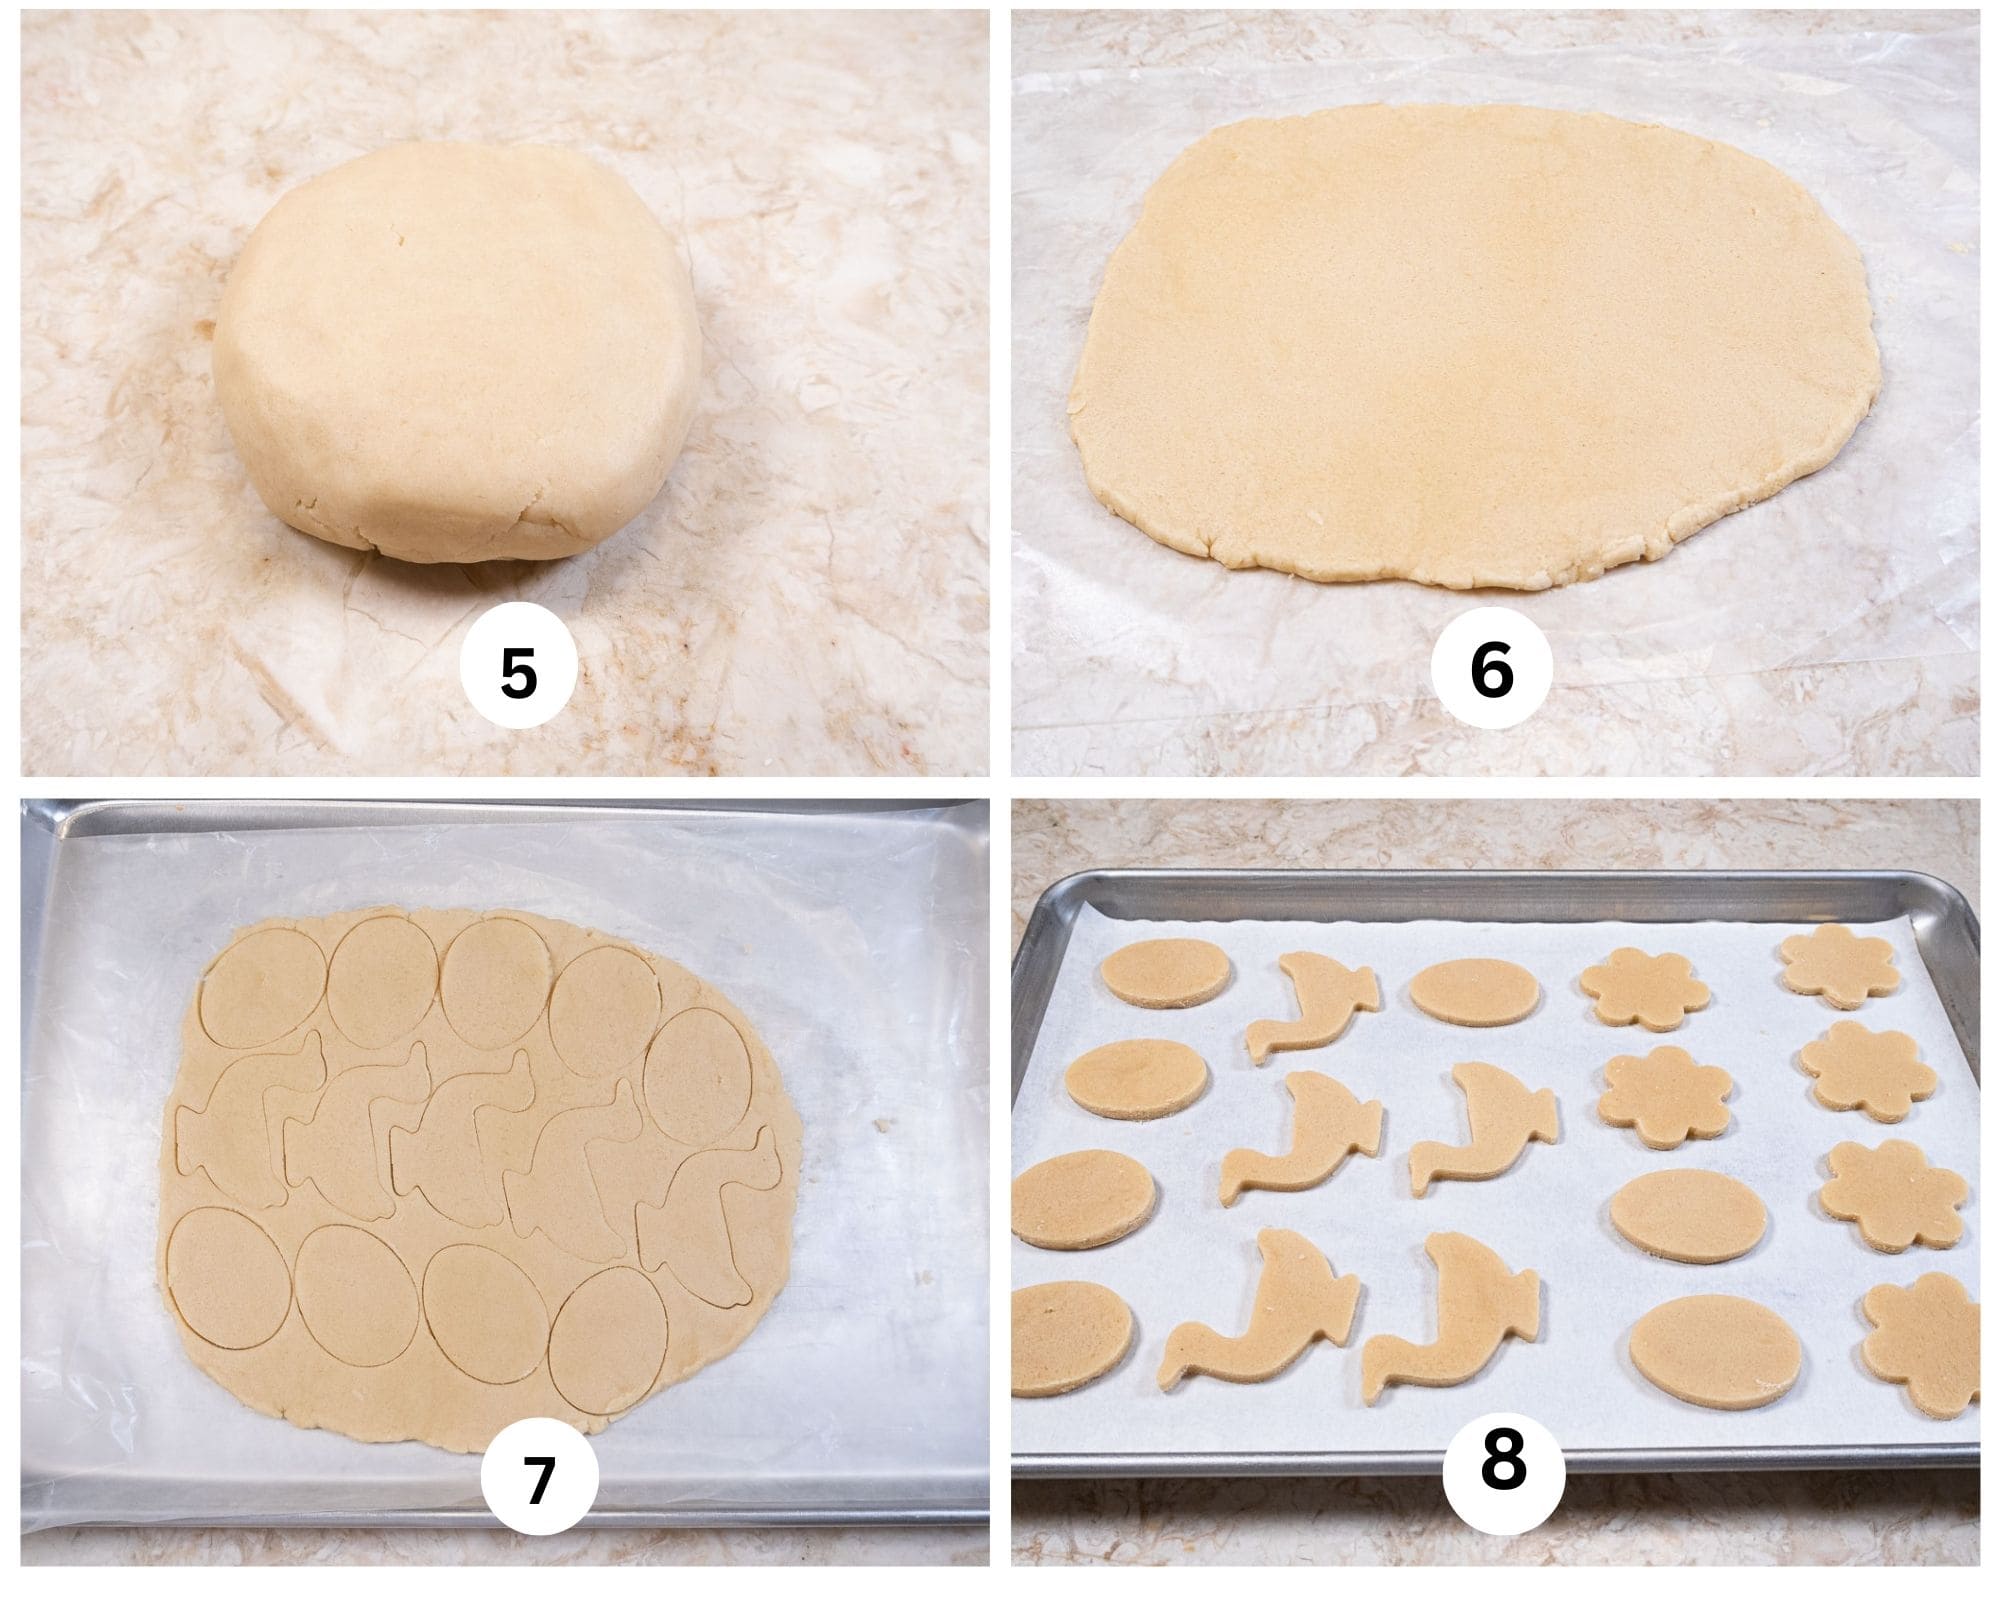
Step 5. Gather the dough and knead it together. Flatten it into a round. Step 6. Divide the dough in half and roll one half between wax paper to about ¼ to ⅓" thick. Step 7. Cut the cookies out, keeping the cutters as close together as possible. Place the cookies, still on the wax paper on a tray and freeze until hard. When frozen, simply push them out or use a pancake turner to lift them off. Freezing the cookies makes it easy to remove them without the cookies losing their shape and with perfectly clean edges. Step 8. Place the frozen cookies on a cookie sheet and keep them frozen until baking.
Decorating the Cookies
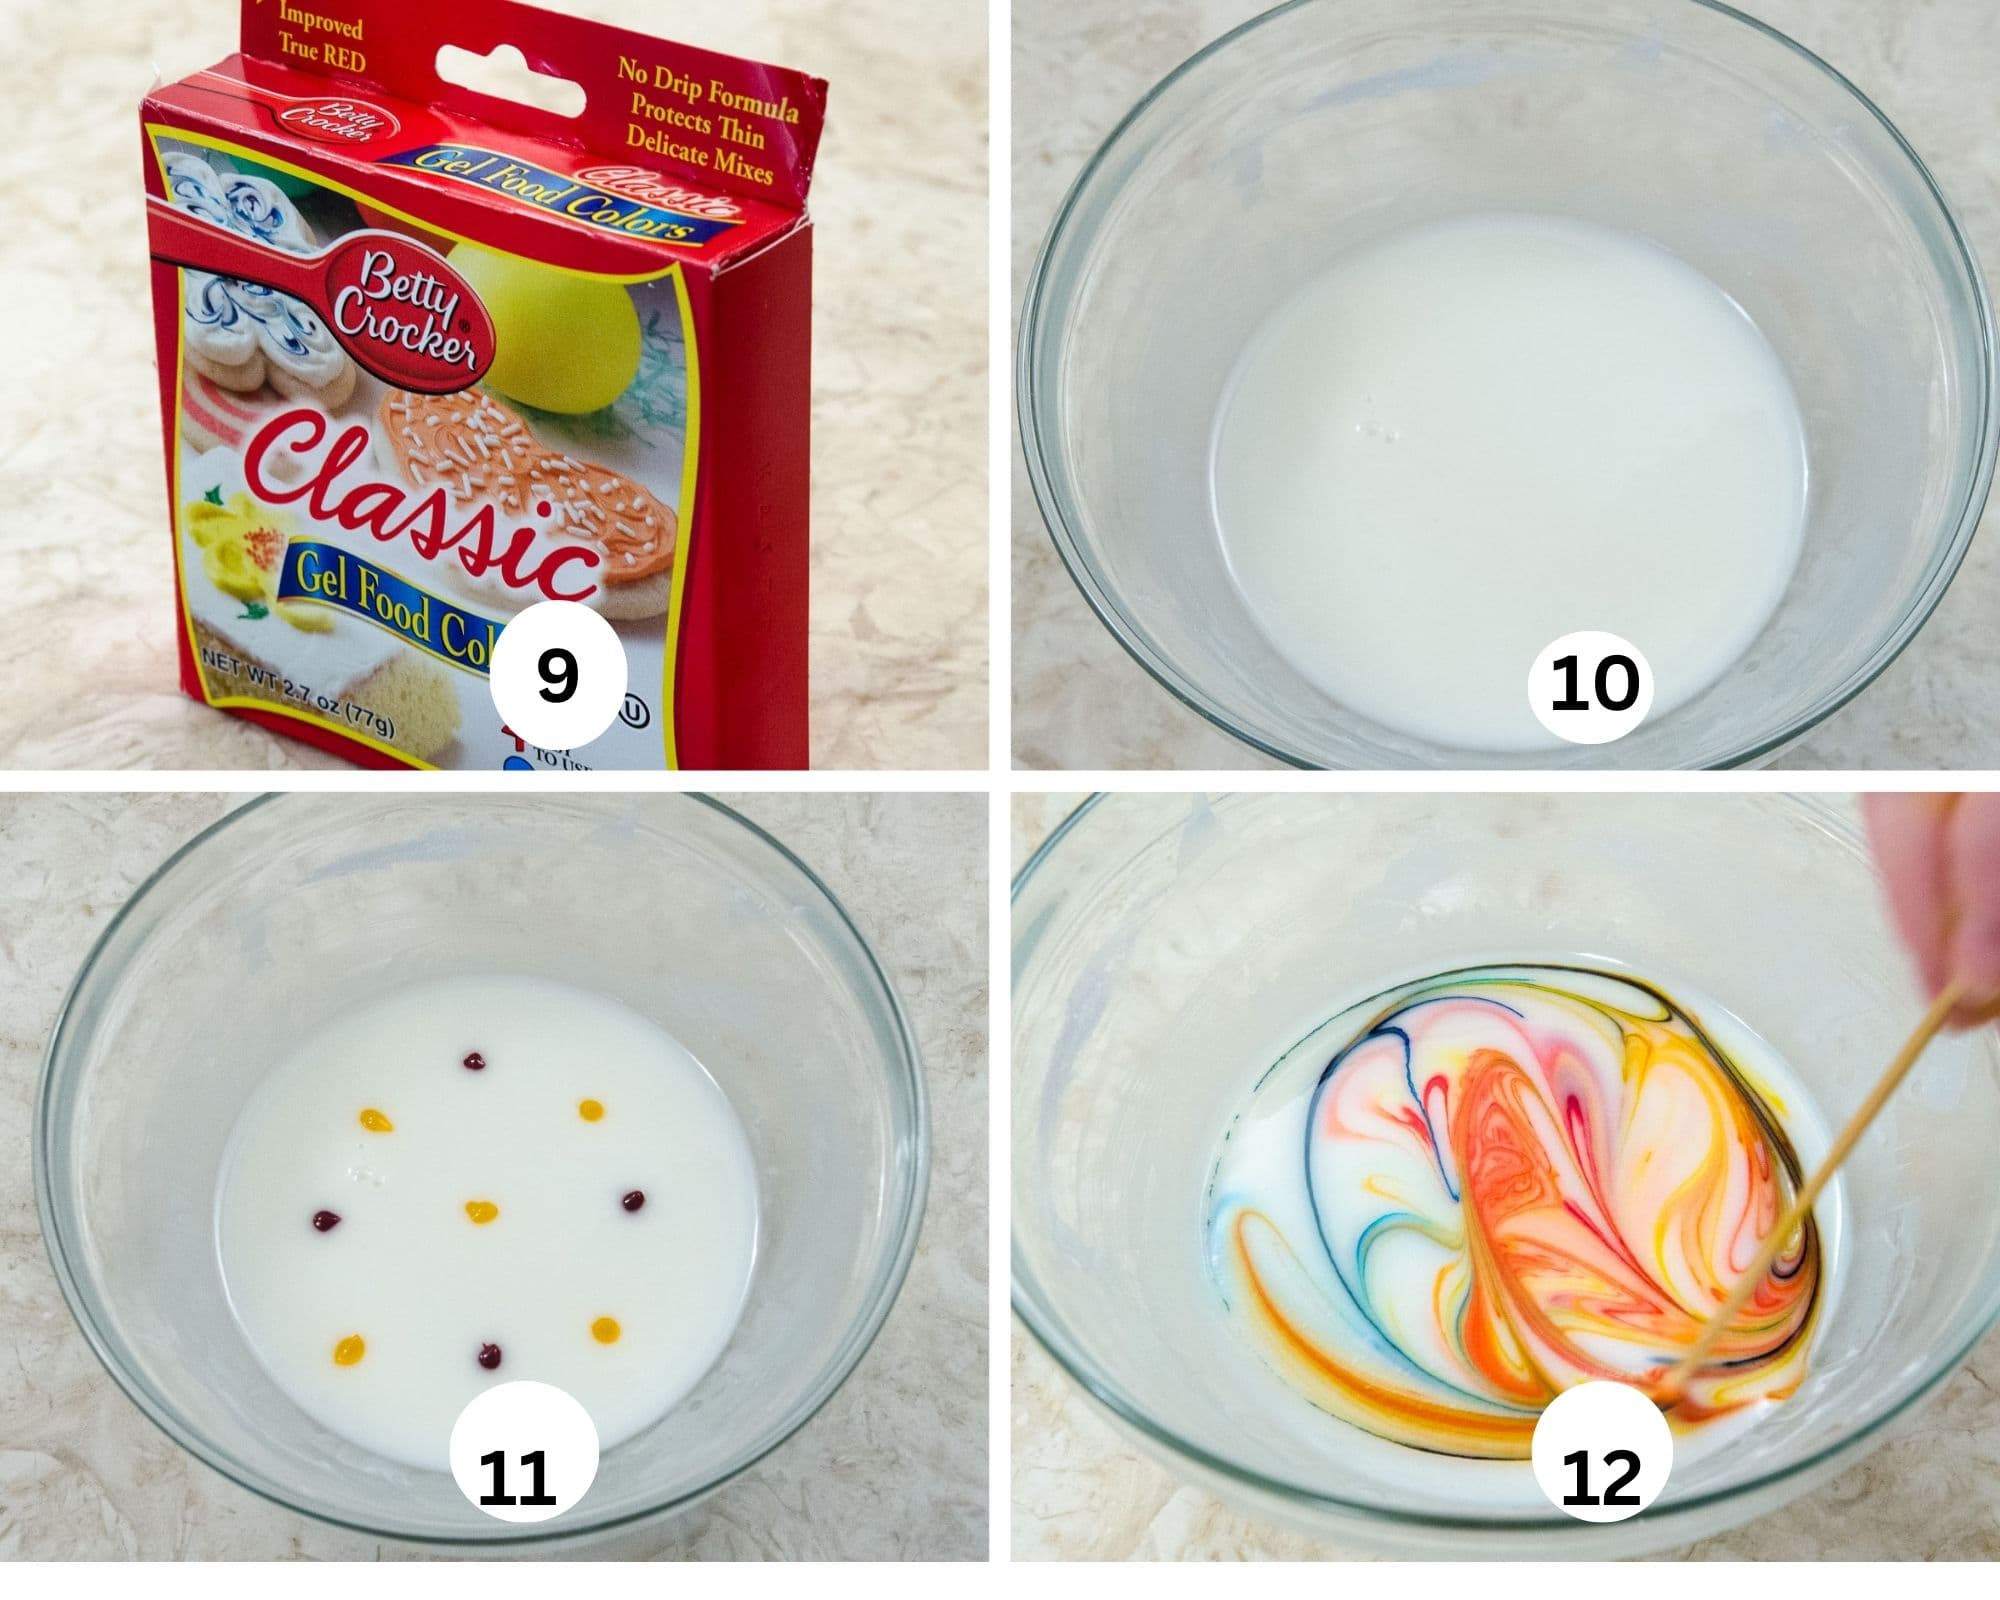
Step 9. Be sure to use gel colors instead of the liquid ones as they usually require a lot more to achieve the same colors as the gel. Step 10. Mix the lemon juice and powdered sugar. Stir with a spoon but not too vigorously or a lot of air bubbles will be incorporated. Step 11. Space out dots of various colors on top of the glaze. Step 12. With a bamboo skewer or toothpick, swirl the colors together. Don't over swirl or the colors will be come murkey after just a few cookies. No two cookies will look alike. Additional color can be added at anytime. For a complete tutorial, see Painted Cookies.
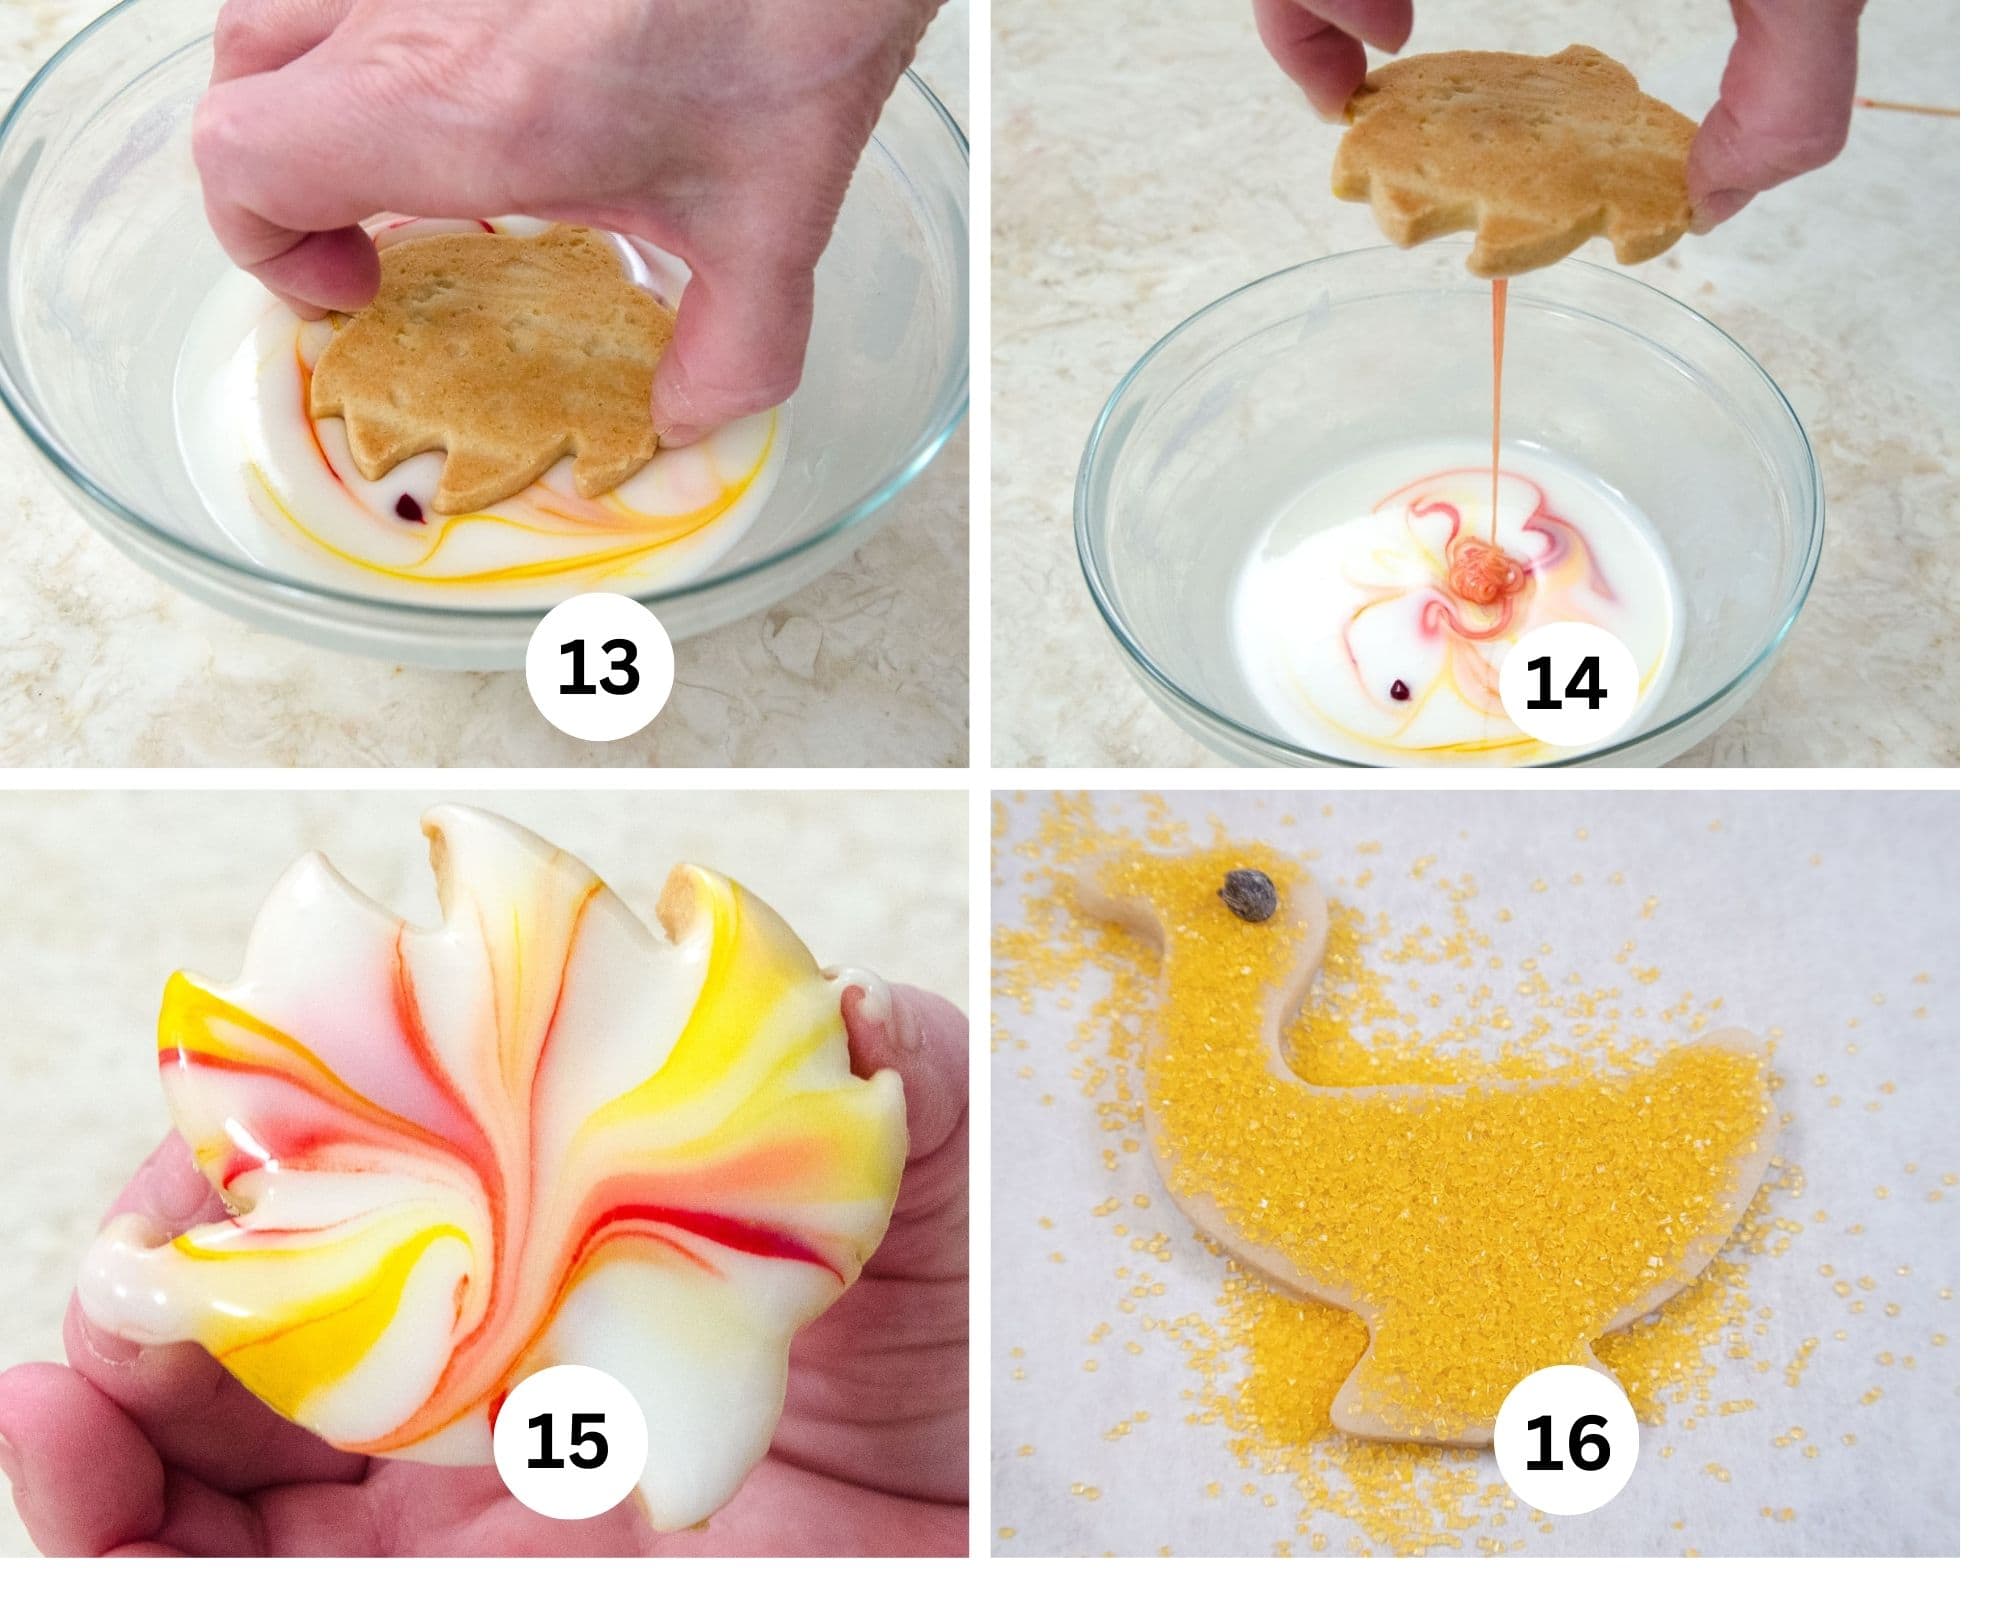
Step 13. Dip the top of the cookie into the glaze just deep enough to coat it. Step 14. Let the excess glaze drip back into the bowl. If there is still too much glaze on the cookie, very lightly wipe it against the top of the bowl. Step 15. The finished cookie glazed. Step 16. This is the second and easiest way to decorate a cookie. Before baking, heavily sprinkle the cookie with colored sugar crystals. Gently pat them in. For the eye of the duck, I used a mini chocolate chip. Place it on the duck before adding the sprinkles. Bake as called for.
Recipe FAQS
Sure. Sugar or butter cookies are perfect to decorate as long as they hold their shape when baked.
For the cookies above no. Just heavily sprinkle them, pat them very gently onto the cookie and bake. They stick right on.
Yes but it might take a day or so depending upon the weather. While it might appear dry on the top, it can still be wet underneath. After the glaze has dried, the cookies an be stacked in an airtight container for a week or more. They also ship well.
Expert Tips
- The cookies can be cut out and frozen for months before baking. They can also be baked and held, unpainted in an airtight container for days before decorating.
- Unsalted European style butter has a higher fat content than American butter and as such, imparts a deeper butter flavor into the cookies. I use this butter whenever I made a butter heavy cookie.
- Wax paper and freezing the cookies are key to a cookie with clean edges that won't lose their shape. Just cut out the cookies, leave them on the wax paper, place them on a cookie sheet and freeze until hard. Then just pop them out or remove them with a pancake turner and place them on a parchment lined baking sheet.
- Lemon juice, water or liqueur makes a somewhat harder glaze than does milk.
- Always us gel colors to impart brighter colors and reduce the amount of liquid added to the glaze. It's necessary to use more liquid coloring to obtain the same bright colors than it is to use gel colors.
- When swirling the colors for the painted cookies, start with 3 different colors and do not swirl too much in the beginning. Additional colors can be added as you go along. However, at some point, the glaze will become murky looking. At that point start over.
- The glaze can be broken down into smaller bowls to use when it is no longer useable. Just cover them with wet towels so they don't skin over. We did this at the bakery when we had hundreds of cookies to glaze.
- Be sure to let the painted cookies dry completely before storing them. The tops may appear dry but they can still be wet underneath. The glaze will usually wrinkle up when picked up and shaken a little if wet underneath.
- If you have children or grandchildren around let them help. This is a great family project. Just be ready for a bit of a mess that is easily cleaned up.
More Great Butter Cookies
If you love these Easy Decorated Shortbread Cookies, It would be hugely helpful and so appreciated it if you would take a moment to leave a rating below. Thank you.
Easy Decorated Shortbread Cookies
Ingredients
Easy Shortbread Cookies
- 1 cup unsalted butter, European preferred (225 grams)
- 2 ¼ cups all purpose flour (315 grams)
- ½ cup granulated sugar (100 grams)
Painted Cookie Glaze
- 2 cups powdered sugar (260 grams)
- ¼ cup lemon juice or water
- 1 teaspoon almond or vanilla extract if not using lemon juice
Instructions
Easy Shortbread Cookies
- If using a processor, butter needs to be cold. If using a mixer, butter needs to be softened. Preheat the oven to 350°F. Line baking sheets with parchment paper and set aside.
Processor Method
- The cold butter needs to be cut into small pieces. Add the flour to the bowl of a processor. Pulse several times to sift. Place the cold, cut up butter in a circle on top of the flour. Process until the butter is indistinguishable. Add the sugar and process until it comes together. It will not form a ball.
- It will take some time for the dough to come together. Redistribute the dough in the processor several times to help it along. Using long pulses will help with the mixing. It will form large crumbs that should be poured onto the work surface and kneaded together.
Mixer Method
- For this method, the butter needs to be softened. Combine the butter with the sugar in the bowl of a mixer. Beat until light. Add the flour all at once and beat until it comes together to form a solid mass.
Cutting the Cookies
- Divide the dough in half. Roll half of it between wax paper to a thickness of ¼ to ⅓ inch. See the post on the Cut Out Cookies Using the Wax Paper Technique for the easiest way. Repeat for the second half.
- Cut the cookies into the desired shapes. Leaving them on the wax paper, place them in the freezer until hard. Pop them out or use a spatula to remove them to the parchment lined baking sheets. Freeze or refrigerate
- Bake 12 to 15 minutes depending upon the thickness of the cookies until lightly browned. Cool completely before decorating.
Painted Cookie Technique
- Make sure the glaze is colored in a bowl just large enough for the largest cookie and your fingers. You do not want the glaze spread out into a large bowl.
- Divide the glaze into different bowls. Cover with a wet towel to prevent it from skinning over. Start a new bowl whenever the current one becomes too murky.
- Dots of color are added around the perimeter of the bowl and in the middle however you wish. Swirl in a few colors and add more if desired. With a bamboo skewer or toothpick, swirl the colors around in a marbleized fashion.
- Holding a cookie upside down by the edges of your fingers, dip it into the glaze making sure the entire top is covered. Allow the glaze to drip back into the bowl. It can drip to one side of the bowl to keep the paint undiluted as long as possible.
- Place the cookie on parchment to dry which can take up to a day if it is humid.
- After dipping some cookies, more or different colors may be added and swirled in to freshen the paint.
- Dry the cookies completely, making sure they are not just dry to the touch and still wet underneath. After drying, drips down the sides can be scraped off with a sharp knife. Store in an airtight tin with paper between the layers.
Sugared Cookies
- Prior to baking, heavily cover the cookies with colored sugar and lightly pat into place. Bake as above.
- The number of cookies will depend upon the cutters you use and the thickness of the cookies.
Notes
-
- The cookies can be cut out and frozen for months before baking. They can also be baked and held, unpainted in an airtight container for days before decorating.
-
- Unsalted European style butter has a higher fat content than American butter and as such, imparts a deeper butter flavor into the cookies. I use this butter whenever I made a butter heavy cookie.
-
- Wax paper and freezing the cookies are key to a cookie with clean edges that won't lose their shape. Just cut out the cookies, leave them on the wax paper, place them on a cookie sheet and freeze until hard. Then just pop them out or remove them with a pancake turner and place them on a parchment lined baking sheet.
-
- Lemon juice, water or liqueur makes a somewhat harder glaze than does milk.
-
- Always us gel colors to impart brighter colors and reduce the amount of liquid added to the glaze. It's necessary to use more liquid coloring to obtain the same bright colors than it is to use gel colors.
-
- When swirling the colors for the painted cookies, start with 3 different colors and do not swirl too much in the beginning. Additional colors can be added as you go along. However, at some point, the glaze will become murky looking. At that point start over.
-
- The glaze can be broken down into smaller bowls to use when it is no longer useable. Just cover them with wet towels so they don't skin over. We did this at the bakery when we had hundreds of cookies to glaze.
-
- Be sure to let the painted cookies dry completely before storing them. The tops may appear dry but they can still be wet underneath. The glaze will usually wrinkle up when picked up and shaken a little if wet underneath.
-
- If you have children or grandchildren around let them help. This is a great family project. Just be ready for a bit of a mess that is easily cleaned up.
Nutrition


Kathleen says
What beautiful cookies! I love the idea of freezing the dough, so genius. Thank you Helen!!
Helen S Fletcher says
You're welcome Kathleen. Happy to help.