
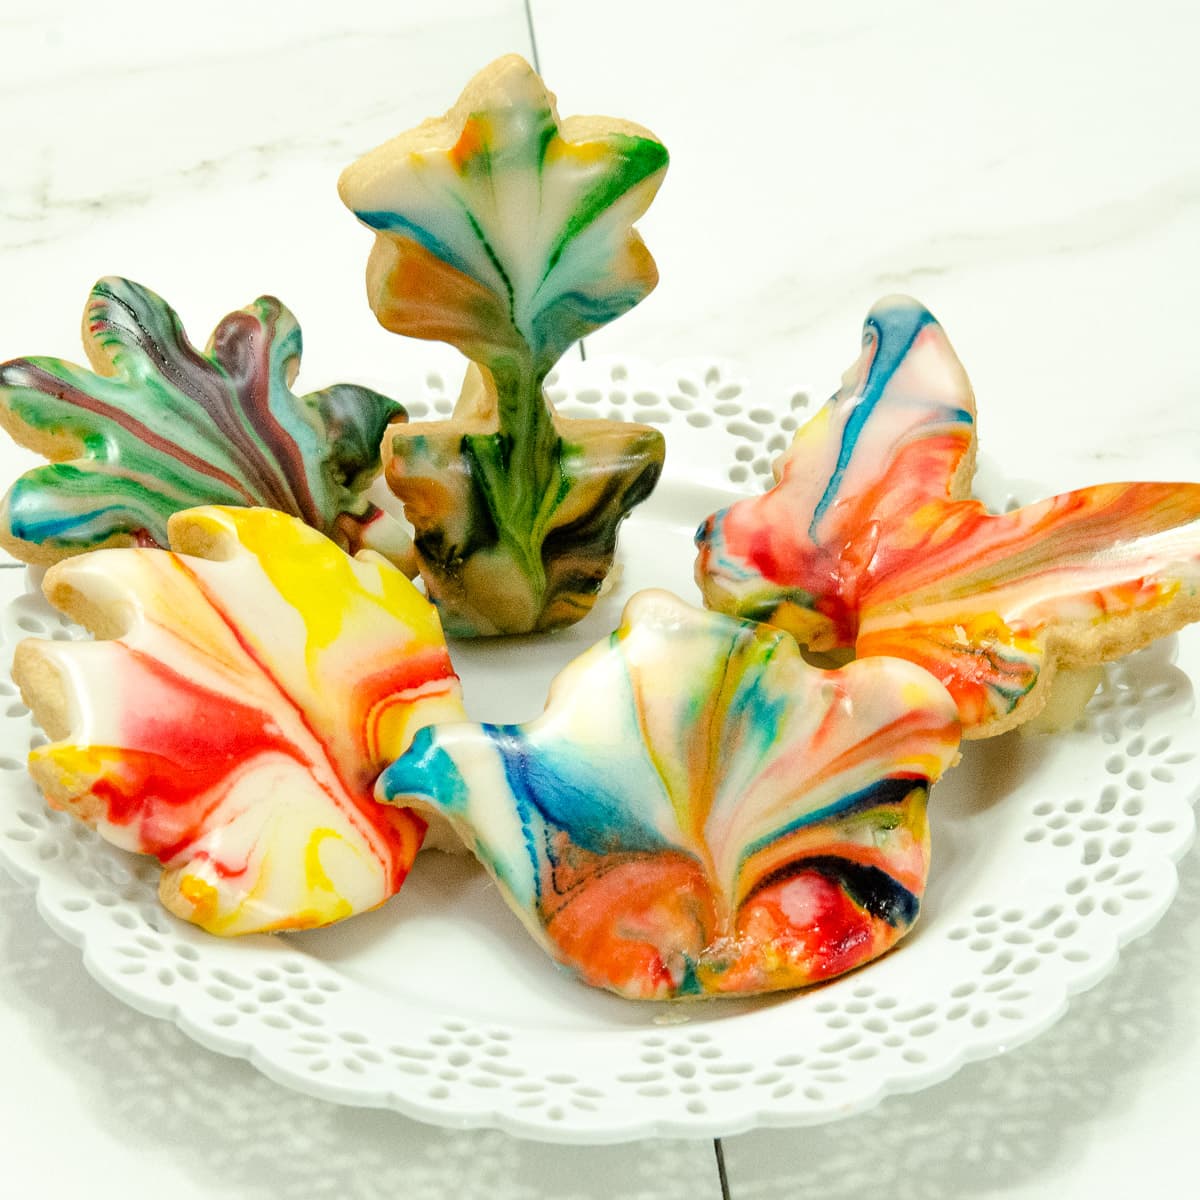
When I had the bakery and later, the retail shop, we made hundreds and hundreds of these painted cookies for holidays and for wedding favors. I originally came up with this method over thirty years ago because I could't use a piping bag with any grace or consistency. So instead of piping decorations on a cookie as everyone did then, I swirled colors though a lemon glaze and finished them with an explosion of color. Now, it is a common technique used by everyone professionally as well as baking enthusiasts even if they can pipe.
While the focus of this blog is the painted cookies, I have included a recipe for a sugar cookie that is the ideal for cut outs as it stays flat and keeps its shape.The number of cookies to a recipe depends upon the size of the cutters.
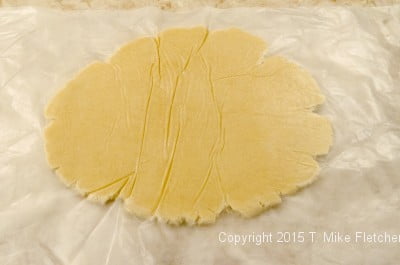
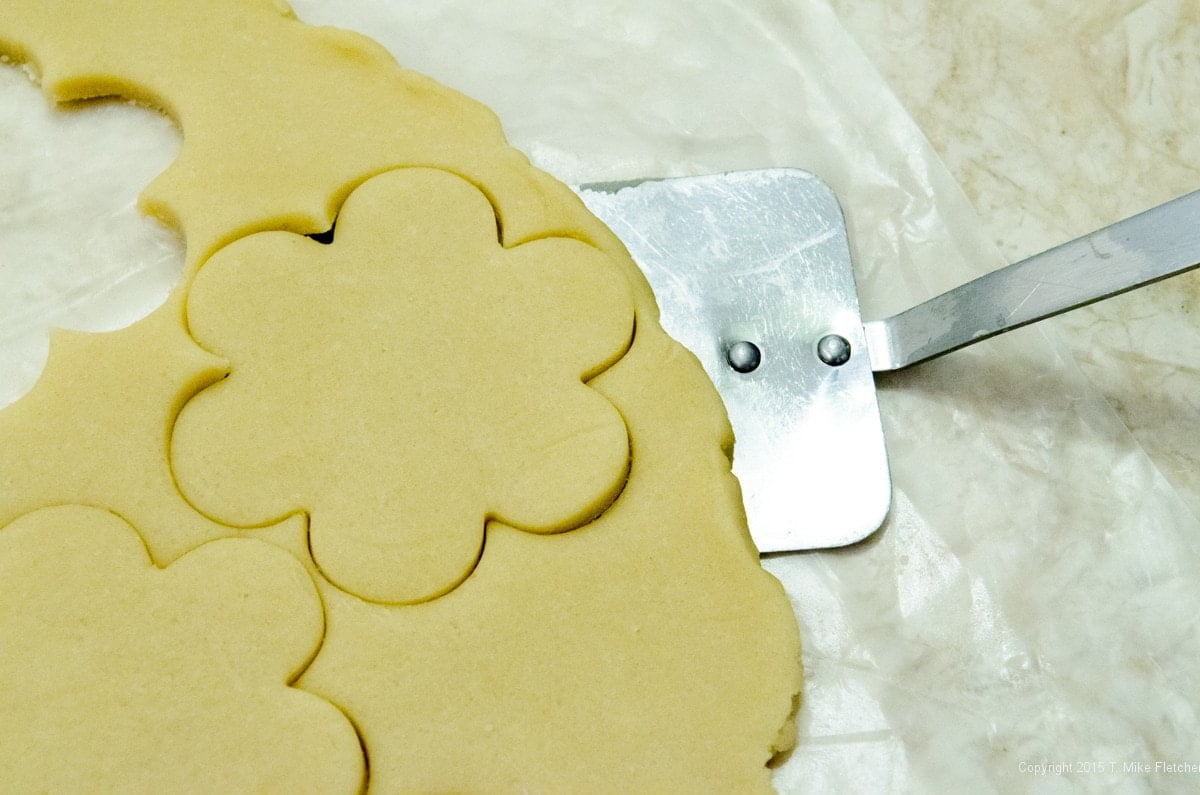
The dough is rolled between two pieces of waxed paper for easiest handling to about ¼ inch. Since this is a butter as well as a sugar cookie, the dough is very soft. After it has been made chilling will be a great help when rolling out. The reason for the waxed paper is avoid using additional flour when rolling out as additional flour can toughen the cookie and interfere with it's delicate flavor. I prefer waxed paper to parchment as the parchment is heavier and I think more difficult to use. The waxed paper also does not stick to the dough when it is removed which can happen with parchment.
However, when rolling between waxed paper, it is important to pull the paper back from time to time, keeping it flat to the dough, and replacing the paper. It is then turned over, where it undoubtedly will be wrinkled not he bottom. Remove the paper again, replace it and roll the dough out again. The paper should be removed in this manner several times.
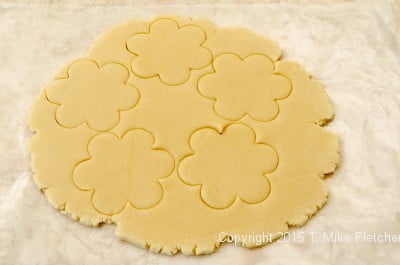
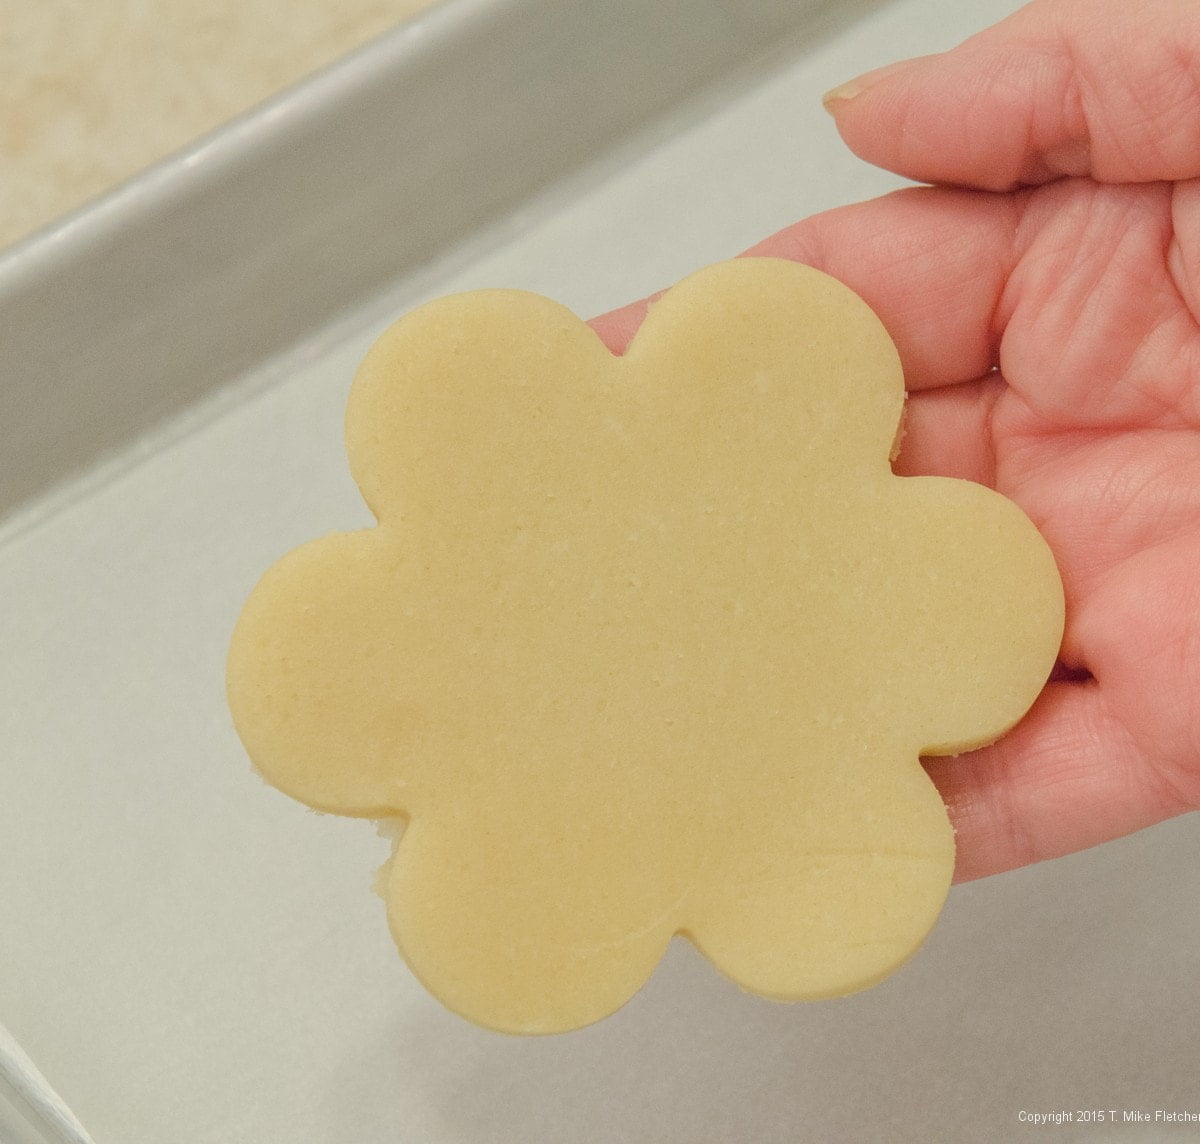
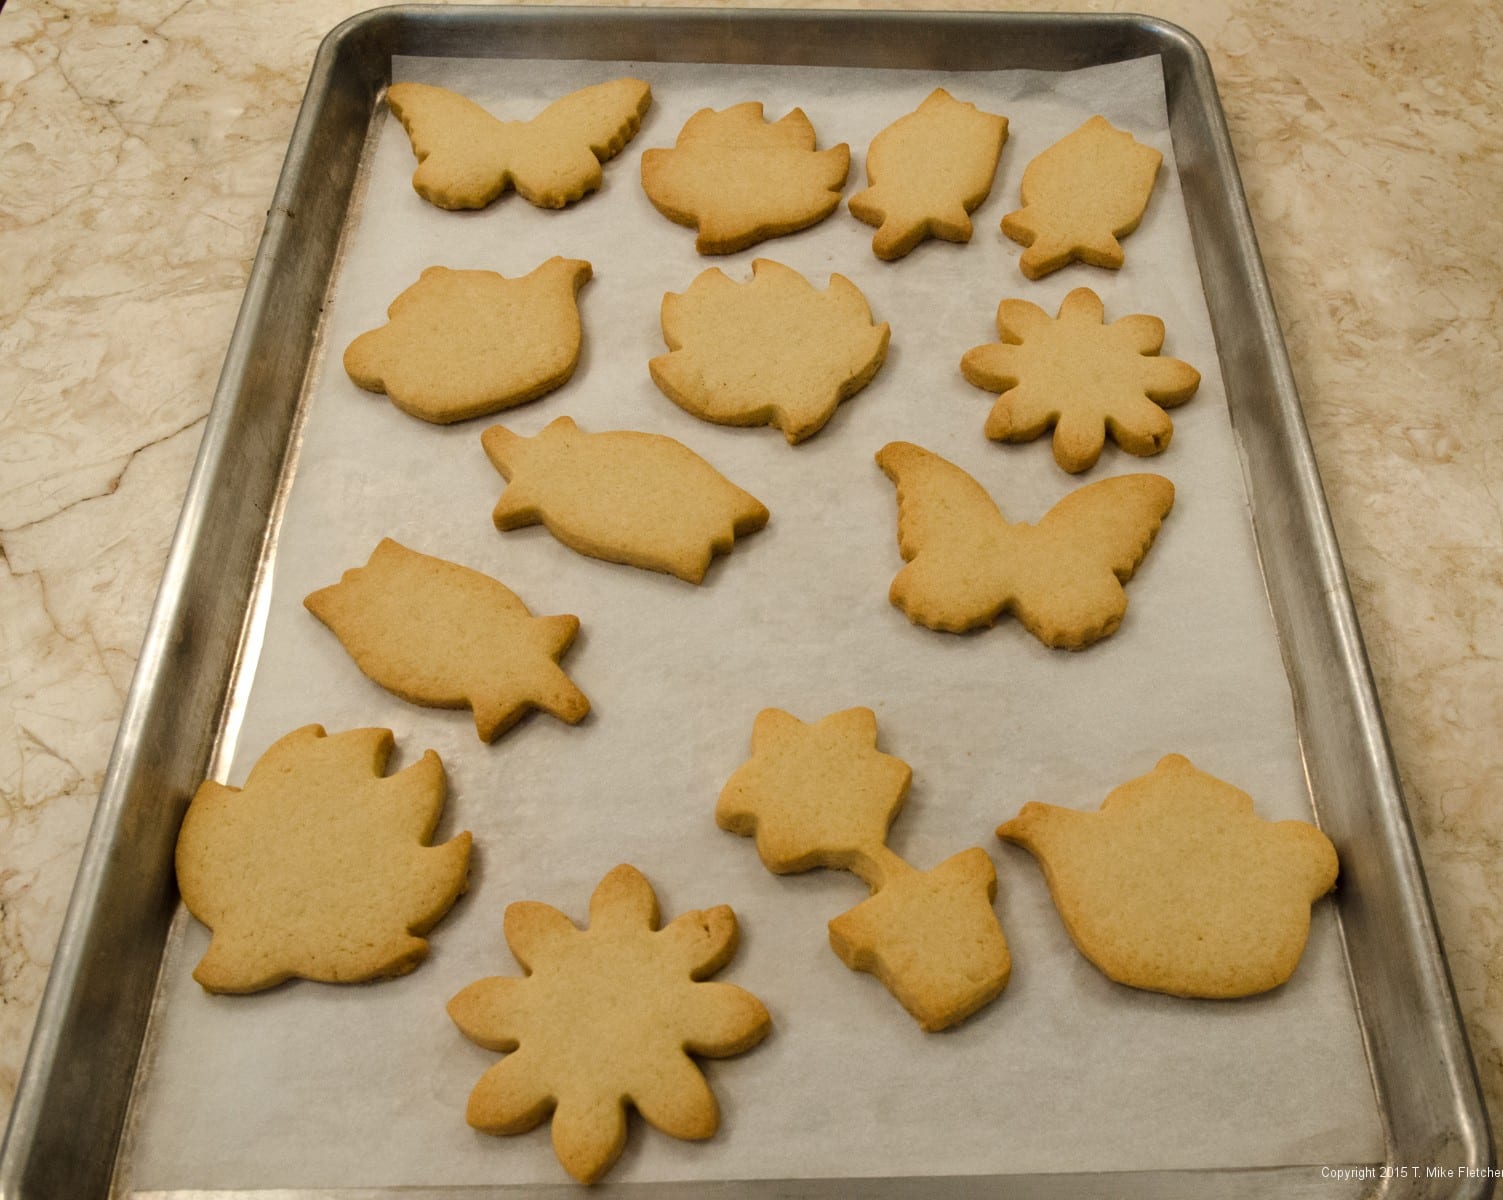
Once the dough has been rolled out, cut the cookies out. If the dough is very soft, chill it first. After the cookies have been cut, place the cookies, on the waxed paper in the freezer. It will be really easy to remove them without stretching them out of shape or breaking narrow parts of the cookies. They also separate from the dough with clean edges.
While all this may sound rather complicated, it really isn't. Once you have cut out cookies in this manner, it will be your go to way of cutting them.
A temperature of 325 degrees for the oven allows the cookies to bake through browning minimally around the edges. This makes an ideal background for decorating.
I have not included how to photos for the making of the dough as it goes together very easily with no complicated steps.
These painted cookies are a great, easy way to celebrate any occasion.
Cookies
2 sticks unsalted butter room temperature (1 cup, 225 grams or 8 ounces),
¾ cup granulated sugar (150 grams or 5 ⅓ ounces)
1 large egg
2 teaspoons vanilla or almond extract or grated rind from 1 lemon
2 ½ cups all purpose flour (350 grams or 12 ⅓ ounces)
¼ teaspoon salt
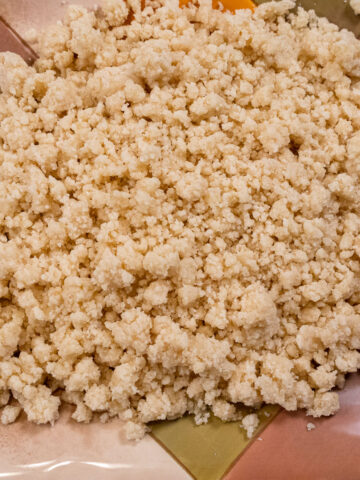
Cream the butter and sugar in a mixing bowl until very light in color and fluffy. Add the egg and beat until completely incorporated. Add the flavoring. Combine the flour and salt and add it to the butter mixture. Mix until everything is well combined and comes together.
Divide the dough in half (it will be very soft at this point) and wrap in plastic film. Refrigerate for 1 to 2 hours or overnight.
Preheat the oven to 325 degrees when ready to roll the dough and cut the cookies out and line baking sheets with parchment paper.
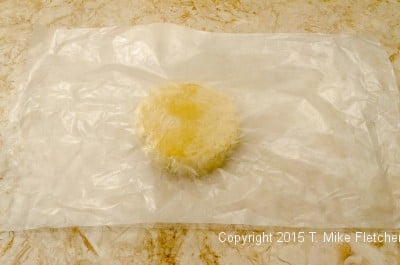
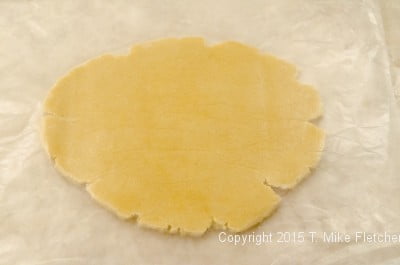
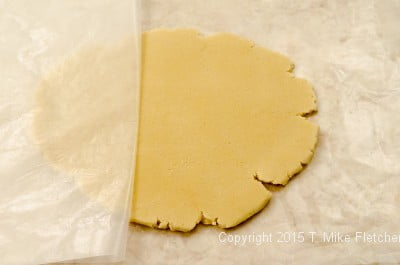
Remove the dough from the refrigerator and roll out between two sheets of waxed paper. It may have to warm up for a few minutes if it has been chilled for a long time.The dough has a tendency to roll only so far before the paper has to be removed, Pull the paper back, keeping it very close to the doughPlace the paper back on top of the dough. Flip the dough over and repeat. The bottom side will have wrinkles - just replace the paper and roll them out.
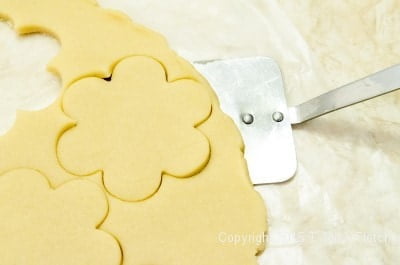
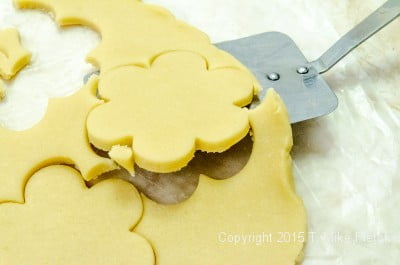
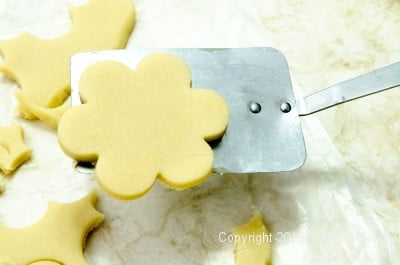
Cut out the cookies and place them, on the waxed paper in the freezer to harden on a cookie sheet. It only takes about 5 to 10 minutes depending upon the freezer. Remove them from the freezer. Place a pancake turner under a cookie and lift it up.
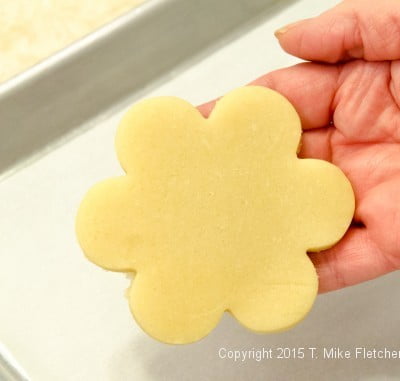
At this point it is very easy to place them on a parchment lined baking sheet with little trouble.
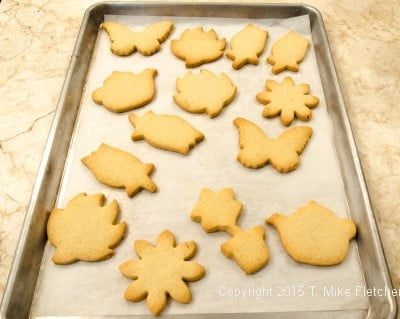
Bake for 12 to 15 minutes. The cookies should be set and just browning around the edges. Cool completely.
Painted Cookies
2 cups unsifted powdered sugar (260 grams or 9 ounces)
¼ cup lemon juice or water
1 teaspoon vanilla or almond if using water
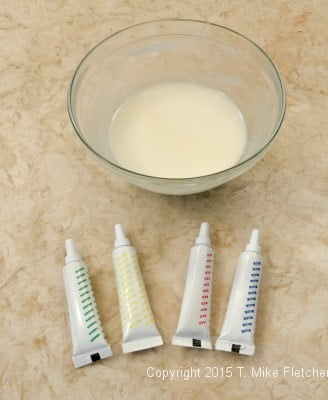
Combine the powdered sugar and water or lemon juice in a bowl big enough to hold the largest cookie. Stir to make a smooth glaze. The glaze should run off your spoon but remain fairly thick. If the glaze it too thick, thin with water or lemon juice a bit at a time. If too thin, add a little more powdered sugar to get the right consistency. Try 1 cookie in plain glaze to get the consistency right. It should coat the cookie and drip off as in the photo.
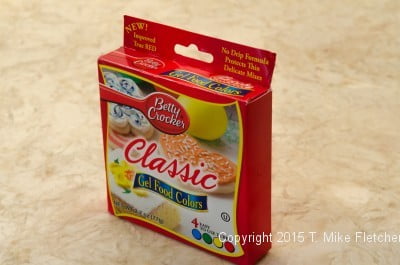
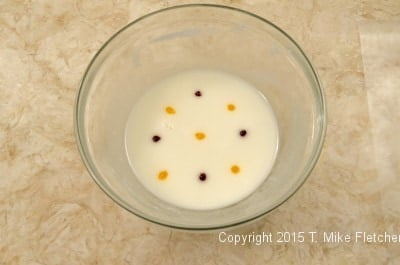
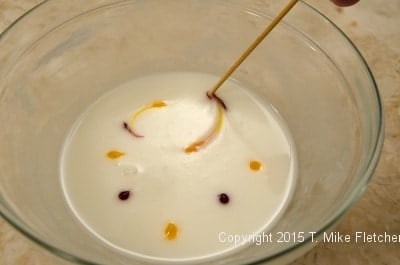

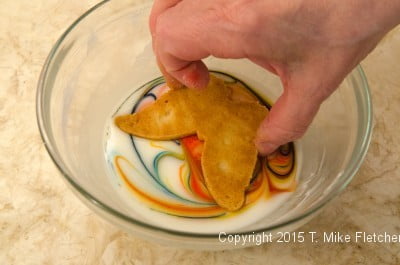
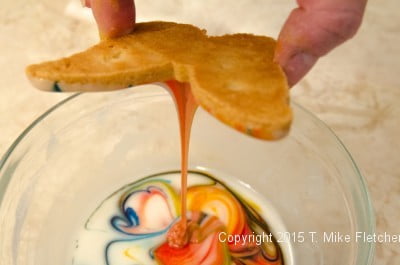
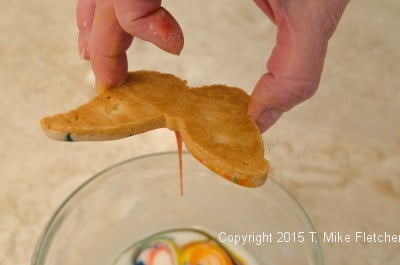
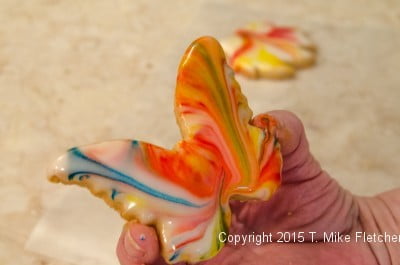
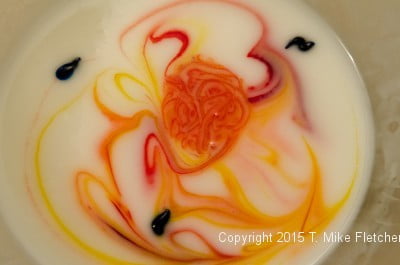
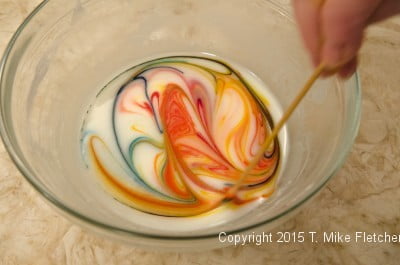
Dot the surface with as few or many Gel Food Colors* as desired. With a bamboo skewer or toothpick, swirl the colors around. Do not over-swirl.Wipe the skewer clean each time it is used. Pick the cookies up by the edge and dip top side down, just to the top of the cookie, into the glaze allowing the glaze to drip back into the bowl..When most of it has dripped back, turn it right side up and place it on parchment paperIf there is a lot of glaze still on the top, wipe the excess off by dragging it very lightly on the edge of the bowl. Place top side up on parchment to dry. Additional gel can be added at any time to create more designs. Repeat until the cookies are all glazed or until the color becomes too muddled.
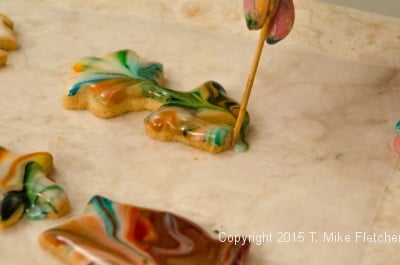
If the cookies run over the edge as will sometimes happen, use a clean bamboo skewer to remove the glaze. Push the cookie to a clean area of parchment to dry. Dry for 24 hours before packing to make sure the glaze as dried all the way through.
These cookies can be made a week or 10 days ahead and stored at room temperature away from heat or humidity.

Yield: It depends upon the size of your cookie cutters.
*These gels may be found in grocery stores as well as cake supply and kitchen supply stores.

Bert says
This is the 2nd time I have made these delicious cookies with my grandchildren. Although the lemon was too tart for their 8 and 4 year old tastebuds, they loved the water/vanilla version for the frosting. These cookies are really good and the dough is fairly easy to work with (follow the directions regarding chilling the dough). I left the dough in the refridgerator for 2 days (simply a scheduling issue), and if there were negatives from being in there that long, we couldn't tell it when we ate the cookies! This is certainly a fun food activity to make with children. Thanks so much for a professional recipe that is easy and delicious and uses ingredients most bakers have in the pantry! I really enjoy your blog and appreciate the instructional side you share with us. Best wishes to you.
Helen S Fletcher says
Hi Bert, When my grandsons were small, we spent a lot of time baking together. It took with one. At 20 he stills loves to bake. I'm happy to hear you feel the same. You never know what will stick with them but the memories they'll have will be good ones.
Celeste Brackley says
Those are so absolutely beautiful. I am going to make them soon!! Thank you for sharing. :)
Helen S Fletcher says
Thank you Celeste. And there easy!
Susan Brooks says
Have made these lovely, yummy cookies many times, using colors to match the seasons (ie pastels for Easter, red/green for Christmas, yellow/orange/red/green for fall leaves). They always look spectacular, and the lemon in the frosting is always a surprise hit. Thank you for sharing your decorating methods for these 5-star cookies!
Helen S Fletcher says
Hi Susan, Happy to hear you like these so much. I love the lemon glaze. I think it's a surprise when tasted.
civ says
Beautiful!
Helen S Fletcher says
Thanks, I hope you get a chance to try them.
Mary Howard says
Love these cookies and the painted frosting. Thanks for the recipe.
Helen S Fletcher says
Thanks Mary - they're really quite easy to do. Decorating is not my forte so I had to figure something I could do early in the Bakery. This was it. We did thousands and thousands of these over the years.
ellen graves says
Well, I done it!! Needless to say mine don't look anything like so spectacular as Helen's. Mine are kind of wishy-washy - pastelly? - compared to yours, Helen. Maybe I need to be less stingy with the icing gel. But they still look really nice and I'm so excited about this new technique.
We both think the basic cookie, without the icing, is excellent.. it's delicious especially using your technique to roll it out, so the dough doesn't get more and more floury and tasteless. No more cardboardy Christmas cookies for us! I think it might be good for icebox cookies too.
I completely agree about tin cookie cutters, I love them! I just discovered a flock of jungle creatures in our local cookshop, I may succumb to temptation now I have such a great rolled cookie recipe.
hfletcher says
I am so proud of you Ellen. This is a finish you can use over and over. I love the cookie dough because it doesn't stretch out of shape in the oven as so many do. It looks like what you cut out.
Before our big move in January I had hundreds of cookie cutters. I culled what I thought I would use and got rid of the rest in the estate sale. Well, wouldn't you know, I had to buy several you see in the photo. My husband is terrified I am starting up again. The joke was I never saw a cookie cutter I could pass up.
The wax paper technique was one my mother used many years ago. I have no idea where she learned it but she used it to roll out the Murbteig cookies.
Thanks so much for letting me know. A lot of work goes into the blogs and I really enjoy knowing others are using the info. and it is working for them.
ellen graves says
Your blogs are wonderful. I think this is the best baking blog I've ever seen. I've often thought how much work it must be for you, having photos at every stage, explaining exactly what you are doing, but it is so worth it at least from my point of view!
I had to use clingfilm (saran wrap) for rolling out because there is no waxed paper round these parts, but it worked fine. It's such a great technique - I have heard of it before but never really did it, you convinced me though.
Cookie cutters - I too have over a hundred. My husband thinks I'm mad. But it was he who pointed out that at least they don't take up much room! So I immediately ordered some more...!
hfletcher says
Hi Ellen - you are too funny! I had so many, I sorted them by occasion or like cutters and put them in plastic shoe boxes with signs as to what they were. But your husband is correct. They don't take up much room!
don massey says
Hi Helen...
These are still my "go to" cookie of all time and have been making your recipe for a while. I recently made a batch for an office party and my coworkers asked me all day "where did you buy these?" I have since directed them to this blog.
Good luck with your surgery! Pace yourself!
Don
***A Note for Home Bakers and Enthusiasts like me***
These cookies are amazingly simple and look gorgeous when they're finished! As former student of Helen, and for those new to her blog, BUY HER BOOKS! All of her recipes are tested over and over and each once always produces consistent results. She created recipes for a large scale, commercial kitchen, and then turned these into single recipes for the home baker. I find her to be simple, some times involved, and produce amazing desserts (...her Pumpkin Cheesecake is my all time fav!!
hfletcher says
Hi Don: Thanks for such a beautiful endorsement. You were one of my best students and I am thrilled that you are still baking. I know the people who are on the receiving end of your baking are very appreciative. Hope you are doing well. Thanks for the good wishes on the upcoming surgery.
ellen graves says
Helen, I have made the dough and put it in the fridge. I have only 'writing gel' to put in the icing. Do you think that would do, or should I buy 'icing gel'? I probably won't get to icing until tomorrow anyway..
Good luck with your surgery. I know from friends that this op. is very effective, I guess you have already found that out though!
hfletcher says
Hi Ellen - There is no reason I sometimes reply via email. If I open a message on my phone or iPad, it often doesn't show up in the comments so I answer to make sure I acknowledge.
As to the dough being difficult, chill it between every step for a few minutes in the freezer. Makes all the difference in the world. I chill it, roll it out, chill it, cut it out, chill it and then remove a perfect cookie that doesn't get stretched out of shape as it might if removed to the baking sheet right after cutting. It only takes 5 minutes or less to get it cold enough to make the next step really easy.
Also, I don't like plastic cutters. They never have edges as sharp as metal ones. I don't even like the Matfur cutters and consider them too expensive. When you get new cutters, try the metal ones. I think you will like them.
So happy you are doing this.
beth296 says
Great looking cookies, I love this method. Will have to make sure to give it a try. Thank you for sharing.
hfletcher says
You're welcome Beth. No one will believe how easy they are. On second thought don't tell them.
ellen graves says
These are so beautiful, Helen. And what lovely cutters!
I too lack the piping gene, so glad to know I'm not the only one. What a wonderful solution to the problem! It is pouring rain here today, I was going to work on taxes (groan) but...
More anon I hope.
Manisha says
Wow Helen!!! What a simple yet gorgeous idea of decorating these cookies. I also have a little trouble with piping. It's a bad combo of lack of confidence and unsteady hand :)
Thanx for sharing this. I will surely be giving it a try.
Love
hfletcher says
Thanks Manisha - I am having surgery this summer, I hope, to have a carpel tunnel release on the right hand. It has become difficult to use it. I had the left hand done years ago but it's time for the other one which is why I like easy things like this.
Manisha says
Good luck Helen and wishing you speedy recovery...remember I am just a phone call away.
sallybr says
Absolutely gorgeous cookies, Helen! Just shared on my Facebook page, and also in a cooking forum, they are spectacular, and you are so creative!
hfletcher says
Hi Sally - I saw you shared. Thanks so much. Your forum has been quite responsive. Glad you like these. Give them a try - they are truly easy.
sallybr says
quite tempted... quite quite tempted...
will let you know....
sending you good luck with the surgery, keep us posted!