Springerle Cookies originated in the German province of Swabia in the 15th century. Originally made to honor Church Holy Days, they have become a much loved anise flavored Christmas cookie and are often used as Christmas tree ornaments.
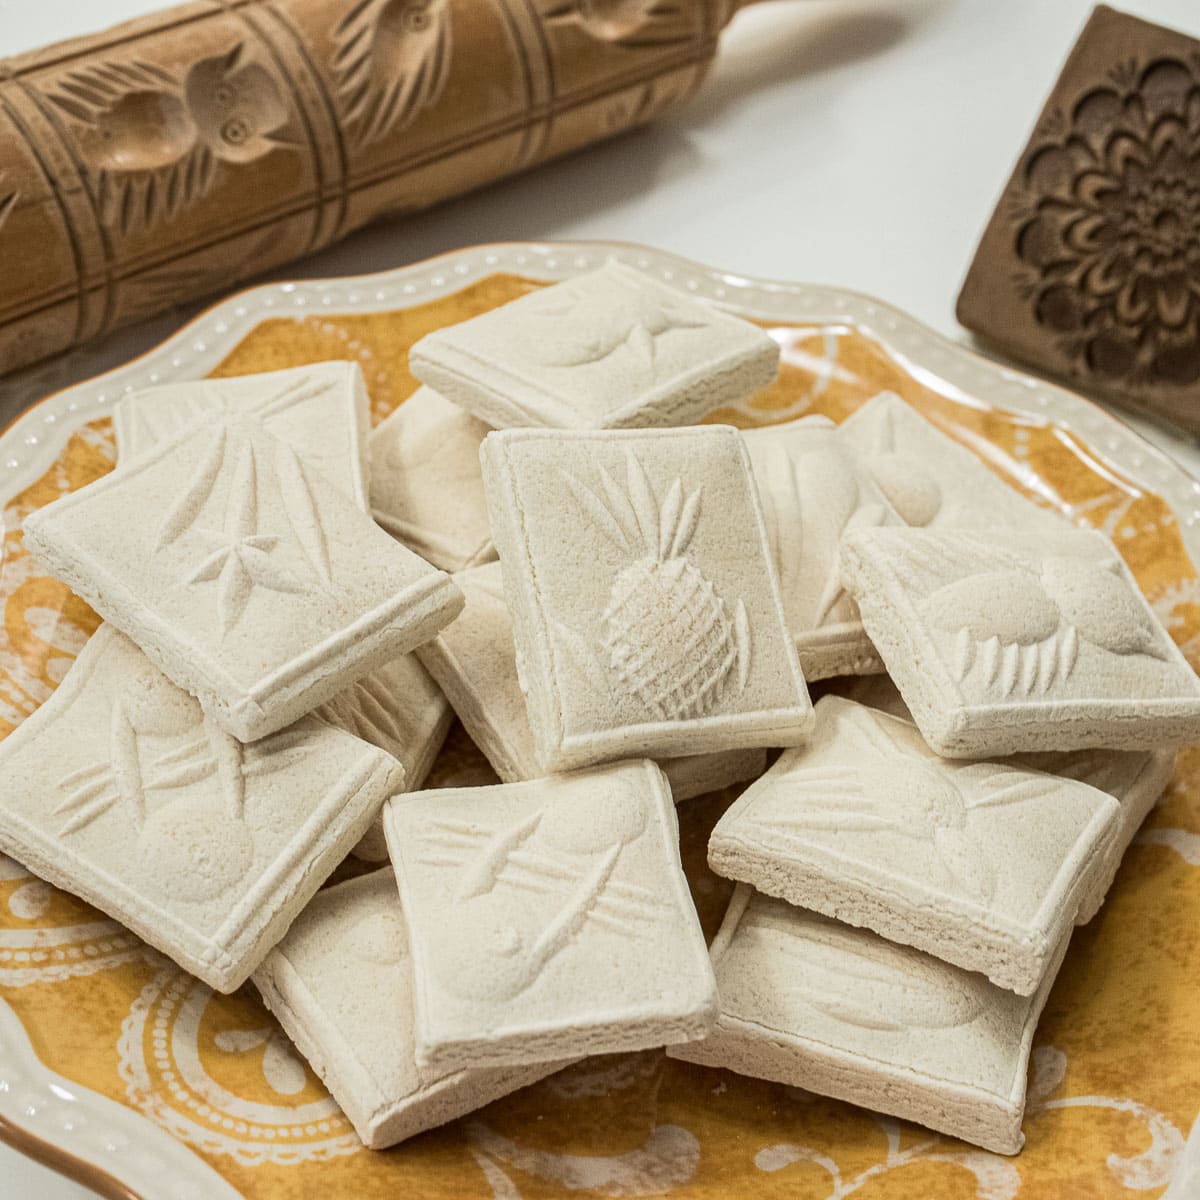
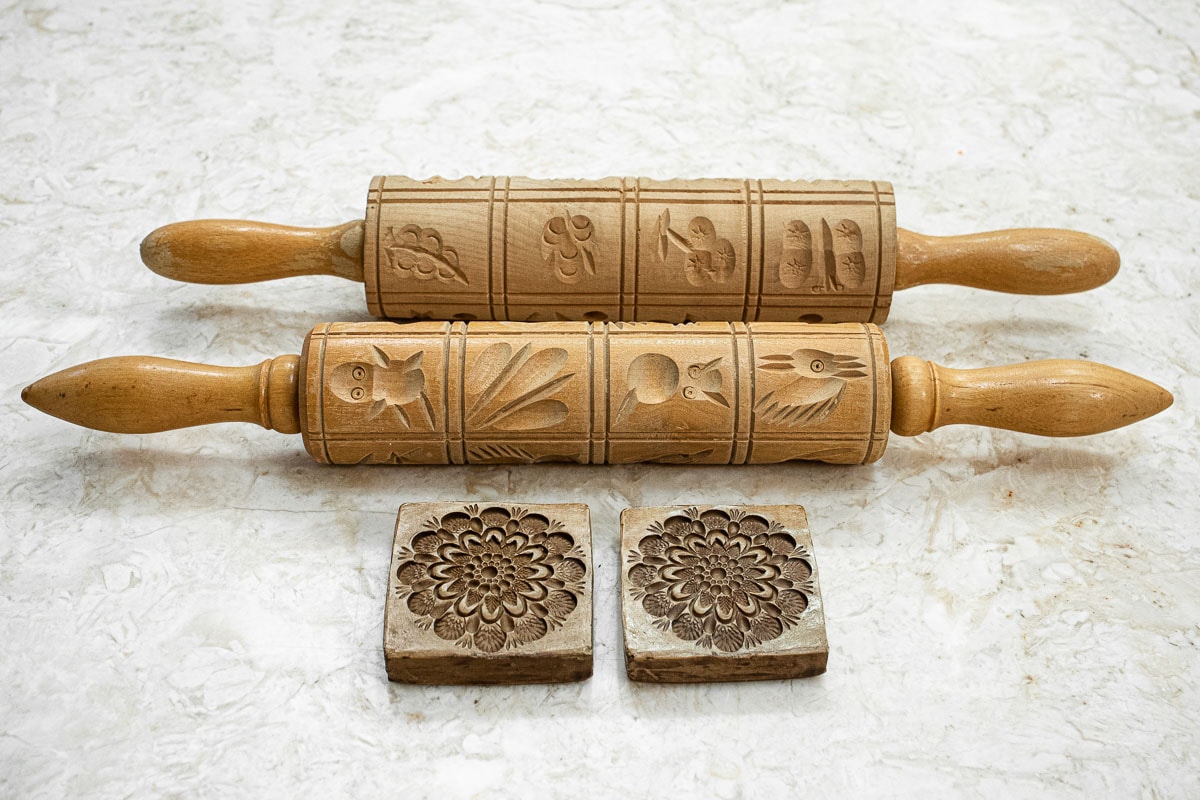
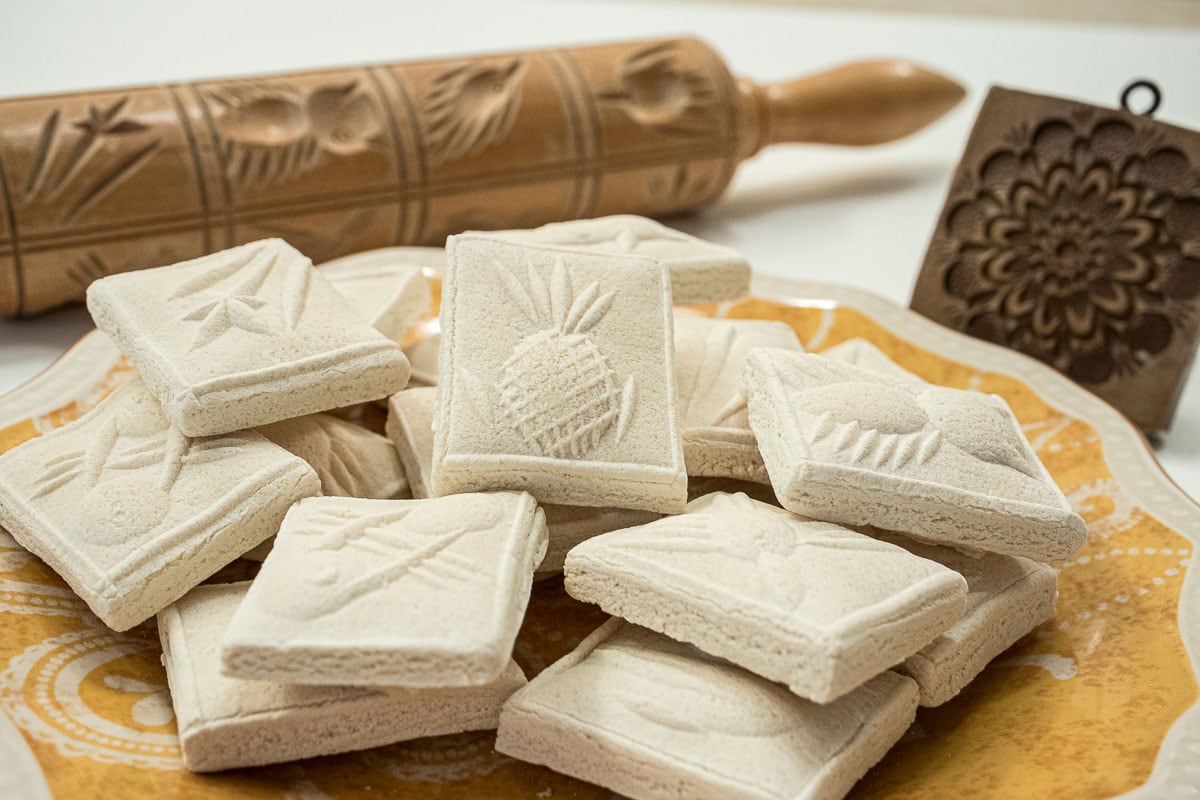
Special rolling pins with various carvings, as well as molds are used to imprint the cookie dough. The oldest known springerle mold carved with an Easter Lamb is from Switzerland and was carved from wood in the 14th century. They can be found online.
I have used the original leavening agent, baker's ammonia or hartshorn. It bakes up lighter and crisper than baking powder which is often used in America. Because there is no fat in Springerle, except for the egg yolks, it is more like a firm cake than what we usually think of as a cookie. It is also mixed differently than most cookies. A whole egg meringue is made into which the flour and flavoring is added. Using cake flour helps keep the cookies a bit softer after baking.
While most recipes I have seen recommend storing these up to 2 weeks before eating, I find that the cookies will become much harder and recommend eating them within a week to ten days at the most. If using them as tree ornaments, dry them out after baking.
More European Cookies for your Enjoyment
- Murbteig Pastry - Delicate lemon butter cookies form Germany.
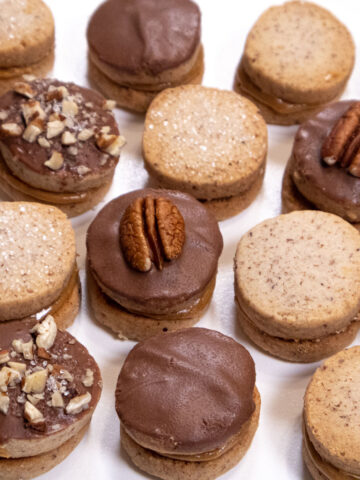
- Sienna Lace - Two delicate spiced lacy cookies are sandwiched with chocolate.
- Chocolate Spice Olive Oil Biscotti - perfect with tea or coffee.
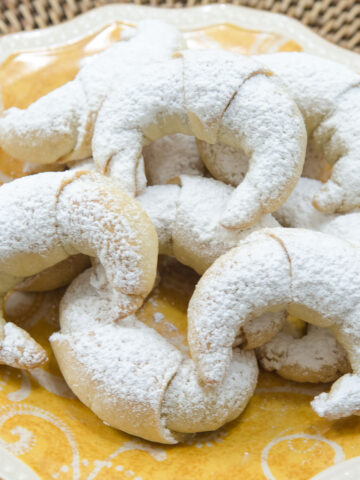
- Kifle - A fantastic sour cream pastry is wrapped around a walnut filling.
- Almond Macaroons - A naturally gluten free cookie half dipped in chocolate.
- French Macarons with Chocolate Raspberry Filling - What else is there to say?
- Sarah Bernhardts - A gorgeous naturally gluten free cookie with a macaron base, topped with a kiss of chocolate ganache, dipped in chocolate and finished with gold leaf.
- Sablé Breton - One of the most simple cookies but with a big wallop of flavor, this cookie comes from the Brittany region of France with its wonderful butter and sea salt, both used in this cookie.
- French Butter Cookies, Petit Buerre are simple, buttery, crisp, barely sweet but addictive, easily made and last indefinitely.
- Zimtsterne or German Cinnamon Stars are meringue based and held together with ground nuts.
Jump to:
The Most Beautiful Springerle
A virtual friend of mine Sally BR of Bewitching Kitchen is an artist in the kitchen. While she blogs about food in general, it is her cookies, pastries and breads that are standouts. Here are a couple of pictures she sent of my Springerle cookies beautifully painted. Do check out her blog, she's amazing.
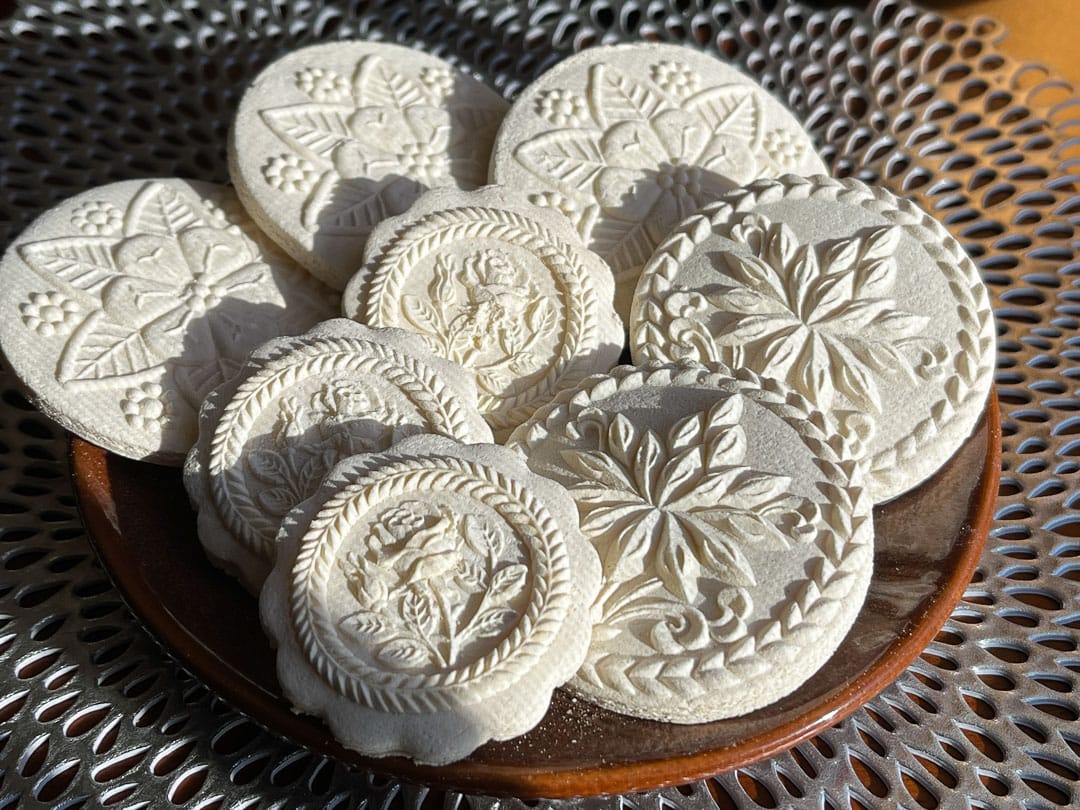
These are the cookies pressed in from molds. They are baked and perfectly white.
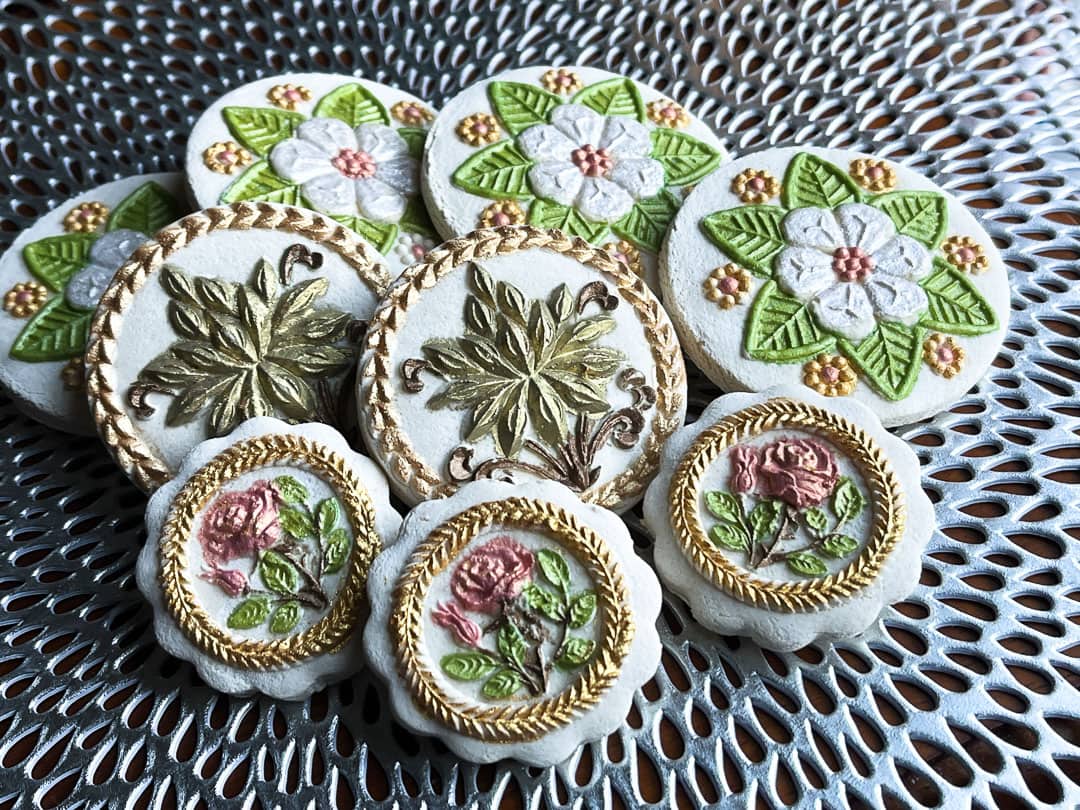
These are the same cookies gorgeously painted. If these had small holes made in the cookies prior to baking, they would make stunning, keepsake tree ornaments to be treasured tied with gold cord.
Springerle Ingredients

FRONT ROW: Anise extract, eggs, ammonium carbonate (Baker's Ammonia)
BACK ROW: Cake flour, granulated sugar
Ammonium Carbonate (Baker's Ammonia) is used in Europe as the leavening agent that shows up most in their cookies. It is easily found online at Amazon and Lorann Oils. When the bottle is opened do not take a whiff. This is the same stuff that is used to bring around someone who has fainted. While the smell is strong, it dissipates completely when baked. No hint of the smell or taste is left. Baking powder can be substituted but the results are not quite the same.
Granulated sugar is used in this recipe. When researching, I found quite a few of the recipes using powdered sugar. When I tested both ways, the granulated sugar cookies held the shape of the cookie and their shape and design better.
Cake Flour is used for a slightly softer cookies. 2 ¼ cups all-purpose flour can be substituted for the cake flour. They will weigh the same at 315 grams.
Be sure to see the recipe card below for the exact ingredients and instructions.
Step by Step Instructions
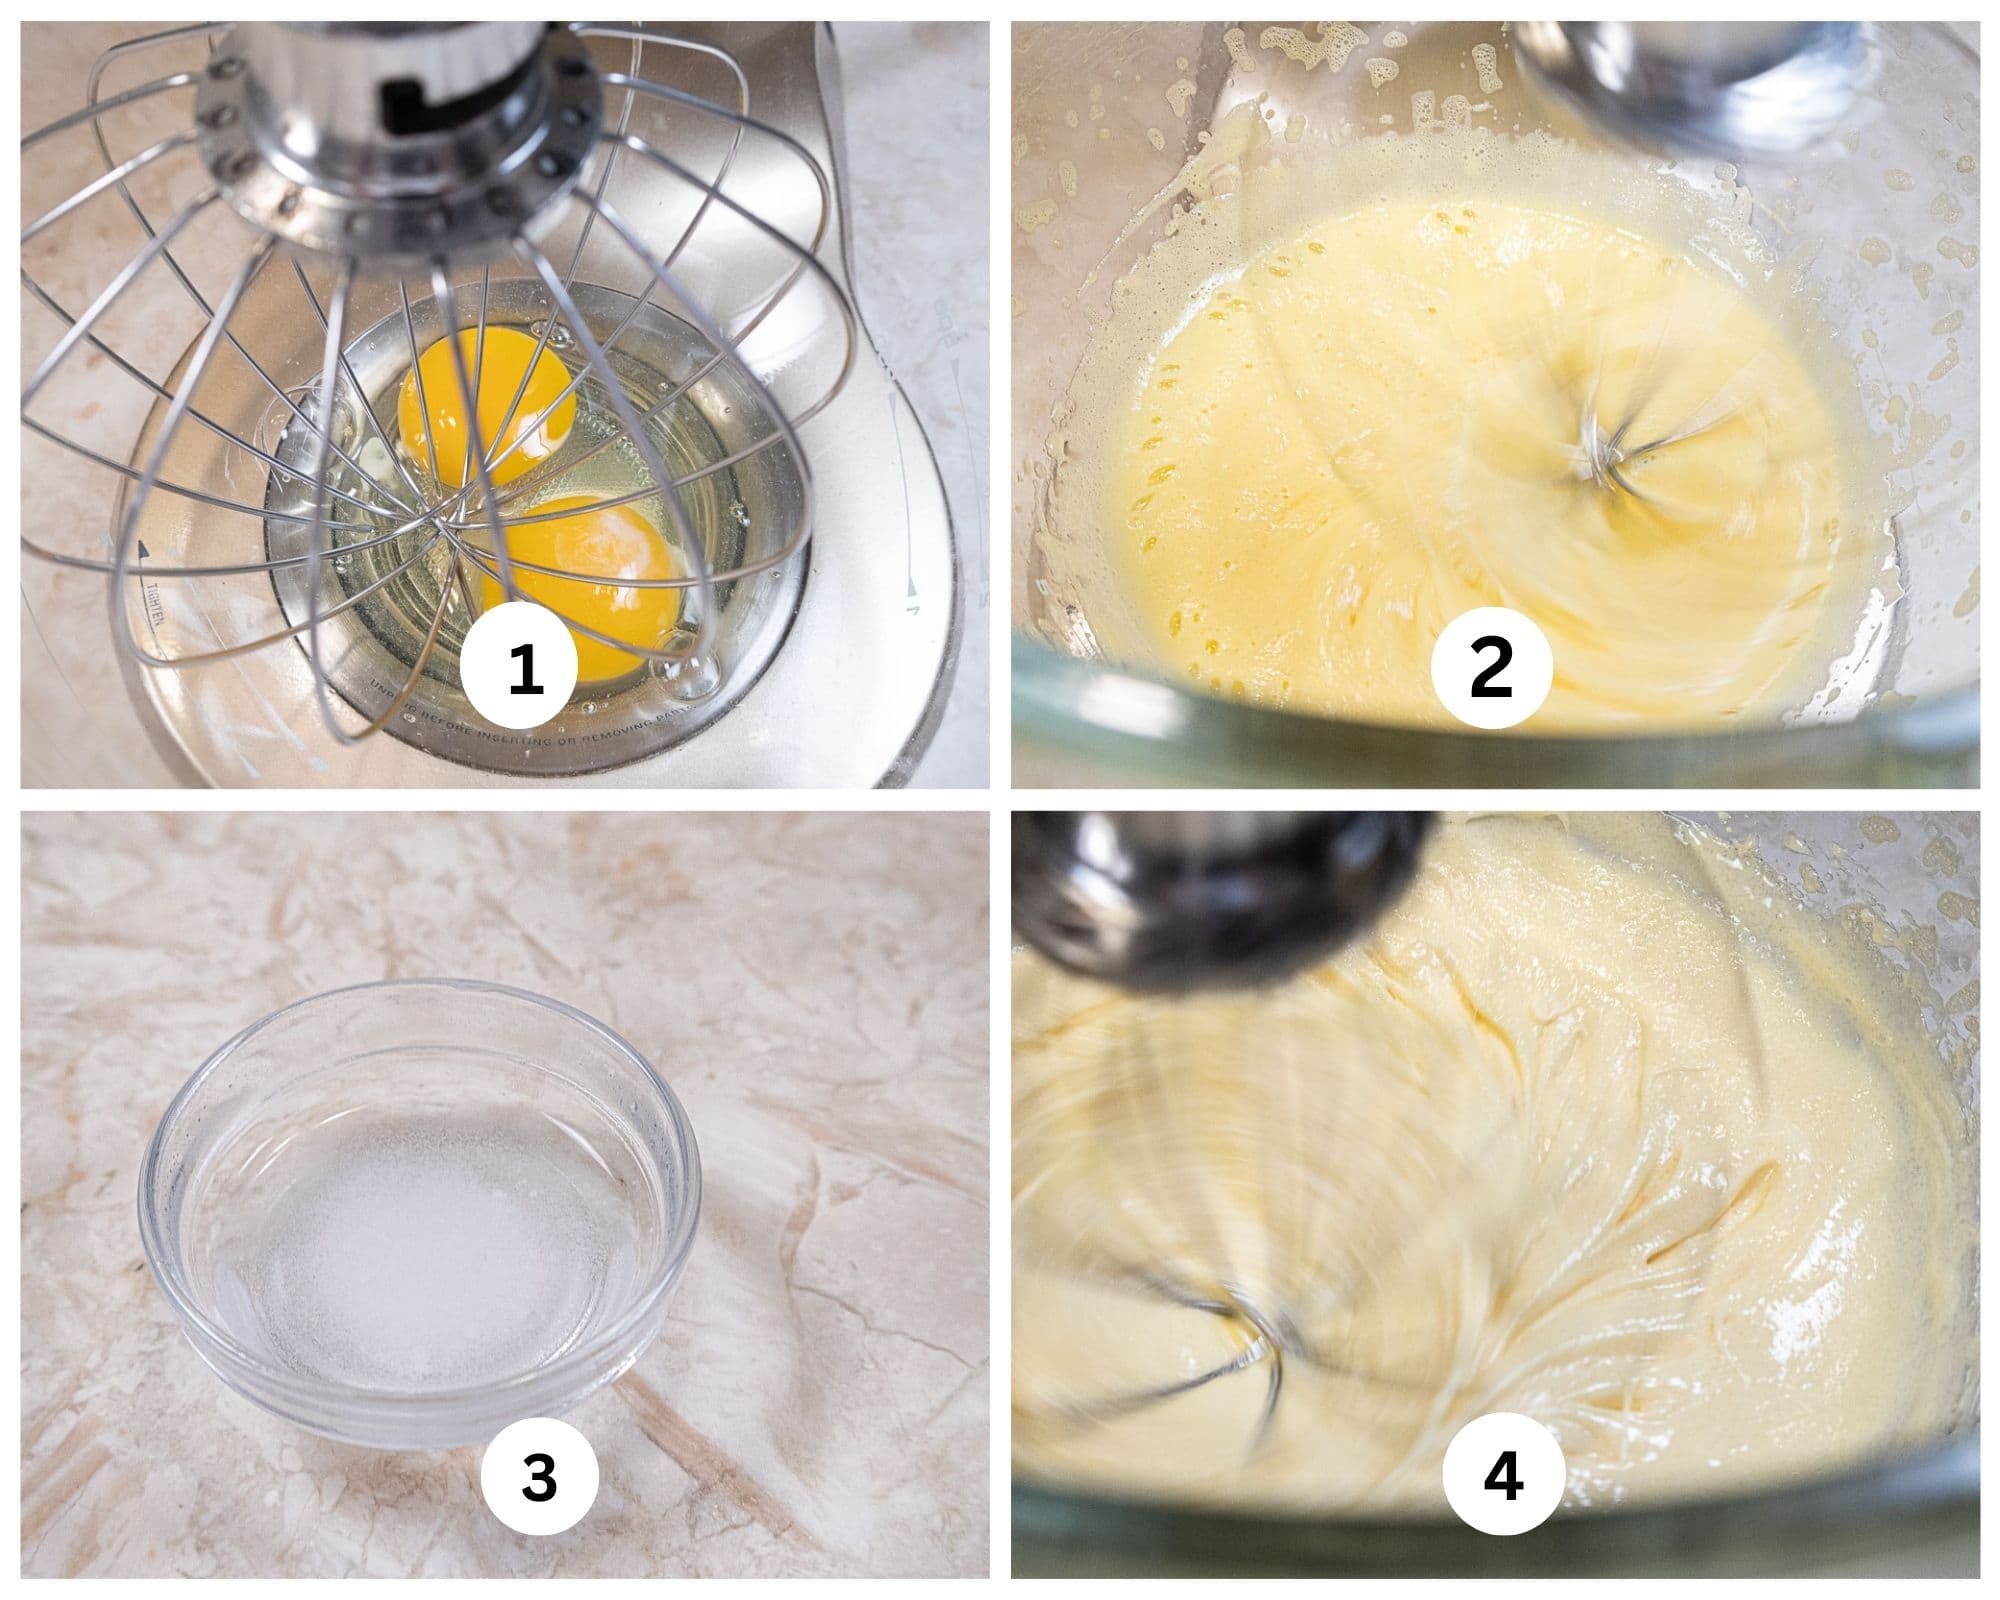
Step 1. Place the eggs in the mixing bowl fitted with the whisk attachment. Step 2. Beat until pale yellow. Step 3. Combine the anise extract and ammonia and add to the eggs. Step 4. Add the sugar a bit at a time, as when making meringue. Beat until the mixture is very light, has increased in volume and is thick.
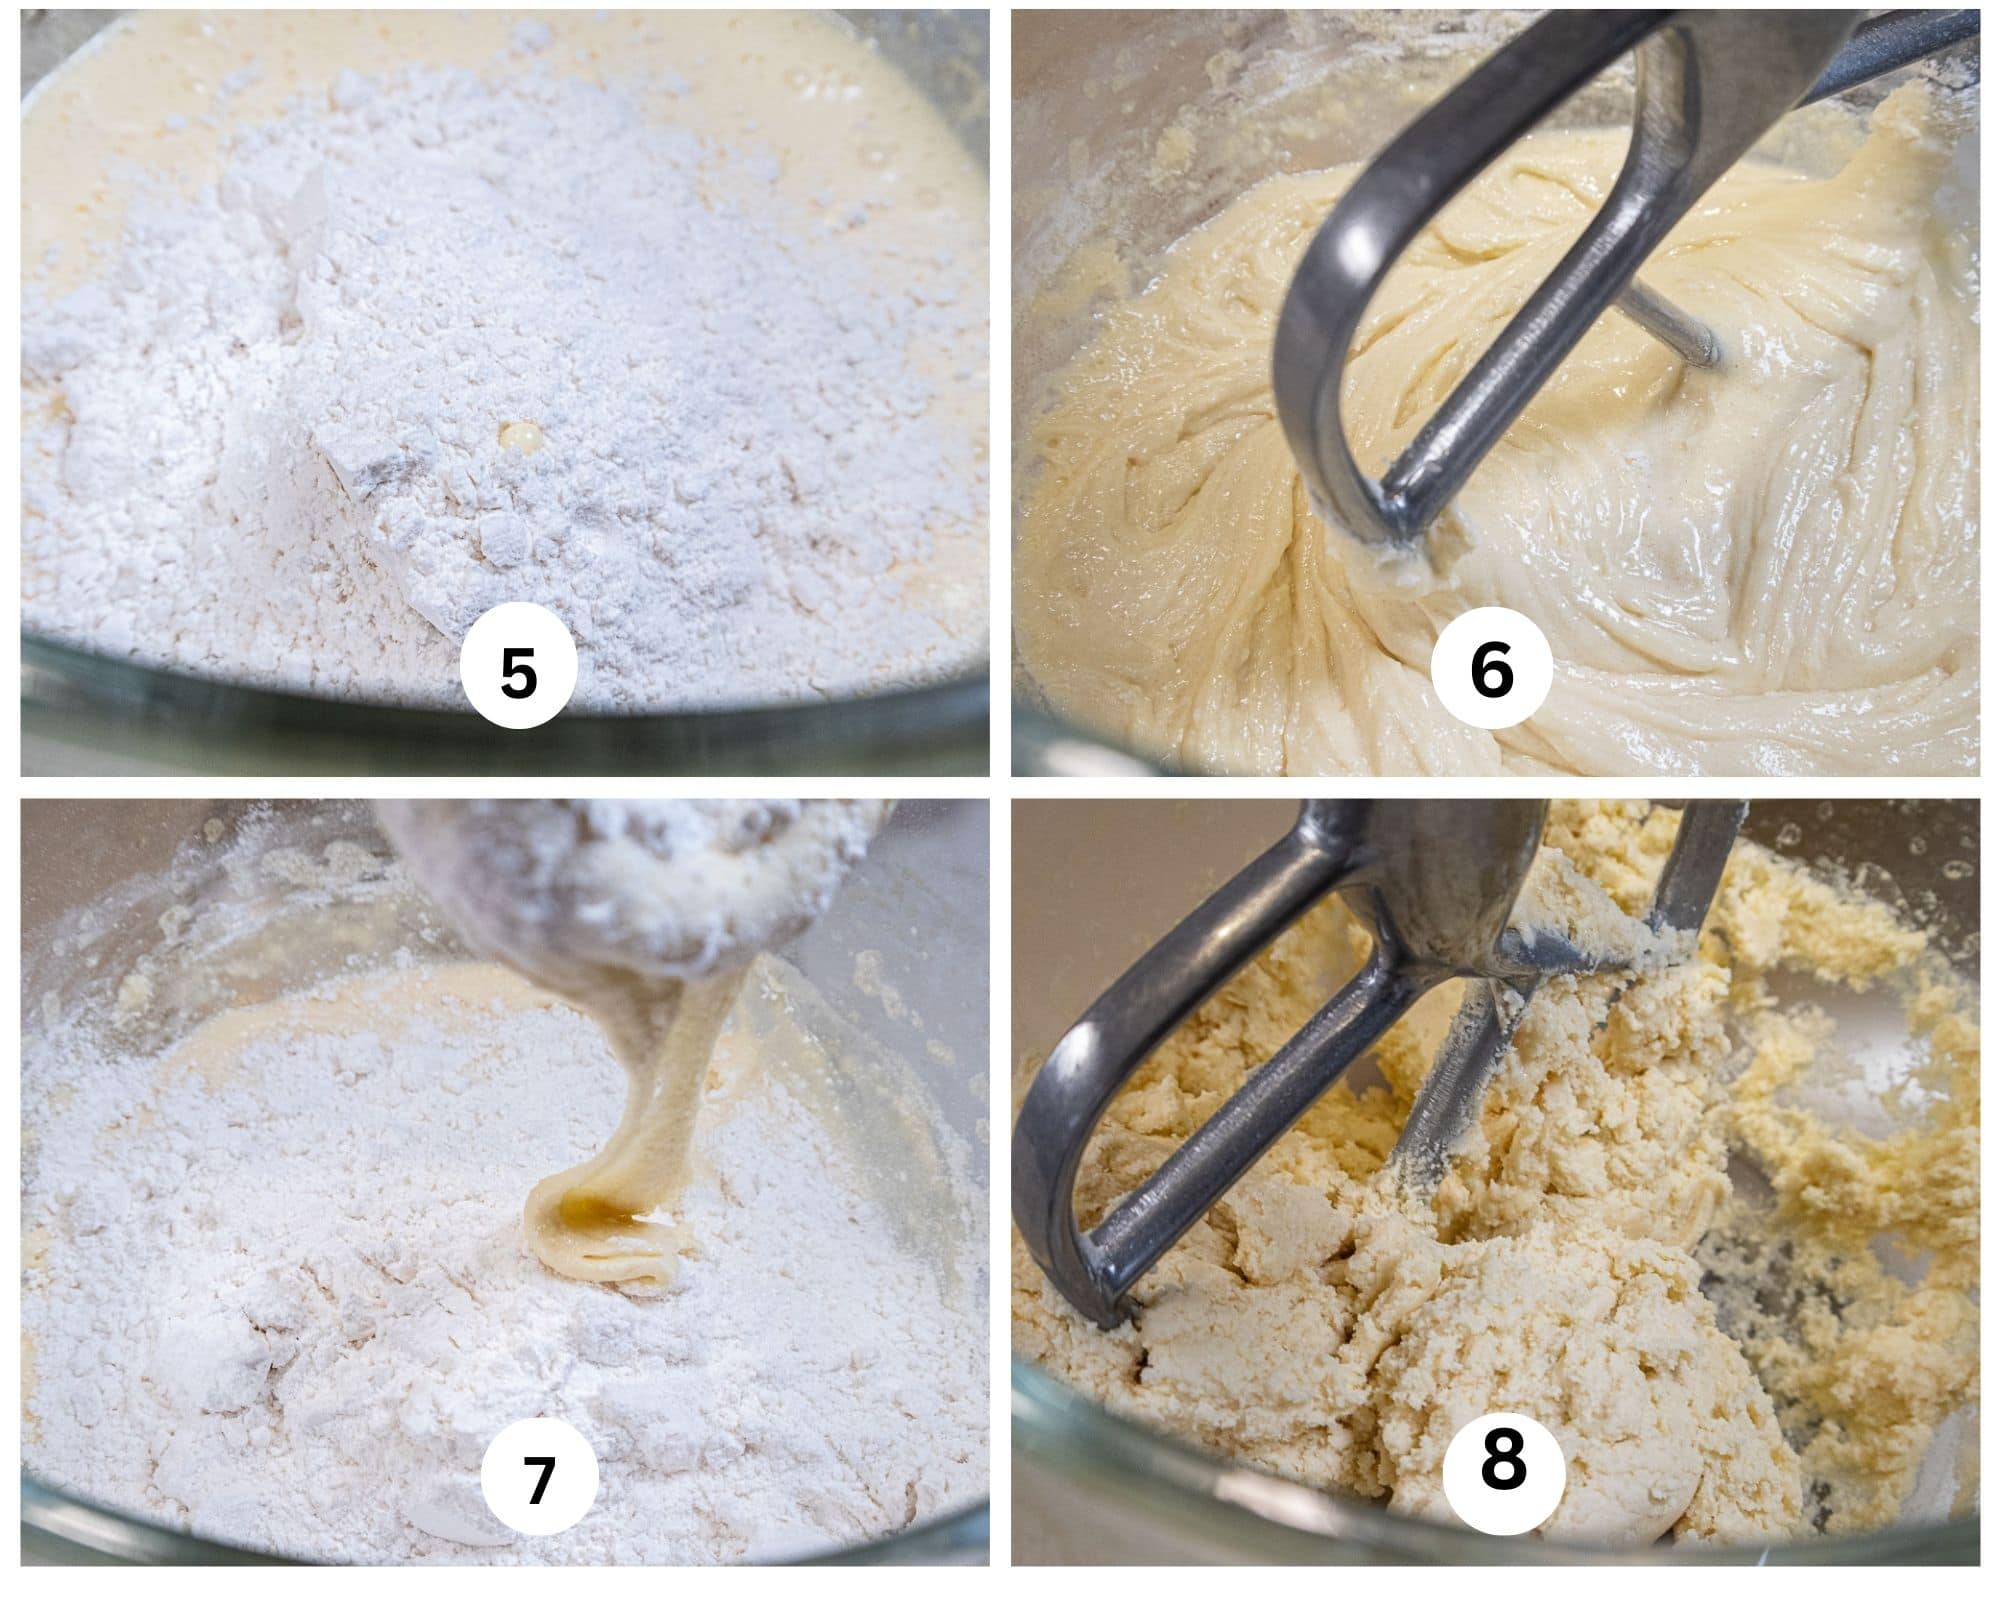
Step 5. Remove the whisk attachment and insert the paddle. This is a heavy, sticky dough so I wouldn't use the scraper paddle. Add half the flour to the egg mixture. Step 6. Incorporate the flour completely. Step 7. Add the remaining flour. Step 8. Beat on low until completely mixed. The dough will be rather sticky. This is as it should be. Do not add more flour.
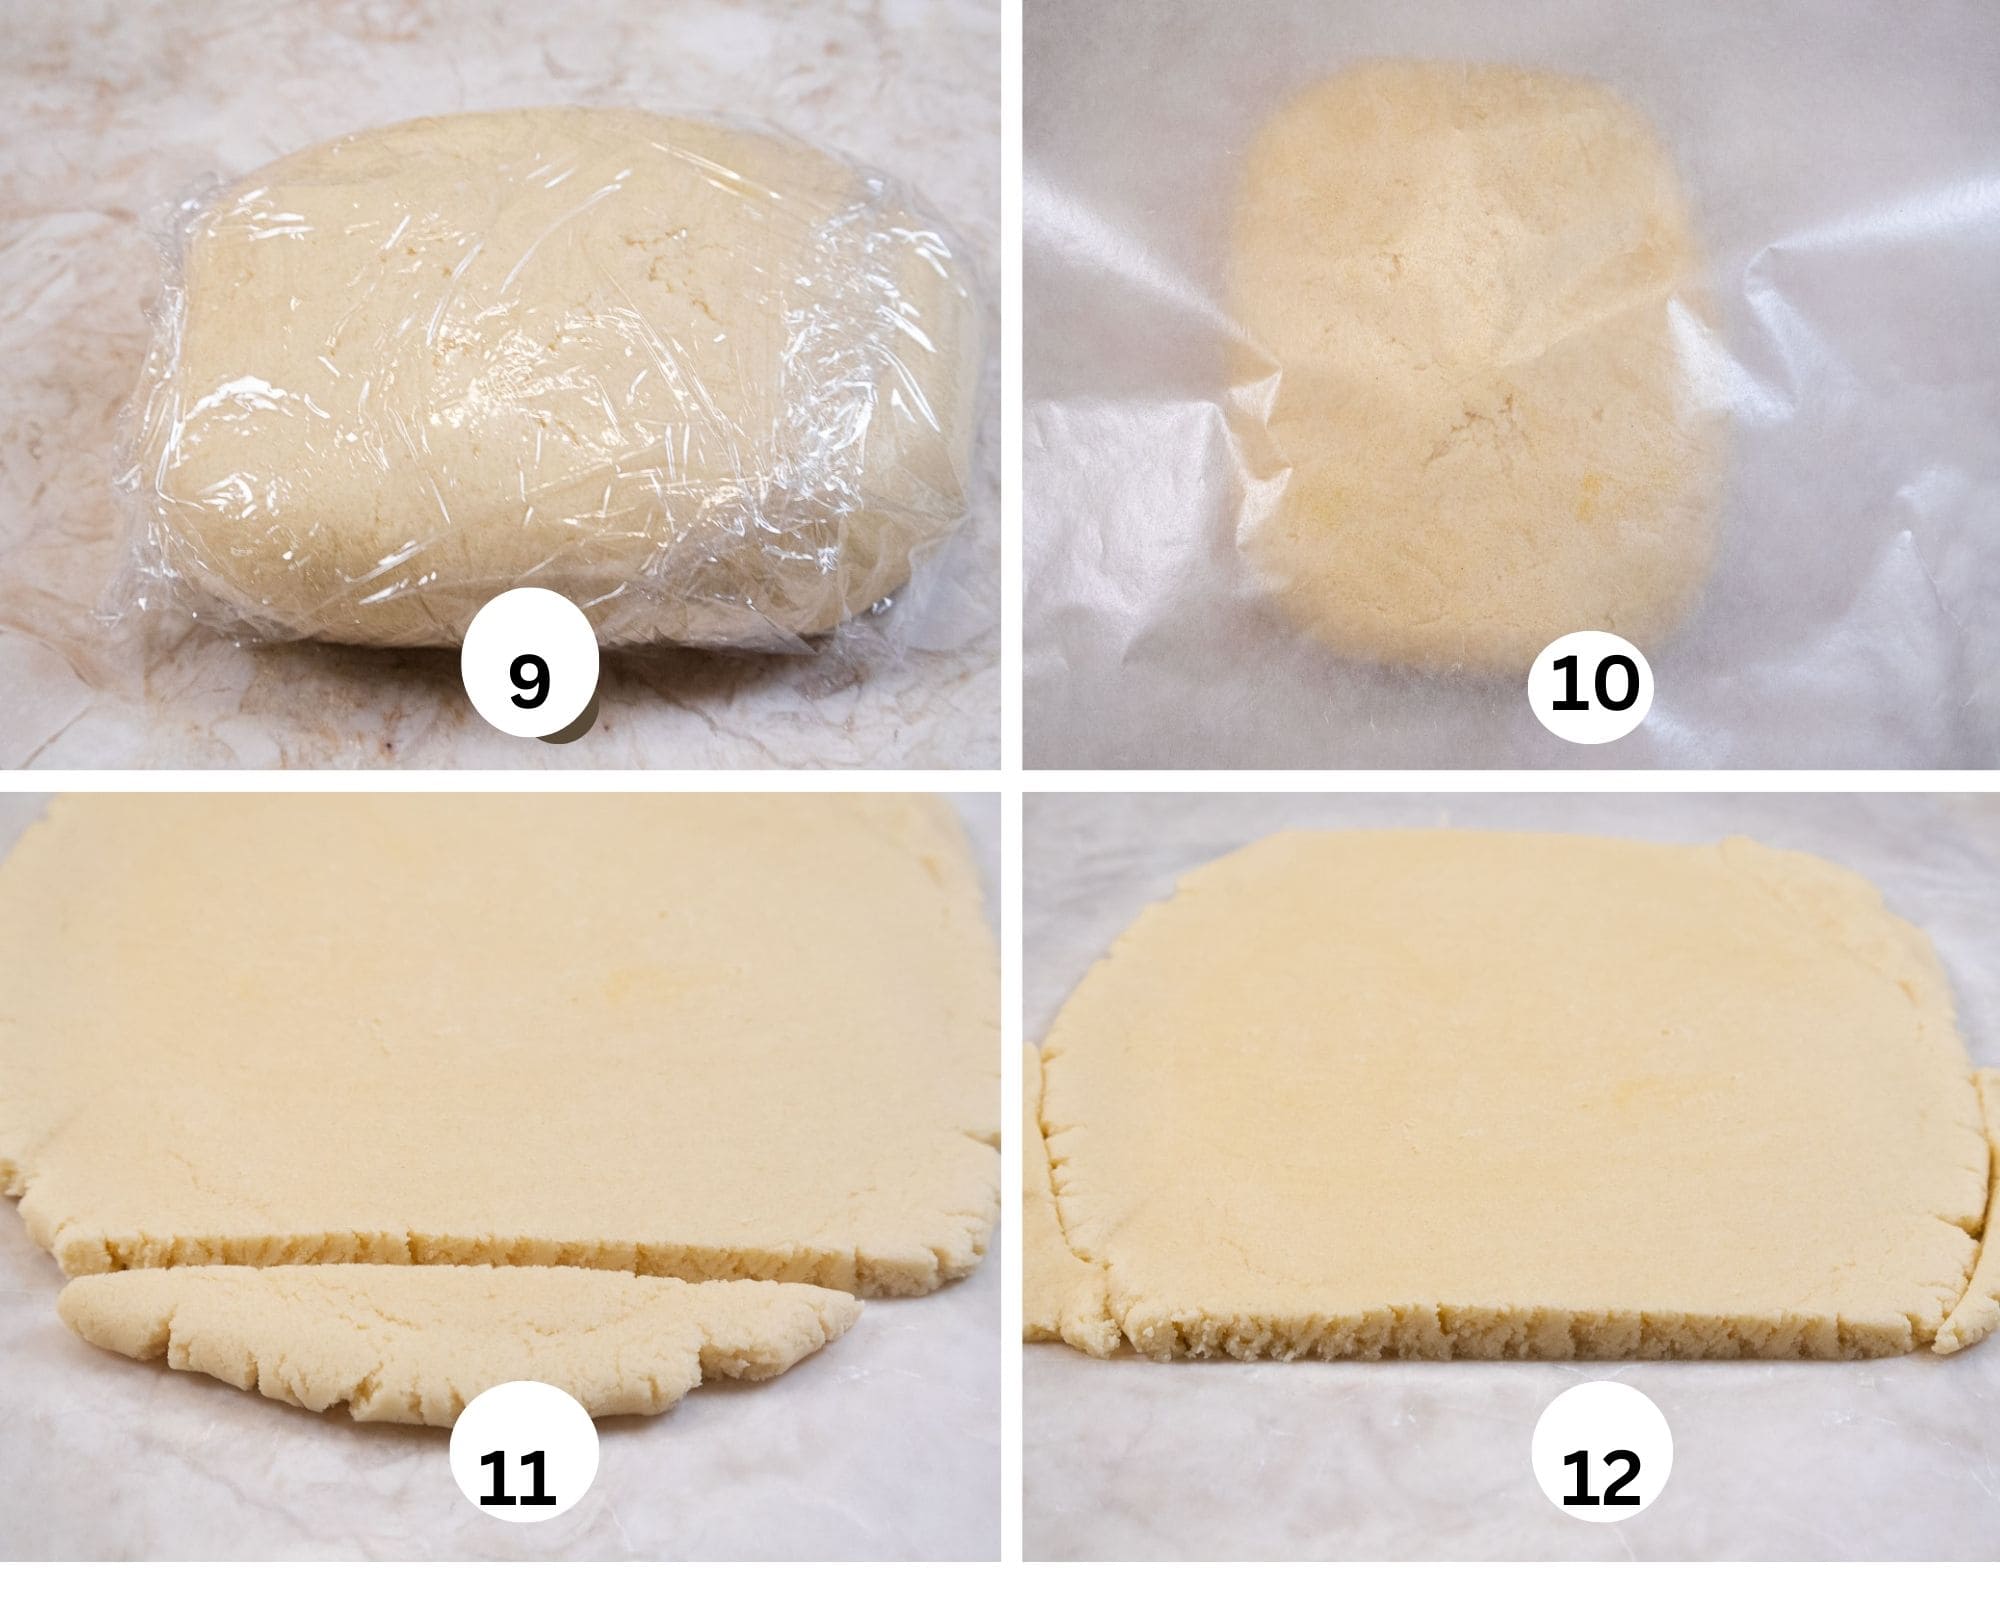
Step 9. Gather the dough together and knead it a few times into a rectangle. Step 10. Place it in plastic wrap and chill for a couple of hours to firm it up to make it easier to roll. Step 11. As much as I try, I don't always roll the dough into a perfect rectangle. So, cut off the bottom. Step 12. Place the dough around the edges to make a rectangle. Press them together, place the waxed paper on top and roll to make a rectangle about ⅜" thick and a little wider than the width of the springerle rolling pin if using one.
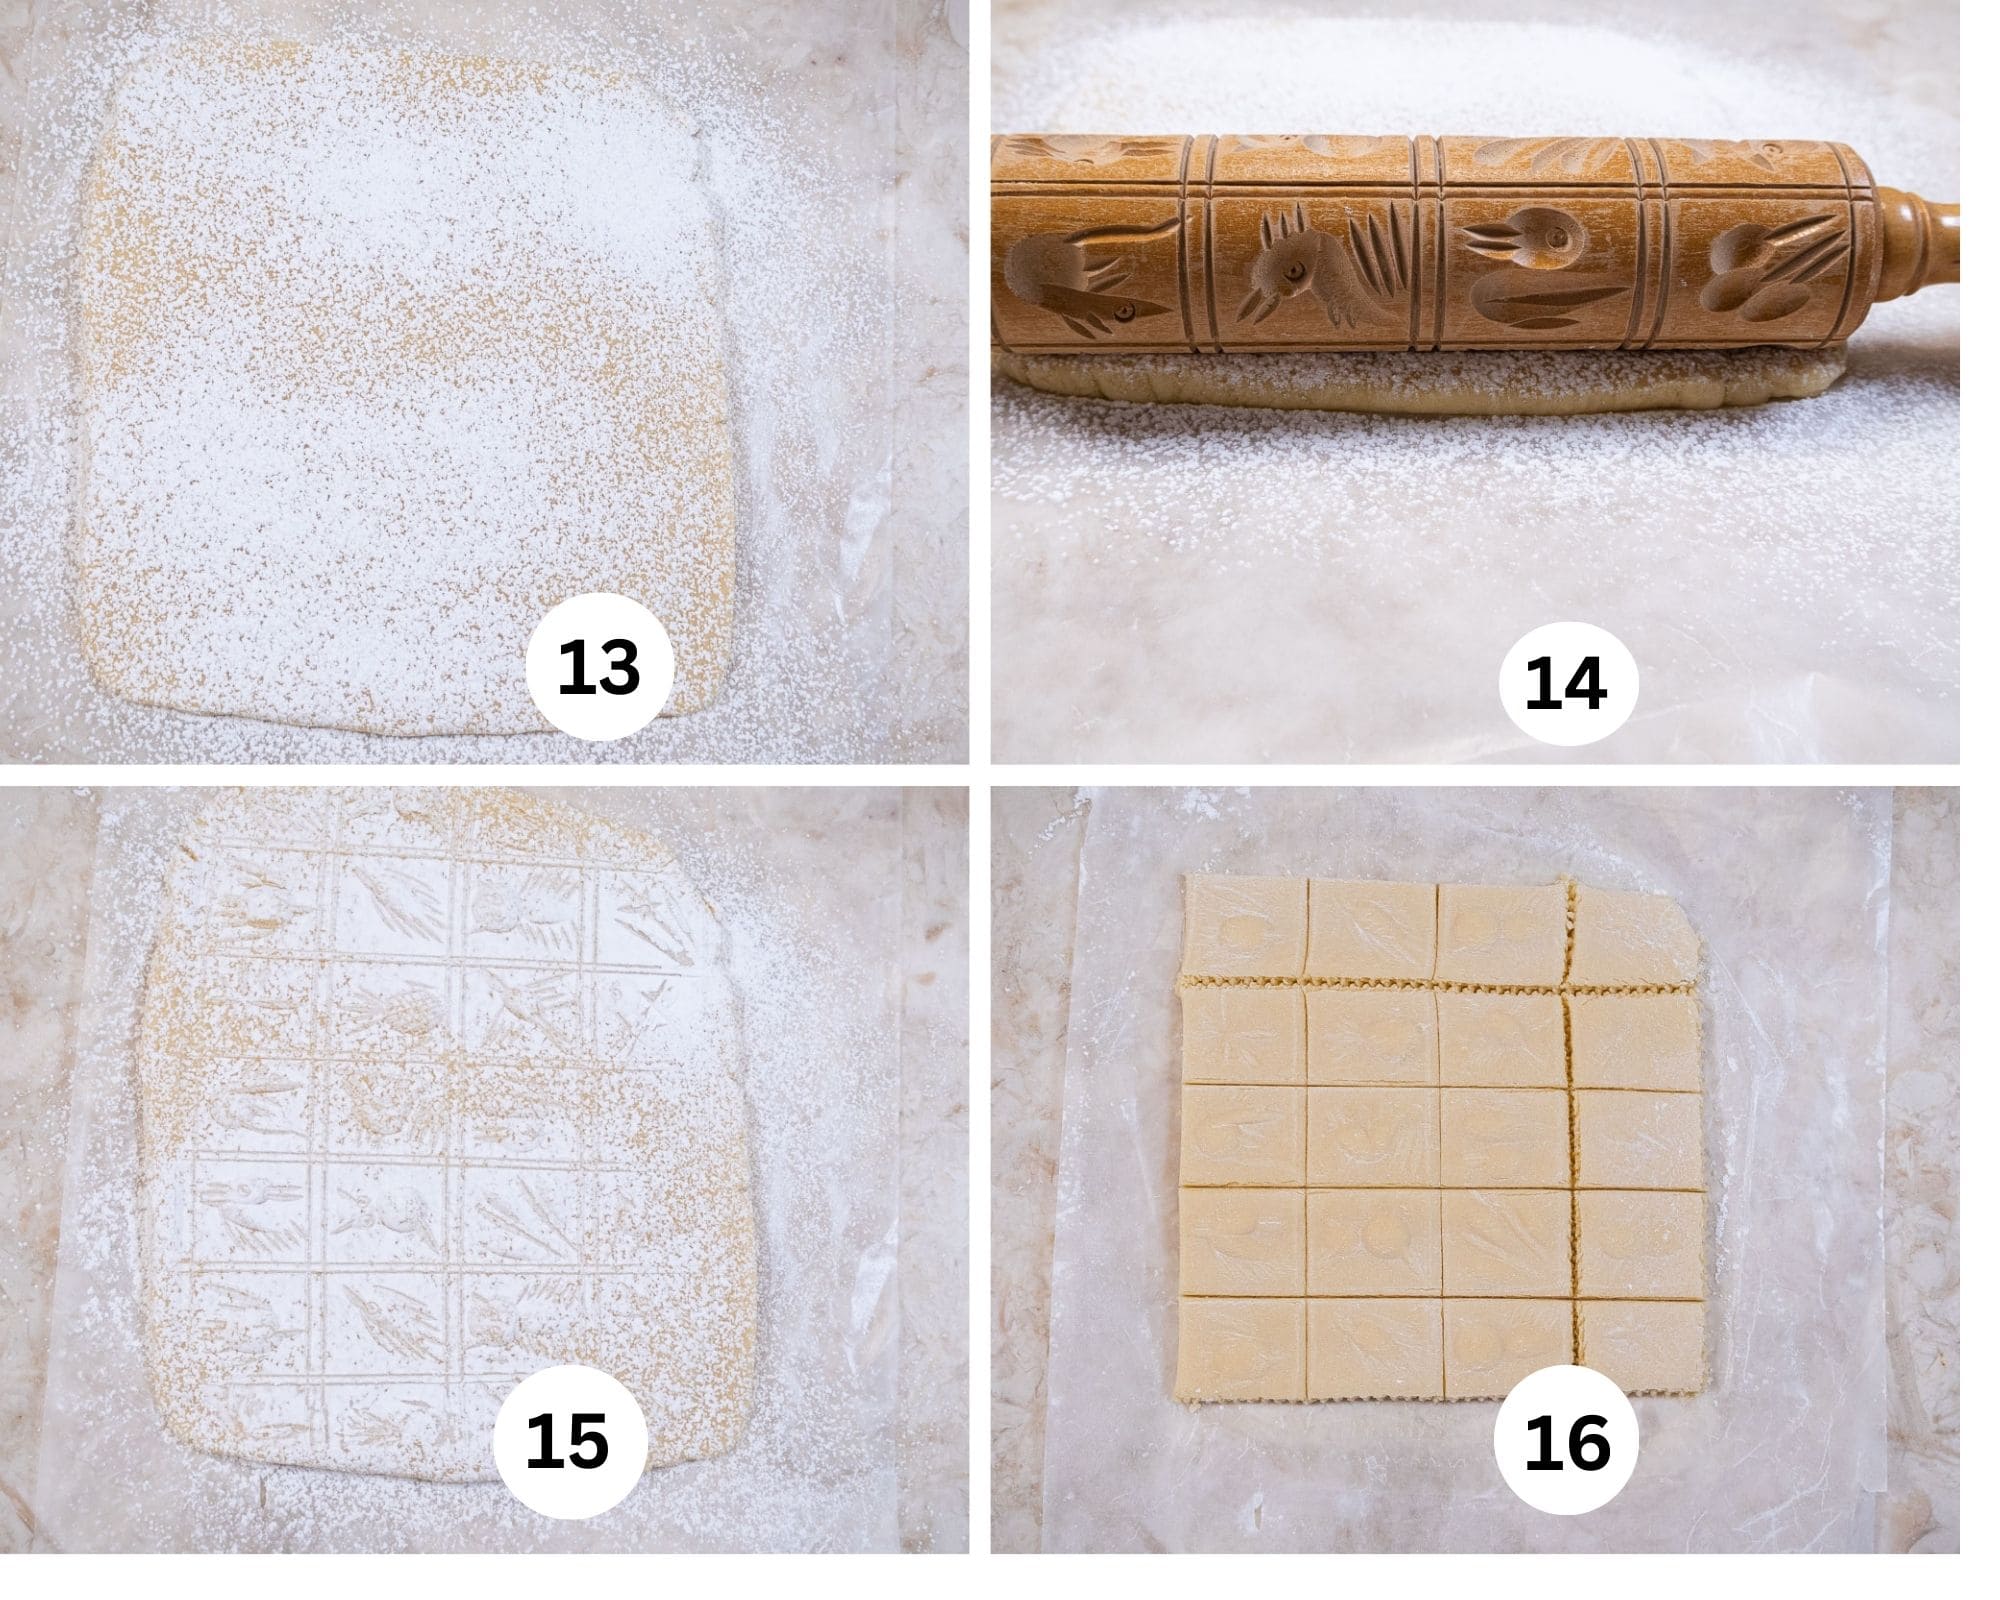
Step 13. After the dough is rolled out, dust lightly with powdered sugar. Step 14. Place the rolling pin with the dividing line between the cookies on the bottom of the dough. Step 15. Roll upward apply enough pressure to make sure the carvings are marking the dough. Step 16. Divide the cookies between the lines on the dough using a fluted pastry cutter or a knife. As you can see, I preferred the knife as I thought the cutter dragged the dough and didn't make a good cut. Freeze to firm up.
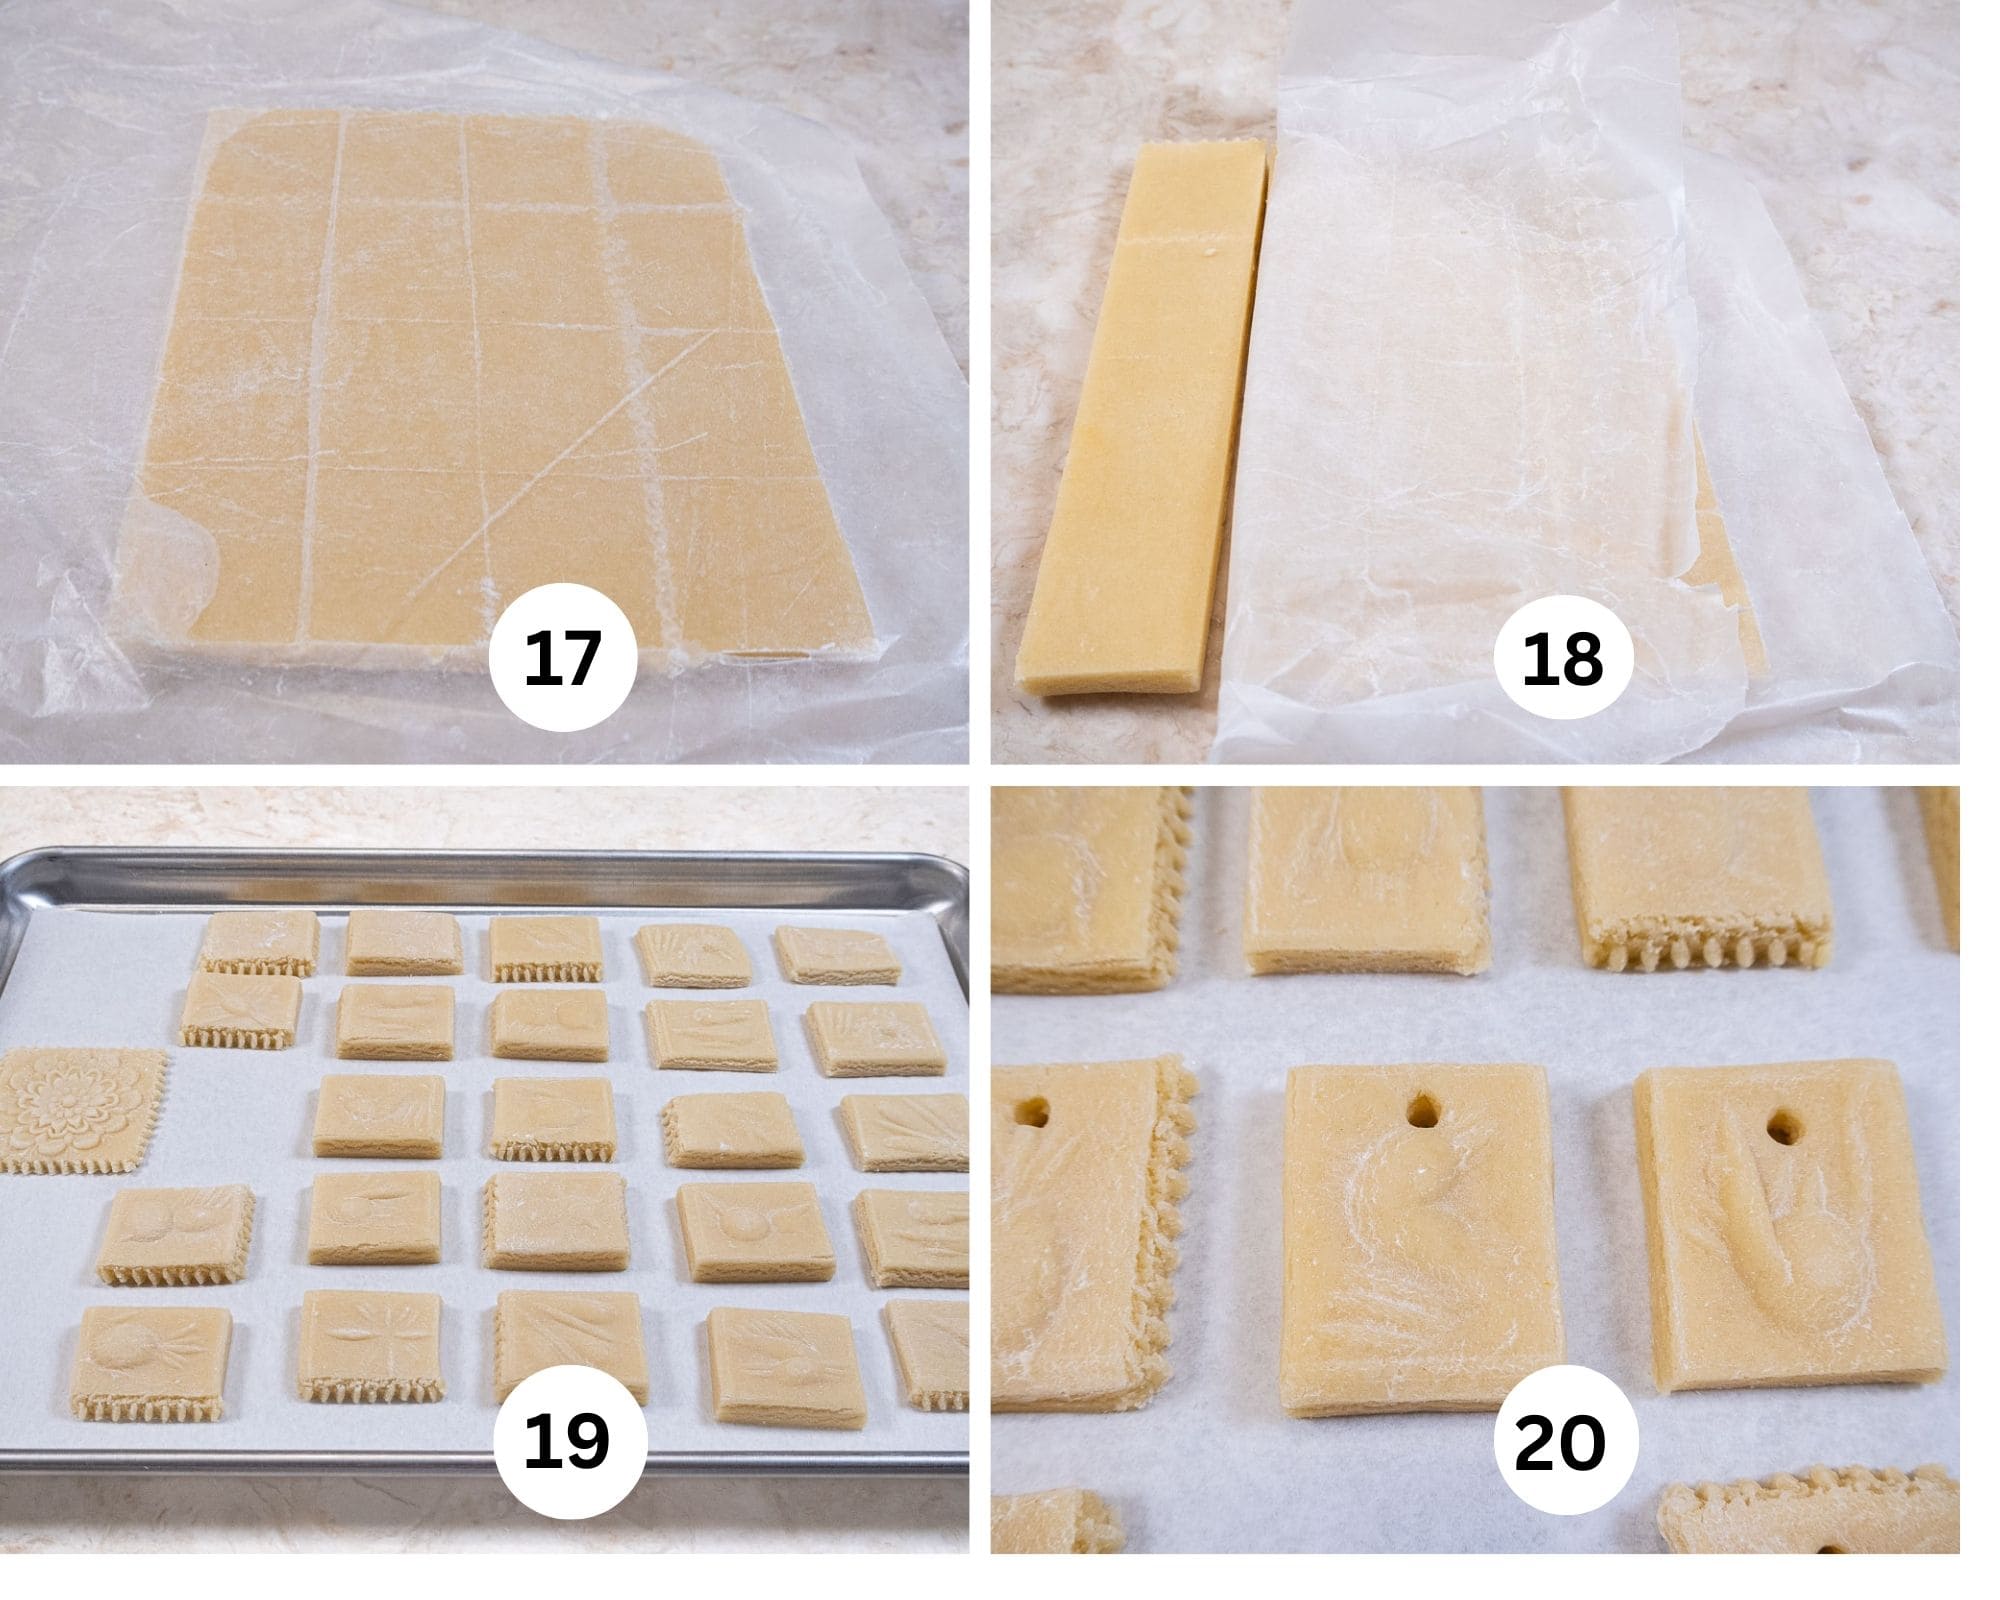
Step 17. When the cookies are firm, keeping them between the waxed paper, turn them upside down. Peel back the paper on one stripe and simply break them apart. Step 19. Place them about and inch apart on a baking sheet. Let dry for 48 hours at room temperature. Bake as directed. Step 20. If using them for ornaments, make a hole in the top of each cookie before baking. Make sure the dough is cleaned off the hole on the backside. I used the tip of an instant read thermometer to make these holes. Reroll the scraps to make more cookies.
Springerle Molds
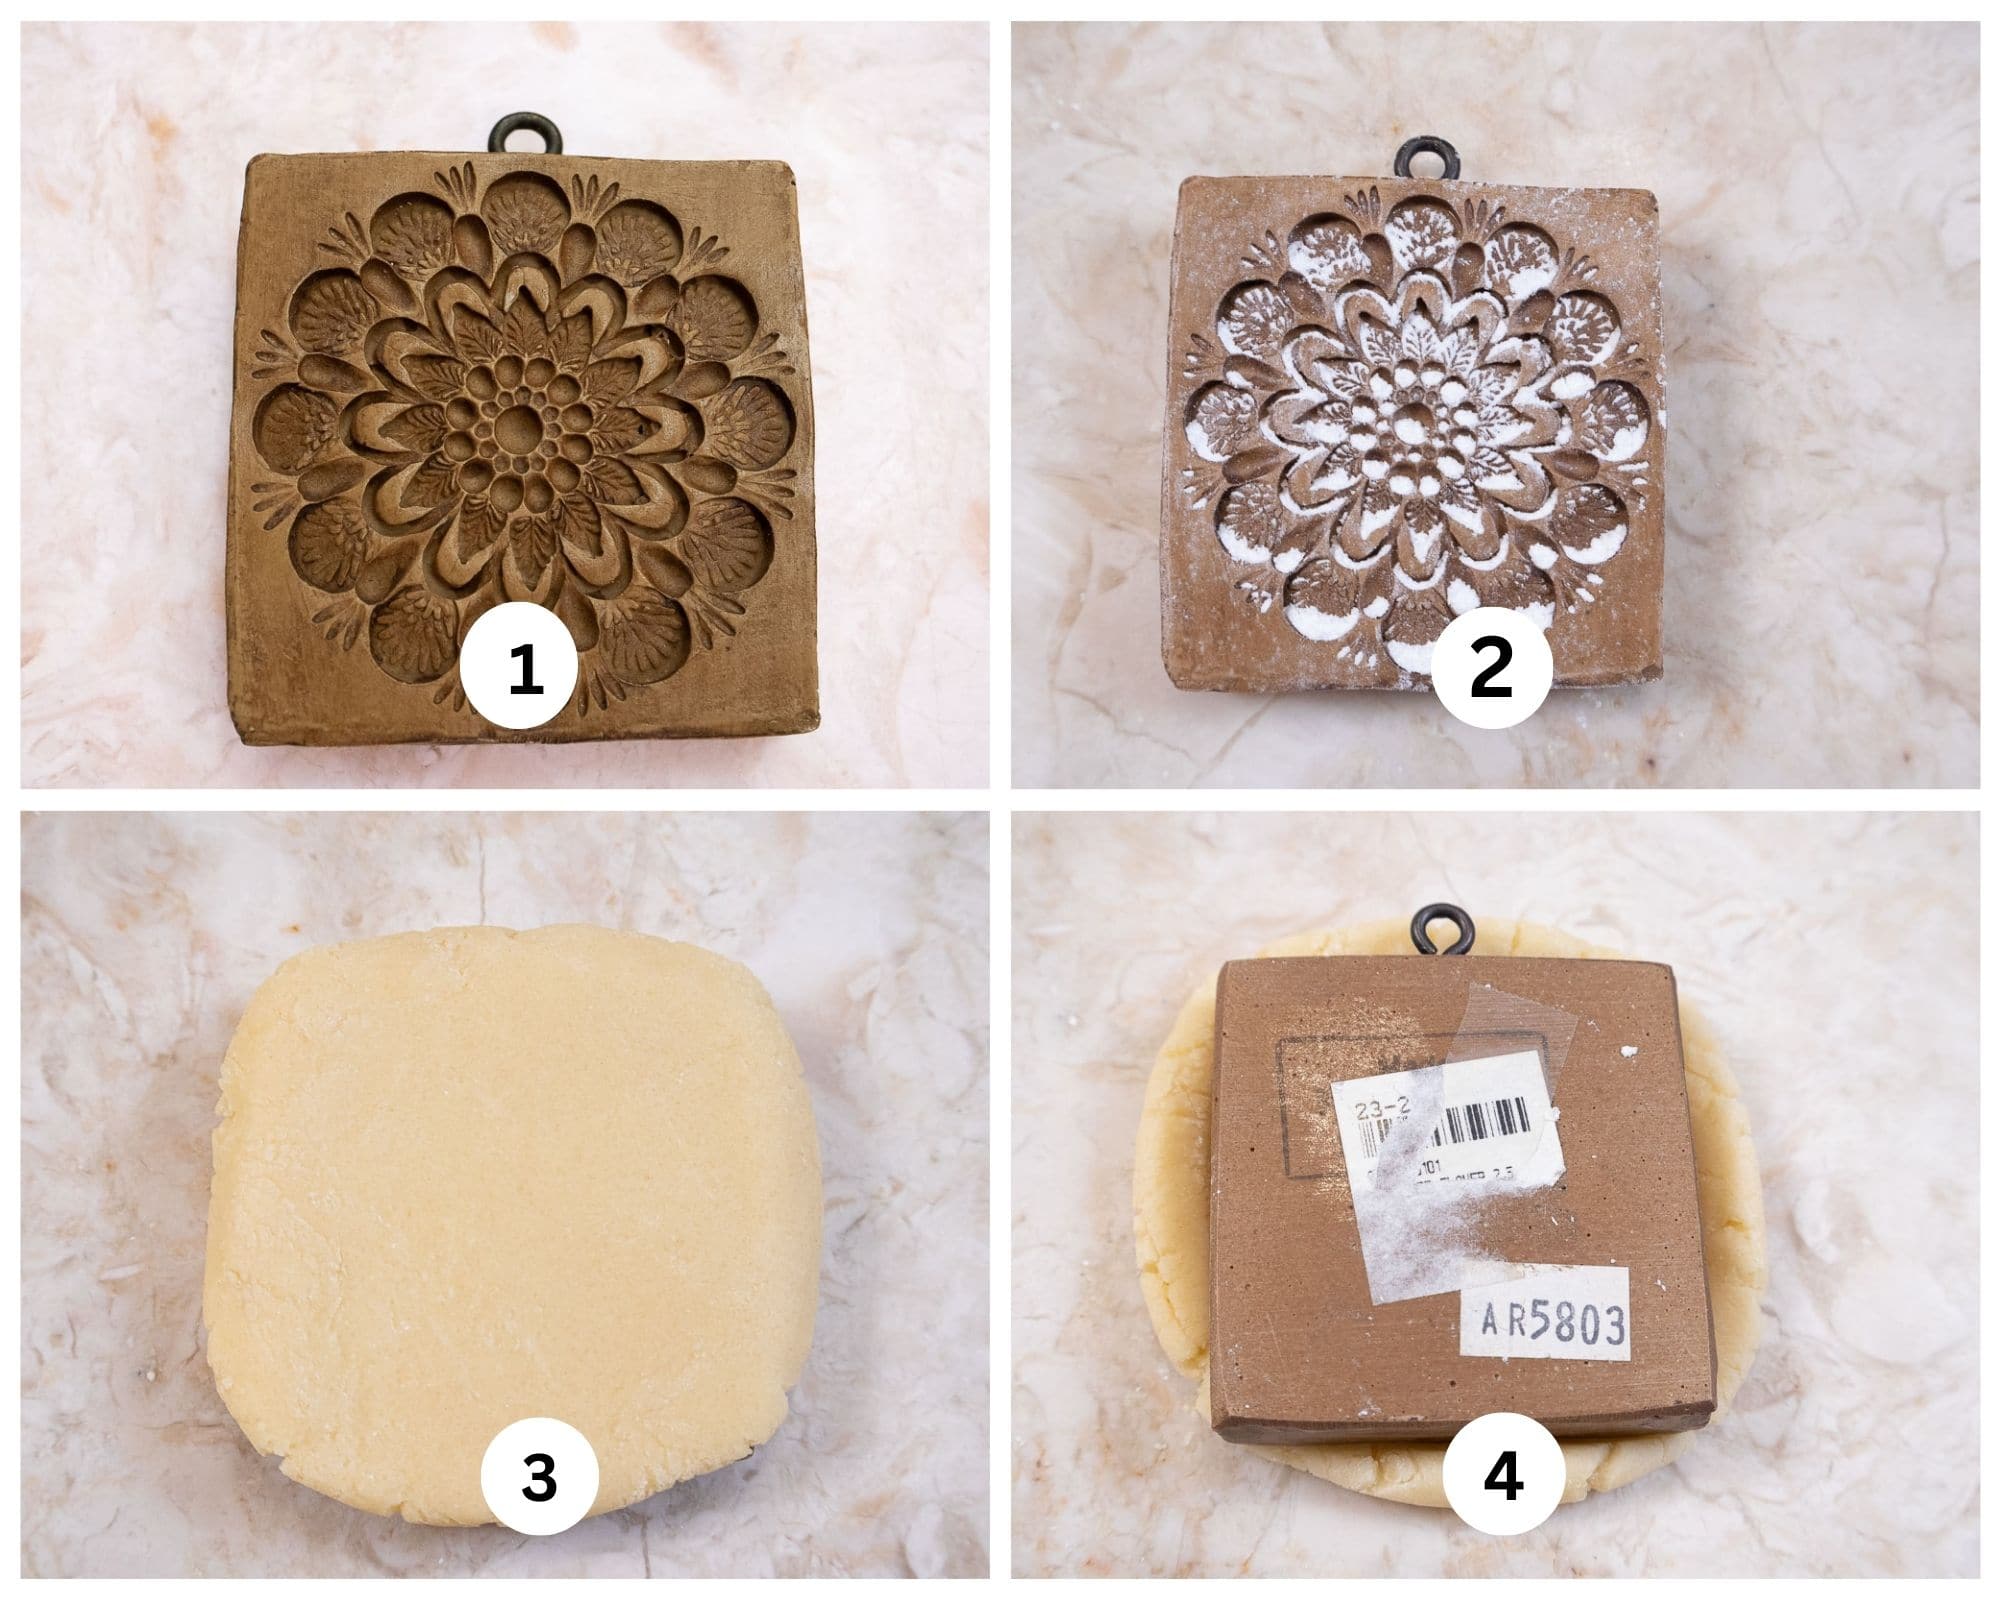
Step 1. This is my wooden mold. Step 2. Dust it with powdered sugar. I don't like to use flour because I feel it can clog up the fine details since it is heavier. Step 3. Make sure the dough is cold and firm. Roll the dough out and make sure it covers the entire mold, including the edges. Press it firmly into the mold. I run my rolling pin lightly over it. Step 4. Turn the mold upside down and press lightly on it to make sure it is getting into the crevices.
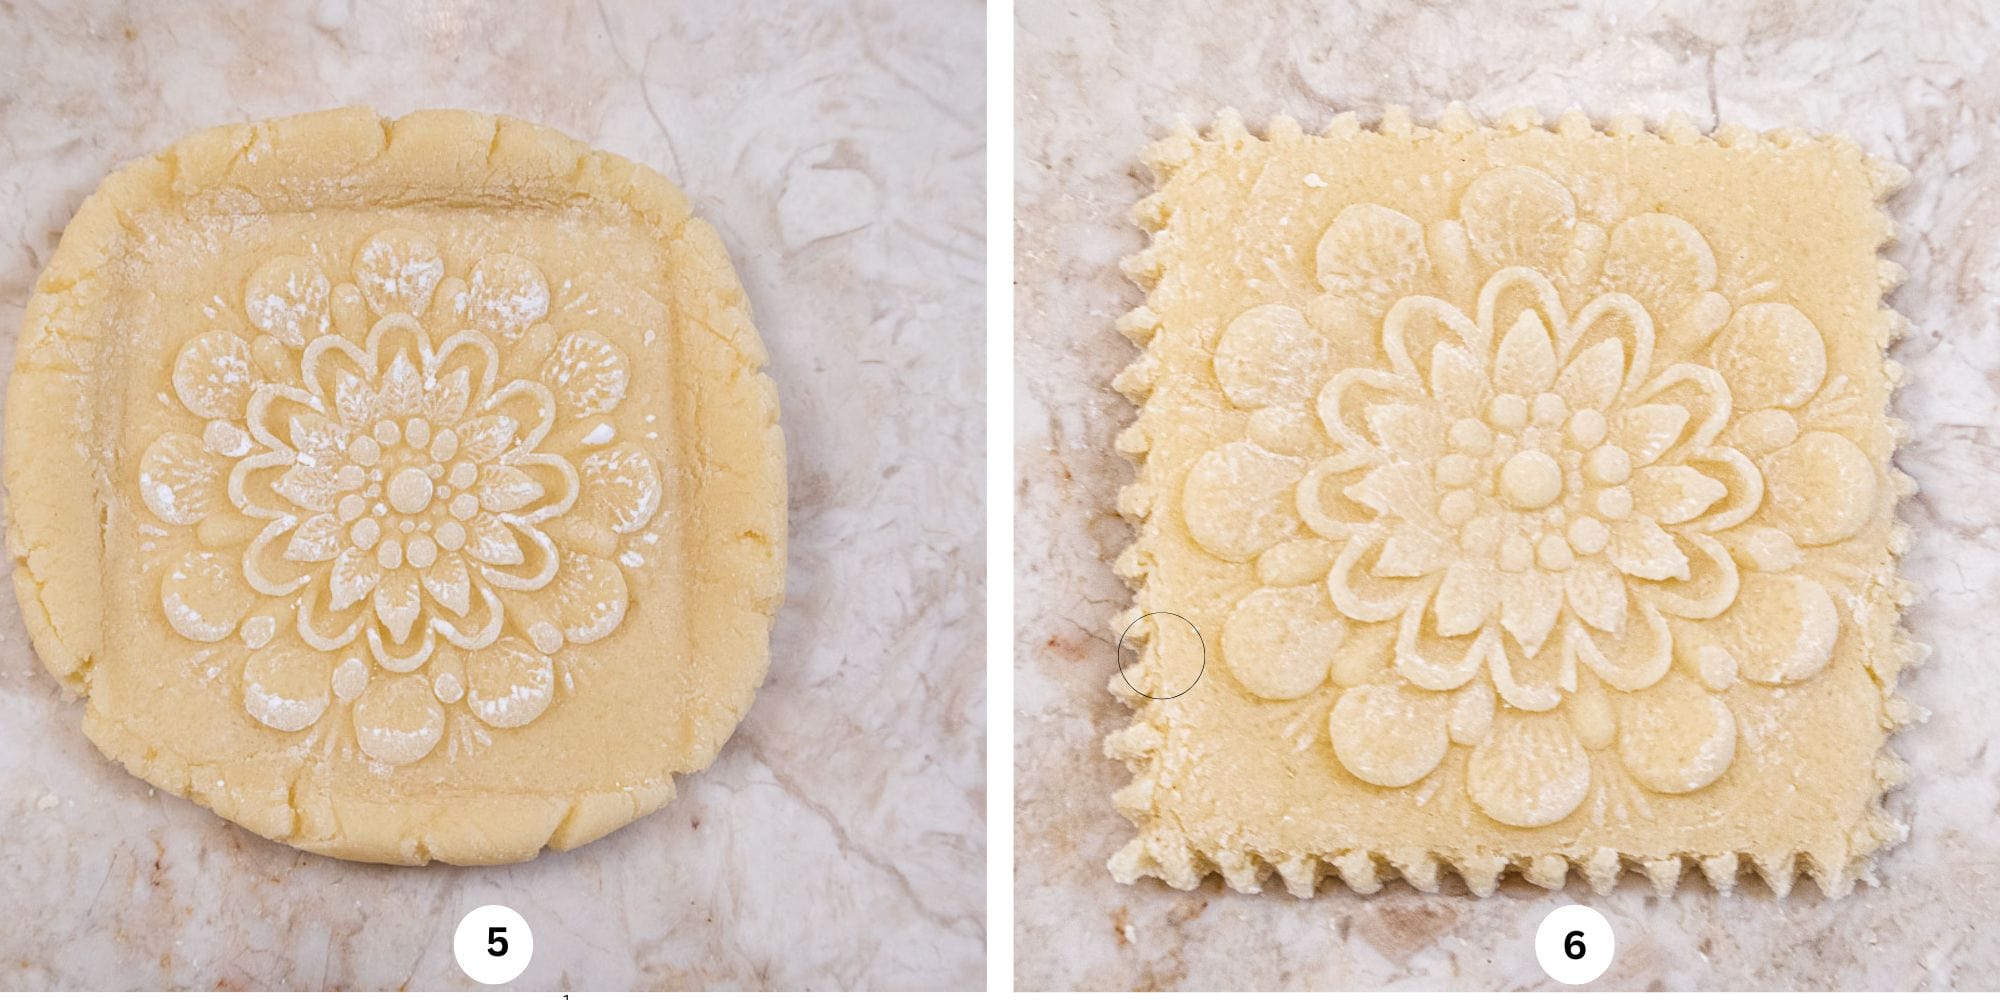
Step 5. Turn the mold over and carefully remove the cookie. Step 6. Trim the cookie and brush off the powdered sugar. Dry and bake as directed.
Recipe FAQs
Springerle means "little knight" or "little jumper" which some people think refers to jumping horses on the molds or rolling pins.
Use a stiff brush such as a toothbrush to scrub as much as you can from the carving. Then rinse it under water, scrubbing to remove any stubborn dough. Pat dry and then allow to dry completely at room temperature. This is easily done by standing it up in a sturdy container. Store it in a cool, dry place.
Yes. Some recipes dust the work surface with anise seeds and place the rolled out dough on top. When the springerle rolling pin is pressed into the dough and rolled the cookies pick up the seeds on the bottom.
Drying allows the surface of the cookie to form a “crust” which helps set the desired impression during the baking process.
Expert Tips
- The cookies should bake so the top remains white or almost white while the bottom is a golden brown.
- To test to see if they are done, break a baked one open to make sure there is no doughy center.
- It is important to dry the cookies so the designs will be set when they are baked. In fact, the designs can be seen more clearly even before going into the oven.
- The cookies will rise from the bottom. Mine are never evenly risen.
- These are not a soft cookie. They are firm the first few days and get harder as they are stored. They are perfect with a cup of coffee or tea.
- To soften them a bit, store them with a piece of bread, changing it as need to keep it fresh. They'll last a long time in an airtight tin.
- I prefer powdered sugar instead of flour for dusting the molds are sprinkling over the dough before rolling the designs on. It is easier to brush off and even if all of it isn't removed it tastes better than baked flour.
- Freezing the dough after impressing and cutting it makes it easier to keep the shape without stretching it.
- Cake flour is preferred for a cookie that stays a bit softer longer. 2 ¼ cups all-purpose flour can be substituted if need be. The weight remains the same.
More Cookies to Enjoy
If you love this Springerle or any other recipe on my website, please leave a 🌟 star rating in the recipe card and let me know how it went the in the comments below. Thank you and I appreciate each of you being here!
Traditional Springerle Cookies
Equipment
- Springerle rolling pin or molds optional
Ingredients
- 2 large eggs
- 1 cup granulated sugar (200 grams)
- ¼ teaspoon ammonium carbonate or baker's ammonia
- 2 teaspoons anise extract
- 2 ½ cups cake flour (315 grams)* see substitution below
- Powdered sugar, as needed
- *2 ¼ cups all-purpose flour can be substituted. The weight remains the same.
Instructions
- Line a baking sheet or two with parchment paper. Set aside
- Fit the mixer with the whisk attchment.
- Add the eggs to the bowl.
- Beat until pale yellow.
- Stir the ammonium carbonate (baker's ammonia) into the anise extract. Mix it into the eggs completely.
- Add the sugar gradually and beat on high for abut 5 to 8 minutes until very thick, light in color.
- Switch to the paddle attachment and incorporate half the flour. Add the remaining flour and mix well. The dough will be somewhat sticky at this point and will not completely come together.
- Remove the dough to a work surface and knead together briefly to make a cohesive rectangle. Wrap it in plastic wrap and refrigerate for an hour or to which will make it easier to roll out.
Using a Springerle Rolling Pin
- Roll between waxed paper into a rectangle about ⅜" thick. If your roll out looks less than a rectangle, see the photos on how to fix it. If the dough is warm at this point, refrigerate or freeze still between waxed paper just to firm up a bit.
- When ready, remove the top piece of waxed paper only and sprinkle lightly with powdered sugar. Place the rolling pin with the dividing line between the cookies on the bottom of the dough. Roll upward applying enough pressure to make sure the carvings are marking the dough. Divide the cookies between the lines on the dough using a fluted pastry cutter or a knife. As you can see, I preferred the knife as I thought the cutter dragged the dough and didn't make a good cut. Freeze to firm up.
- For the final step, turn the cookies over and pull back the waxed paper on one strip of cookies. Remove the cookies and break along the cut line to divide them. Place them on the parchment line sheets about 1" apart. Reroll any scraps and make more cookies.
- Let the cookies dry for 48 hours to allow the patterns on the cookies to set before baking.
- Preheat the oven to 325°F. Double Pan and bake for about 15 to 20 minutes depending upon the thickness. The cookies should stay as white as possible with the bottoms, which will have risen, a golden brown. Don't be concerned if they do not rise evenly. I don't think mine every have and it doesn't really show.
Using Springerle Molds
- For the molds, roll the pastry out as above. Cut pieces that will completely cover the mold. Sprinkle the mold with powdered sugar. Press the dough firmly into the mold.
- To insure a good relief on the cookie, turn them mold upside down and press it on the table.
- Turn it upright and very carefully remove the cookie from the mold. Trim the edges and place it on the parchment paper. Dry as above.
- If using the Springerle for ornaments, make a hole in the top of each one. I found the pointed tip of an instant thermometer was perfect for this. Remove any excess dough on the back of the hole.
- Let them dry at room temperature for 48 hours.
- Preheat the oven to 325°F. Double Pan and bake for abut 15 to 20 minutes depending upon the thickness. The cookies should stay as white as possible with the bottoms, which will have risen, a golden brown. Don't be concerned if they do not rise evenly. I don't think mine every have and it doesn't really show.
- To check to see if they are baked through, remove one cookie and break it open to make sure there is no unbaked dough.
- Yield: 24 to 28 cookies with rerolls.
- Store the cookies in an airtight container. These are not a soft cookie. They are firm the first few days and get harder as they are stored. They are perfect with a cup of coffee or tea. To soften them a bit, store them with a piece of bread, changing it as need to keep it fresh. They'll last a long time in an airtight tin.



Katja Walker says
I use the German recipe - but will try cake flour and maybe take the granulated sugar and put it in the food processor to make it finer.
To make the coolies rise evenly - take a dishtowel and wet it. Wring it out and then lay it out. After drying overnight, take each of the cookies and gently rest it on the towel and then put it back on the cookie sheet. Bake the cookies as usual. The reason the cookies do not rise evenly is that the moisture content of the dough on the bottom of the cookie is not even.
Helen S Fletcher says
Hi Katja - I tried this and it didn't work for me. If I make them again, I'll give it another try. As I remember, the article I read wasn't clear as to when to put them on the wet towel. I may have done it incorrectly. Thanks for sharing.
SallyBR says
Hi, Helen! I just made the dough - will continue later, but I wanted to ask you - when you use the rolling pin you omit the drying? I have never used a rolling pin, but for the molded cookies I do as you, dry them for 48 hours, sometimes a little less if I see the bottoms with a nice ring of dry area on the edges.
Helen S Fletcher says
Hi Sally - All the cookies, no matter how they are made dry for 48 hours. I mentioned it in the how to sequence but just added it to the recipe also. Thanks for the question so I could clarify. Hope your holidays are great!
SallyBR says
my babies are drying - I might be able to bake them Monday morning, if all goes well
SallyBR says
One of my favorite cookies to bake in this time of the year! I have never used granulated sugar but now I am intrigued. My recipe calls for confectioner's and now I really want to try your version. Too bad that I just made a huge batch and in fact donated them all already.... I might have to squeeze another one in!
Helen S Fletcher says
If you make mine, let me know what you think. Most of the recipes do call for confectioner's sugar - you are correct.
Ronnie Moorr says
Regarding confection sugar versus very fine granulated sugar.
My grandfather was a German baker from Germany and used the fine granulated sugar. Once he added the sugar to the very well beaten eggs He then beat the eggs and sugar for at least another 15 minutes. That is what I do also.
But now I’m going to try using the powdered sugar for dusting my special German rolling pin for imprinting instead of the flour.
Thanks for the tips!
Helen S Fletcher says
Hi Ronnie - I'm so happy to be included in such a wonderful tradition. You were lucky to have such a grandfather!
Sally Kolilis says
This question is not specific to this recipe but about dehydrated strawberries in a previous recipe. What is the best way to pulverize dehydrated strawberries. They turn into an uncontrollable dust when trying to pulverize.
I want to thank you for sharing your expertise that you have after years of experience. I look forward to getting your recipes.
Helen S Fletcher says
Hi Sally, I don't know of another way to pulverize them except to put them through the processor. Make sure the feed tube of the processor is covered. I put the plunger in and hold my hand over it. That seems to take care of the problem. Let the "strawberry dust" settle in the processor before opening it up. Thank you for your kind words, I do appreciate them.
Sally Kolilis says
Helen thank you for your reply to my question. You may find this question humorous only because it was the topic of conversation at Sunday dinner.
Helen S Fletcher says
Love that it was the topic at your dinner.