
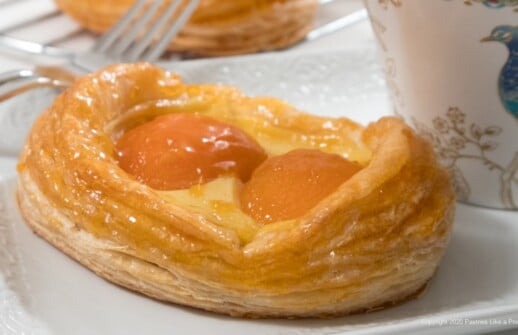
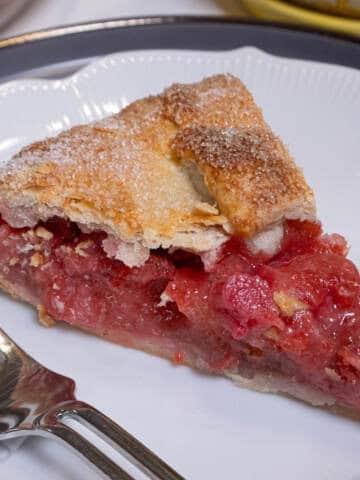
 You might recognize Sunny Side Up Apricot Pastries if you own “Baking with Julia” by Julia Child. Michel Richard, the consummate baker contributed the recipe. These are a playfull French pastry featuring puff pastry, pastry cream and apricots. The finished pastries look just like sunny side up eggs. I told you he is the consummate baker!
I made a few changes by using my puff pastry which doesn’t require butter blocks or days to make as well as my pastry cream. Canned apricot halves in light syrup are used since they are unavailable fresh this time of year.
A Few Changes
It’s interesting how recipes change over the years. In my original book, The New Pastry Cook I used a combination of all purpose and cake flour which is more like pastry flour for the puff pastry. Then, at some later date, I changed it to bread flour which is a much stronger flour. While both rose nicely, I decided that the bread flour was rather a sturdy dough when baked. So I am back to the original flours. They bake up crisp but more tender.
While many recipes for pastry cream have the finished product being pushed through a sieve or strainer after it is cooked, I find this to be a cumbersome. The only reason I can see for straining it is to remove the possibility of lumps caused by the cooked chaleze which is the white cord that attaches the yolk to the white in the egg.
So, I strain my mixture before it is cooked when it liquid and easily goes through the strainer without pushing it through after it is cooked. If there are lumps after cooking, it wasn’t stirred the whole time and the starch coagulated in lumps. So just stir the whole time.
Making the Sunny Side Up Apricot Pastries Ahead
Although this recipe may seem daunting when first looked at, it can be broken into parts making it very easy to make. The puff pastry can be made a month ahead, frozen and thawed. Likewise, the pastry cream can also be made and, because it uses flour as a thickener instead of cornstarch, it can also be frozen.
The entire Sunny Side Up Apricot Pastries can be assembled, frozen for several weeks and then baked off from the freezer. Since they should be eaten warm, this is the ideal solution to warm French pastries for breakfast or brunch.
A Tip for Success
It would be helpful to read the posts on puff pastry and pastry cream before starting.
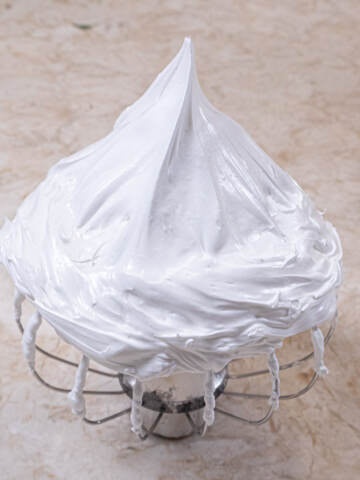
Puff Pastry
For how to pictures go here but use the ingredients listed below. I strongly suggest using a scale for the measurements.
1 cup unsalted butter (225 grams, 8 ounces or 2 sticks)
1 ¼ cups all purpose flour (170 grams or 6 ounces)
¾ cup cake flour (85 grams or 3 ounces)
1 teaspoon salt
⅔ cup + 1 tablespoon cold water
Cut each stick of butter into small pieces and freeze until hard.
Combine the all purpose, cake flour, and salt in the bowl of a food processor. Pulse several times to mix.
With the processor running pour the water down the feed tube. Process until a ball forms. The dough will be soft. If it isn’t, add additional water a teaspoon at a time.
Remove the dough and knead it a few time to make a smooth ball. Flatten to about 1”. Wrap in plastic wrap and freeze until the edges of the dough are hard about 1 ½” in toward the center.
Do not freeze the entire dough.
Divide the dough into 4 pieces and divide each of those piece into 3 more pieces. Place 3 piece of dough in the processor with ¼ of the frozen butter. Pulse to cut the dough and the butter into pieces. I pulse very quickly about 20 to 25 times. The dough and butter will be cut into varying size pieces which as it should be. Empty the contents of the bowl onto your work surface and repeat 3 more times.
Push the dough together into a block about 8x6 inches. Lightly flour under and on top of the dough and roll out to 18x6 inches. Square the sides up by pushing them inward with a ruler or bench scraper. Lightly re-flour as necessary. Use a pastry scraper to scrape away the dough and flour from under the pastry from time to time. Be sure to wipe your rolling pin clean with paper towels to keep it from sticking.
Brush off any flour on the rolled out dough. Fold both ends to meet in the center. Brush off flour again and fold in half.
Roll and fold again in the same manner. Wrap in plastic wrap and chill for at least an hour or two. Repeat the rolling and folding twice again as above. After this, the puff pastry can be refrigerated for 3 days or frozen up to 6 months. Defrost in the refrigerator if frozen before using. Do not thaw at room temperature.
Use as directed.
Yield: About 625 grams or 1 ⅓ pounds
Pastry Cream for Sunny Side Up Apricot Pastries
While the ingredients remain the same for this version of my pastry cream, I made it slightly easier to make. Take note that my pastry cream, now as in the past, uses flour as the thickener so it can be frozen. Cornstarch breaks down when thawed after freezing, flour does not. So this can be made ahead and frozen.
This recipe makes about a cup of pastry cream. The recipe can be doubled or tripled if more is needed.
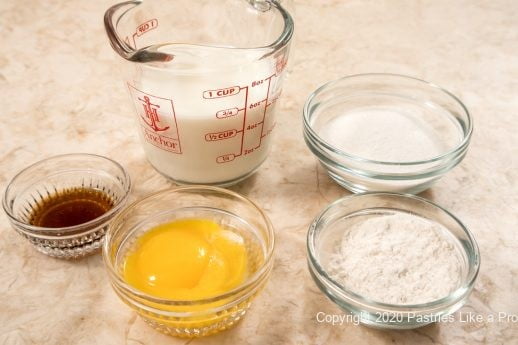
¾ cup milk
2 large egg yolks
¼ cup granulated sugar (50 grams or 1 ¾ ounces)
2 tablespoons all purpose flour (14 grams or ½ ounce)
1 teaspoon vanilla
Heat the milk until hot but not boiling. Set aside.
Whisk the egg yolks and sugar together in a small bowl.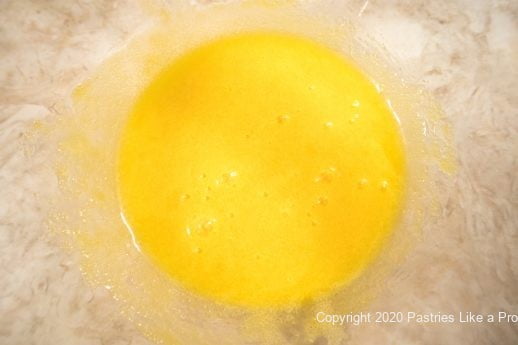
Add the flour and 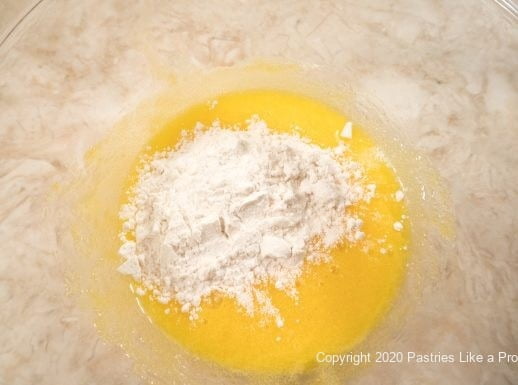 whisk until smooth.
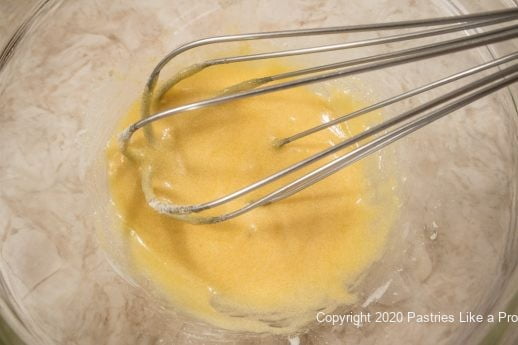
Pour the milk in, whisking together. Be sure to get into the edges of the bowl.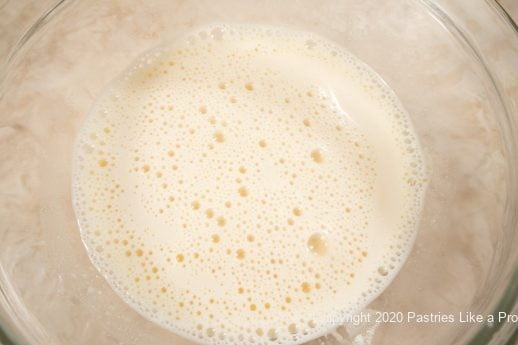
Pour through a strainer or sieve into a small pan to remove the chaleze. The chaleze is the hard white cord attaching the yolk to the white. When separating eggs it can stay attached to either the yolk or the white. It becomes hard when cooked.
Over medium heat whisking constantly, bring the mixture to a boil and cook for 1 minute.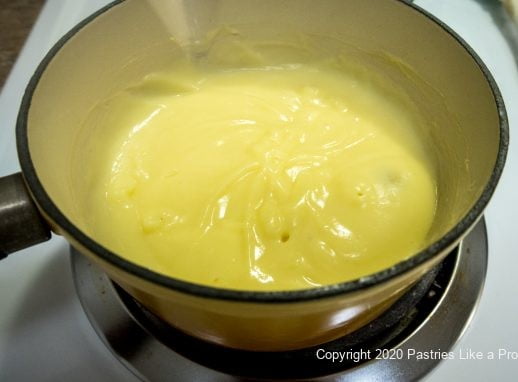 Remove from the heat and whisk in the vanilla.
Pour into a storage container, place plastic wrap directly on top of the pastry cream and cool to room temperature. Cover and refrigerate up to a week or freeze for several months. Thaw in the refrigerator if frozen.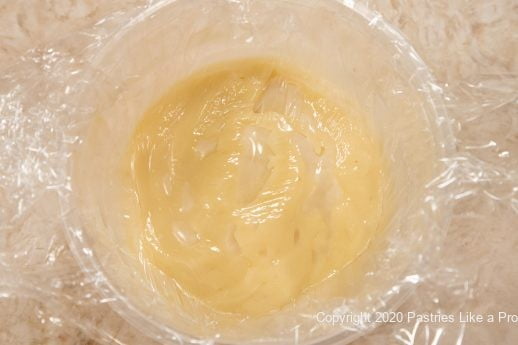
Yield: 225 grams, 8 ounces or about 1 cup
Assembly
Puff Pastry
Canned Apricot halves in Light Syrup, well drained
¾ cup apricot jam or preserves
1 teaspoon water
The puff pastry should be very cold and cut with a round cookie or pastry cutter. Do not use a glass or a bowl and cut around it. This would risk sealing the edges of the pastry and prevent them from expanding as they should.
When ready to use roll out to a 7 ½ x 11x½ inch rectangle. Chill or freeze to firm up before cutting. Using a 3 ½ round cutter, cut 6 rounds straight down (2 across – 3 up). Do not twist the cutter or the pastry can puff up lopsided. 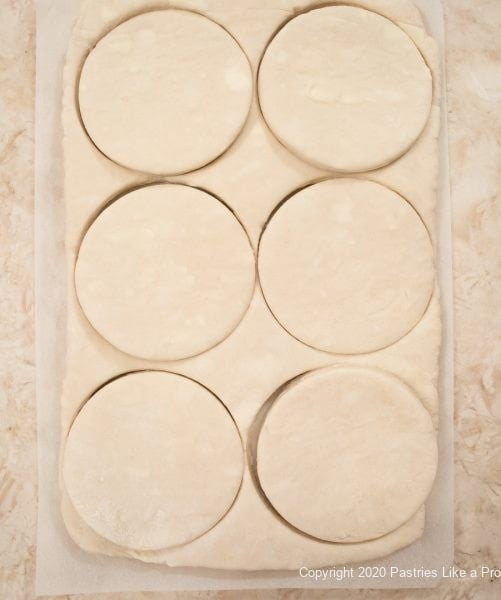 These should be firm enough to roll immediately. However, it is best to roll one piece at a time and keep the others refrigerated.
Place a round in front of you and 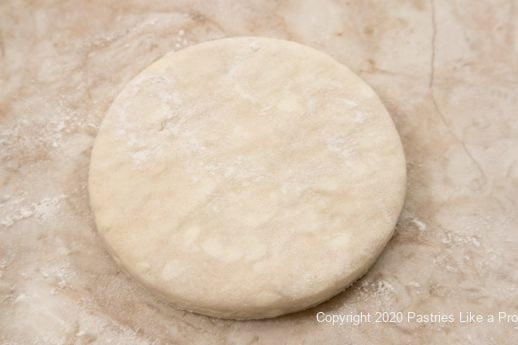 roll from the center to within about ½” from each side creating a 5 ½ inch oval. Do not roll over the ends. They have to be higher to puff up and enclose the apricots.
 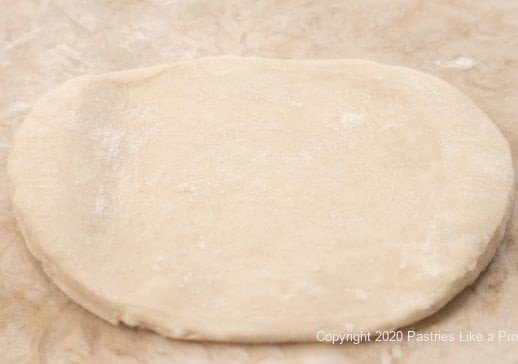 Place them on a baking sheet about an inch apart and refrigerate while rolling the remaining 5 rounds.
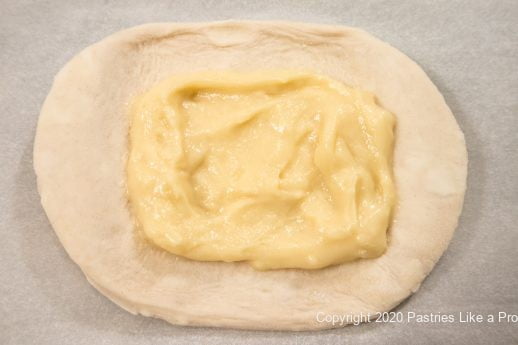
Whisk the pastry cream to smooth it out. 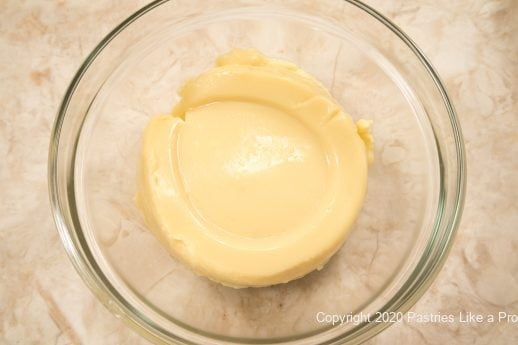
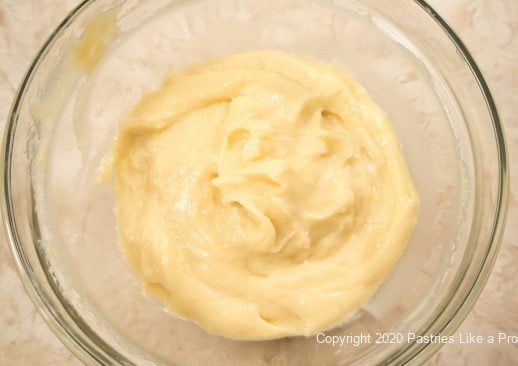 Spread 2 tablespoons over the flat part of the puff pastry.
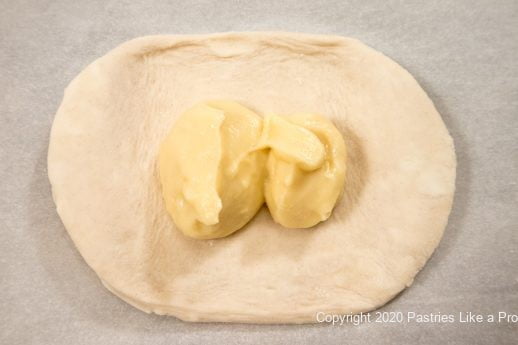
 Place 2 apricot halves side by side on top of the pastry cream.
 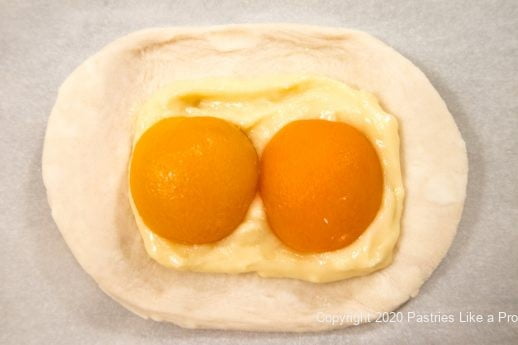 Place in the freezer until completely frozen through. At this point they can be wrapped well and kept frozen for at least a month.
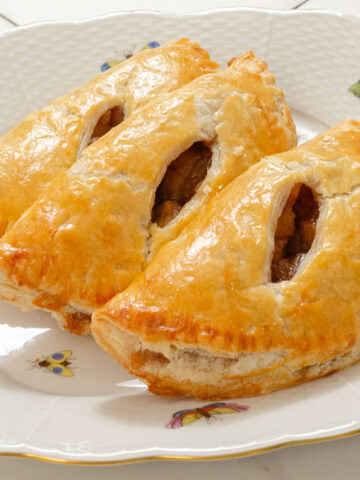
Baking and Finishing the Sunny Side Up Apricot Pastries
When ready to bake, preheat the oven to 350°F. Double pan the pastries and bake for 35 to 40 minutes until golden brown.
In the meantime, heat the jam until hot. Strain it to remove any solids. Stir in 1 teaspoon of water.
Remove the pastries to a parchment covered cooling rack. Cool for 5 to 10 minutes.
Brush the pastries with warm apricot jam all over.
These are best eaten warm the day they are made.
Yield: 6 Sunny Side Up Apricot Pastries
If you enjoyed this post, here are several ohers:
60 Second Brioche
Cuccidati Coffeecake
A Better Kouign Amann


Jen says
Helen, these are one of my favorite pastries and I was excited to try your version. This was a new way for me to make blitz puff pastry, and the dough was such a dream to work with! I poached fresh apricots for the topping, and the finished pastries were absolutely delicious! However, after baking at 350, double-panned, for the allotted time, they were not as bronze as I'd hope and not quite as well-cooked under the pastry cream as I would like. I am inclined to bump up the heat (maybe to 375) when I bake off the remaining 3, but would welcome your advice. In any event, many thanks for this lovely, easy-to-follow recipe!
Helen S Fletcher says
Hi Jen, yes you can do that or just bake the longer. Either will work. Glad you like them as much as I do and you found the puff easier.
Lynette Pruett says
These pastries look amazing, Helen, and are definitely going on my "bake it soon" list, hopefully in December. Your observation that fresh apricots are not available during this season is of course correct, but I’ve found that canned, well drained, apricots in pastries are actually more flavorful than fresh, so canned are what I prefer.
Thank you for the instructions to make ahead and freeze before the final bake. The convenience of having them prepared in the freezer before baking and serving will surely make this a recipe I will use often.
Thanks for the recipe and a very Happy Thanksgiving to you and yours, whatever form it takes this year.
Michelle says
Hello from the United Kingdom!
I came across your fantastic site a little while back and I’ve thoroughly enjoyed looking over the variety of posts, but I’m sorry to say I find your actual recipes themselves frustrating. I’m in England where in baking, we always, without fail, measure all of our ingredients accurately. You have our french neighbours to thank for the origins of all things patisserie, and no self-respecting pastry school teaches their students to do anything but measure measure measure! Such an arbitrary unit as a “cup” has no place in modern baking. Cooking yes, I suppose. But not baking. Its use doesn’t exist outside the US...and there’s a reason for that. As any chef, professional or hobby knows, consistent success starts with accuracy before all else. It doesn’t matter how excellent your skill is if your proportions aren’t in check...
And yet your recipe above includes weights for all other ingredients, but still gives the liquid element in “cups” and tablespoons. Do you know that if one googles conversions from American cup measurements to metric, all manner of options are apparent? So it’s not even as if the conversion is absolute. Surely if you’re going to go to the trouble of giving a metric option for some ingredients, then the liquid elements should be too? Readers aren’t psychic, I don’t know what “cup” size you’re using to be able to convert myself...
My clientele is wide and varied as I’m based in Oxford which attracts a huge number of tourists all year round, many of which are American. So I’m always browsing for inspiration for menu options from overseas. Hence having come across your site, which really is quite wonderful, and your clear, step by step instructions are great and have clearly inspired a lot of people to create things they might never have dreamed of baking. I spent literally hours reading through your past posts yesterday, and my mouth was watering! But as you can imagine, I can’t embark on making something unless I’m guaranteed it’s going to be a success, and sadly as the majority of the recipes are only given in volumes, all I can do is read and drool :(
hfletcher says
Hello Michelle, I do understand your frustration with the measurements but I am in America and it has taken many, many years just to get people to use a scale to weigh dry ingredients. And hopefully, I have gotten them to think in grams because they are so much easier to use than ounces which is the decimel system. So while I do understand, it is not reasonable for me to measure for my largest audience in other than cups, teaspoons and tablespoons because that is what they use. And to be perfectly honest, I am great with weights butliters and milileters do not come naturally to me or my audience. I write for the people who love to bake and not necessarily for professionals, although I am one myself. If it helps, the standard measurement for 1 liquid cup in America is 8 fluid ounces. I will say I have quite a few followers in all parts of the world but rarely get comments about how the recipes are written.
I noticed the Great British Bake Off Book mixes teaspoons with ml. Paul Hollywood uses tablespoons in some of his recipes. American cookabooks and blogs still mainly use volume measurements for everything. Under the tab
Baking Information, there is a great deal of information that would be helpful to you such as Fluid Ounce Conversion
Chart that explains measurements in cups, ounces and ml. There is an ingredient conversion chart and in depth discussions of many techniques,measurements, etc. I think if you look there you wil be able to make the translations you need.
As a professional, I test and test to make sure everything works the way I say it will or the pictures indicate. However, even with all that work, if I give the recipes to 10 people, laymen as well as professionals, it may come out differently depending where they live, the ingredients available, tempertures, altitude etc. Either in my bakery or in the restaurant, I would never put in item that I didn't test to make sure it worked consistently.
I would encourage you to go to the Baking Information section where I think you will find information that will help you convert any of the measurements you don't understand.
Eileen says
Hi Helen! Wow, I do have Julia Child's book and have forgotten this one. I made it once for my office and no one could believe I had not gotten them from a bakery. You are right, broken down in steps it is not difficult. I am going to add this to my list of baking to do!
hfletcher says
Hi Eileen - These truly are beauties. Better yet, they are one of the best tasting pastries I've eaten. I think a lot of people are intimidated by baking and pastry because it's viewed as hard or difficult. Broken into steps, it becomes very easy to manage. Happy I was able to remind you about these.