
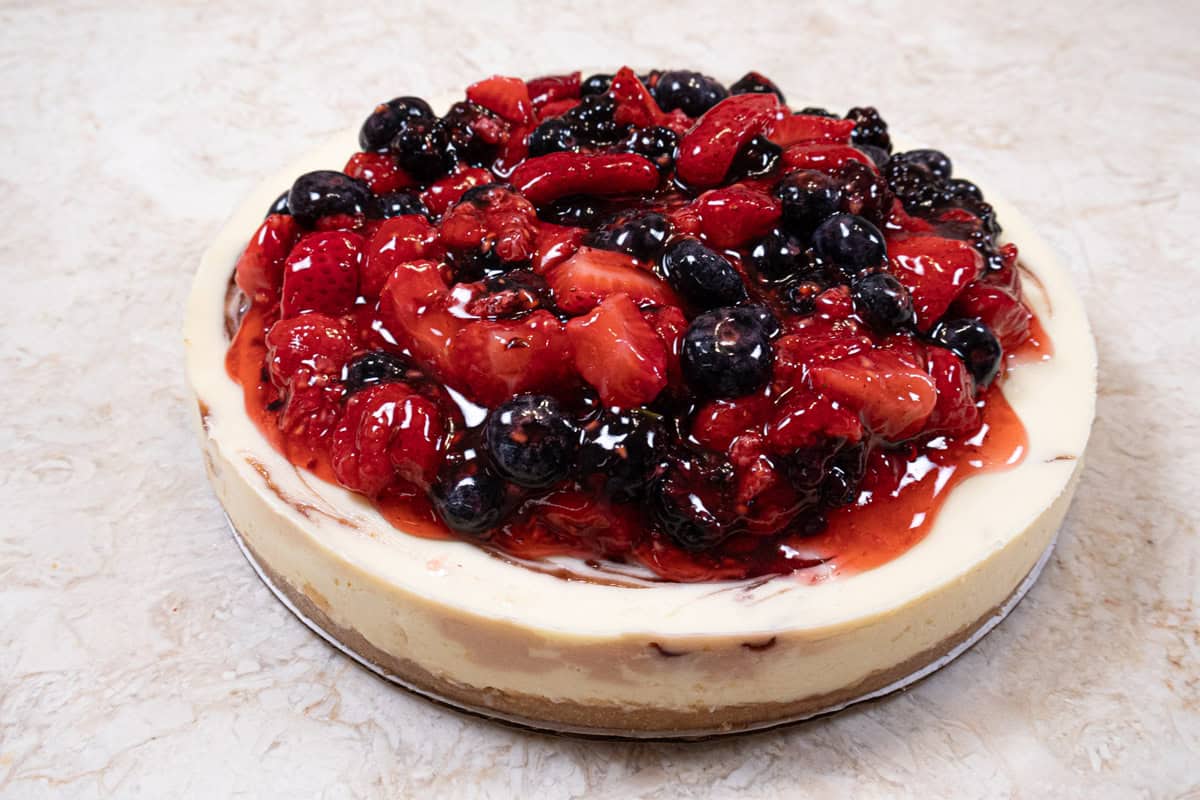
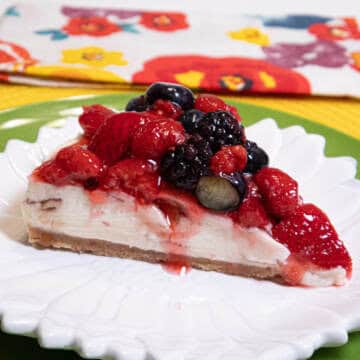
This No Bake White Chocolate Cheesecake with its mixed berry topping is not only easy to make, there's absolutely no baking involved. You don't have to tell anyone how easy it is. Let them think you worked all day in the kitchen just for them.
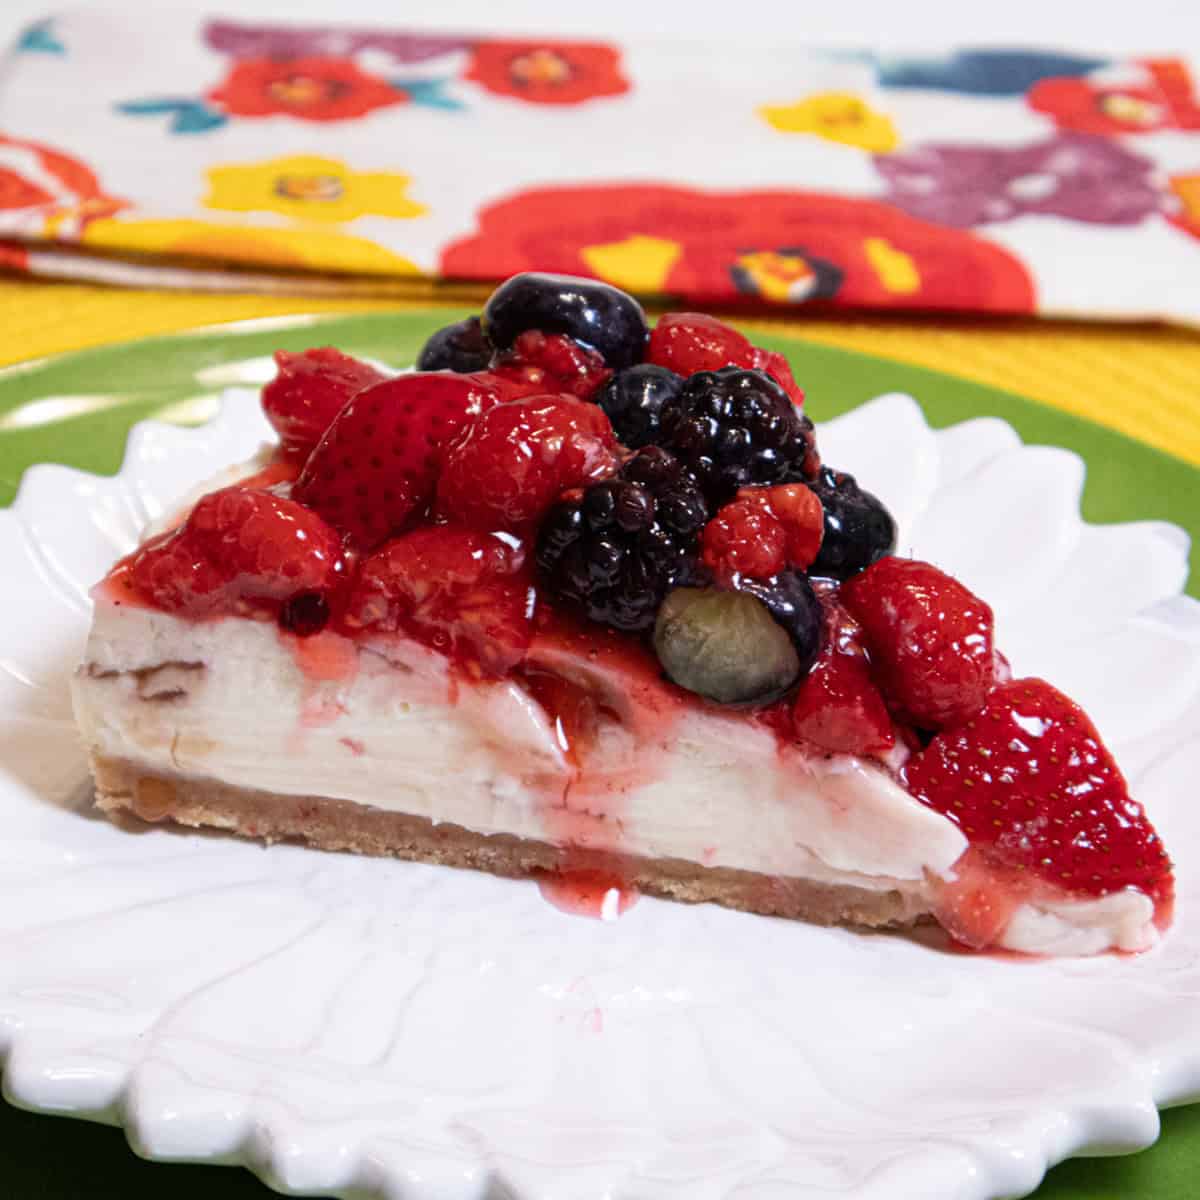
Add a ribbon of raspberry jam to the cheesecake and it is the perfect finish to any dinner. The vanilla wafer crust is chilled while the cheesecake is finished. The abundant berry topping requires no cooking since it is set with instant clear gel. I'm telling you, this doesn't get any easier.
Jump to:
- WHITE CHOCOLATE VS. WHITE COATING CHOCOLATE
- The processor or mixer for mixing cheesecakes
- Cheesecake Pan or Springform Pans
- Releasing the Cheesecake from its pan
- Why You'll Love This Recipe
- Variations
- Ingredients
- Key Ingredients
- Step by Step Instructions
- Recipe faq's
- Expert Tips
- Other cheesecakes you may fancy
- No Bake White Chocolate Cheesecake
WHITE CHOCOLATE VS. WHITE COATING CHOCOLATE
White chocolate is made of cocoa butter, sugar, milk solids, vanilla, and a fatty food additive called lecithin. That's it!
White melting wafers or coating chocolate are made by several companies and can include: Sugar, Palm And Palm Kernel Oil, Nonfat Dry Milk, Whole Milk Powder, Sorbitan Tristearate, Soy Lecithin, Salt, Natural Flavor.
As you can see there is no cocoa butter. While they melt, they are not white chocolate and they don't taste like white chocolate.
The processor or mixer for mixing cheesecakes
Several years ago I found a better way to mix cheesecakes.....the processor. It was quite accidental. I was making them for the restaurant and I had something in the bowl of the mixer. The particular cheesecake I was making takes a long time to bake and cool in the oven so I made it in the processor. When the owner of the restaurant tasted the newly made cheesecakes he said, "I don't know what you did, they were always good but these are outstanding".
But why are they better? When mixed in a mixer, air is whipped into the cream cheese even when using the paddle attachment. This makes for a fluffier cheesecake. For the ultimate smooth, creamy cheesecake using a processor which doesn't add air to the mixture is the answer. They are simply better this way whether they are baked or a no bake cheesecake. While some of my older posts still use the mixer (at least till I get to updating them) I make all my cheesecake in the processor now. See if you can't see a difference.
Cheesecake Pan or Springform Pans
When I had my bakery we used cheesecake pans for cheesecakes as well as to assemble cakes with soft fillings that could slide before setting up.
A cheesecake pan has a solid outer ring and a flat bottom that fits in it. On the other hand the springform pans have an outer ring that opens and closes with a spring. The bottom also usually has a lip on it to fit within the ring when it is closed. The problem with that is two fold. Over time or sooner depending upon how it is stored, the spring no longer closes tightly.
The cheesecake in the cheesecake pan can be easily released by dropping the side and then using a metal spatula to go between the crust and the bottom plate it is easily released and moved to a serving plate or cake board. We did this thousands of times at the bakery.
With the springform pan the lip on the bottom makes it much more difficult to release cleanly as it is more difficult to get the spatula under the crust. The cheesecake pan is also a snap to wash and dry. Not so much the springform pan.
Releasing the Cheesecake from its pan
Have a fat can at the ready. A 28 ounce can of tomatoes is perfect. Go around the outside of the cheesecake pan with a hair blower set on high. Place the cheesecake on the can and slide the side of the pan down. Smooth the side of the cheesecake with a spatula.
After the side has been removed, place the cheesecake on a flat surface. With a flat metal spatula, go under the crust to release it. Place two pancake turners under the crust on either side and, lift up the cheesecake, placing it on a board or serving plate.
Why You'll Love This Recipe
- The most important reason is it tastes incredible.
- The cheesecake uses simple ingredients that are easy to get.
- It's easy to make yet has a bakery worthy in presentation.
- The berry topping needs no cooking.
- It's quick to make.
- It can be made ahead.
- Lemon juice in the Berry Topping offsets the sweetness of the cheesecake.
Variations
Any fruit can be used. Peaches, strawberries, blueberries can all be used alone or in a grouping.
The red raspberry jam can be omitted if desired.
Ingredients
Vanilla Wafer Crust
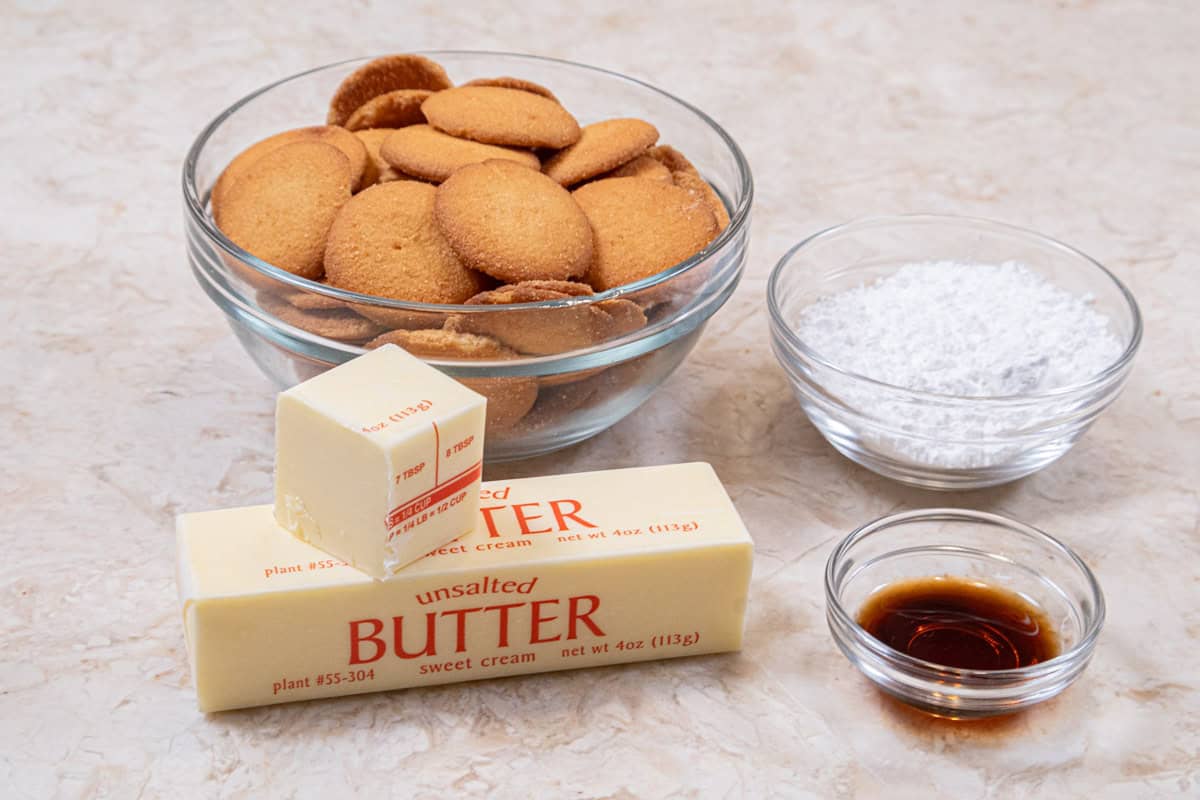
FRONT ROW: Unsalted Butter, vanilla
BACK ROW: Vanilla wafers, powdered sugar
White Chocolate Cheesecake
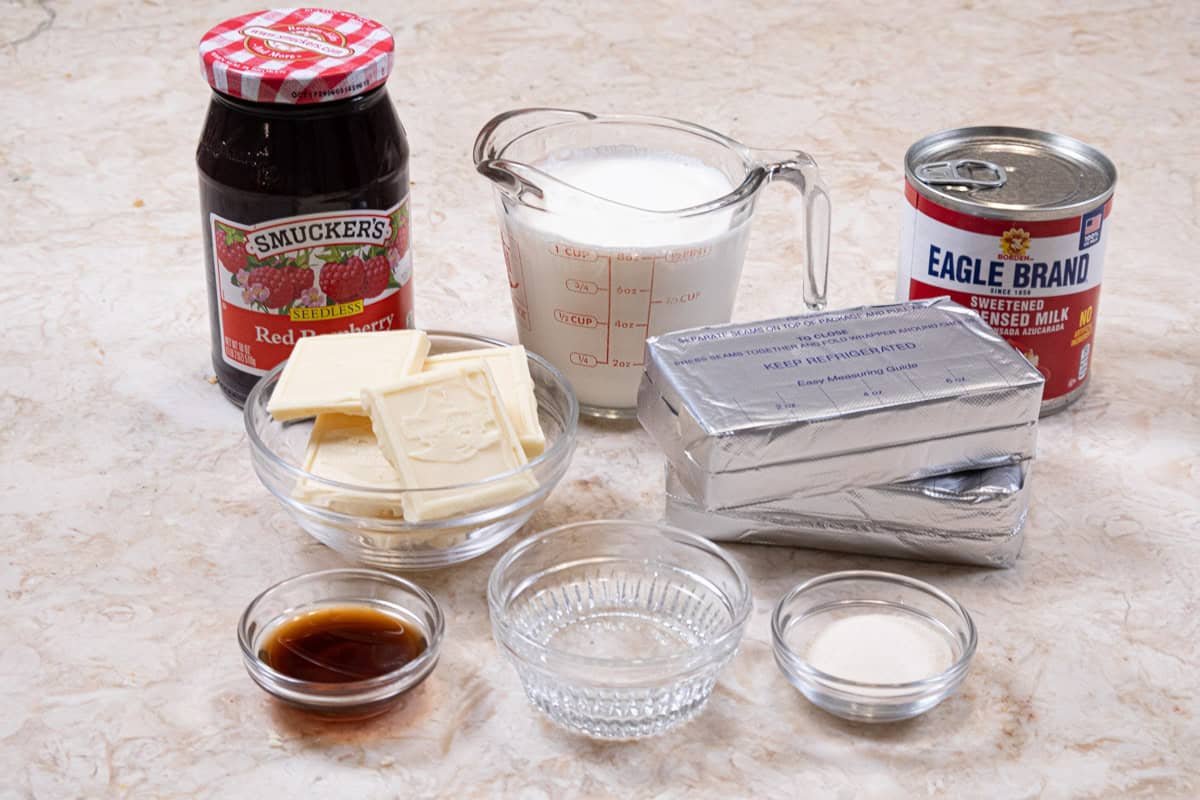
FRONT ROW: Vanilla, water, gelatin
SECOND ROW: White chocolate, cream cheese
BACK ROW: Seedless Red Raspberry Jam, heavy cream, sweetened condensed milk
Berry Topping
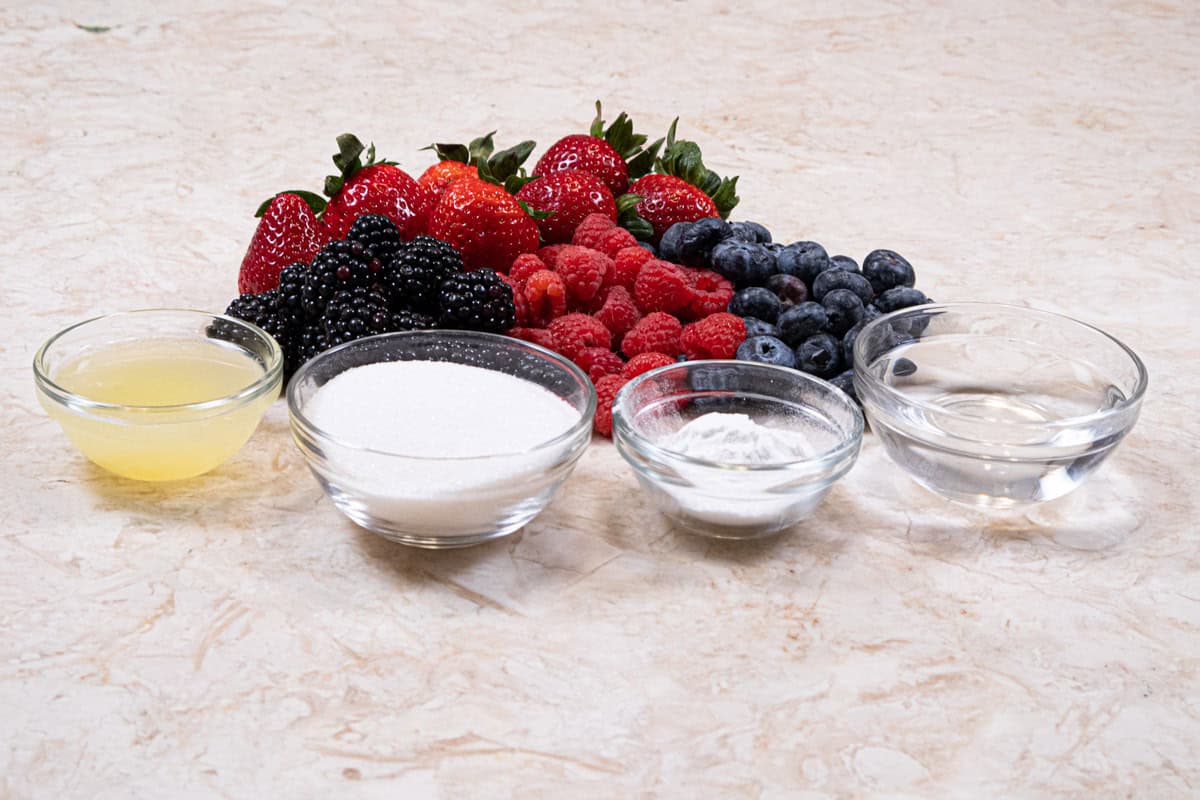
FRONT ROW: Lemon juice, sugar, instant clear jel, and water
BACK ROW: Blackbereries, red raspberries, blueberries and strawberries
Key Ingredients
- While I used Nabisco Nilla wafers any vanilla wafers can be used. However, they may require more or less butter. So start with 4 ounces or 1/2 cup and increase as needed. If they still seem dry, add another tablespoon or so of butter.
- Make sure to use white chocolate and not the compound or coating as they are a different product. I used Ghirardelli White Chocolate but another brand can be used.
- The seedless red raspberry jam is optional but delicious. Jams have no fruit pieces and are smooth and you definitely want seedless.
- Heavy Cream should be used not only for flavor but the instant clearjel used is based on this. Lighter creams such as whipping cream will not set up as firm.
- Cream Cheese - I used full fat but 1/3 less fat can be substituted.
- Be sure to used sweetened condensed milk which should not be mistaken as evaporated milk.
- Any fruit may be substituted for the mixed berries.
- Be sure to use instant clearjel. . It can be found on online as well as in many grocery stores. Please see my post, Thickeners as used in baking.
Be sure to see the recipe card below for the full ingredients and instructions.
Step by Step Instructions
Vanilla Wafer Crust
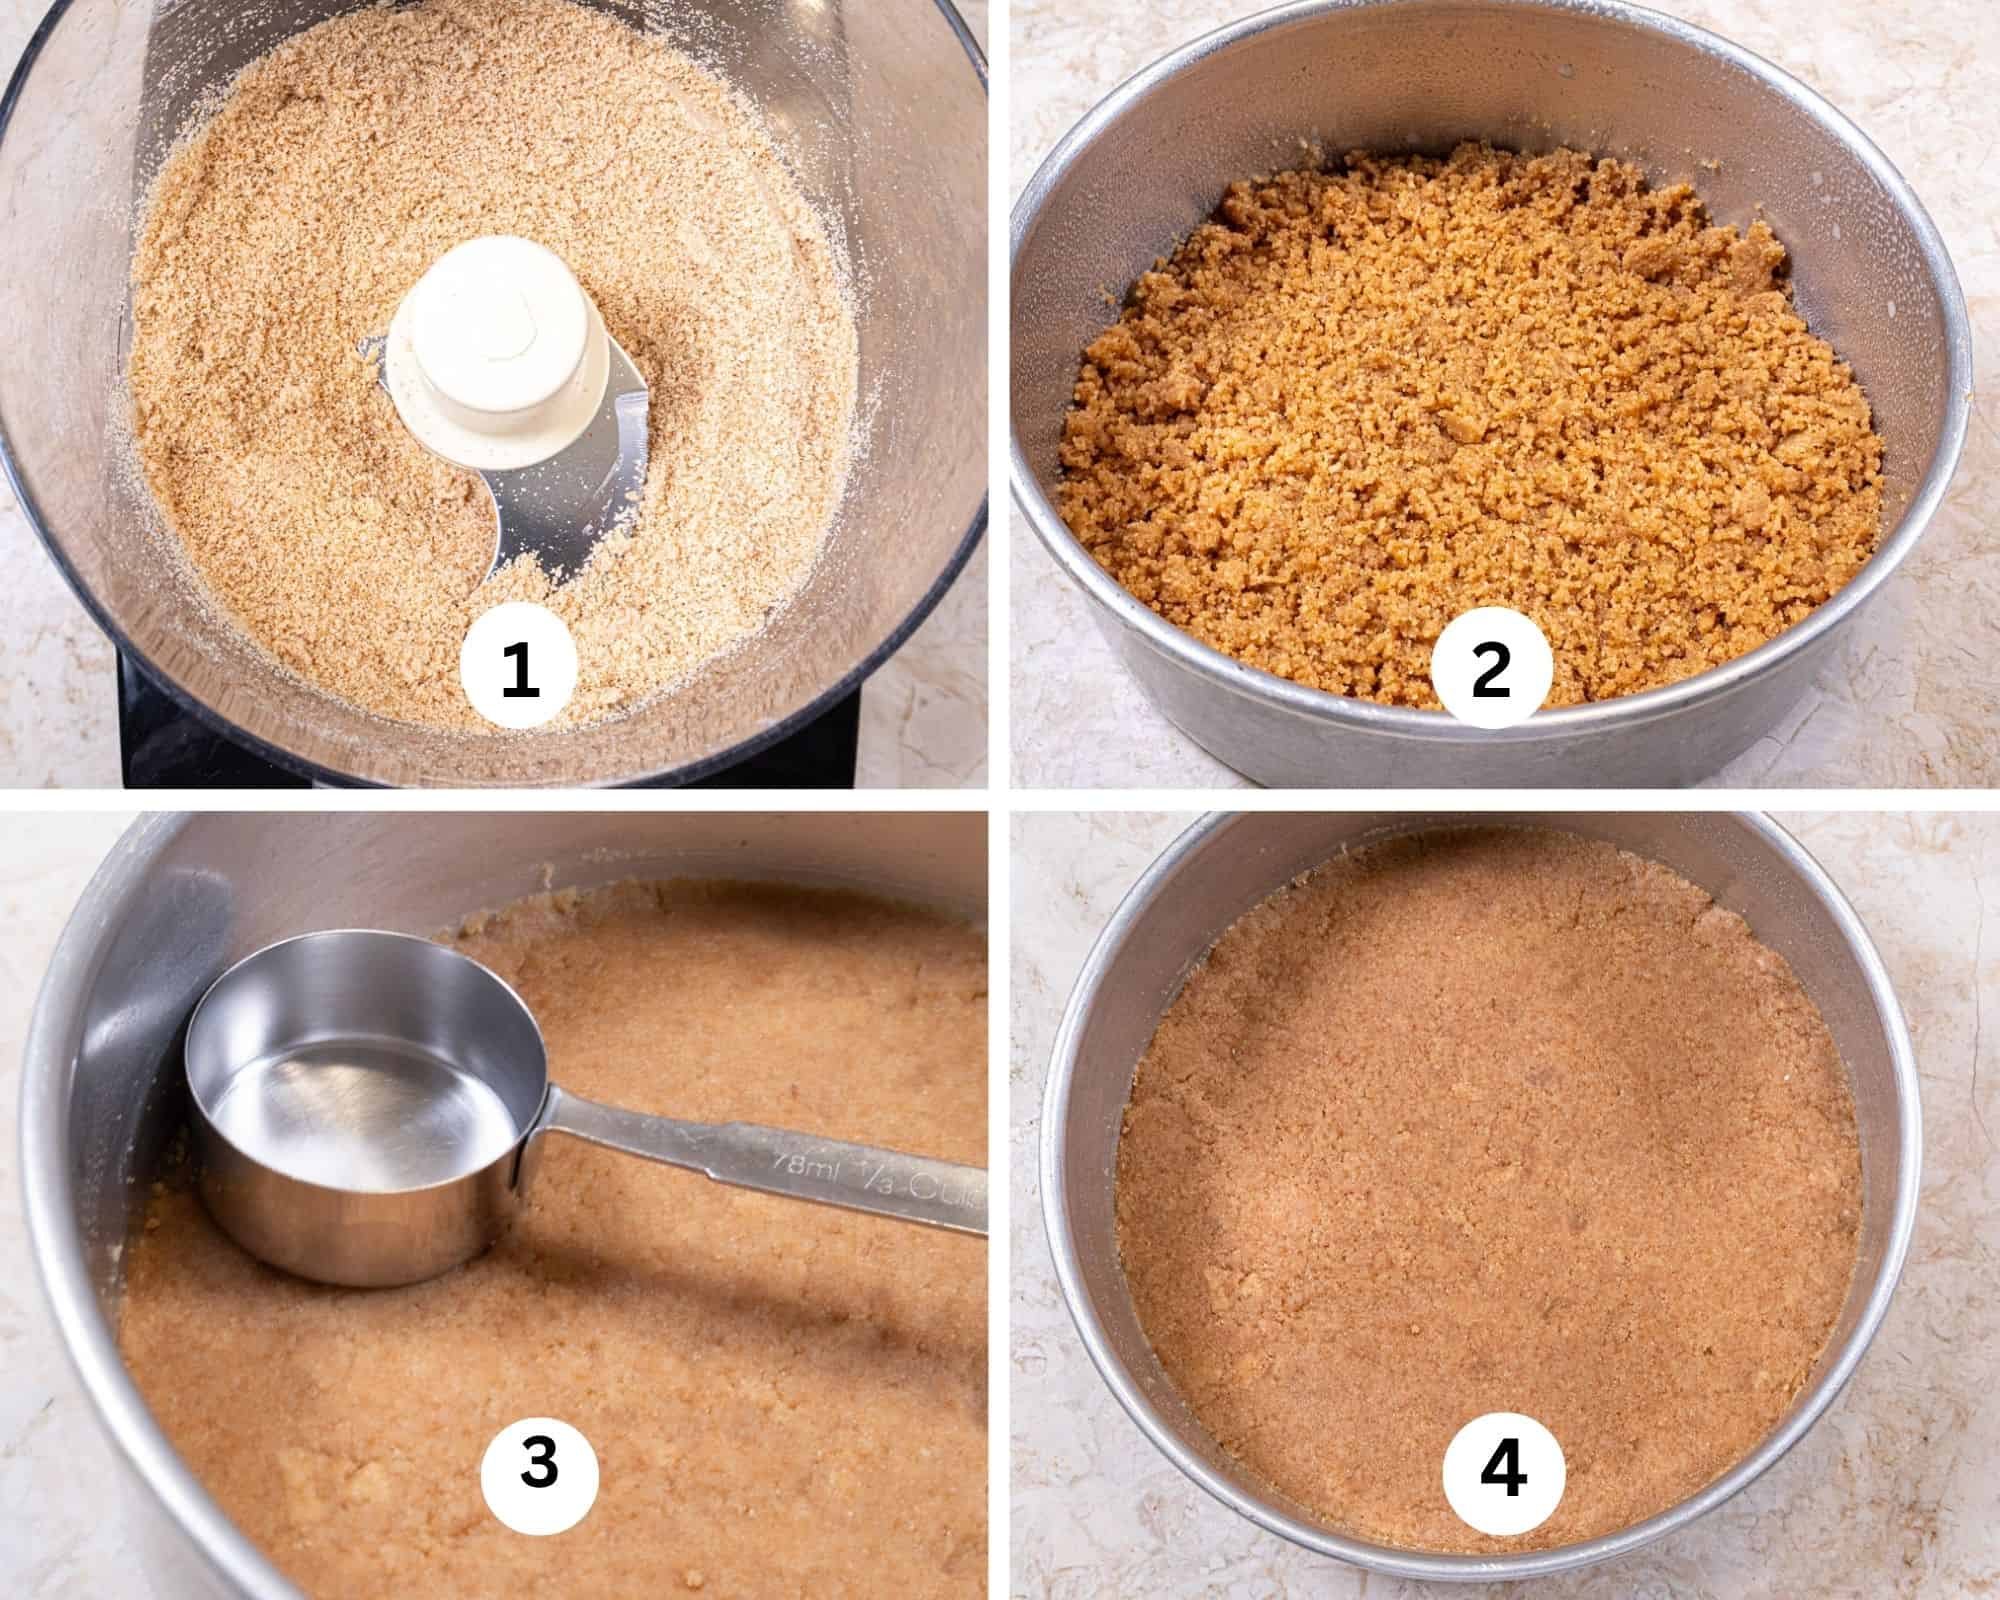
Step 1. Spray a 9x2 or 3 inch round cheesecake or springform pan with a non stick baking release. Break the wafers up and place them in the bowl of a food processor along with the powdered sugar. Process until fine crumbs form. Step 2. Add 1/2 cup of the melted butter and pulse to mix. Take some of the crumbs between your fingers and press together. If they stay together well, that all you need. If not, pulse in the rest of the butter. I found the Nabisco Nilla wafers took all of the butter. Pour them into the prepared pan. Step 3. Distribute the crumbs evenly over the bottom of the pan. Press the crumbs firmly into the pan. I do this with my hand but a small measuring cup can help tamp them down. Step 4. When the crumb crust if finished, place it in the fridge while you make the rest of the cheesecake.
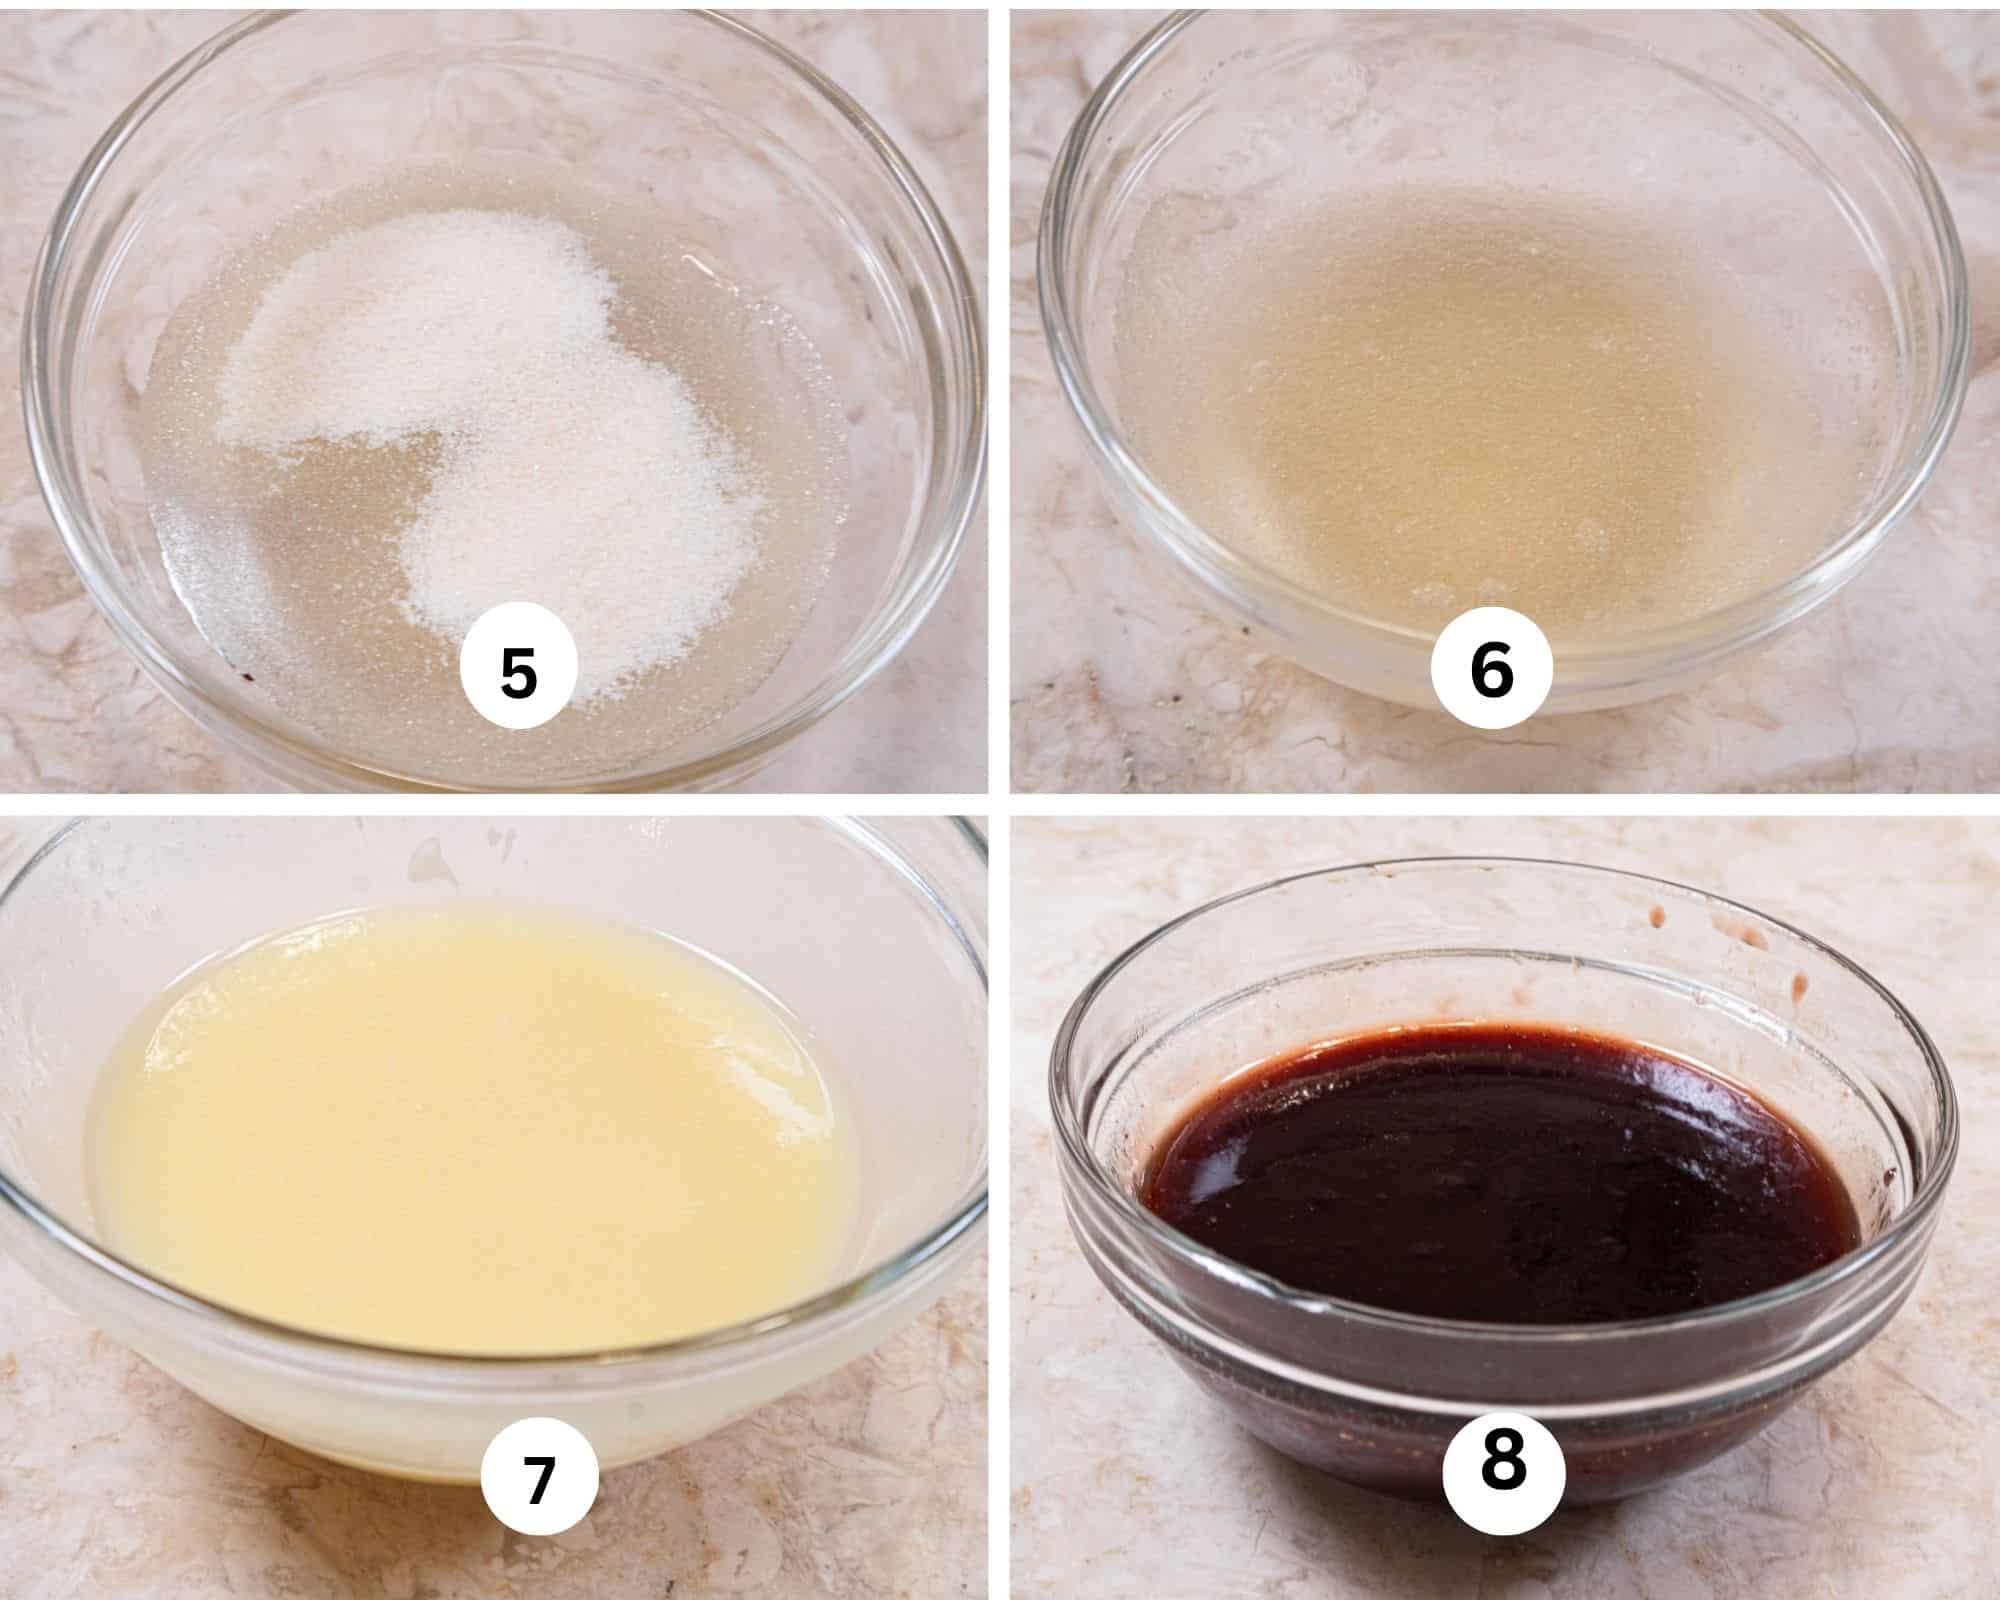
Step 5. Add the clearjel to the water in a small bowl. Step 6. Immediately stir so the it's completely mixed in. Set aside. Step 7. Place the white chocolate and 1/4 cup of the cream in a medium bowl and microwave at half power for 1 1/2 minutes. If it looks melty and shiny, stir to melt the rest. If it doesn't melt all the way, return it to the microwave and give it a few seconds more. What you need to know about white chocolate is it burns and lumps up (siezes) very quickly. So low and slow is the mantra. This can also be done over a double boiler. If you are new to melting white chocolate, I would suggest you place the chocolate in a bowl and place that over another pan so the white chocolate bowl does not touch the water. Bring the water to a simmer (do not boil) and stir it when it looks melty. In any case remove it from the heat or microwave and let it cool to room temperature. Step 8. Place the red raspberry jam in a small bowl and microwave briefly about 40 to 50 seconds - stir to smooth out completely. Set aside.
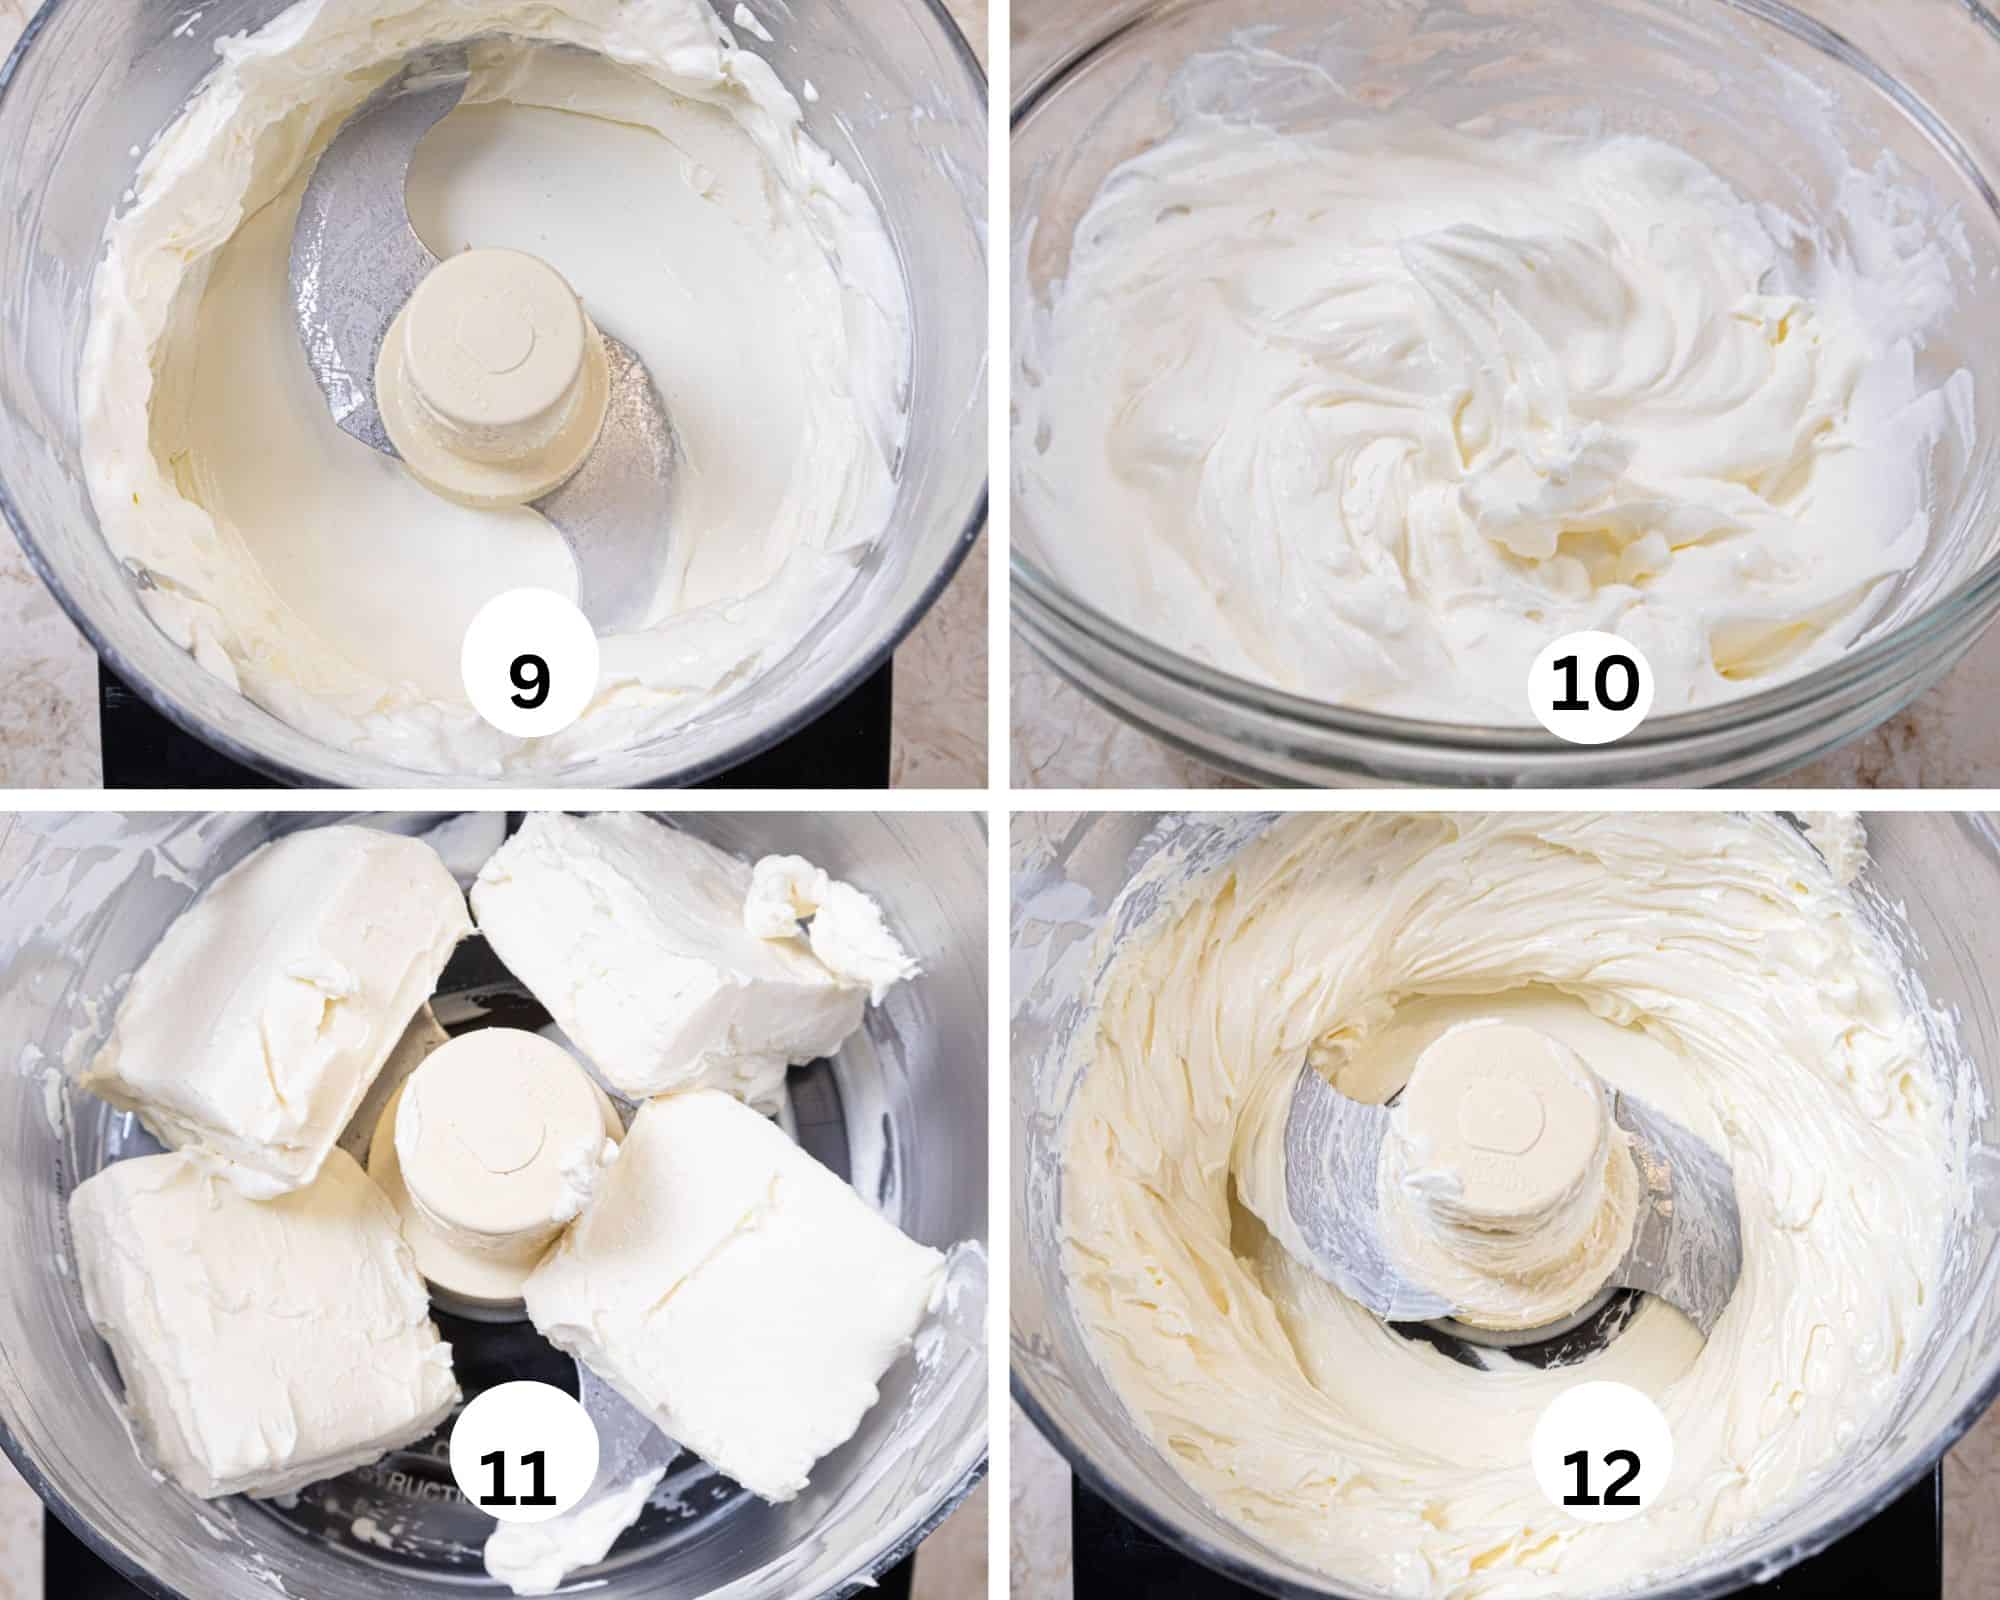
Step 9. Add the heavy cream to the processor and process until it is very stiff around the edges of the bowl. There will be some unincorporated cream left in the middle of the bowl. Step 10. Transfer the whipped cream and the unincorporated cream to a bowl. Whisk the two together to a medium firm consistency. Set aside. Step 11. Without cleaning the processor bowl, place the softened cream cheese in the processor bowl. Step 12. Process the cream until smooth.
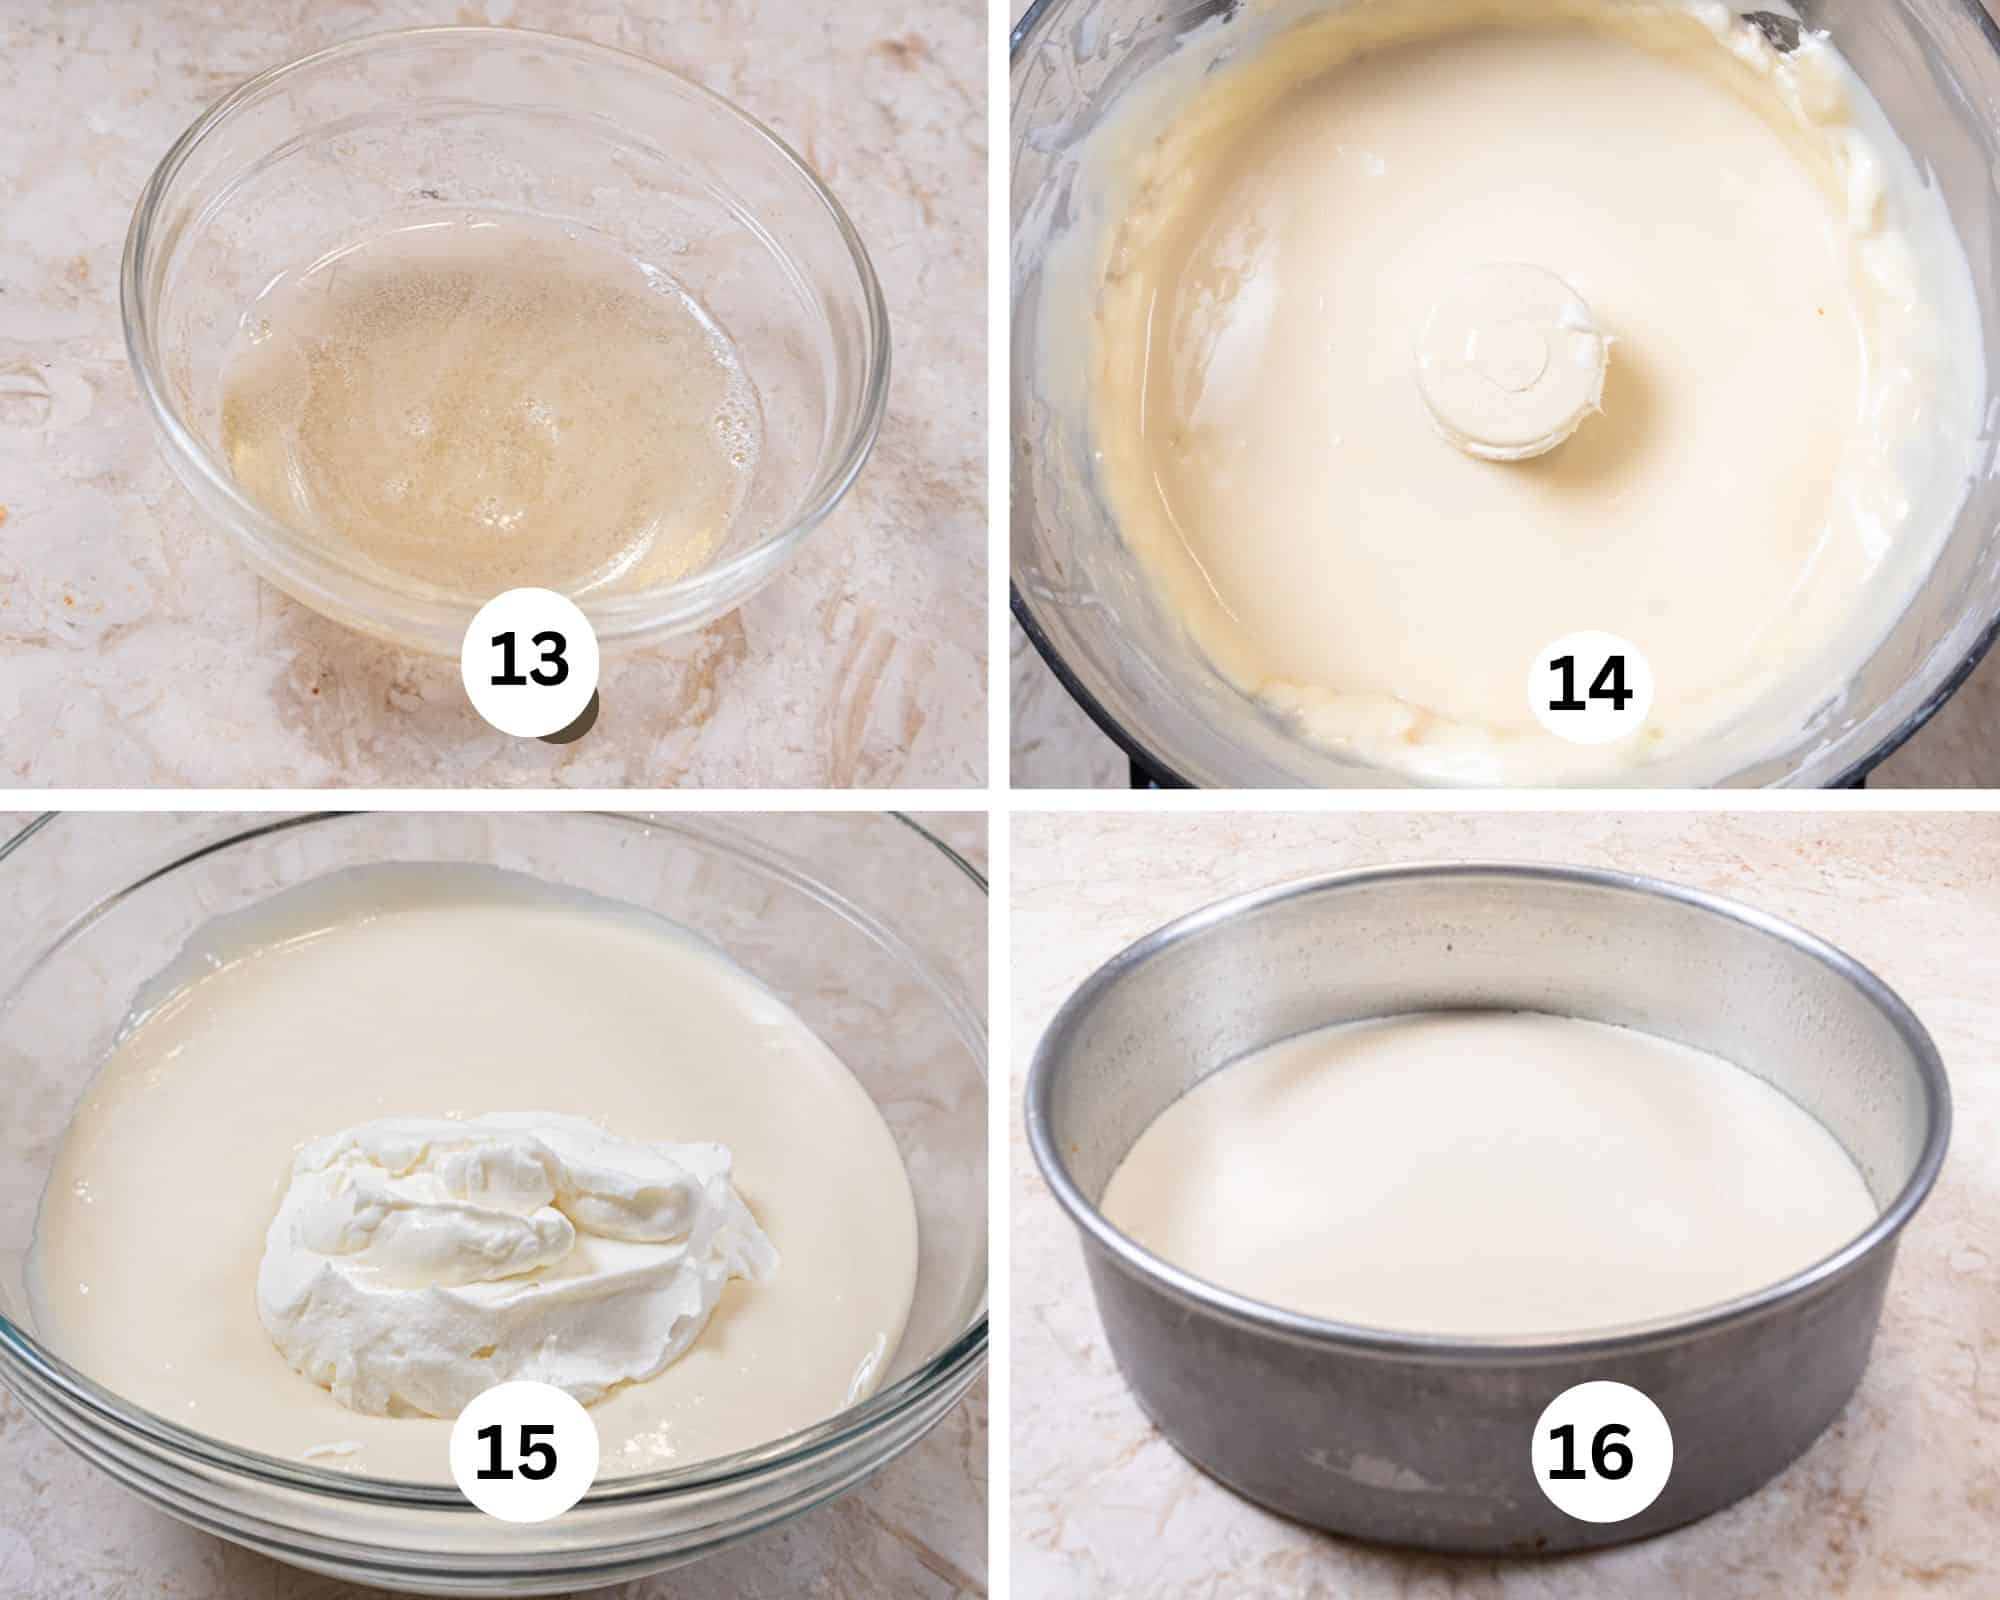
Step 13. Add the gelatin to the cold water. Stir to make sure all of it is incorporated. Let it sit for a few minutes until it is firm. Step 14. Place the gelatin in the microwave for about 5 to 7 seconds to liquify it, It should be liquid but not hot. If it is, cool it before adding it with the other ingredients. Add it along with the melted white chocolate, condensed milk, and vanilla. Scrape down the processor bowl as needed so everything is smooth. Step 15. Fold the whipped cream into the cheesecake. Step 16. Remove the crust from the fridge. Pour half of the cheesecake over the crust.
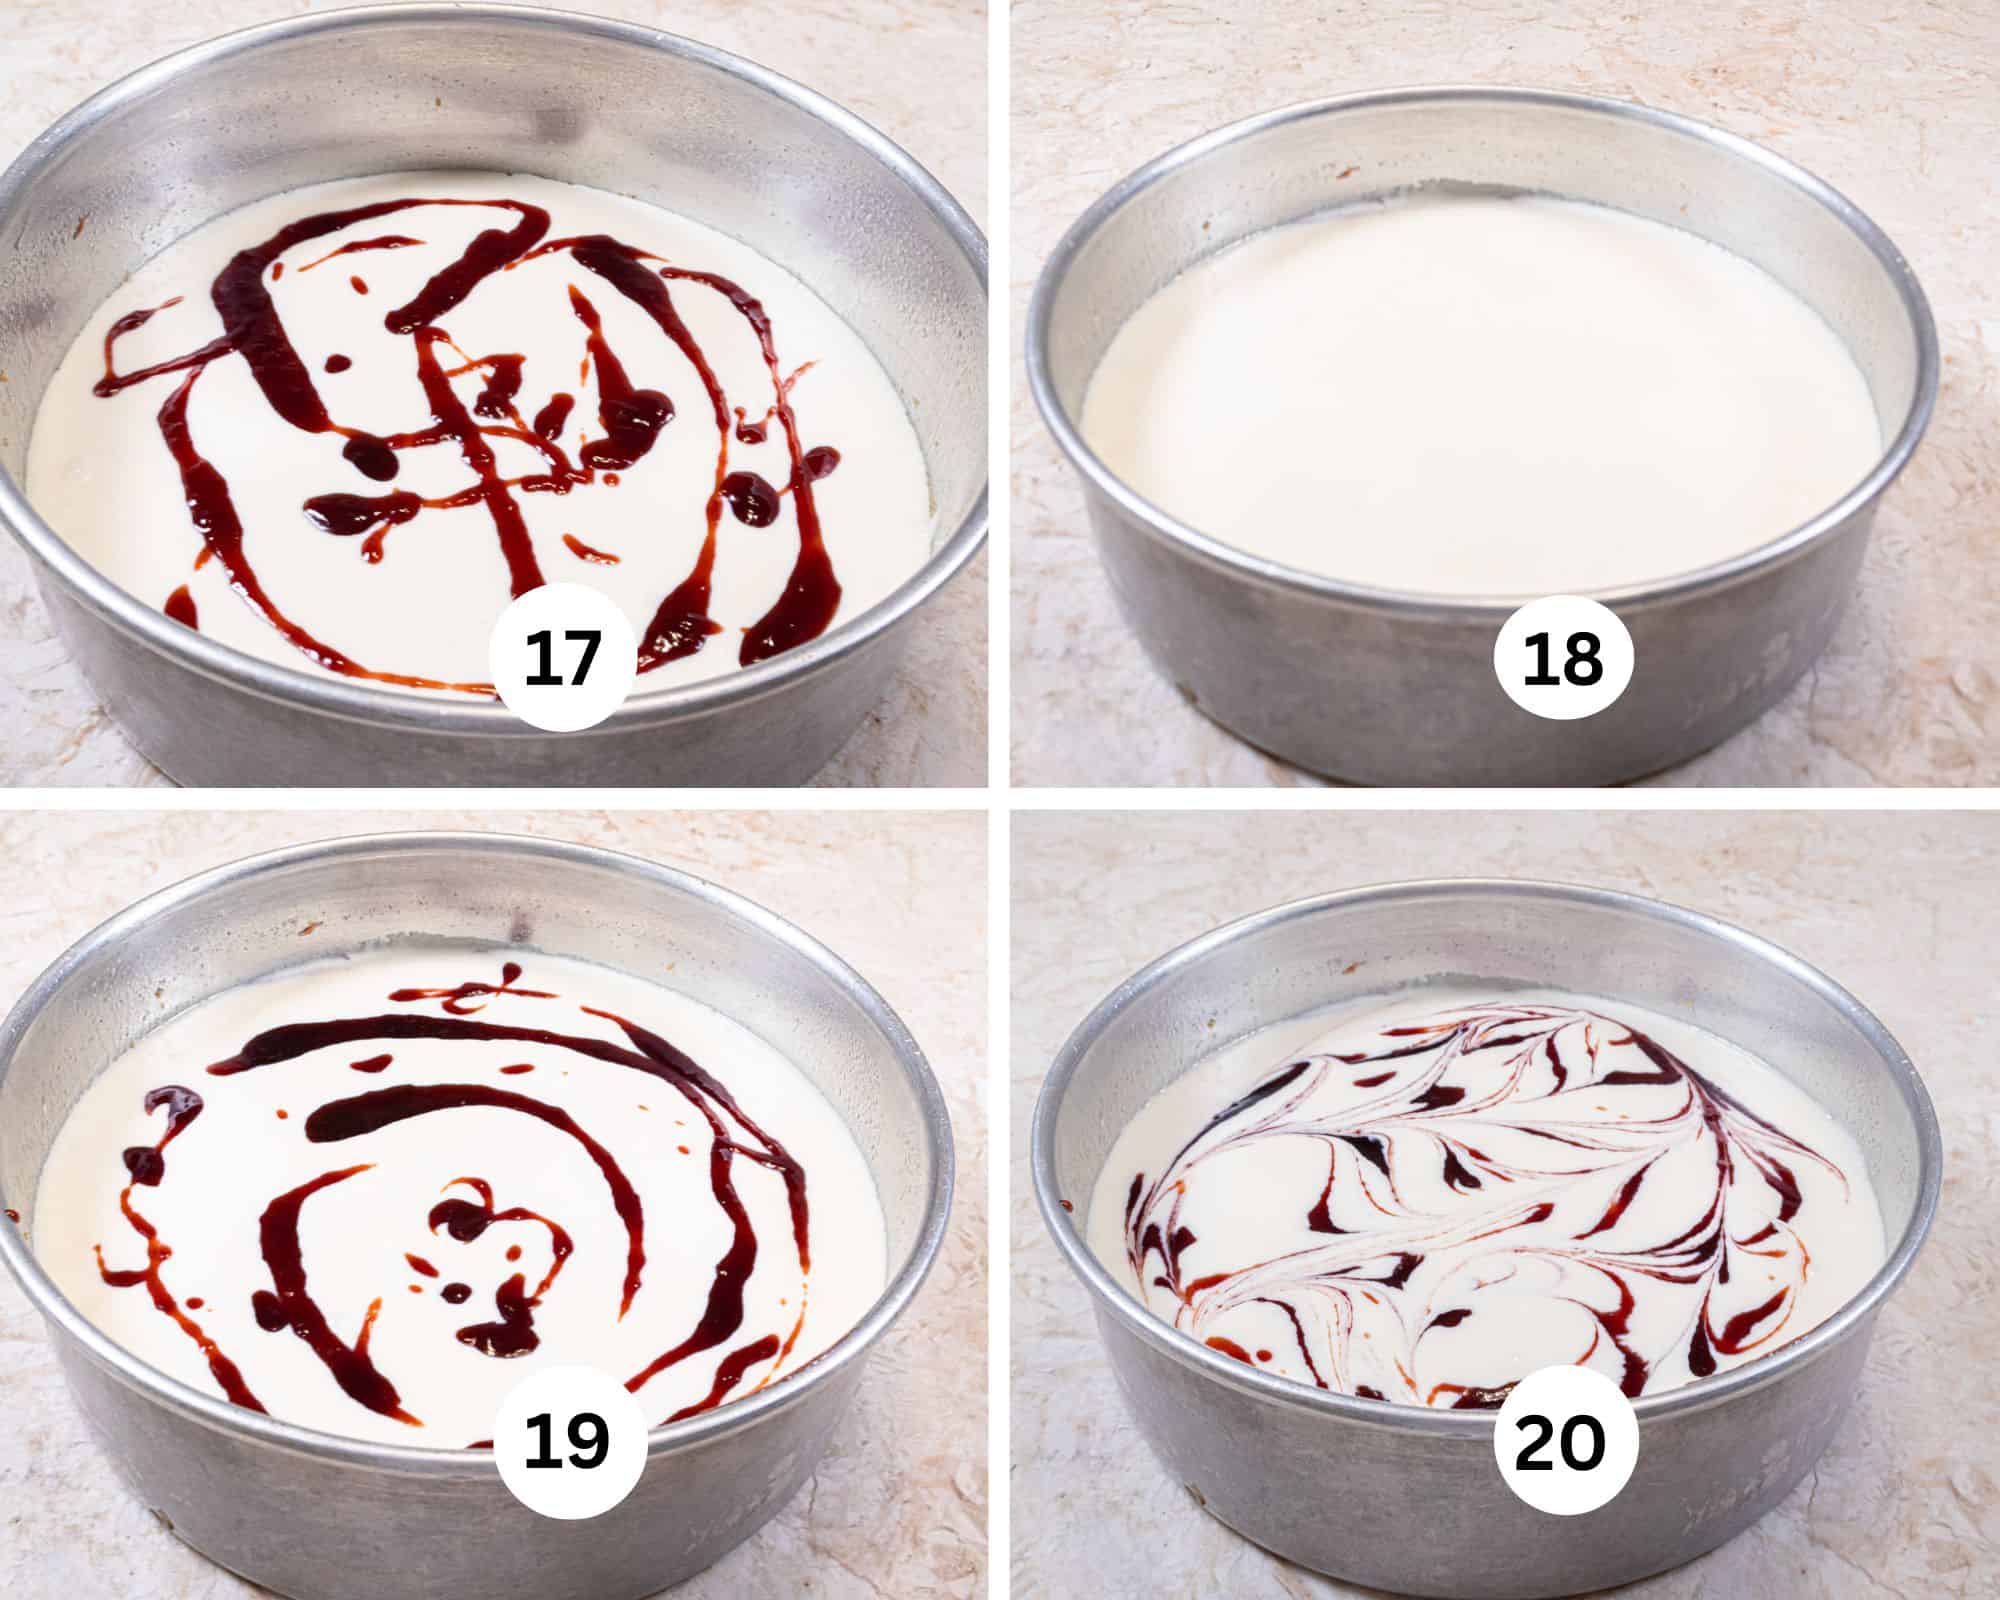
Step 17. Randomly spoon half of the jam over the cheesecake. Step 18. Add the remaining cheesecake filling to the pan. Step 19. Again, spoon the remaining jam over the cheesecake, Step 20. Swirl everything together reaching down to incorporate the bottom layering. Refrigerate overnight to set up.
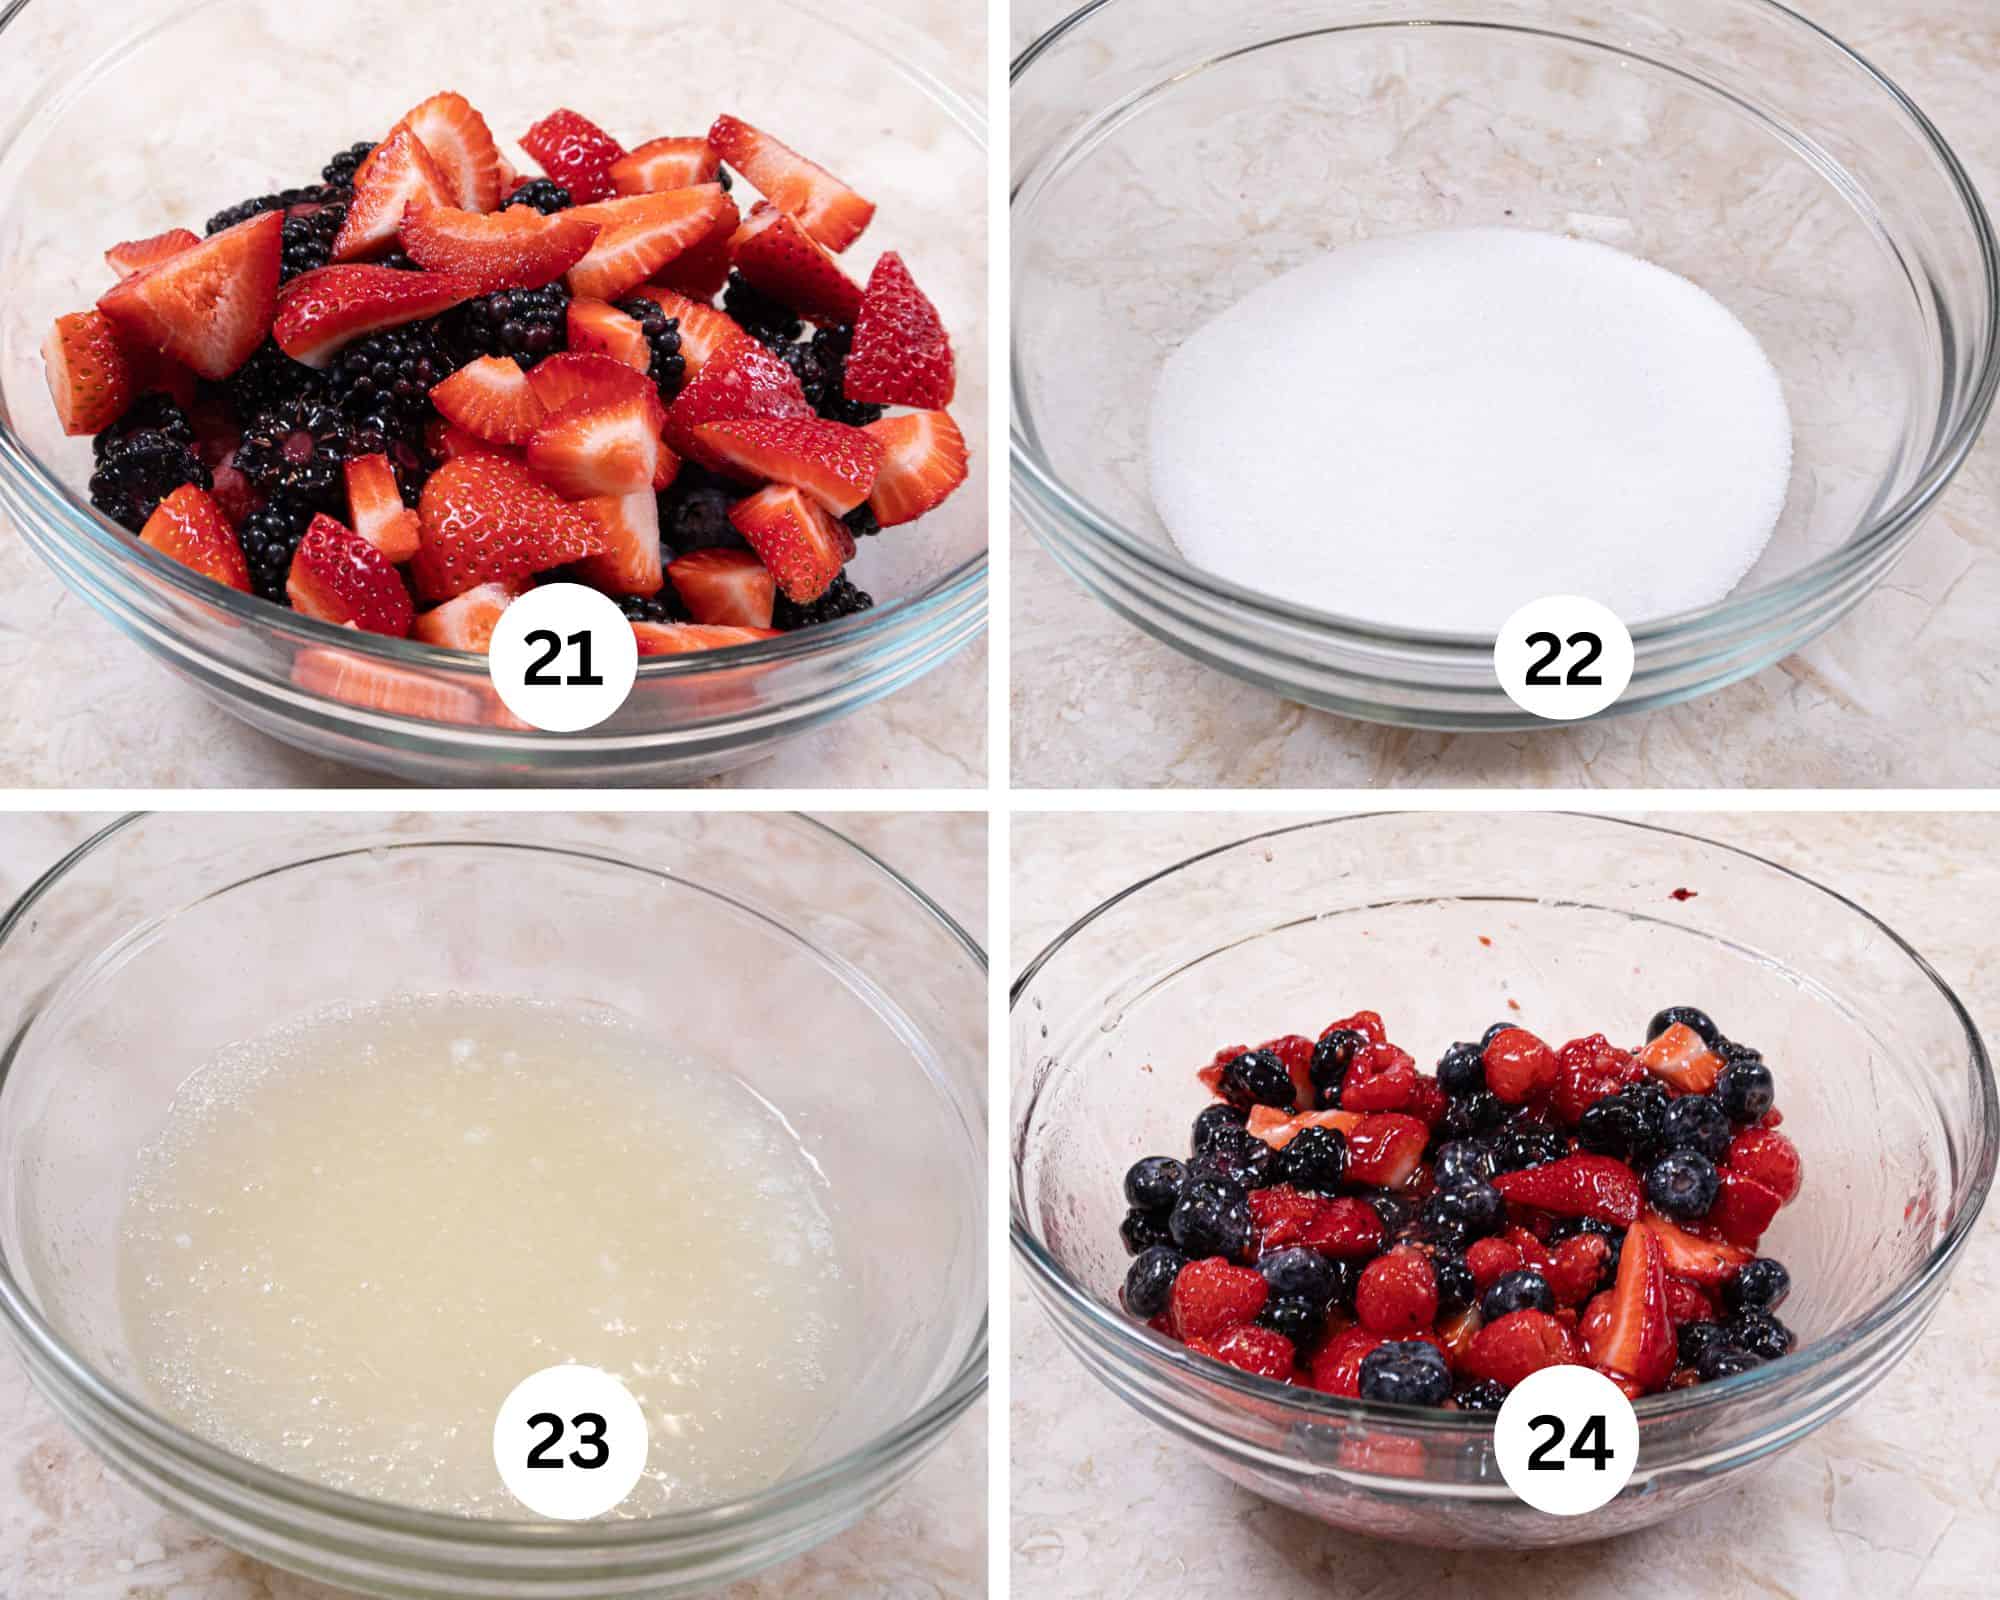
Step 21. Cut the strawberries and half the blackberries if they are big. Combine in a big bowl. Step 22. Whisk together the sugar and instant clear jel. Step 23. Combine the water and lemon juice. Add the sugar and clear jel mixture, whisking well. Step 24. Add to the berries stirring well but gently so the fruit isn't broken up. Wait a few minutes until everything is thickened and pour over the cheesecake after it is released from the pan. Serve immediately or refrigerate several hours. The berry topping can be made a day ahead, refrigerated and added later to the cheesecake.
Recipe faq's
Yes. Freeze the cheesecake only without the topping until hard. Tightly wrap it and freeze up to 2 months. Thaw it overnight in the refrigerator and top it with the fruit before serving.
White chocolate pairs beautifully with fresh raspberries, strawberries, blueberries, cherries, lemon curd, caramel sauce, chocolate curls, toasted coconut, or crushed pistachios. A tart fruit topping provides the perfect balance to the rich, creamy filling.
Absolutely! In fact, this dessert is even better when made a day ahead. Preparing it 24 hours in advance gives the filling plenty of time to firm up and allows the flavors to develop, making it perfect for entertaining. Both the cheesecake and the filling can be made ahead. It is best to add the topping just before serving.
Expert Tips
- Have the cream cheese at room temperature or softened before processing.
- Use real white chocolate not chips with no cocoa butter in the ingredients. The chips taste and melt differently,
- Be sure to use very low heat when melting white chocolate as it tends to seize quickly under medium or high heat.
- It is best to refrigerate the cheesecake overnight to allow it to set up properly,
- Whip the cream to medium peaks. It will be difficult to fold in if beaten really stiff. See the photo as a guide.
- I don't suggest a graham cracker crust because of it can overtake the delicate flavor of the white chocolate.
- The red raspberry jam may be omitted if desired but it adds a lot of flavor.
Other cheesecakes you may fancy
A lot of work goes into each of my recipes and my only ask is that if you like the recipe or even the looks of it, please leave me a star rating to help me rank better. It’s important and I appreciate it and I appreciate you.
No Bake White Chocolate Cheesecake
Equipment
- Food Processor
- 9x 2 or 3" Cheesecake Pan or Springform mold
Ingredients
Vanilla Wafer Crust
- 1 1/3 cups vanilla wafer crumbs (170 grams)
- 1/4 cup powdered sugar (35 grams)
- 8 to 10 tablespoons unsalted butter, melted (114 to 150 grams)
- 1 teaspoon vanilla
White Chocolate Cheesecake
- 4 ounces white chocolate (114 grams)
- 1/3 cup seedless red raspberry jam, optional
- 1 cup heavy cream
- 16 ounces cream cheese, softened (2 - 8 ounce pkg)
- 1 14 ounce can sweetened condensed milk
- 2 teaspoons vanilla extract
- 1 1/2 te teaspoon gelatin
- 2 tablespoon water
Berry Topping
- 5 ounces blueberries (140 grams)
- 5 ounces red raspberries (140 grams)
- 5 ounces blackberries (140 grams)
- 5 ounces strawberries (140 grams)
- 2 + 1 tablespoons + 1 teaspoon Instant clear gel
- 1/2 cup granulated sugar (100 grams)
- 1/2 cup lemon juice, freshly squeezed
- 1/3 cup water
Instructions
Vanilla Wafer Crusst
- Spray a 9x2 or 3 inch cheesecake pan or springform mold with a non-stick baking release. Set aside,
- Break the wafers up and place them in the bowl of a food processor, along with the powdered sugar. Process until finely ground.
- Add 8 tablespoons of the melted butter and pulse to make crumbs. Take a little between you fingers. If it hold together an isn't dry, you're done. If it's at all crumbly or doesn't hold together, add the remainder of the butter.
- Pour the crumbs into the prepared pan and even them out. Press the firmly into place. I use my hand to do this but a measuring cup is fine also. Refrigerate while preparing the cheesecake.
White Chocolate Cheesecake
- Place the white chocolate and 1/4 cup of the cream in a medium bowl and microwave at half power for a minute. If it looks melty and shiny, stir to melt the rest. If it doesn't melt all the way, return it to the microwave and give it a few seconds more. What you need to know about white chocolate is it burns and lumps up (siezes) very quickly. So low and slow is the mantra. Adding another liquid can also help. This can also be done over a double boiler. If you are new to melting white chocolate, I would suggest you place the chocolate in a bowl and place that over a pan so the white chocolate bowl does not touch the water. Bring the water to a simmer (do not boil) and stir it when it looks melty. In any case remove it from the heat or microwave and let it cool to room temperature.
- Microwave the jam briefly and whisk it smooth. Set aside to cool.
- Stir the instant clearjel into the water making sure they are completely combined. Set aside.
- Wipe the bowl of the processor clean (no need to wash), Add the heavy cream and process until it is very stiff around the edges, There will be some unincorporated cream in the middle of the bowl.
- Remove the cream and the unincorporated cream to a bowl. Whisk to combine the two. The cream should be medium stiff. If it isn't, whisk it a few times. Se aside.
- Without wiping the bowl, add the softened cream cheese and process until smooth.
- Microwave the clearjel until liquid - about 5 to 7 seconds. Do not get it hot but it has to be liquid. If it is hot, wait until it has cooled before continuing.
- Add the cooled melted chocolate and clearjel, condensed milk, and vanilla. Process until smooth, scraping down as necessary. Fold the whipped cream into the cheesecake mixture.
- Remove the crust from the fridge. Pour half of the mixture over the crust. With a spoon, randomly drop half of the jam over the filling in a circular pattern.
- Pour the remainder of the cheesecake over the jam and repeat the with the remainder of the jam. Using a skewer, swirl the mixture together reaching to the bottom of the cheesecake.
- Refrigerate overnight.
Berry topping
- Rinse all the fruit and dry with paper towels.
- Cut the strawberries into bite size pieces. If the blackberries are large, cut them in half. Combine all the fruit in a large bowl and set aside.
- Mix the sugar and the instant clearjel in a bowl. In a separate bowl, whisk together the water and lemon juice.
- Whisk the sugar/clearjel mixture into the liquid until completely blended. Pour it over the fresh fruit and gently mix everything together. This can be made the day ahead, covered and refrigerated.
Releasing the Cheesecake and Assembly
- Have a fat can at the ready. A 28 ounce can is perfect. Go around the outside of the cheesecake pan with a hair blower set on high. Place the cheesecake on the can and slide the side of the pan down. Smooth the side of the cheesecake with a spatula.After the side has been removed, place the cheesecake on a flat surface. With a flat metal spatula, go under the crust to release it. Place two pancake turners under the crust on either side and, lift up the cheesecake, placing it on a board or serving plate.
- Arrange the berries on top of the cheesecake to within about 1" of the edge. This can be done several hours ahead.
Notes
Nutrition

Patty says
Every recipe of yours I have made is phenomenal. Your detailed recipes make it hard to mess up!
Helen S Fletcher says
Thank you Patty! I appreciate you taking the time to comment. And thank you for your kind words
SallyBR says
Great post, Helen! (as usual)
I am wondering... do you think the cheesecake could stand on its own without the berry topping? To donate it would be complicated, but I can definitely see myself taking just the cheesecake - would you add any type of drizzle on top or leave it plain?
thank you!
Helen S Fletcher says
Hi Sally - It would be good without the topping, especially with the raspberry jam swirl. Not sure it needs anything else if you use the raspberry. If you wanted maybe do a drip of chocolate down the sides. That would be attractive with the swirl.
SallyBR says
awesome, thanks so much, Helen!