
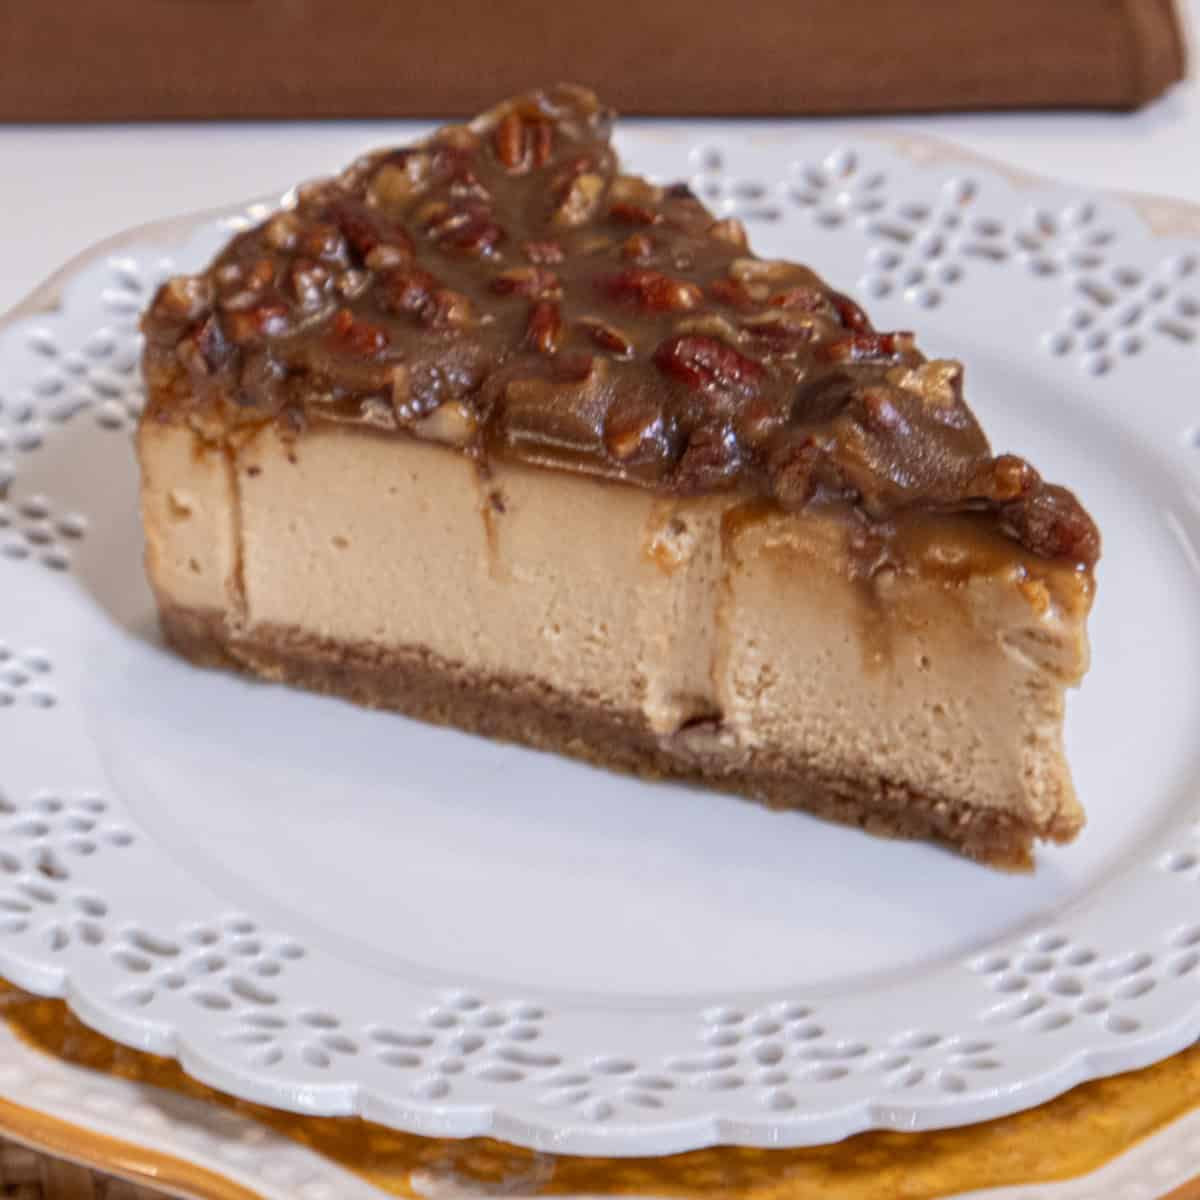
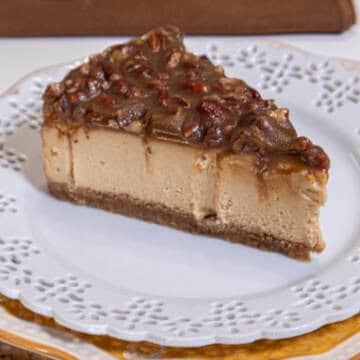
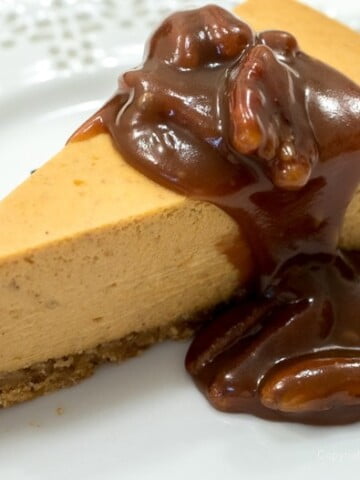
This Caramel Pecan Cheesecake combines the best of two favorite holiday desserts - pecan pie and cheesecake in the creamiest cheesecake I have ever made or eaten. What's more, it's easy with a foolproof way of baking with no cracking and no water bath. The cheesecake comes together with only 4 ingredients in mere minutes and then a long, slow bake turns it into a silky, incredibly creamy base to be finished with an easy caramel topping.
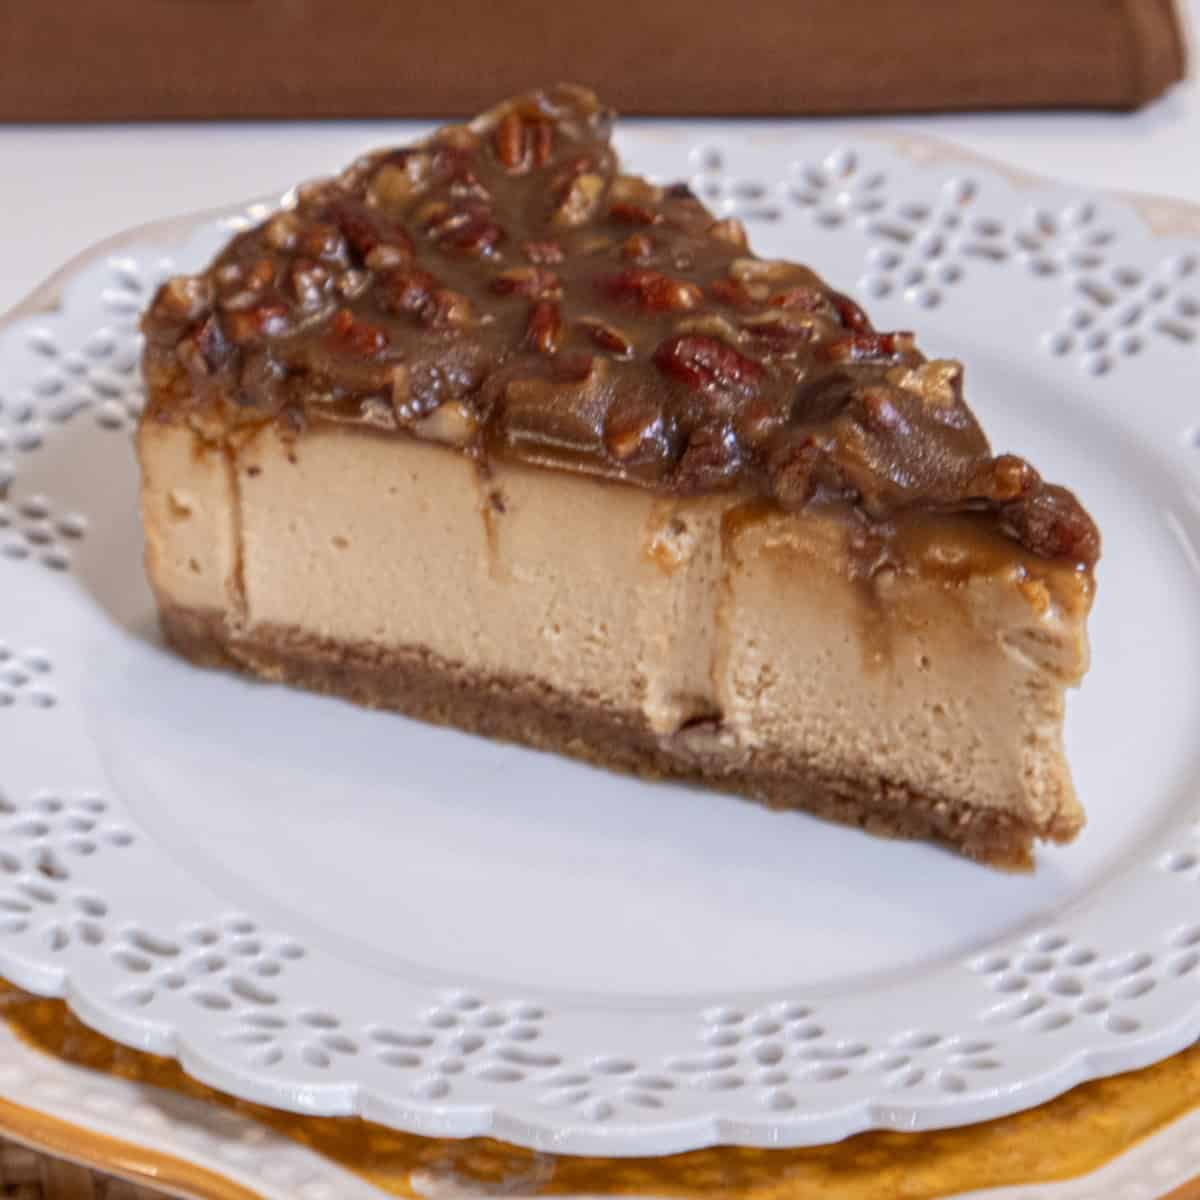
Want to know more? It absolutely freezes so it's great for the busy holidays or anytime you need to get ahead. You can tell everyone you made it or tell them you got it from a bakery - you did --yours! Make it once and you'll make it again.
These cheesecakes are made to keep you company - The Definitive Baileys Cheesecake, White Chocolate Mocha Cheesecake, Unbelievable Cheesecake Update, and another fall favorite Apple Crisp Cheesecake.
Jump to:
- Processor vs. The Mixer for Cheesecakes
- Let's talk Cheesecake pans
- Why the Slow Oven?
- Why You'll Love This Cheesecake
- Recipe ingredients
- Key ingredients
- Step by step instructions
- Releasing a Cheesecake
- Recipe FAQ's
- Expert Tips
- Looking for a few More Cheesecakes?
- This Caramel Pecan Cheesecake Is Pure Fall Indulgence
Processor vs. The Mixer for Cheesecakes
Years ago while I was the pastry chef for the most esteemed restaurant in St.Louis, I needed to start the lemon cheesecakes but the mixer was in use. So I made it in the food processor. When the owner tasted it he exclaimed, "I don't know what you did to this, it was always good, but now it's phenomenal." The only change was I used the food processor instead of the mixer.
And it made sense. The mixer will add air to the cheesecake, the processor doesn't so it makes an extraordinarily smooth, creamy cheesecake. It's how I make my cheesecakes now. Don't get me wrong, the mixer is still fine to use but the processor is better.
Let's talk Cheesecake pans
There are two basic types of pans into which a cheesecake is baked. A springform pan or a cheesecake pan. The former is used mostly by home bakers while the later is used by professionals.
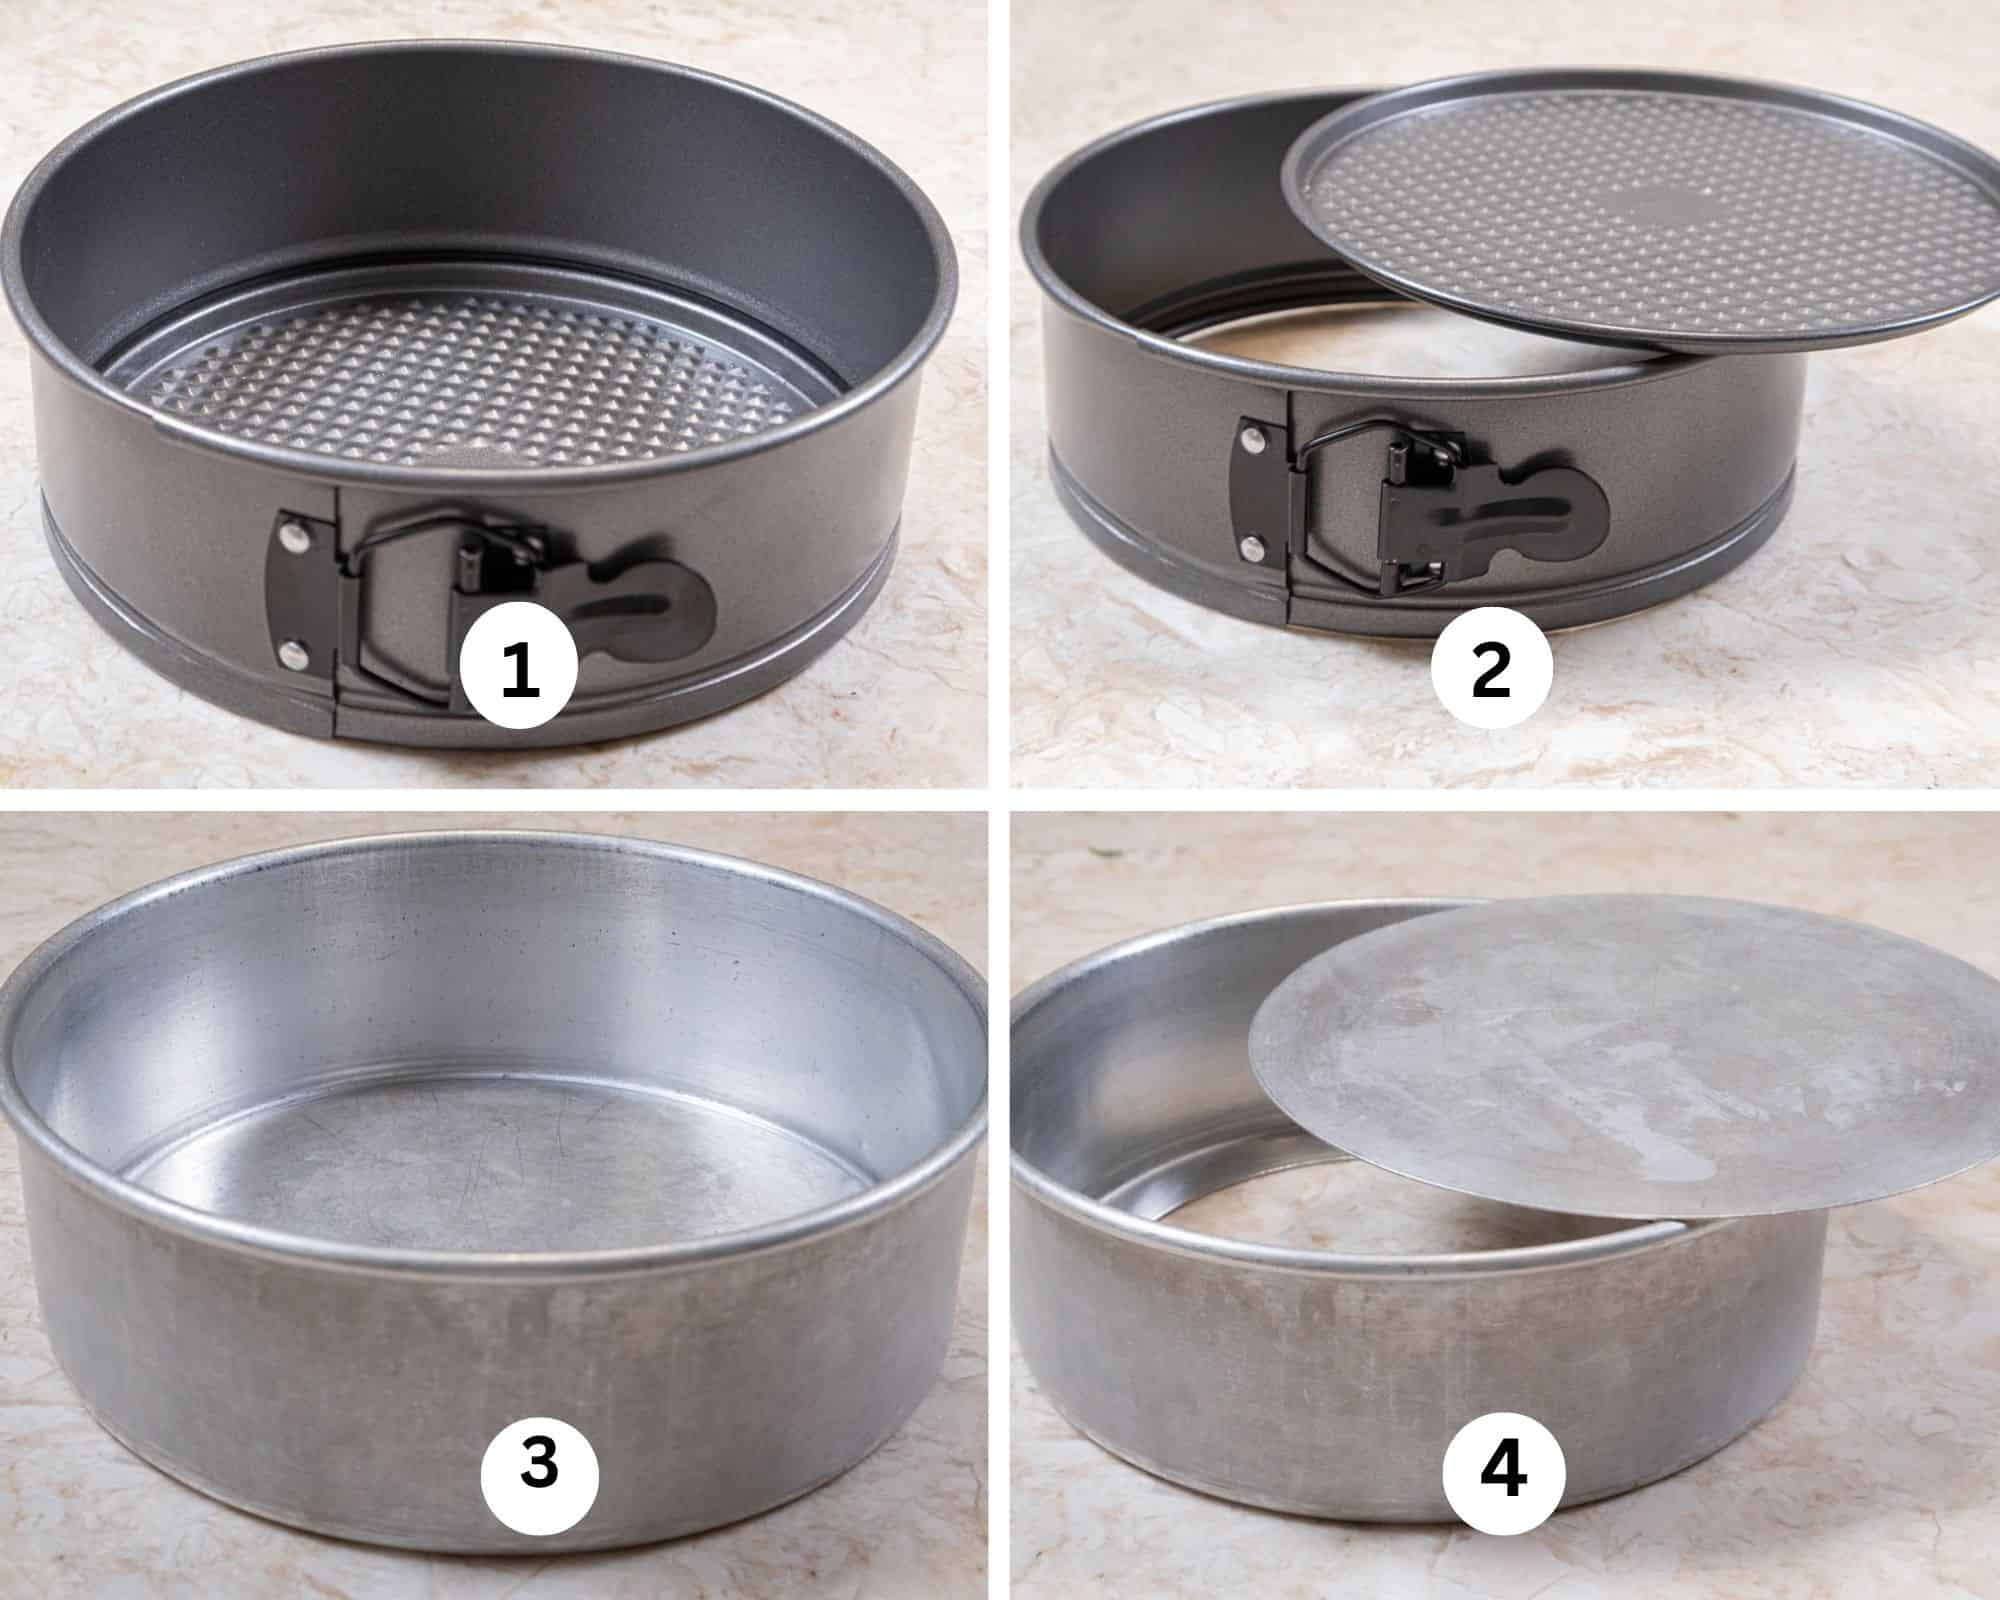
Springform pan 1. As you can see in the photo, there is a clasp that closes the rim of the pan. This is why professionals don't use these pans. If the pan is improperly stored or gets old that clasp can loosen and the side won't close. Springform pan 2. The bottom is a separate piece. Look at the edge of the pan, it has a lip on it which makes it difficult to get the cheesecake out. Cheesecake Pan 3. This is a cheesecake pan which professionals use because they last forever. I had about 100 at the bakery. They are easy to use and easy to clean. This one is 3" deep and we used it for both cheesecakes and to assemble cakes with wiggly fillings so the sides of the cake would be straight, As you can see the rim is solid. Cheesecake Pan 4. This has a removable bottom with no rim so it's easy to release the contents.
Why the Slow Oven?
Cheesecakes can be tricky. Many require the cheesecake to be baked in a water bath to slow the heat and keep it from cracking. The pan also has to be wrapped in foil to keep the water from seeping into the bottom of the pan. This is usually done with higher baking temperatures.
With this recipe, all of this is avoided by simply baking at a much lower temperature for a longer time with no water bath or wrapping of the pan. As you will see in the photos below it is a perfect cheesecake.
Why You'll Love This Cheesecake
- It's unbelievably easy.
- The cheesecake uses readily available ingredients and just a few of them.
- It can be made over a few days.
- Both the cheesecake and the caramel pecan topping take less than 20 minutes to make.
- The baked cheesecake can be frozen for later.
Recipe ingredients
Graham Cracker Crust
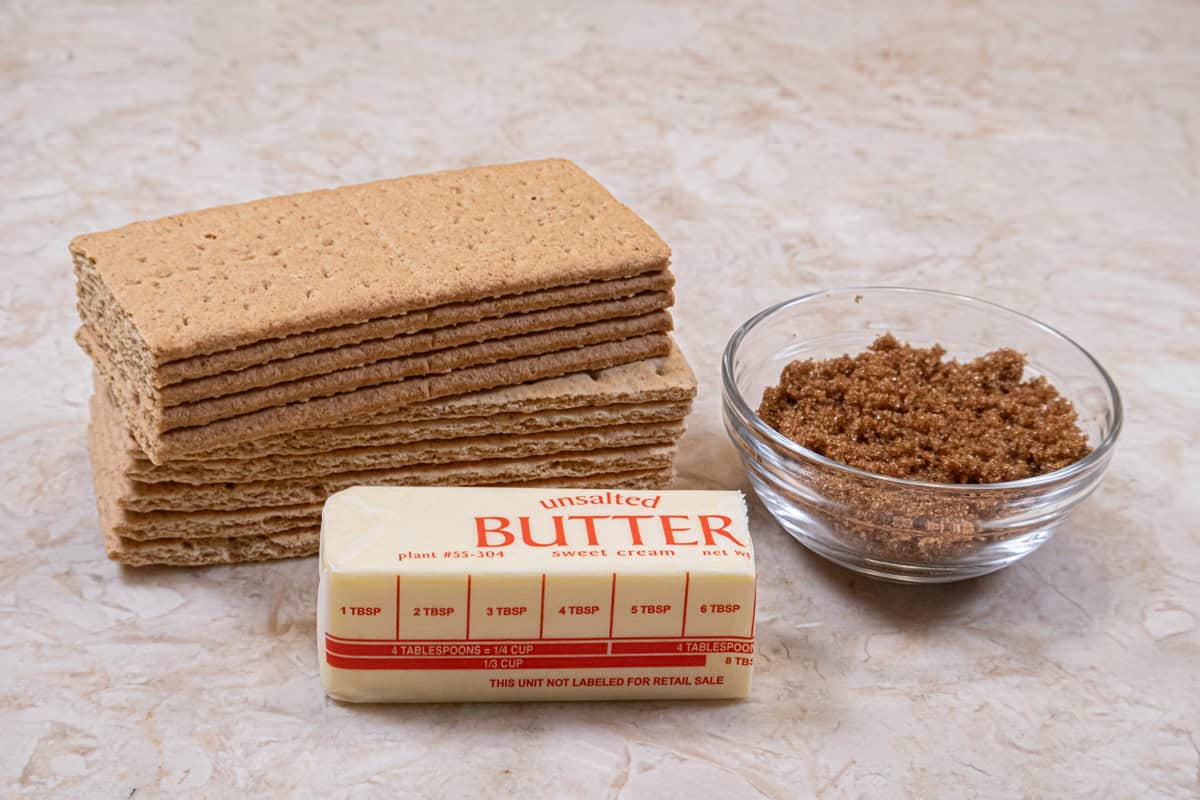
FRONT ROW: Unsalted butter
BACK ROW: Graham crackers, brown sugar
Caramel Pecan Cheesecake
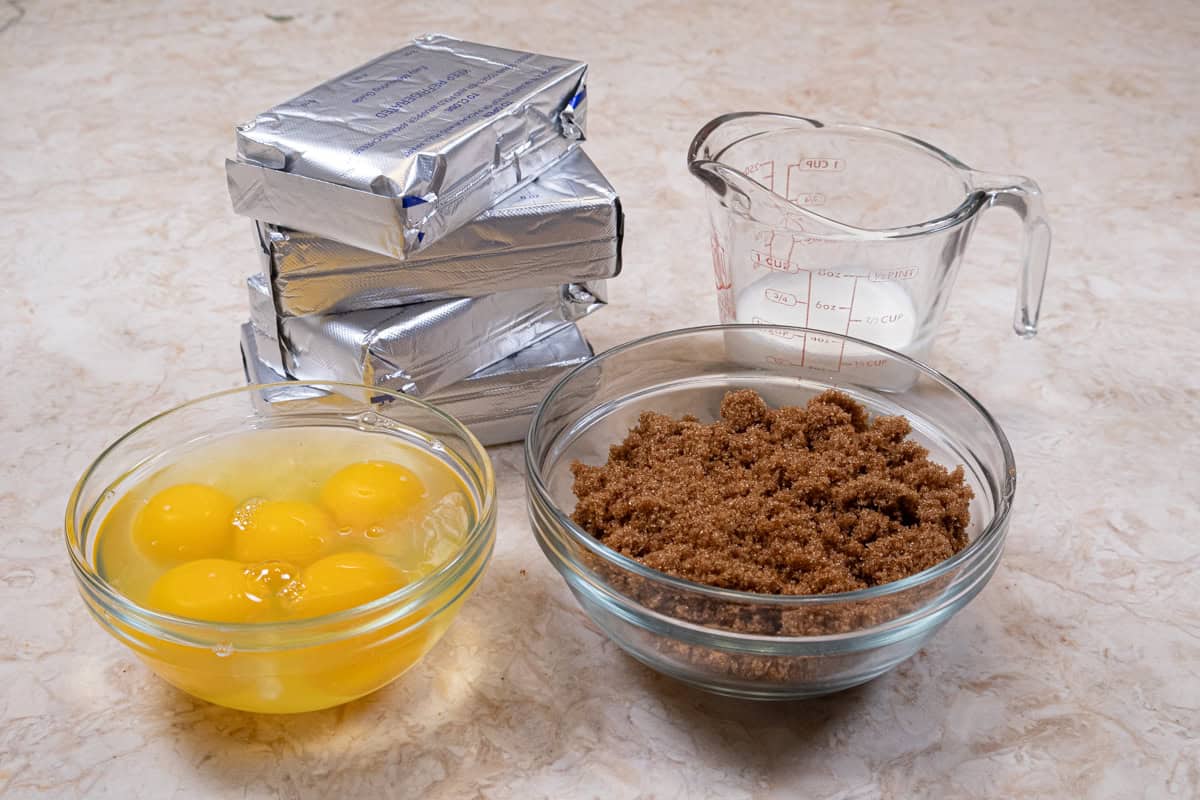
FRONT ROW: Eggs, brown sugar
BACK ROW: Cream cheese, heavy cream
Caramel Pecan Topping
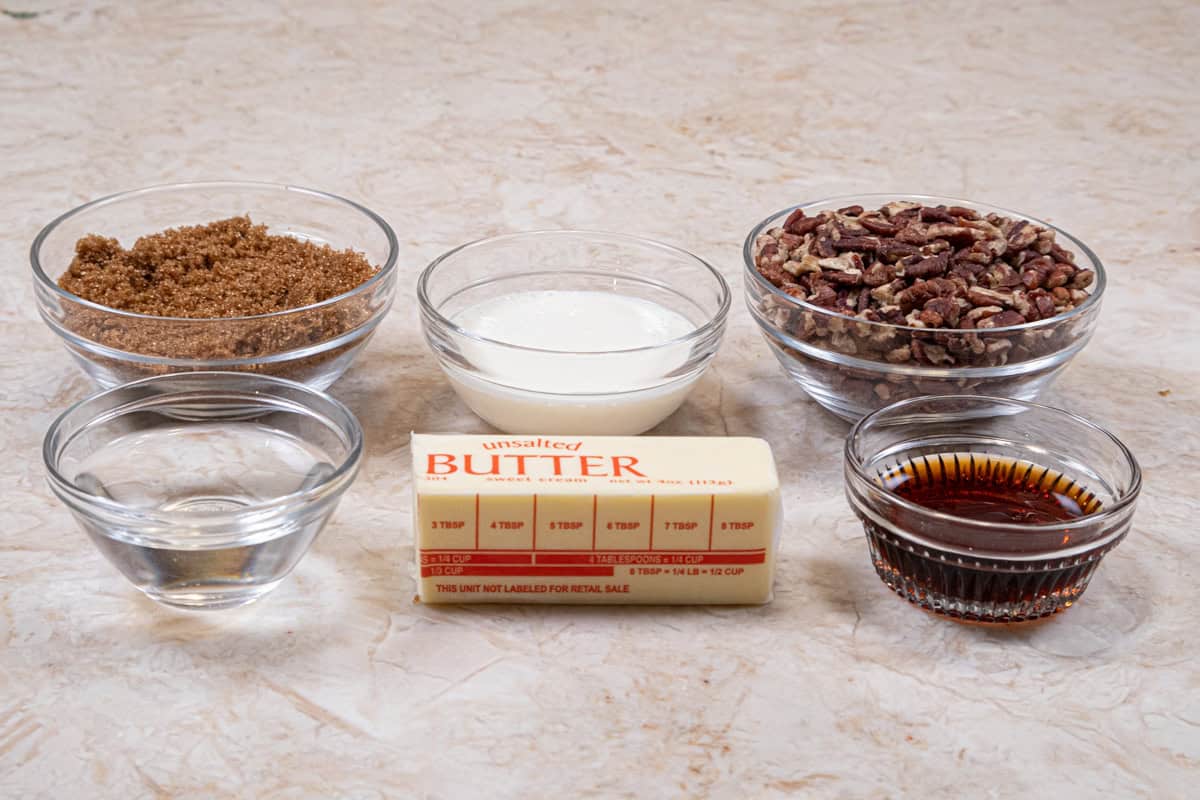
FRONT ROW: Water, unsalted butter, maple syrup
BACK ROW: Brown Sugar, heavy cream, toasted pecan pieces
Key ingredients
- Either light or dark brown sugar can be used but dark will give you a deeper caramel taste.
- I used Honey Maid plain graham crackers and used all the butter. Different brands of crackers may take a little less or a little more butter as formulas are different. Start with about 5 tablespoons of butter. If the mixture doesn't hold together, add the rest. If it is still dry, add a bit more.
- For the caramel pecan topping I used real maple syrup. However, regular corn syrup or golden syrup can also be used.
- Be sure to take the temperature of the topping to 234°F so it sets up properly.
- Trader Joe's has toasted pecan pieces in 8 ounce packages. No chopping, no toasting!
Be sure to see the recipe card below for the full ingredients and instructions.
Step by step instructions
Graham Cracker Crust
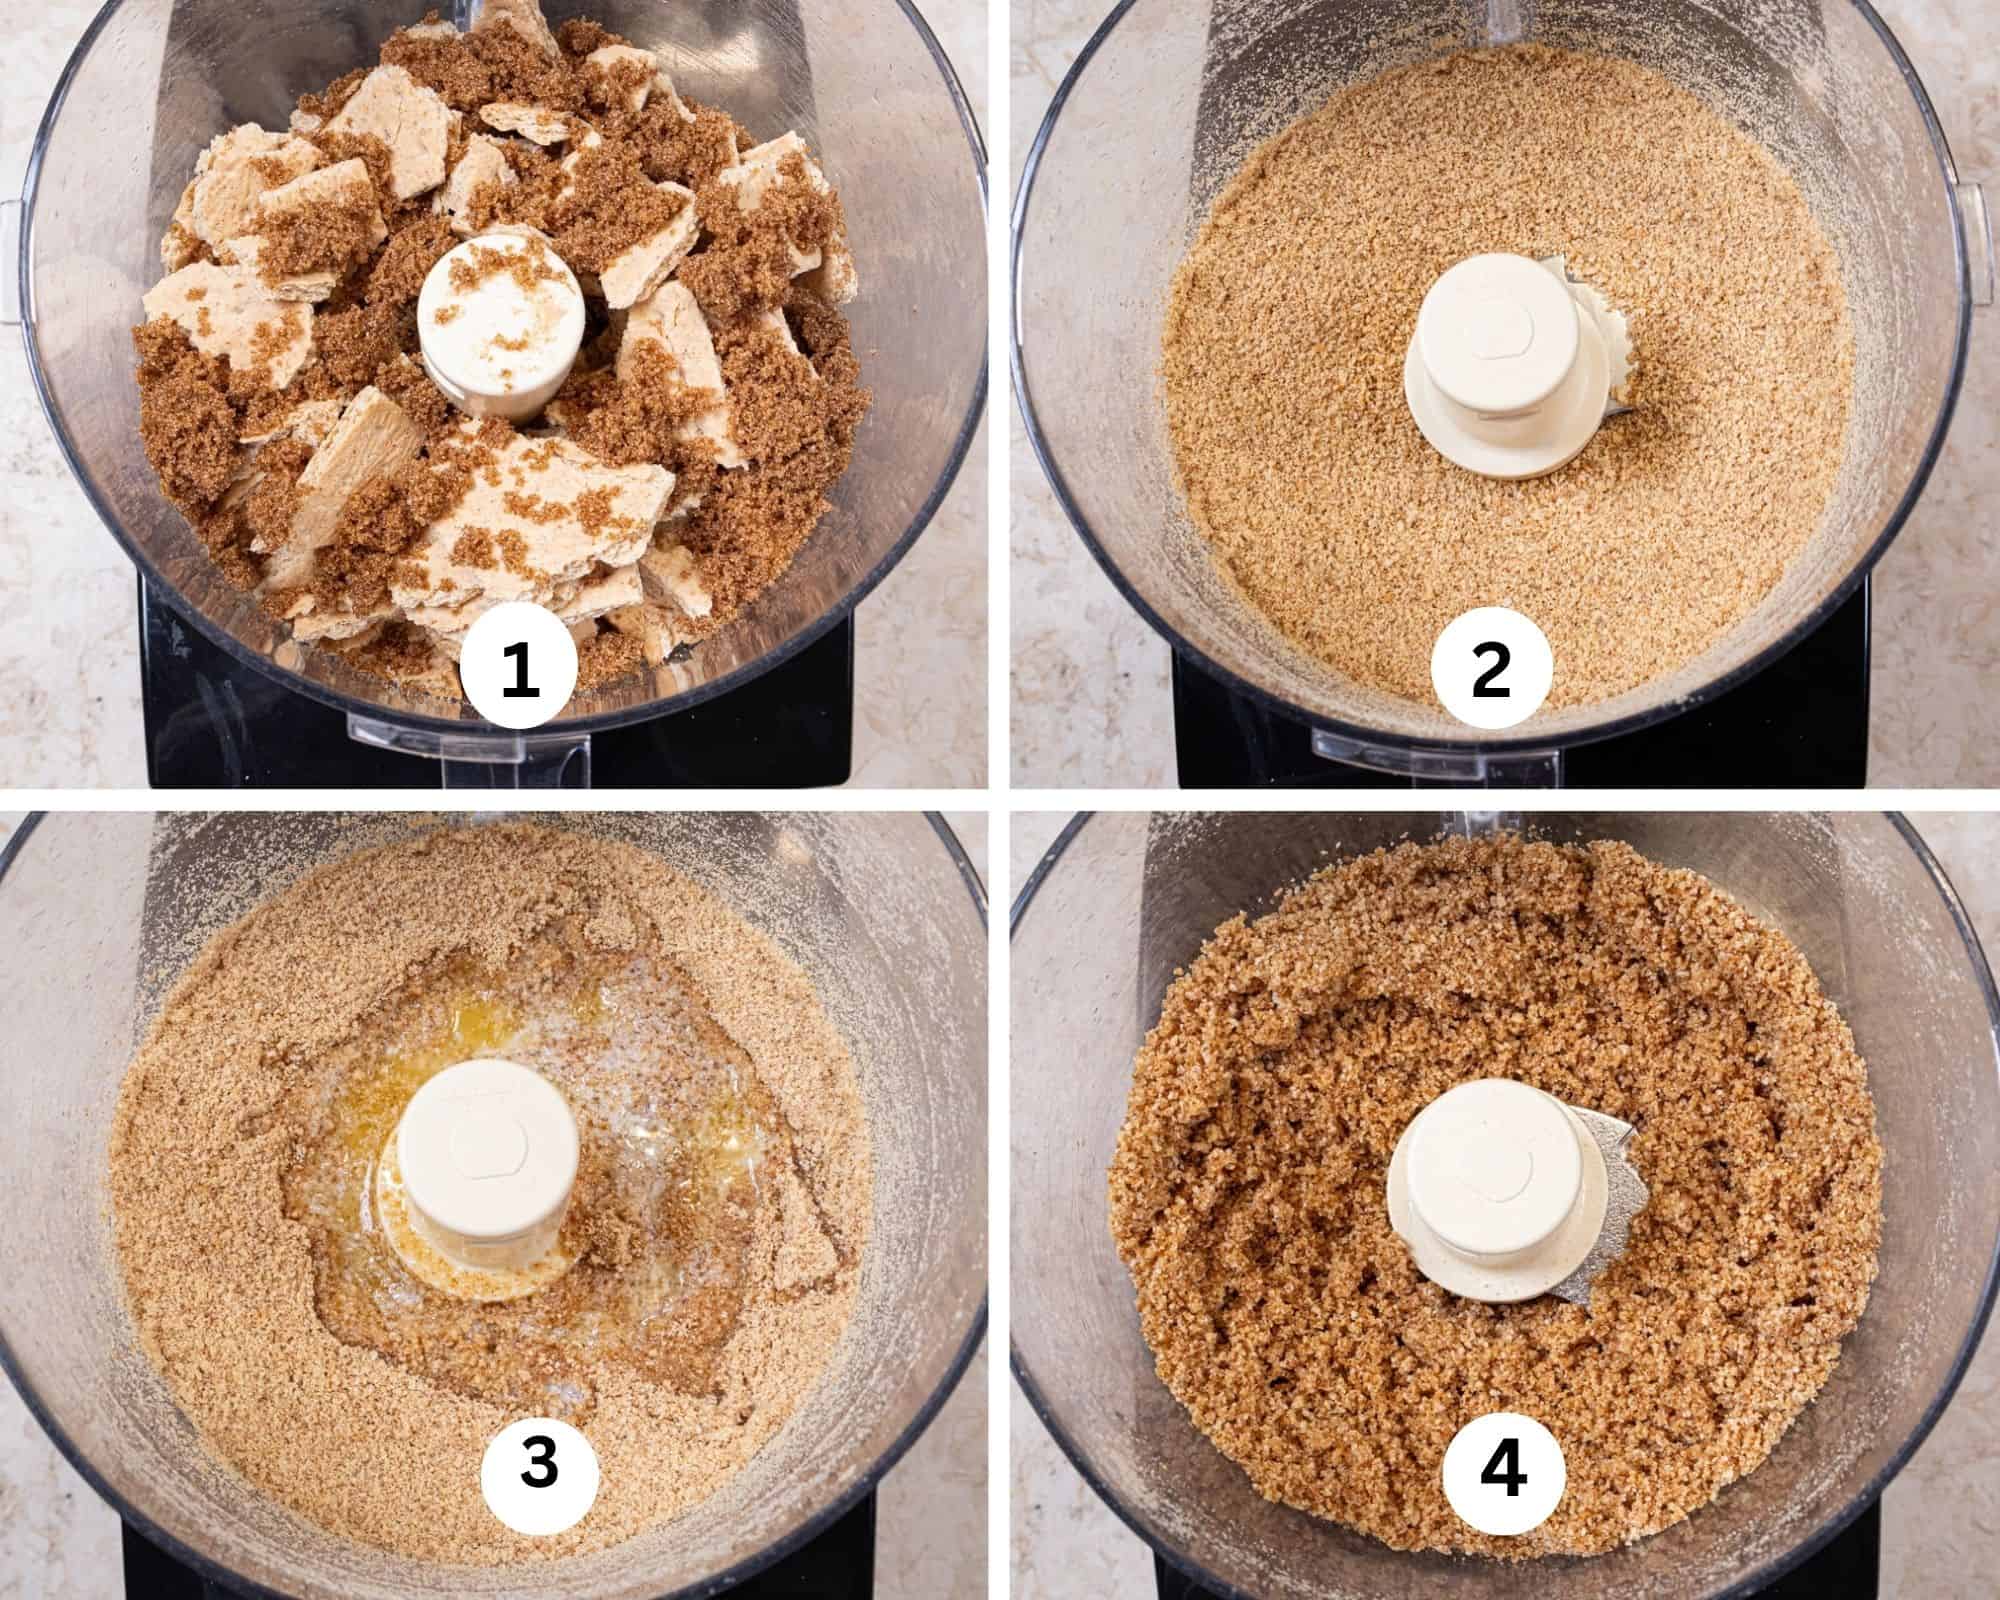
Step 1. Place the graham crackers and brown sugar in the bowl of a processor. Step 2. Process into fine crumbs. Step 3. Add the melted butter. Step 4. Pulse with short bursts until the crumbs are formed. Do not over process.
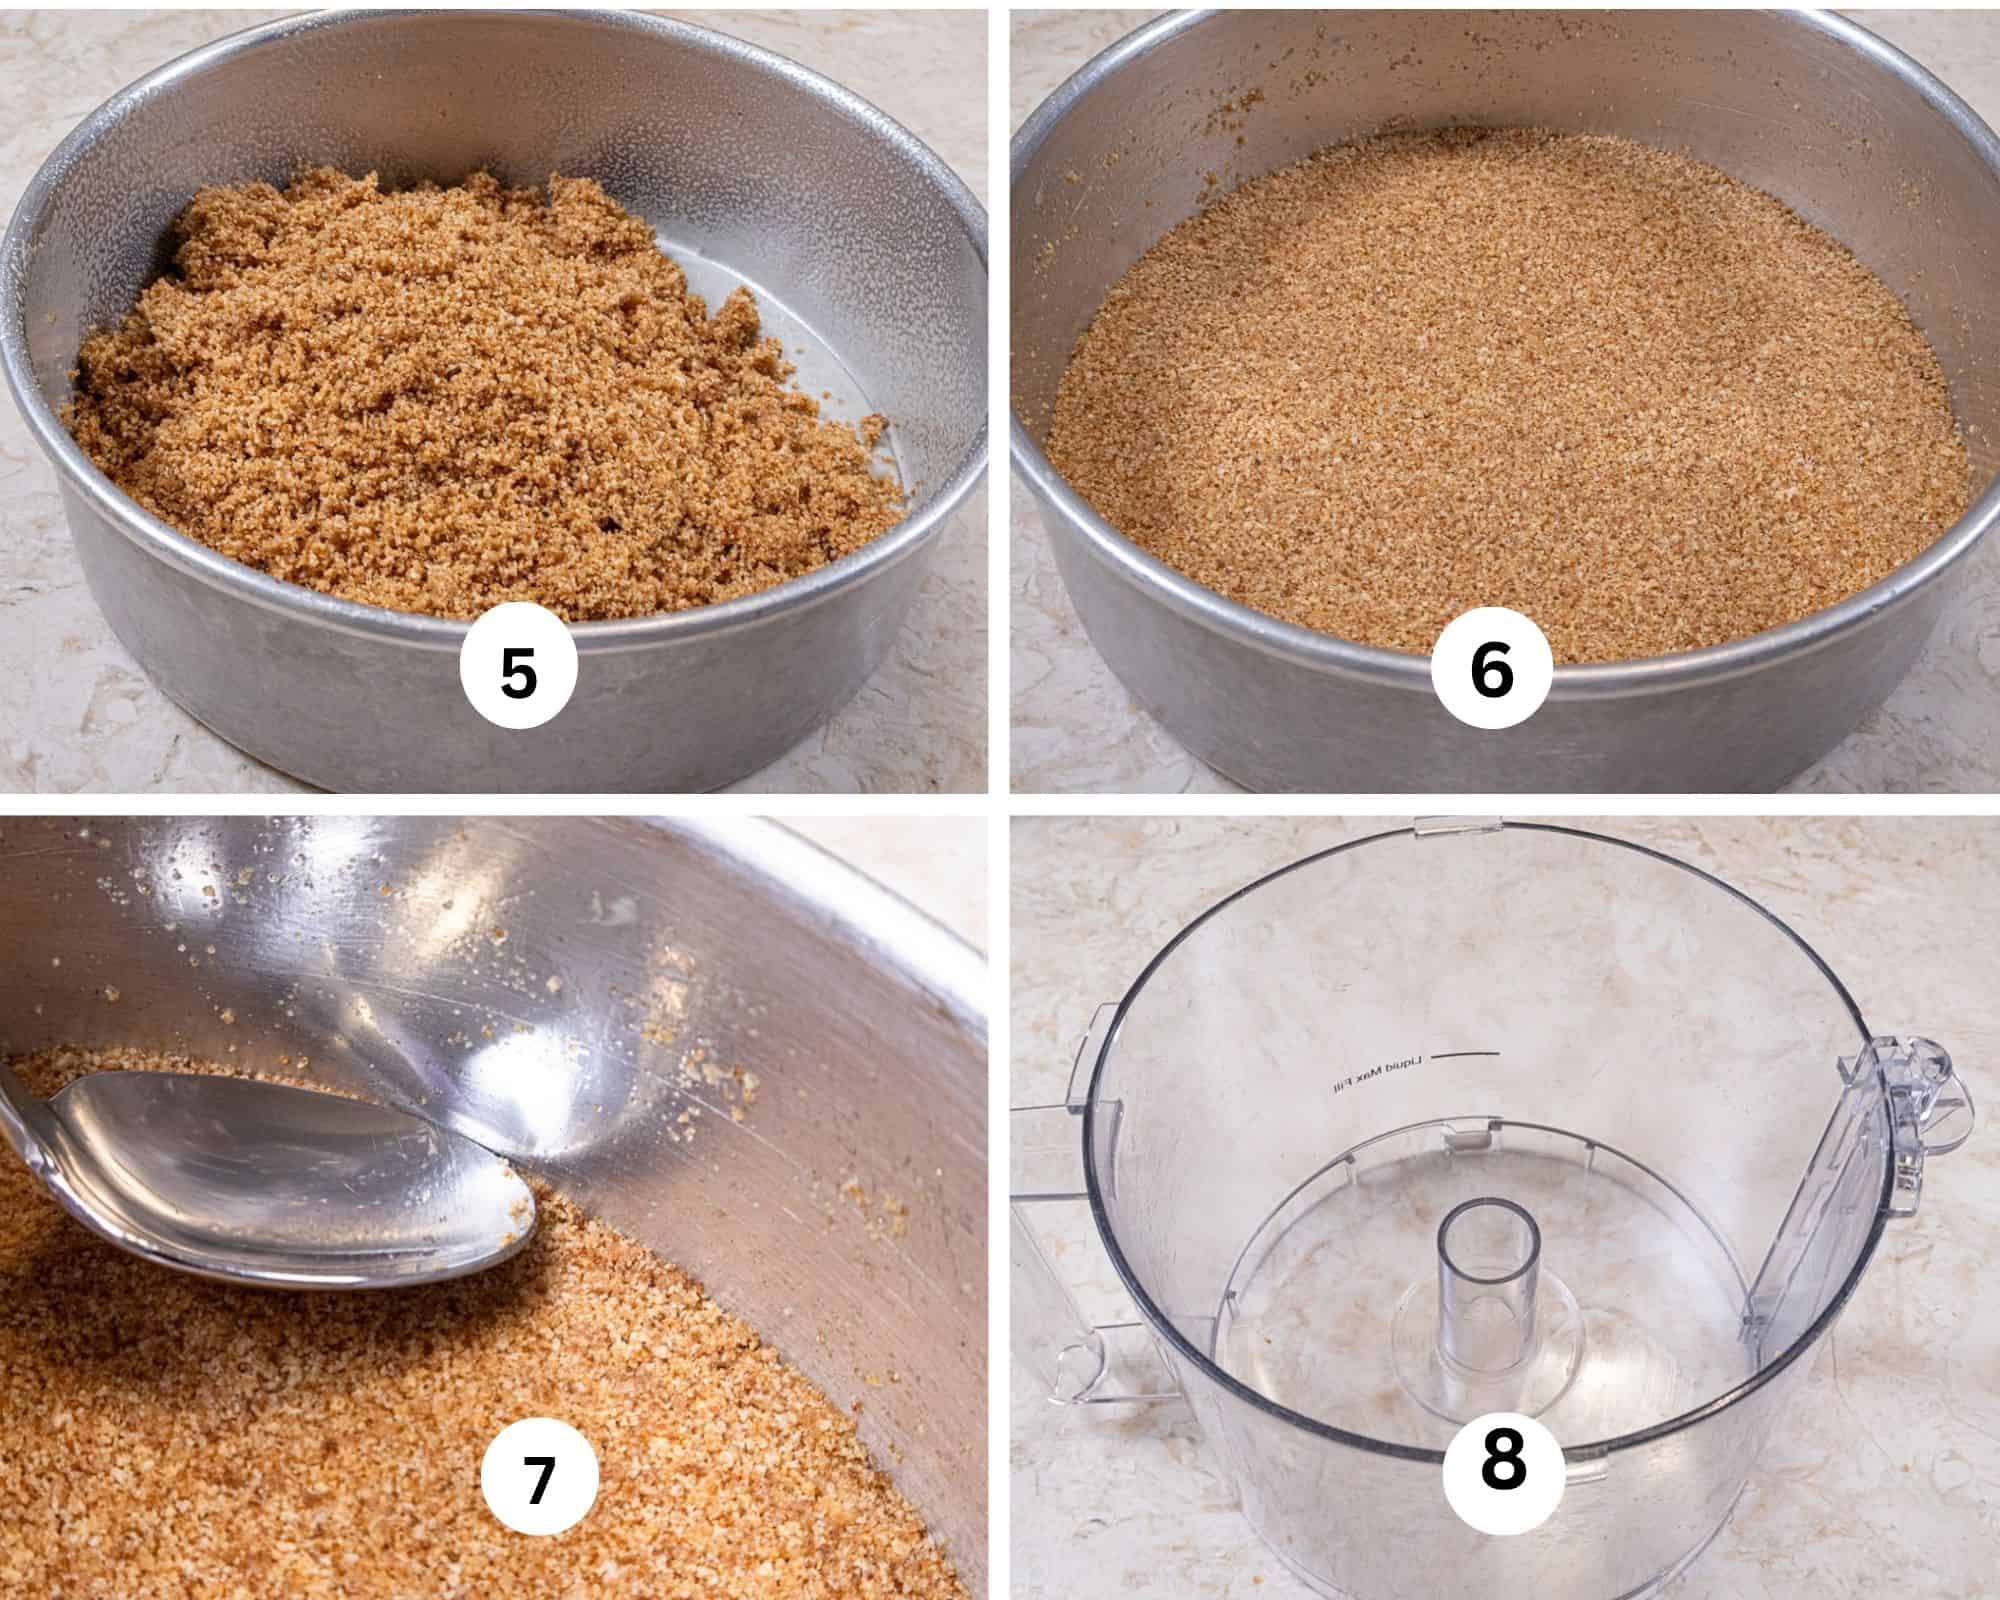
Step 5. Spray the cheesecake pan with a non-stick baking release and pour the crumbs into the pan. Step 6. Press them firmly into the bottom of the pan. Step 7. Spoon the crust by using a side of a spoon to press the crumbs around the edge of the pan firmly against the pan. Set aside. Step 8. Wipe the bowl clean with a paper towel.
Caramel Pecan Cheesecake
Spray a 9"x3" cheesecake or spring form pan with a non-stick baking release and set aside. Toast the pecan pieces at 350°F for about 5 to 7 minutes until fragrant and a little browner. Set aside.
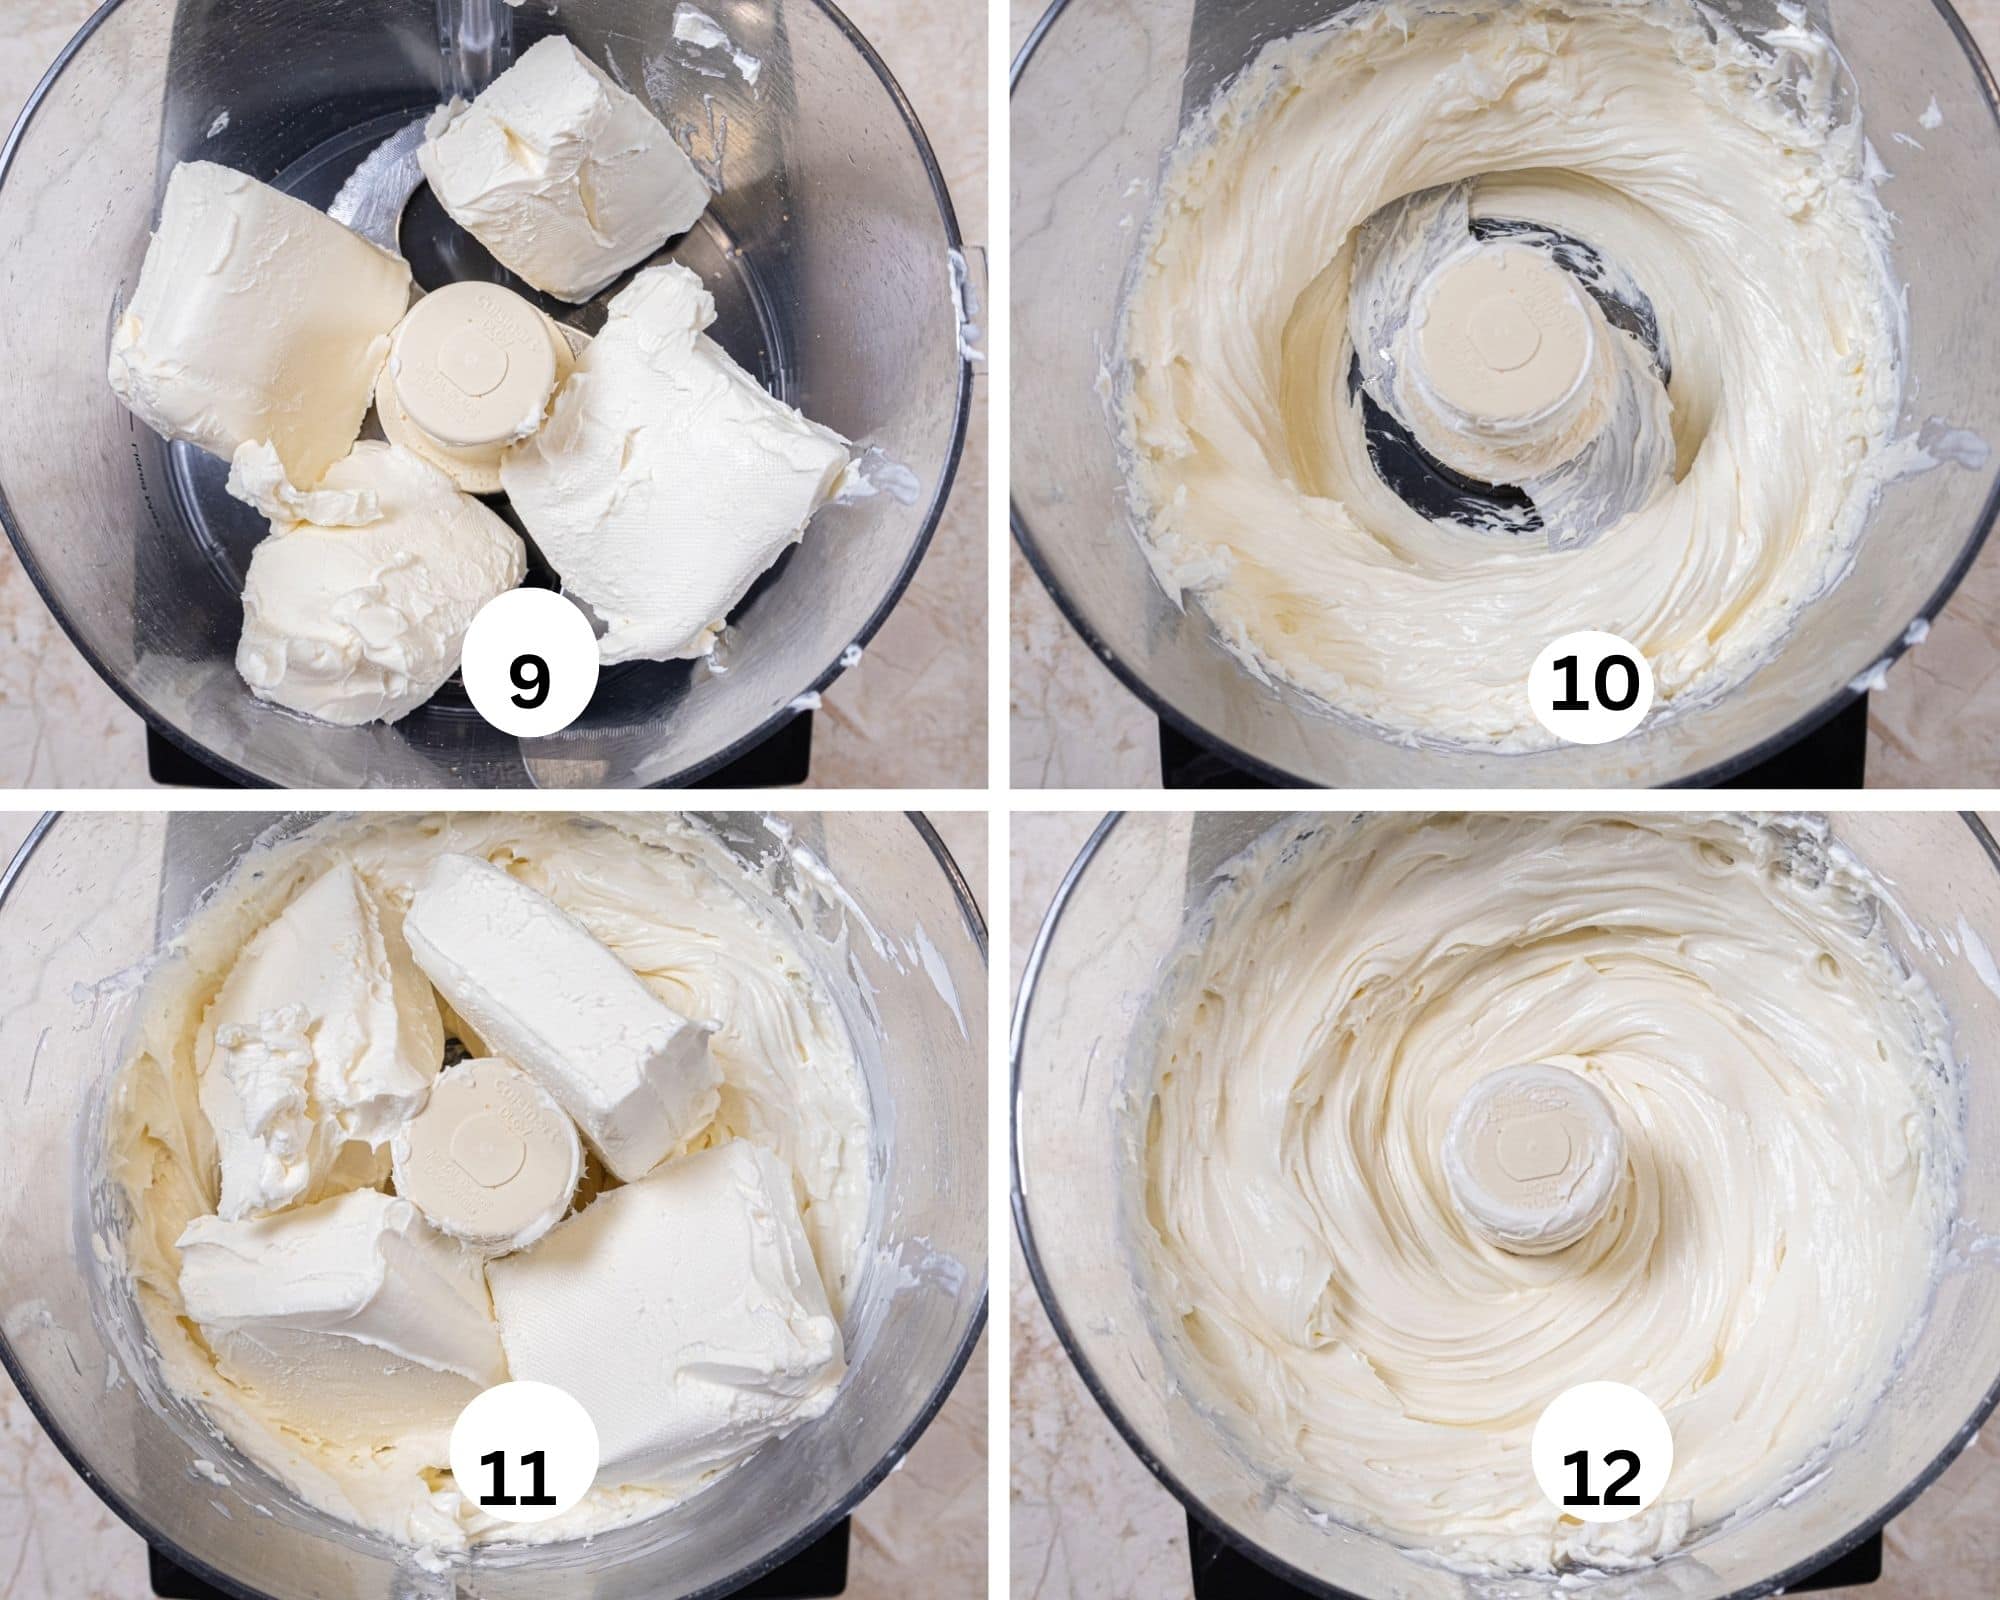
Step 9. Place half of the room temperature cream cheese in the bowl of a processor. Step 10. Process until smooth. Scrape down. Step 11. Place the remaining cream cheese in the processor bowl and process until all is completely smooth. Be sure to scrape down as needed until no lumps remain.
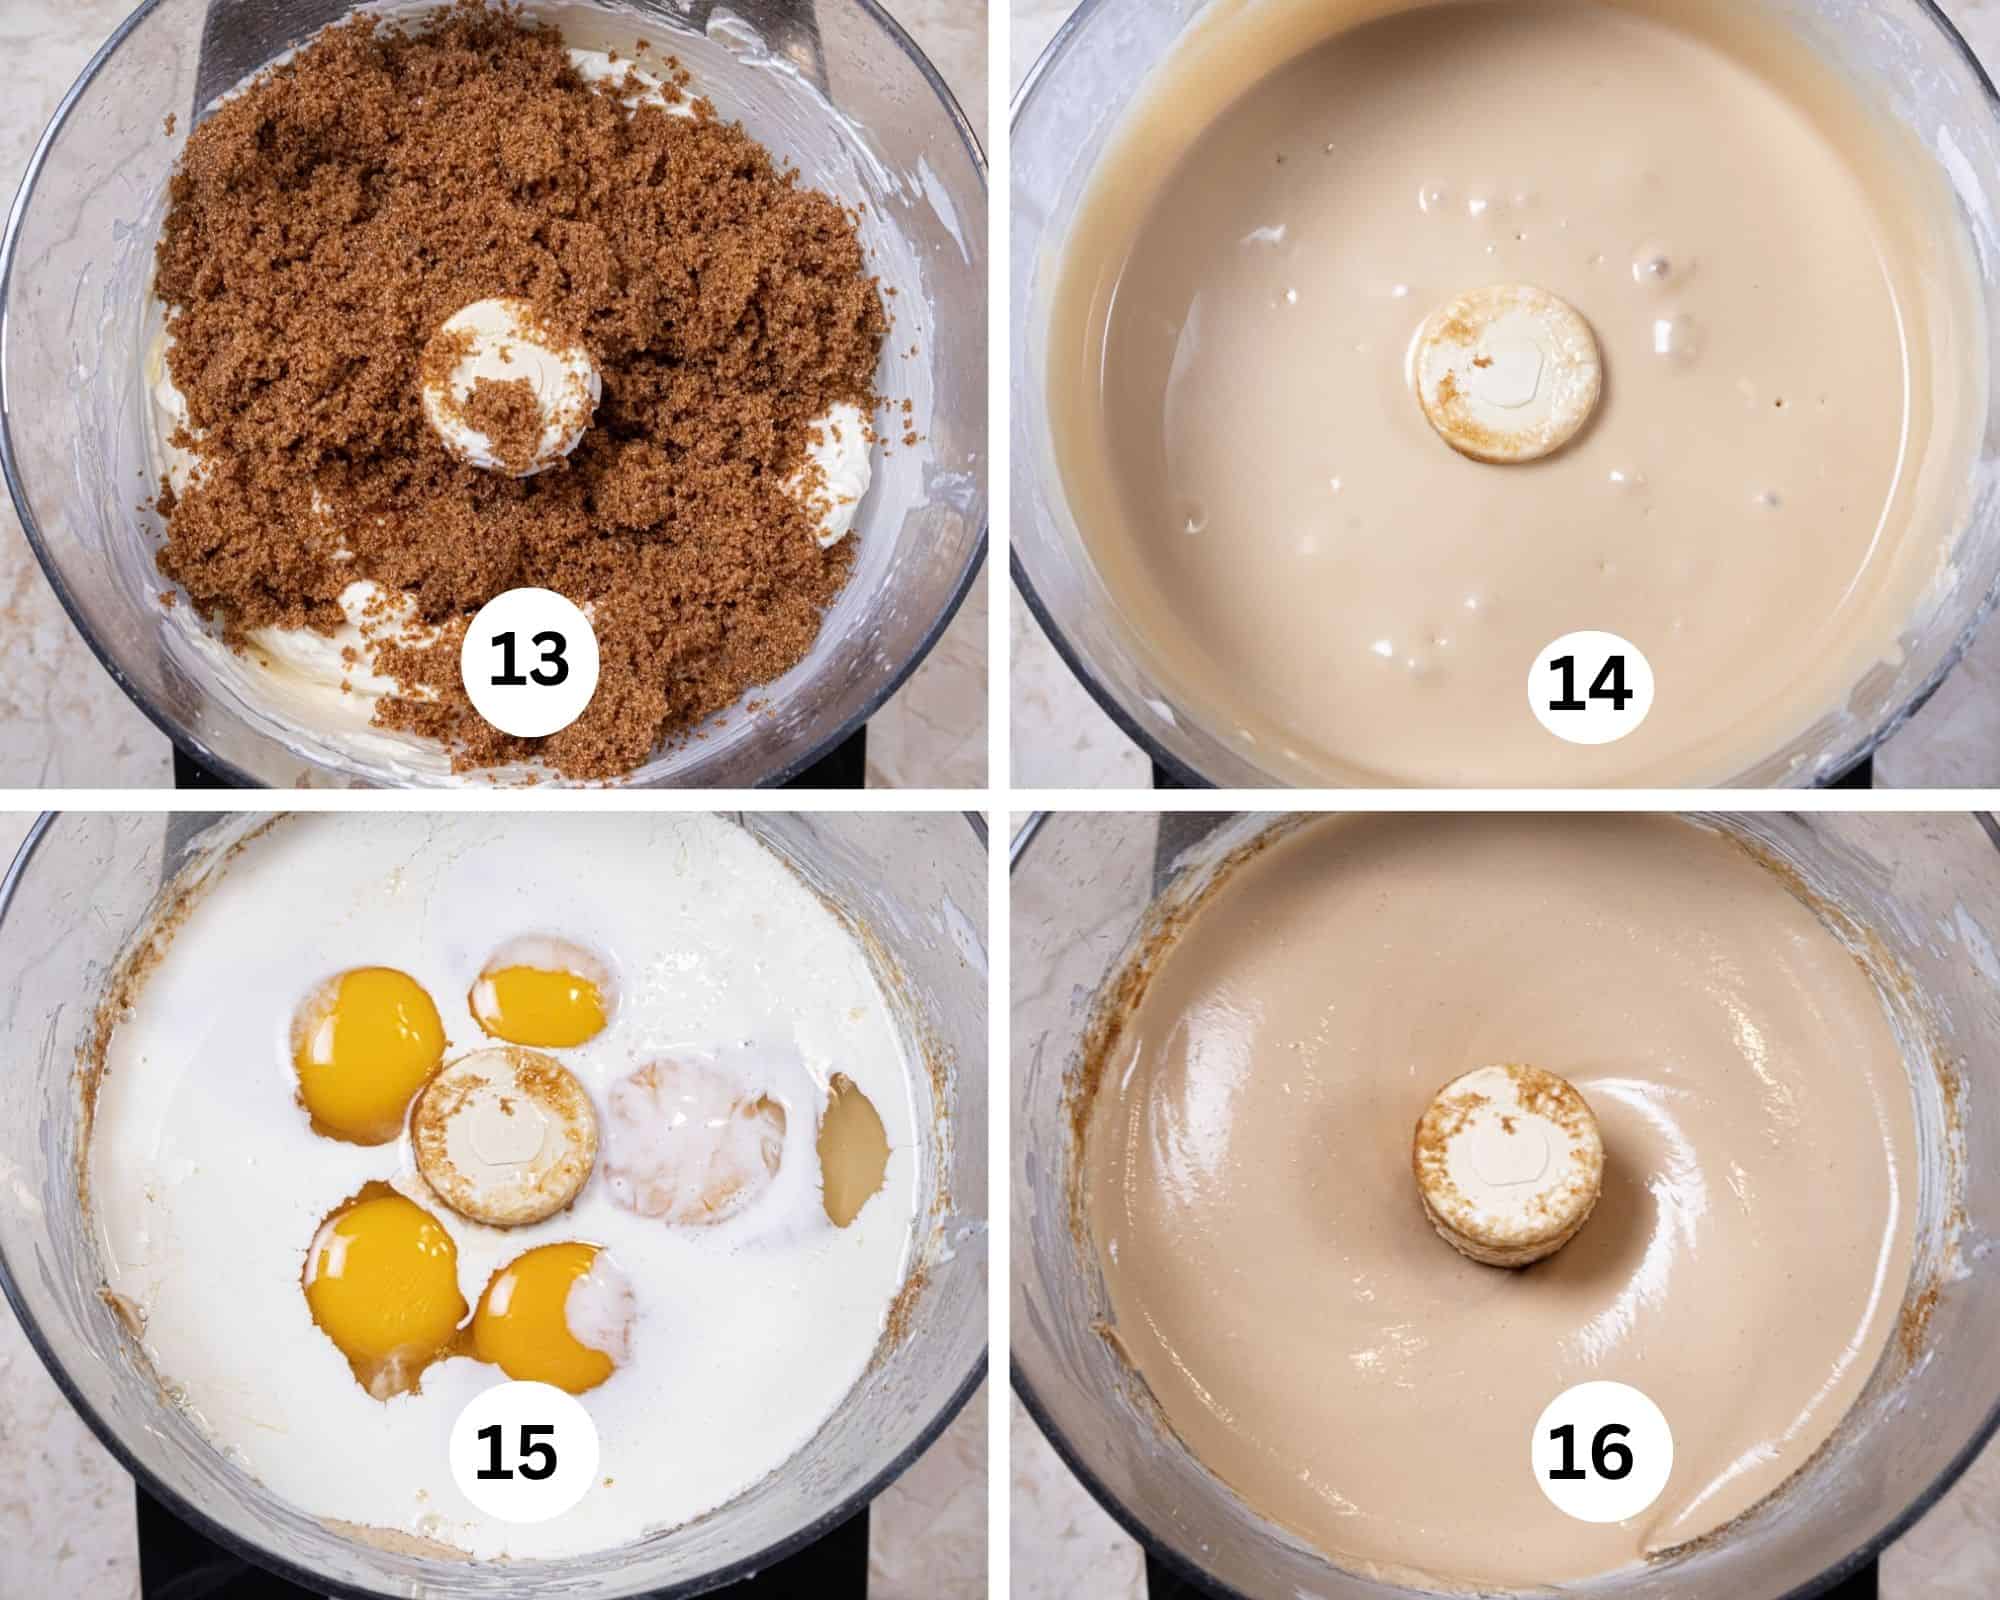
Step 13. Add the brown sugar. Step 14. Process until smooth. Step 15. Add the eggs and cream. Step 16. Process until smooth, making sure to scrape into the bottom of te processor to get a perfectly smooth filling
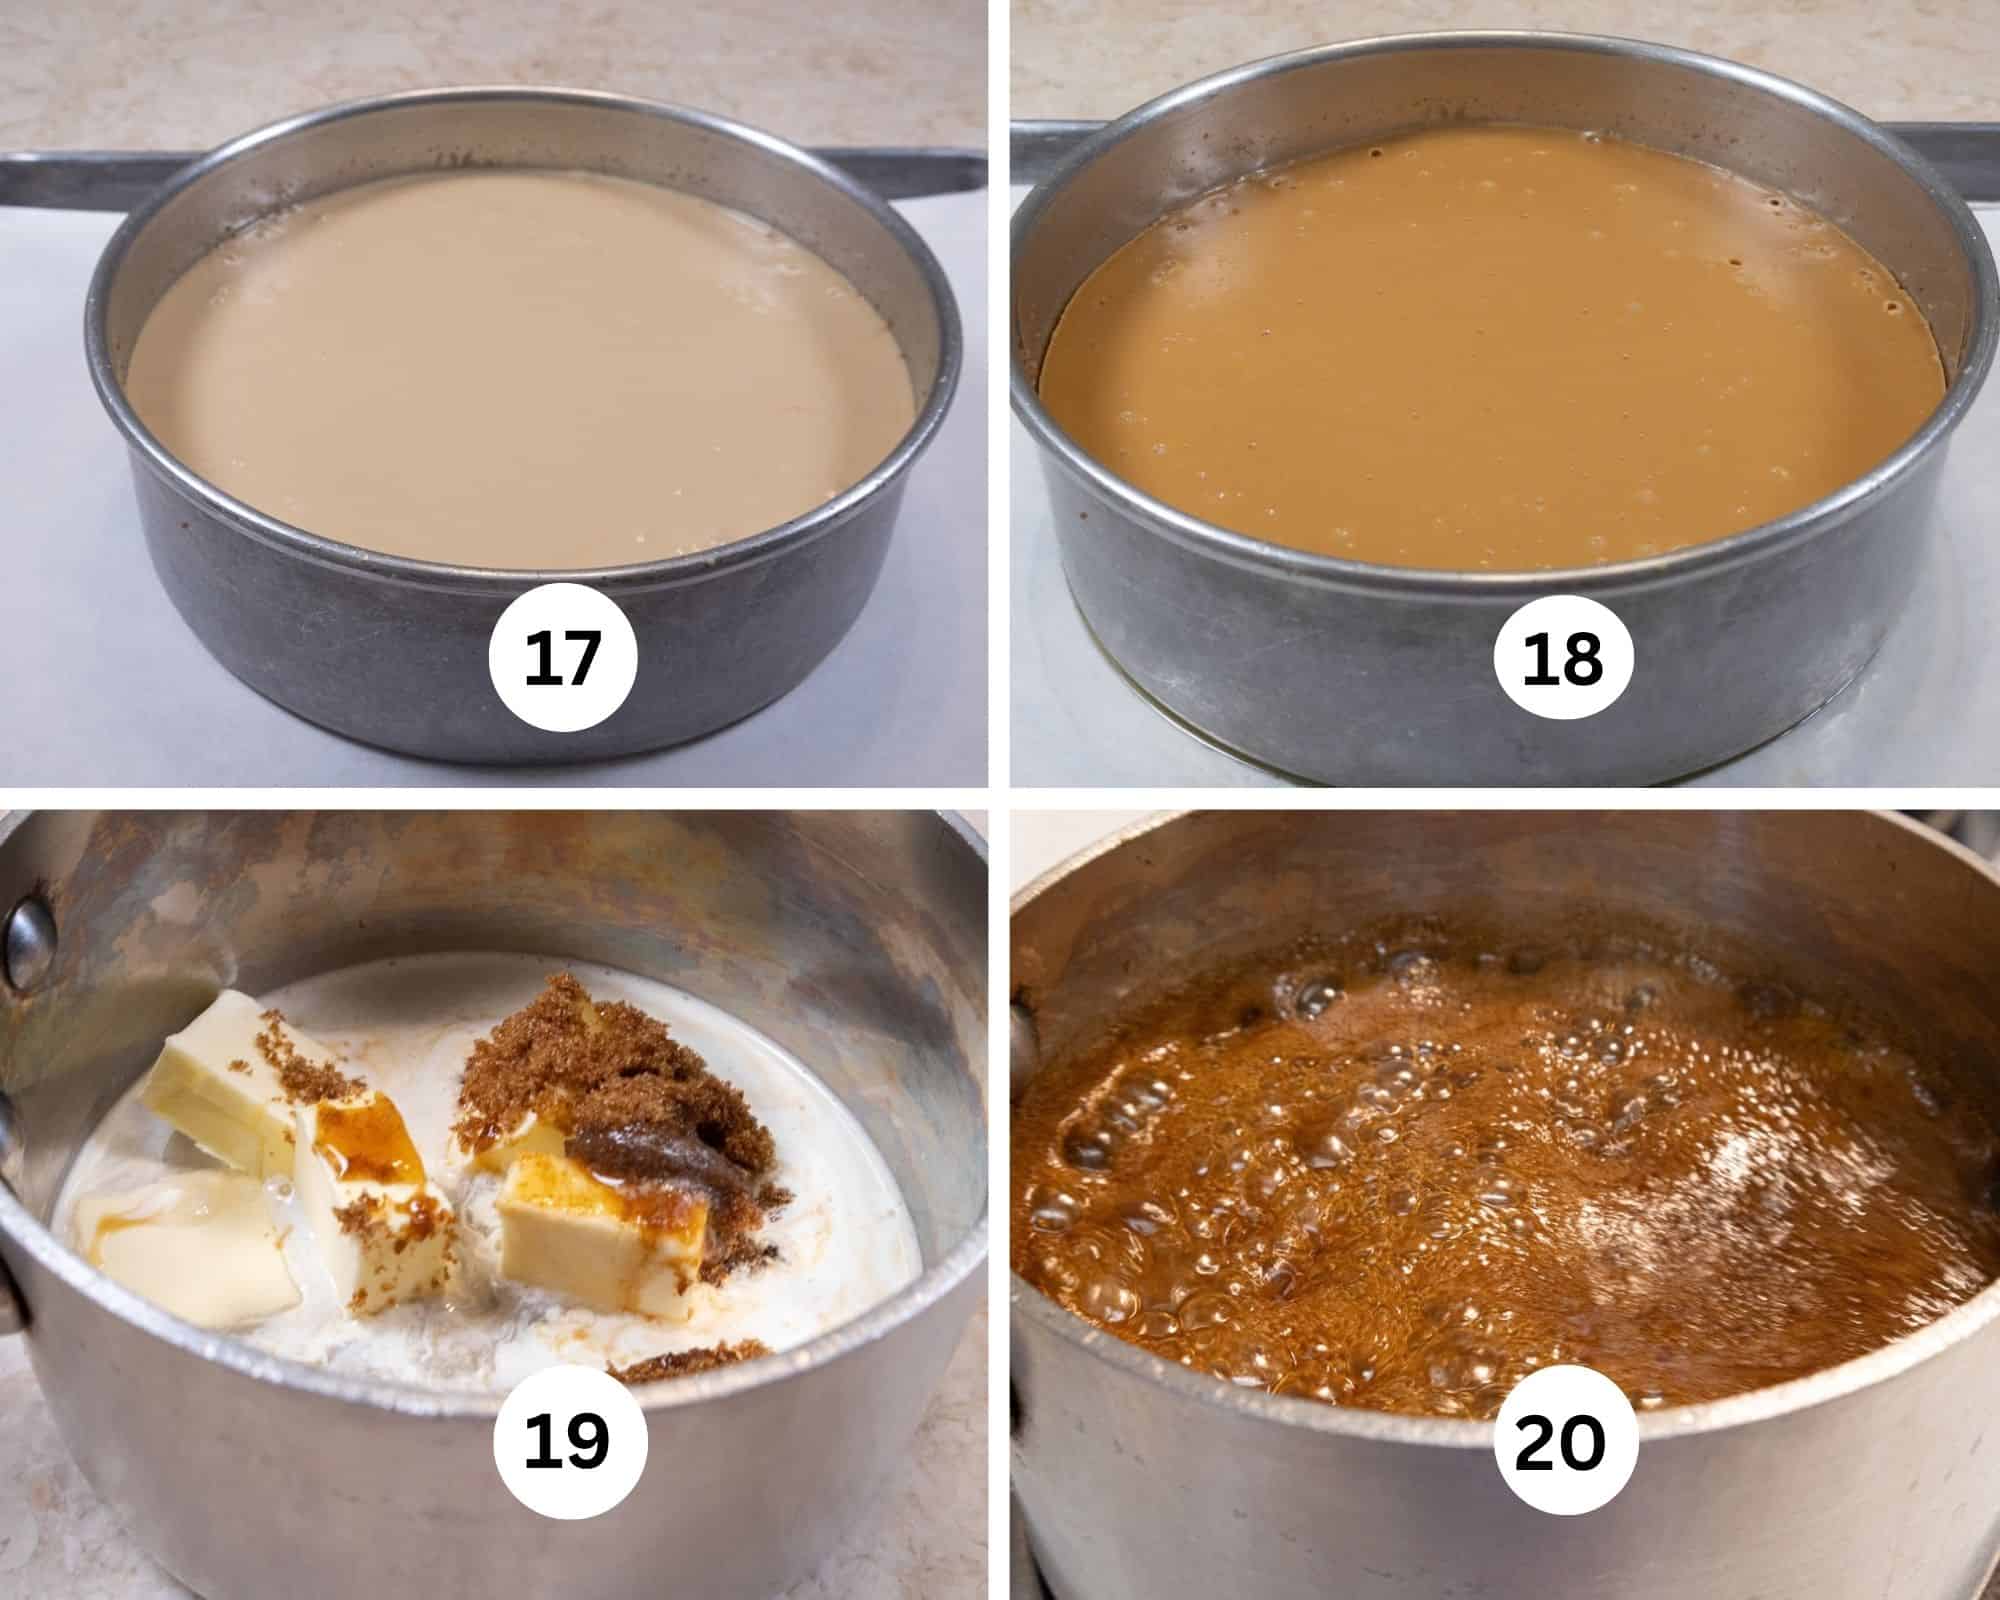
Step 17. Pour the cheese cake into the prepared pan. Step 18. Bake as directed. Cool to room temperature. If the cheese cake is set and firm the caramel can be poured over it. If in doubt, refrigerate until cold and completely set or overnight. Step 19. Place the brown sugar, butter, water, maple syrup and cream in a small saucepan. Mine saucepan held 6 cups. Step 20. Place over medium high heat and bring to a boil. Wash the sides of the pan down with a brush dipped in cold water. This will remove any sugar crystals clinging to the sides of the pan which can cause the entire batch to granulate and become grainy. Boil to a temperature of 234°F.
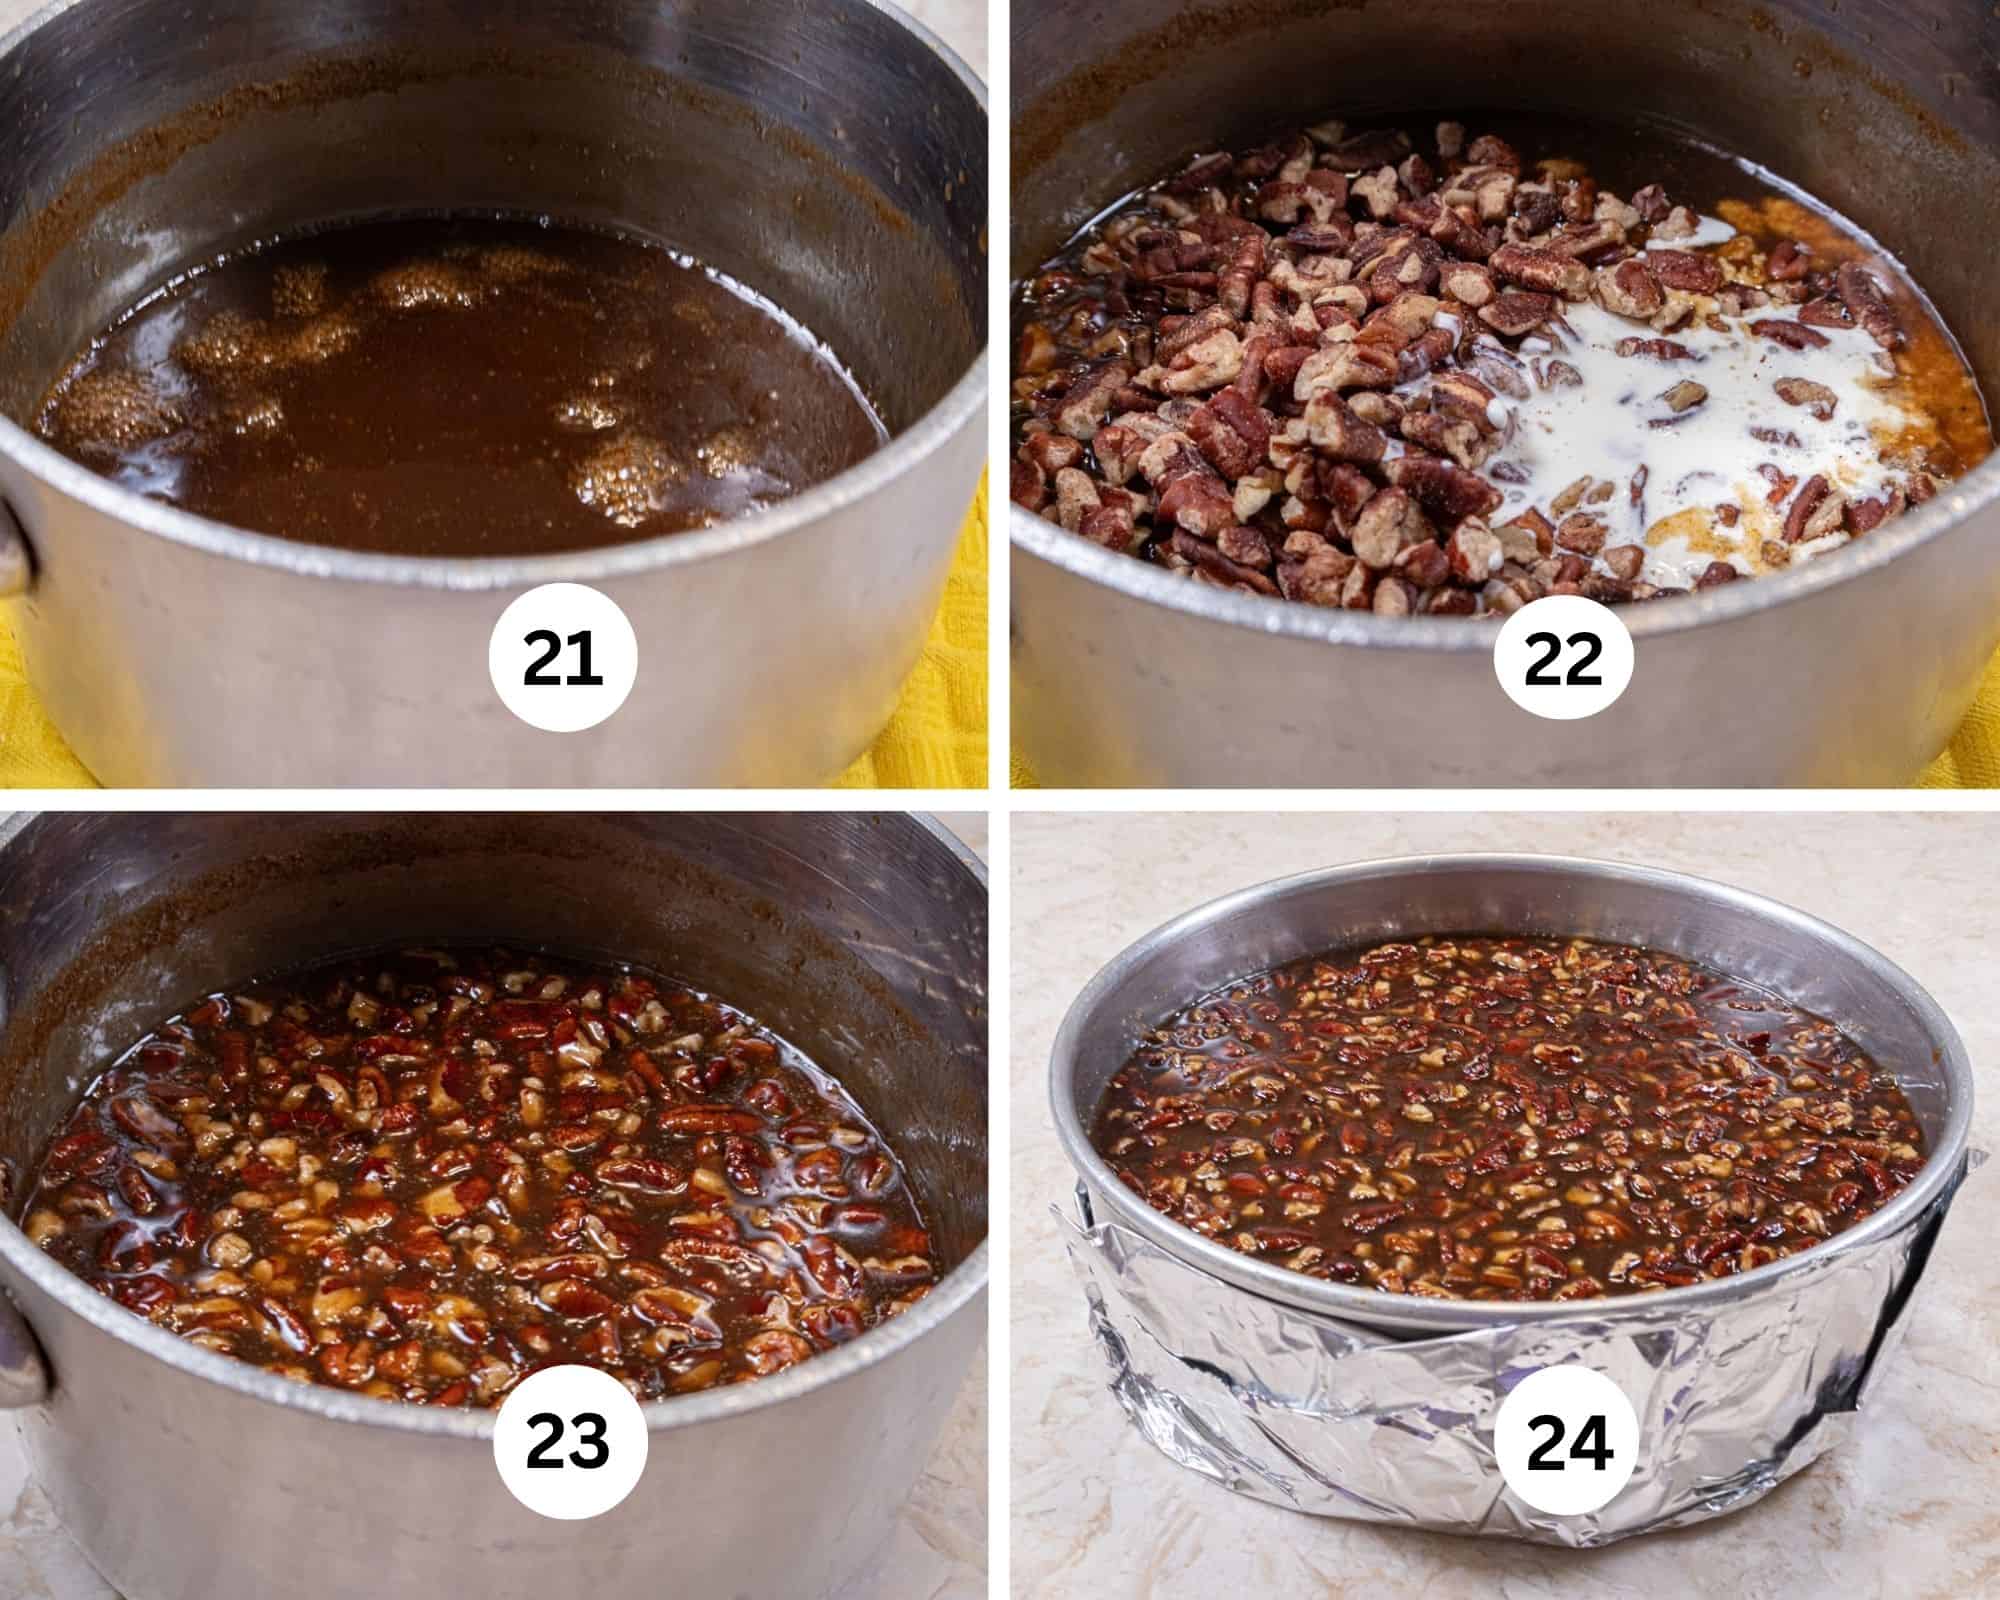
Step 21. Remove the caramel from the heat. Step 22. Add the remaining cream and pecans. Step 23. Stir everything together well. Step 24. Pour over the cheese cake and refrigerate overnight for the caramel to set up.
Releasing a Cheesecake
These photos are of a different cheesecake but the technique is the same.
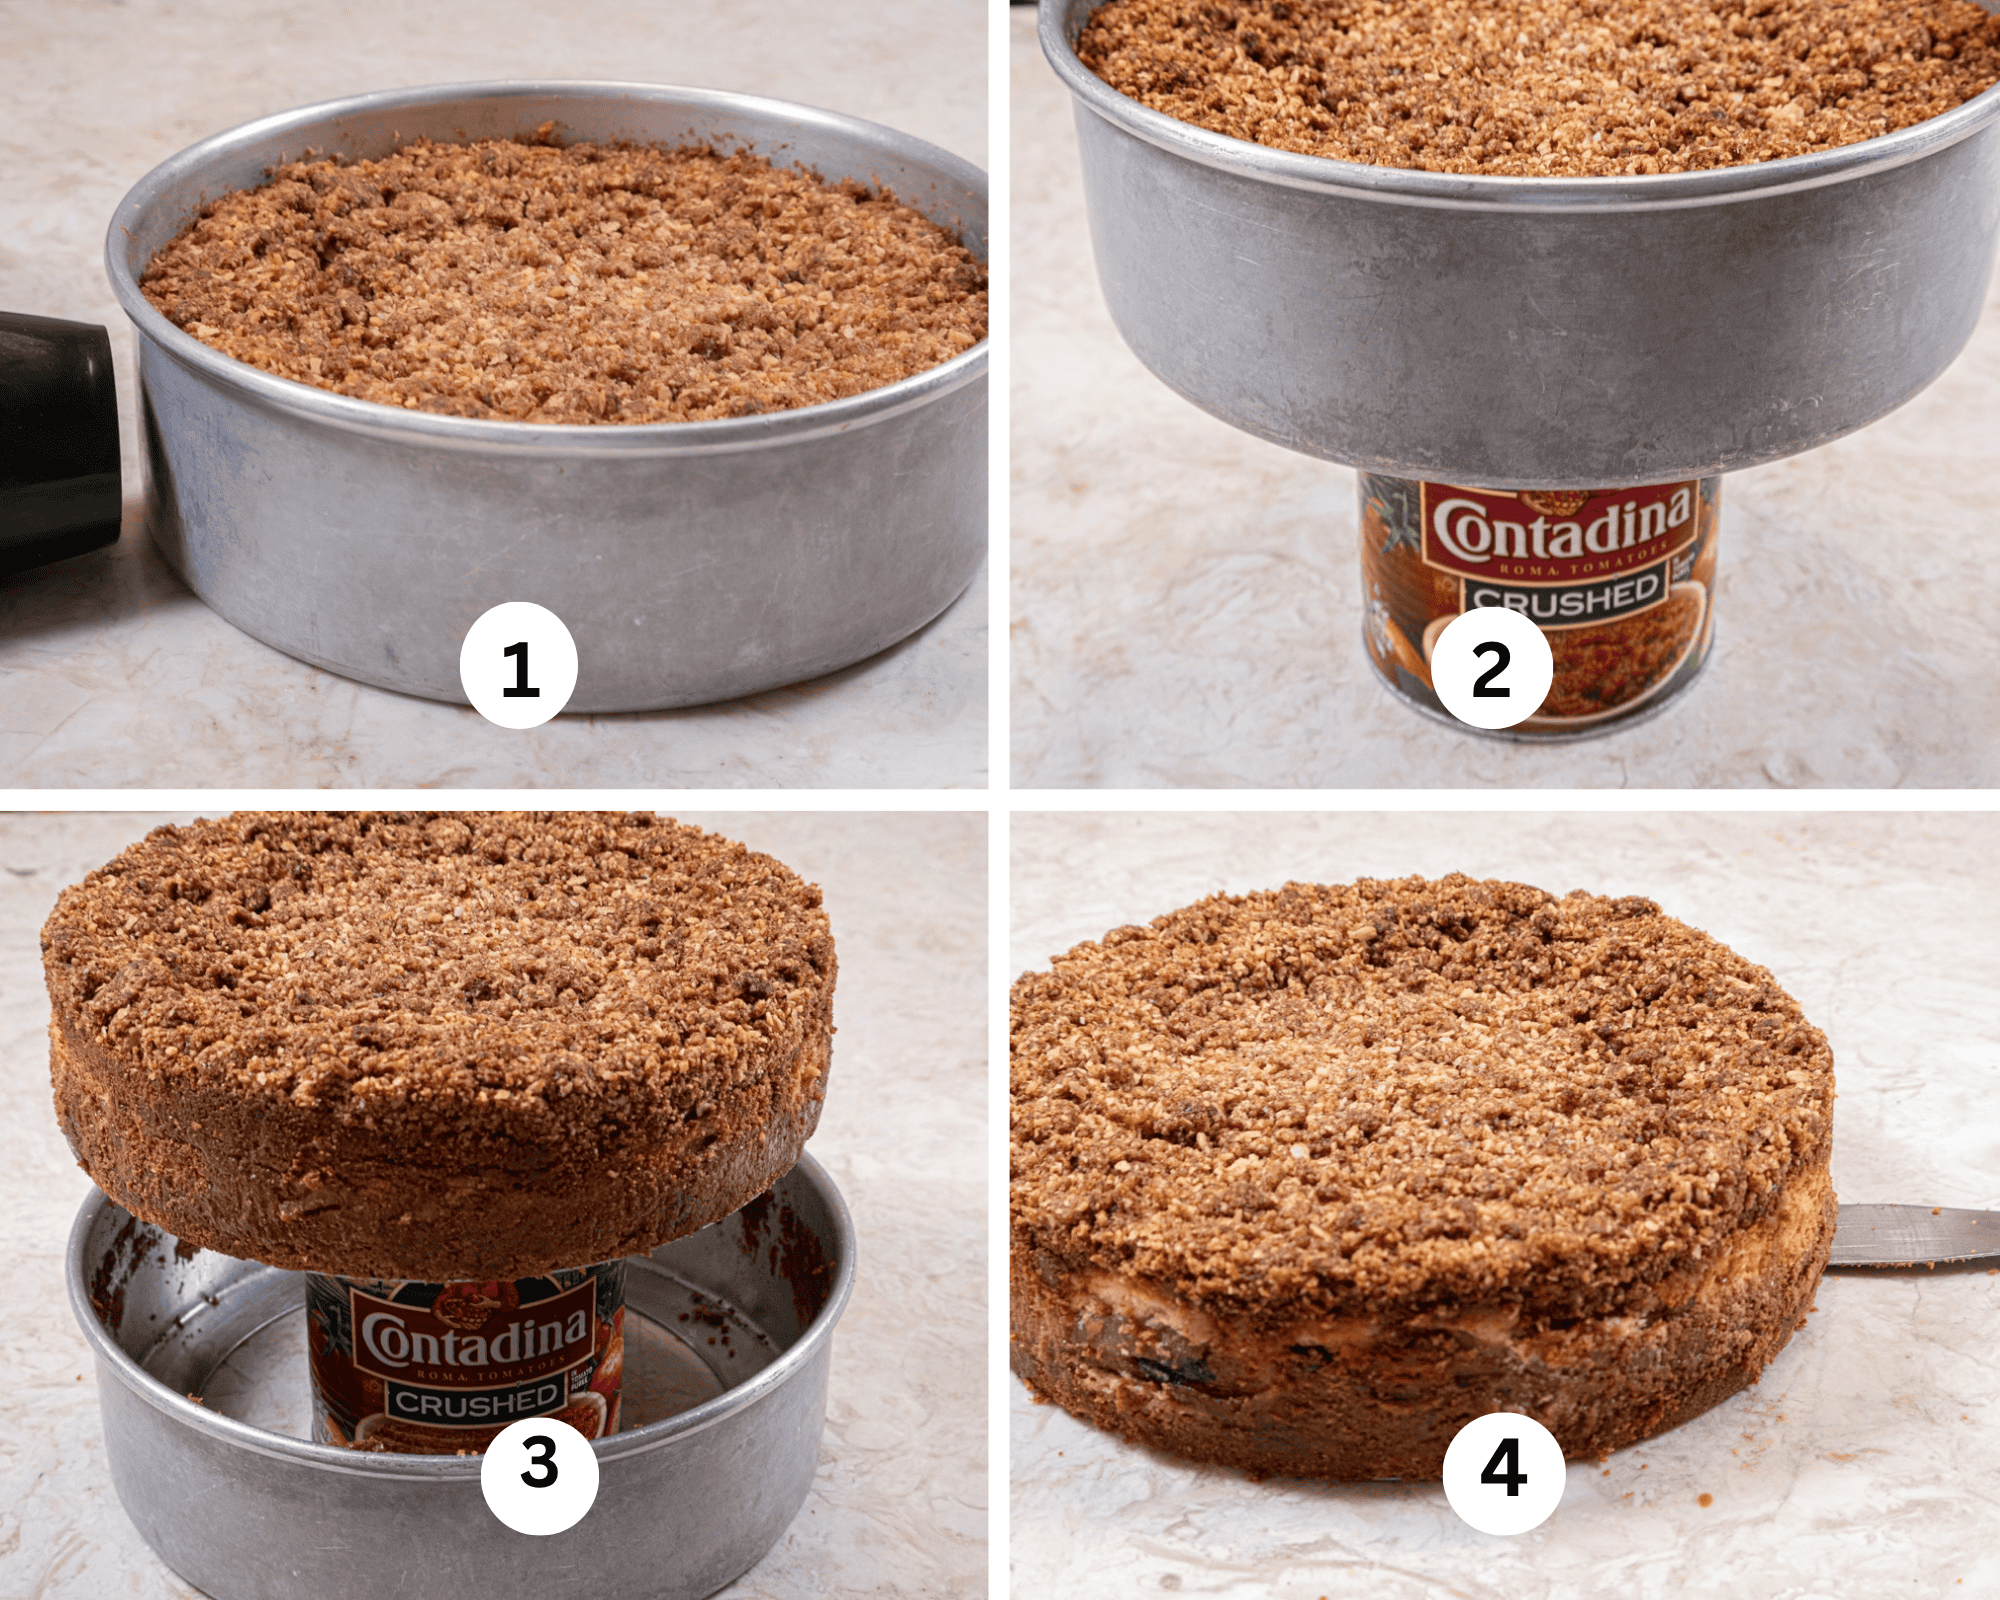
Step 1. The easiest way for home bakers is to use a blow dryer on high to go around the edge of the cheesecake pan. Step 2. Place it on a 28 ounce can of anything, I have a crushed tomato can I use for this. Step 3. Slide the rim down. If it doesn't want to come down, go around it with the blow dryer again. Step 4. Insert a metal spatula between the bottom of the cake and the removable bottom. Go around the entire bottom to make sure it is free. With two pancake turners one on each side, lift the cake to a cake board or serving plate. We did this the exact same way at the bakery.
Recipe FAQ's
Most likely the baking temperature was too high or it was baked too long. It should jiggle slightly in the middle when done. In that case, a water bath would be helpful to slow down the baking. Another alternative is to lower the temperature and bake for a longer time. C
Cheesecakes freeze really well in most cases with the exception of those with a sour cream topping. It cracks when thawed.
Don't worry about it. It will still taste good. If it bothers you, cover it up. Depending upon what kind it is, cover it with a chocolate ganache, sour cream topping, fruit or whipped cream.
Expert Tips
- When scraping the bowl of the processor, make sure to use a hard plastic spatula and get all the way to the bottom so no unincorporated cream cheese ruins the creamy texture.
- Either dark or light brown sugar can be used, but dark will give a more intense caramel taste,
- It is important to take the caramel pecan topping to 234°F for it to set up properly,
- Use toasted pecans for the best taste,
- The test for a baked cheesecake is that it will jiggle slightly in the very middle. Over baking at this point can cause a cheesecake to crack, especially at higher temperatures.
- Have the cream cheese at room temperature before processing to avoid lumps.
Looking for a few More Cheesecakes?
A lot of work goes into each of my recipes and my only ask is that if you like the recipe or even the looks of it, please leave me a star rating to help me rank better. It’s important and I appreciate it and I appreciate you.
This Caramel Pecan Cheesecake Is Pure Fall Indulgence
Equipment
- 9"x2" or 3" cheesecake or springform pan
- Food Processor
- Food thermometer
Ingredients
Graham Cracker Crust
- 1 1/3 cups graham cracker crumbs (190 grams)
- 1/4 cup brown sugar, packed (50 grams)
- 6 tablespoons unsalted butter, melted (90 grams or 3/4 stick)
Caramel Pecan Cheesecake
- 2 pounds cream cheese, room temperature (910 grams or 4-8 ounce packages
- 1 cup brown sugar, packed (200 grams)
- 5 large eggs
- 1/3 cup heavy cream
Caramel Pecan Topping
- 1/2 cup brown sugar, packed (100 grams)
- 6 tablespoons unsalted butter (90 grams or 3/4 stick)
- 1/4 cup water
- 2 tablespoons maple syrup, golden syrup or clear corn syrup
- 1/4 cup heavy cream, divided
- 1 cup pecan pieces (150 grams)
Instructions
Graham Cracker Crust
- Spray a 9"X 2" or 3" cheesecake pan or springform mold with a non-stick baking release. Set aside.
- Break up the graham crackers and add them to the food processor along wiht the brown sugar. Process to form fine crumbs.
- Add the melted butter and pulse to form crumbs. Do not over process or it can become paste.
- Pour them into the prepared pan and press them firmly onto the bottom. Spoon the crust by using a side of a spoon to press the crumbs around the edge of the pan firmly against the pan. Set aside.
- Wipe the bowl and blade of the processor clean with paper towels. There is no need to wash it.
Caramel Pecan Cheesecake
- Preheat the oven to 200°F.
- Place half of the cream cheese in the rocessor and process until it is smooth. Scrape down
- Add the remaining cream cheese and process again until smooth. Scrape down being sure to get to the bottom of the bowl.
- Add the brown sugar and process again.
- Add the eggs and cream and process until all is smooth without lumps. Scrape down as necessary.
- Pour into the prepared pan. Place it on a parchment line rimmed pan ( a sheet pan works well here. Bake for 2 1/2 to 3 hours until the cheesecake jiggles slightly in the middle.
- Allow to come to room temperature. It should be firm enough to add the topping but if in doubt, refrigerate until firm.
Caramel Pecan Topping
- When the cheesecake is firm, combine the brown sugar, butter, water, maple syrup, and 2 tablespoons of cream in a 6 cup saucepan. Bring to a boil over medium heat.
- Wash down the sides of the pan with a pastry brush dipped in cold water. This will prevent any sugar granules from crystalizing when cold making the caramel grainy.
- Boil until it reaches 234°F on a food thermometer. Spread it out so the pecans are evenly distributed. Chill overnight or for a couple of days before serving.
- To release the cheesecake if using a cheesecake pan, go around the outside of the pan with a blow dryer set on high. Set it on a 28 ounce can and slide the bottom down. Place a metal spatula between the crust and the bottom of the pan. Go around the entire removable bottom to make sure it is free. Lift if off with 2 pancake turners and place on a cake board or serving plate.
- At this point it can be refrigerated or frozen, wrapped and kept for 2 months. Thaw, still wrapped, in the refrigerator.
Notes
Nutrition

Leave a Reply