
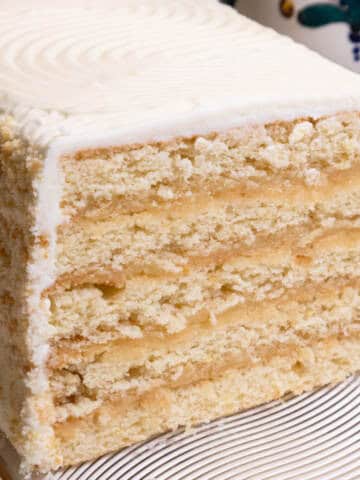
This Yellow Buttermilk Cake is a complete remake of my original one and is one of the easiest cakes to make. The layers are a full 1 ½ inches tall reaching almost to the top of the cake pan for a spectacular presentation. As a high ratio cake, it is basically two steps and into the oven it goes. This is as close to fool-proof as a cake can get.
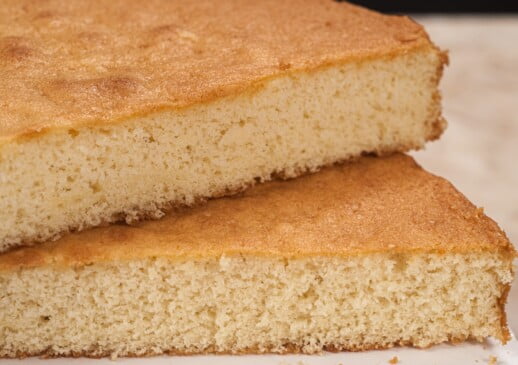
This Yellow Buttermilk Cake is very tender, light and stays moist for days. It is easily scaled up and accepts any number of filings. The batter is thick, velvety and luxurious. If you've ever been intimidated by making cake, this is the one to make.
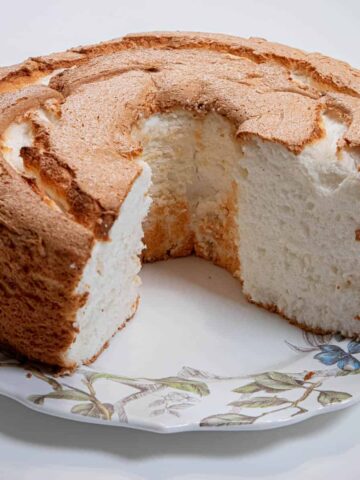
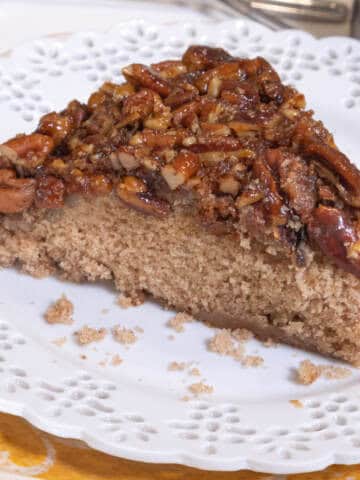
If you enjoy classic homemade cakes, you'll also love this Pecan Upside Down Cake.
Jump to:
What is a High Ratio Cake
High ratio cakes require the sugar to be equal to or exceed the amount of flour by weight not by volume. It's also the quickest way to make a butter cake. Not every cake can be mixed this way.
Basically, part of the wet ingredients are held out and mixed together. The dry ingredients are added to the mixing bowl along with part of the liquid and all of the very soft butter. After about a 2 ½ minute mix the wet ingredients are added in thirds, mixed for30 seconds each and that's it. Into the pans it goes. It just doesn't get any easier or any better.
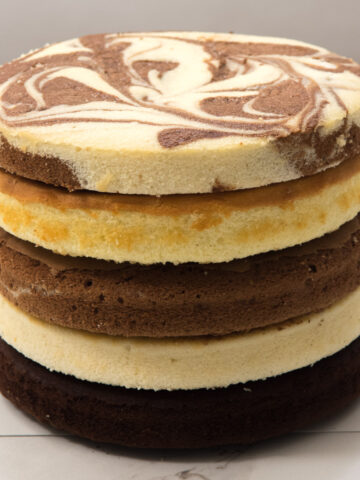
Another great example of high ratio cakes on my site are From One Recipe Comes Multiple Layers.
How to Bake a Flat Cake Layer
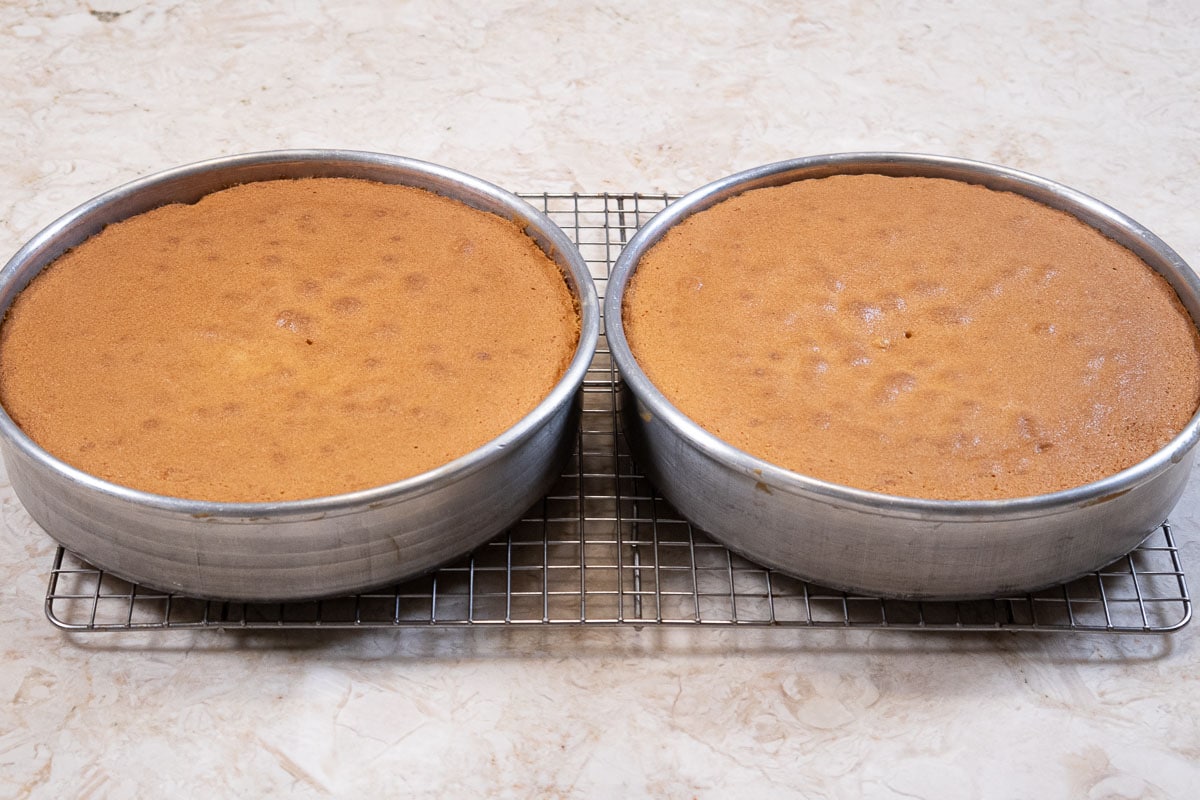
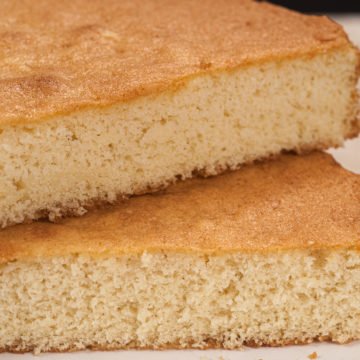
At the bakery, we didn't have time to trim humpy cakes flat so I came up with a method to insure flat layers. It is based on the way an angel food cake is baked. Angel food cake pans are not prepared in any way. The batter is just added to the pan, smoothed out and baked. By sticking to the sides of the pan, the cake cannot slide down the side as it does in a greased pan.
Cake Pan Prep guides you to the perfect, flat cake layers every time. It's all in how the cake pan is prepared.
How to Finish the Cake
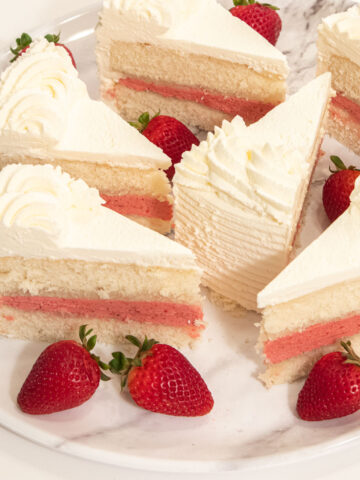
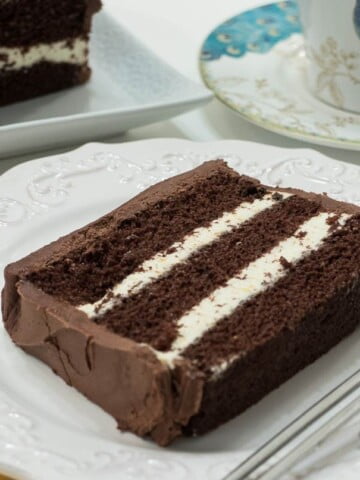
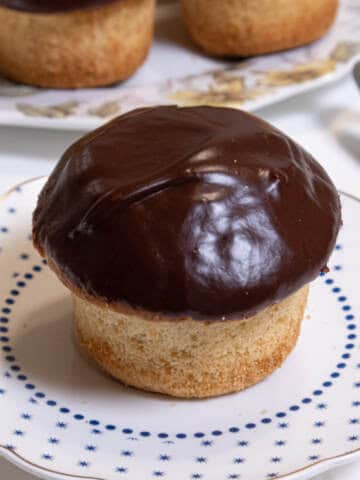
Although chocolate filling and frosting are often used with the Yellow Buttermilk Cake which is said to be the favorite birthday cake, there are many ways to finish this cake. Here are a few for to get you started: Spirited Chocolate Buttercream, Strawberry Buttercream, any flavor of Swiss or Italian Buttercream, French Buttercream. There is more information in All Manner of Buttercreams.
Why You'll Love this Cake
- There isn't an easier Yellow Buttermilk Cake to make. Basically two steps and it's done.
- The texture and taste are unbeatable.
- It can accept any number of fillings and finishes as you prefer.
- The layers can be frozen for later finishing.
- The recipe can be easily scaled up to any size required. See Pan Size Conversions and The Secret of the 9 Inch Cake Pan.
Recipe Ingredients
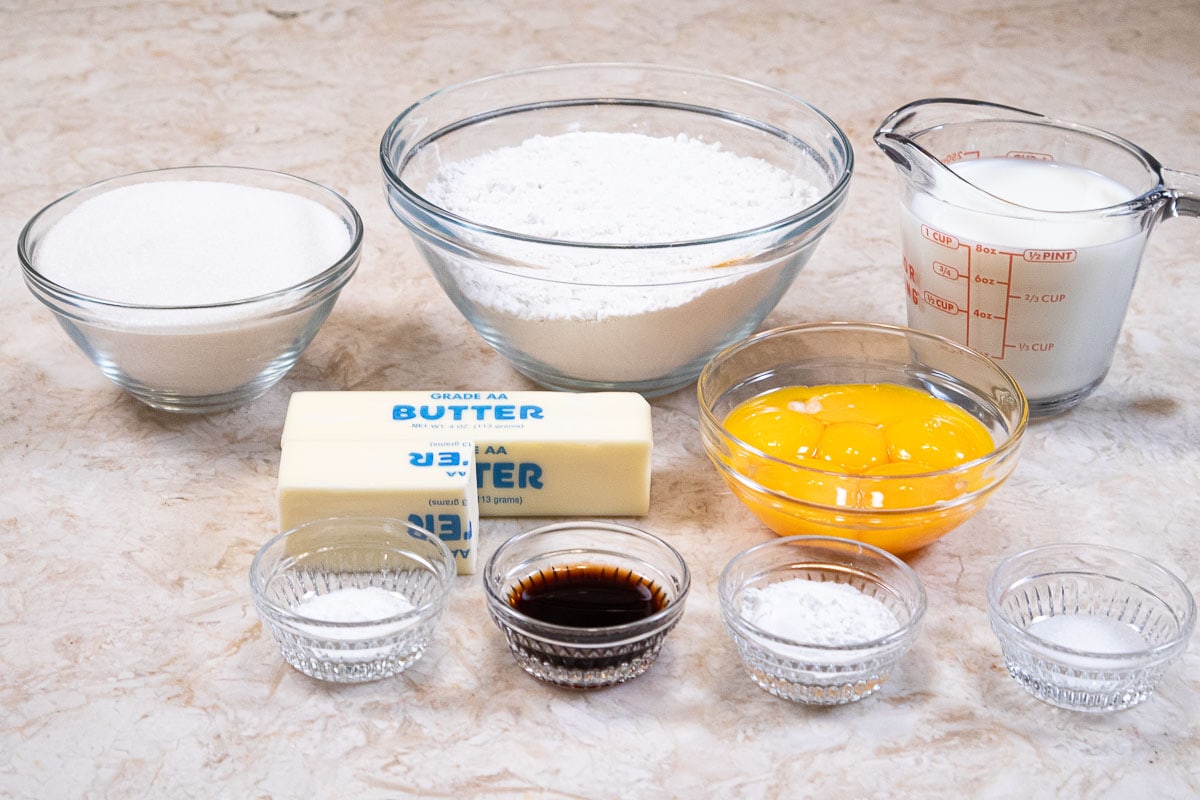
FRONT ROW: Baking soda, vanilla extract, baking powder, salt
MIDDLE ROW: Unsalted Butter, egg yolks
FRONT ROW: Granulated sugar, cake flour and buttermilk
Key Ingredients
- Cake Flour is used for it's low protein or gluten count which makes a more tender cake. I don't recommend using all-purpose flour as the weights of the two are different. There is more information on flours in my post, Flour as Used in Baking.
- Both baking powder and baking soda are used. The baking soda neutralizes the acid in the buttermilk aiding the baking powder as a leavening the cake.
- Egg yolks are fat and add to the tenderness of the cake.
- Buttermilk adds tenderness, flavor and moisture to a cake.
Be sure to see the recipe card below for the exact ingredients and instructions.
Step by Step Instructions
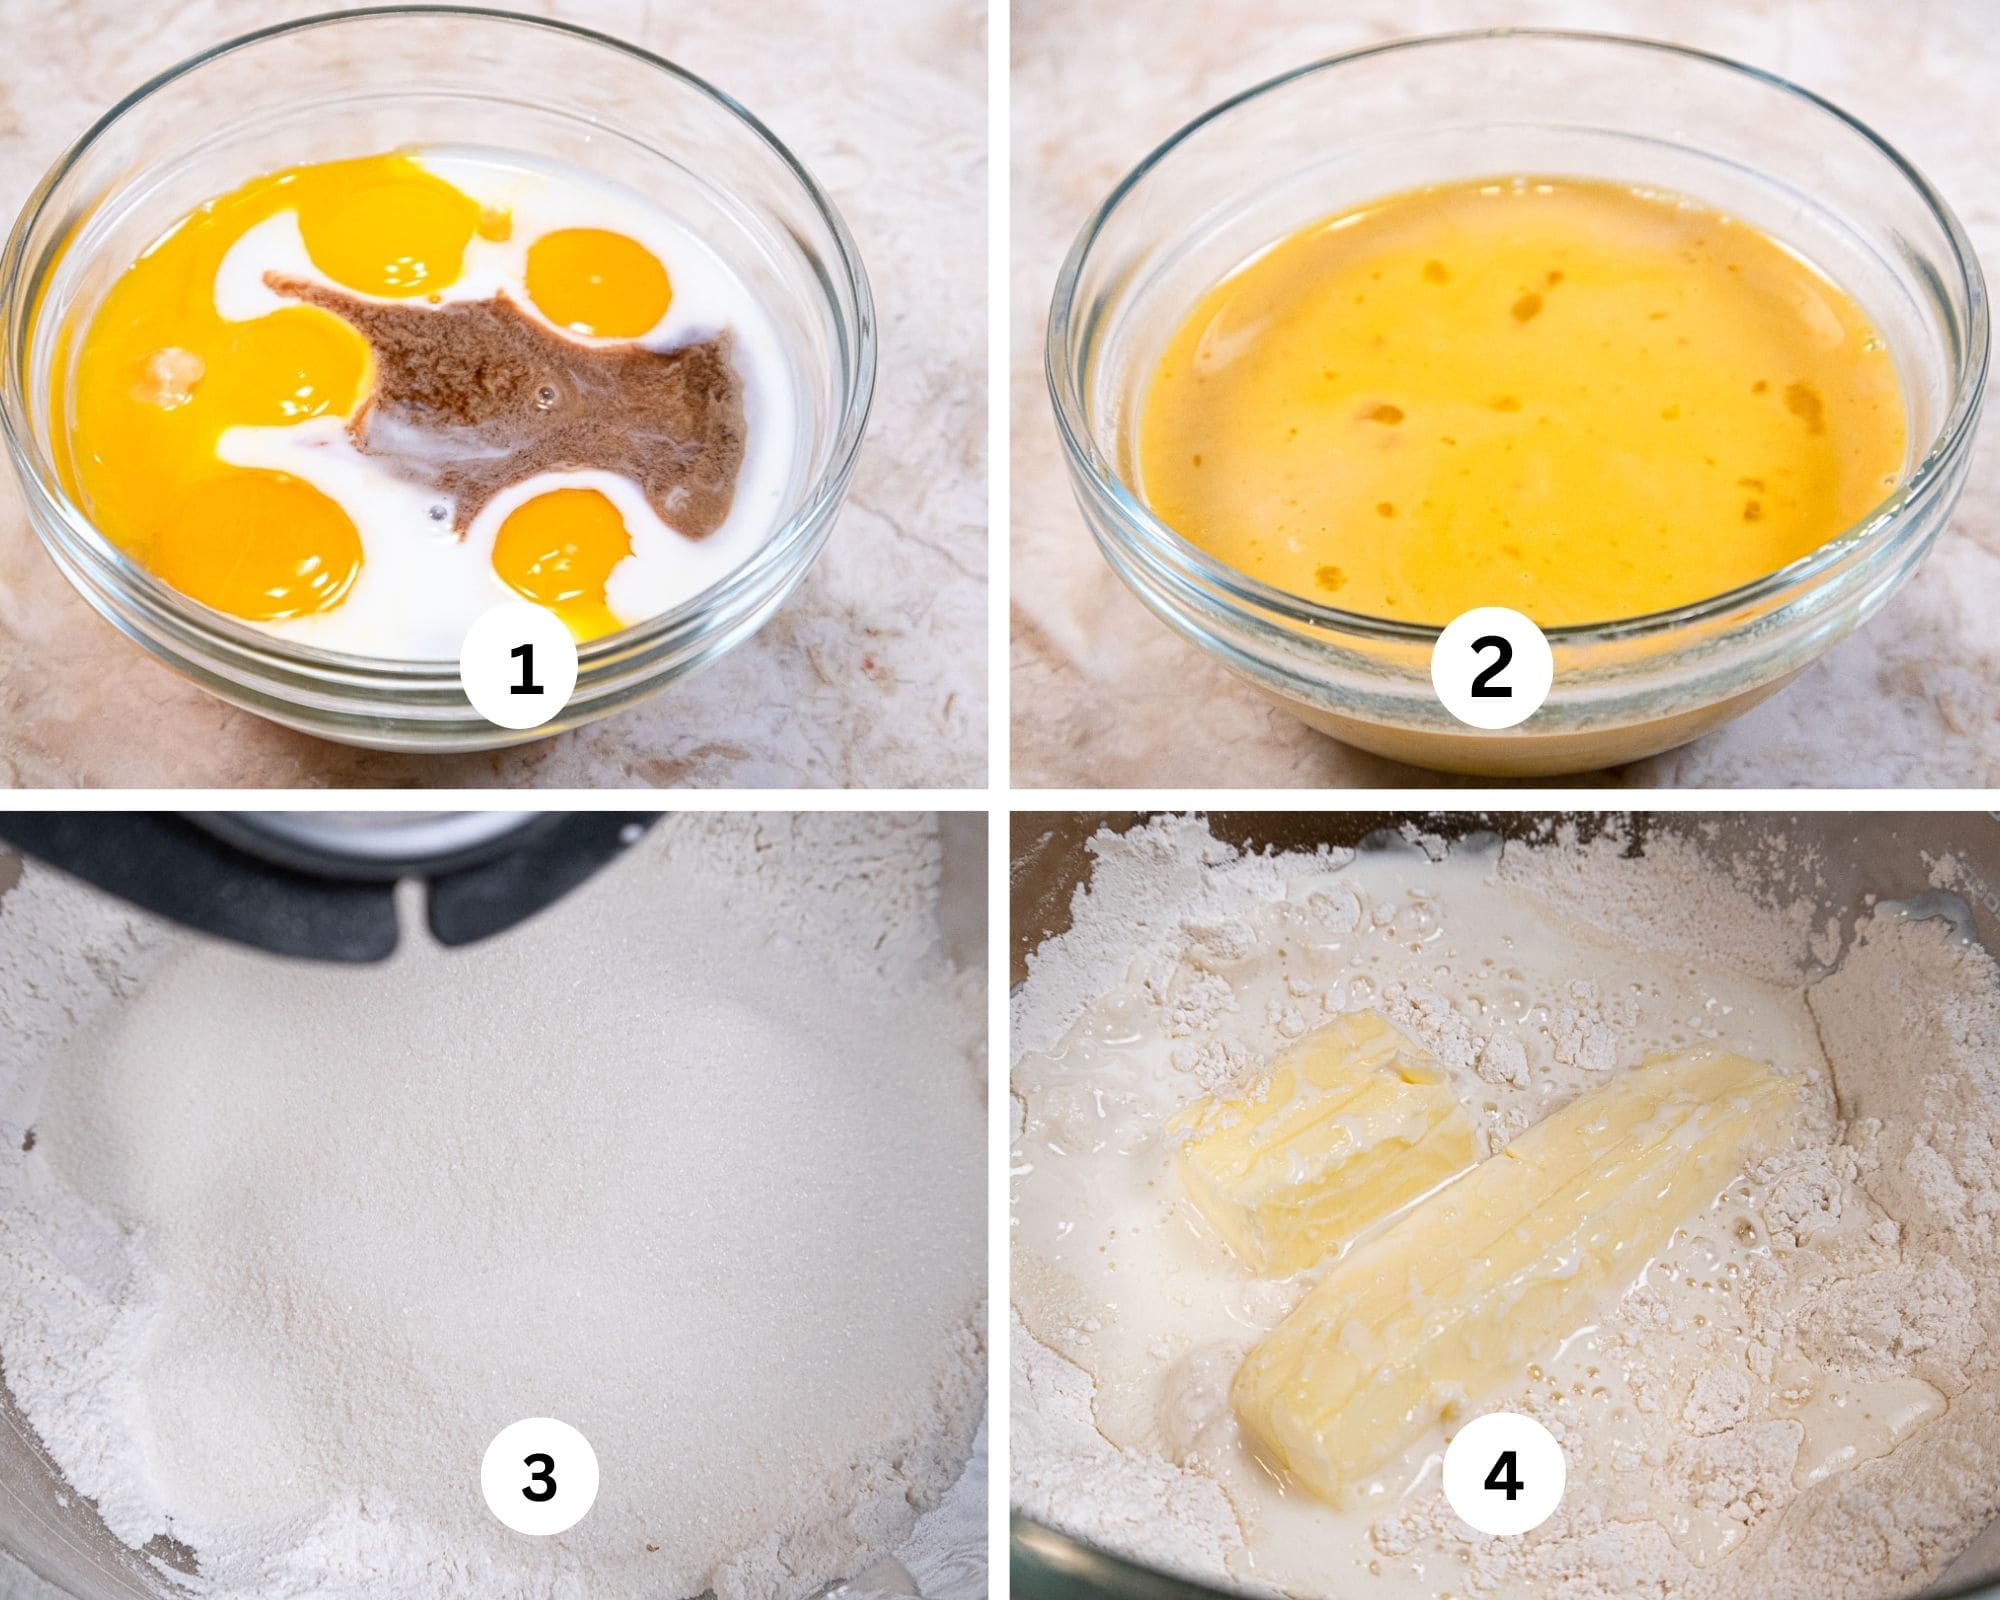
Step 1. Combine the egg yolks, ⅓ cup buttermilk, and the vanilla. Step 2. Whisk to combine. Step 3. Place all the dry ingredients in the bowl of a mixer. Step 4. Add the very soft butter and the remainder of the buttermilk.
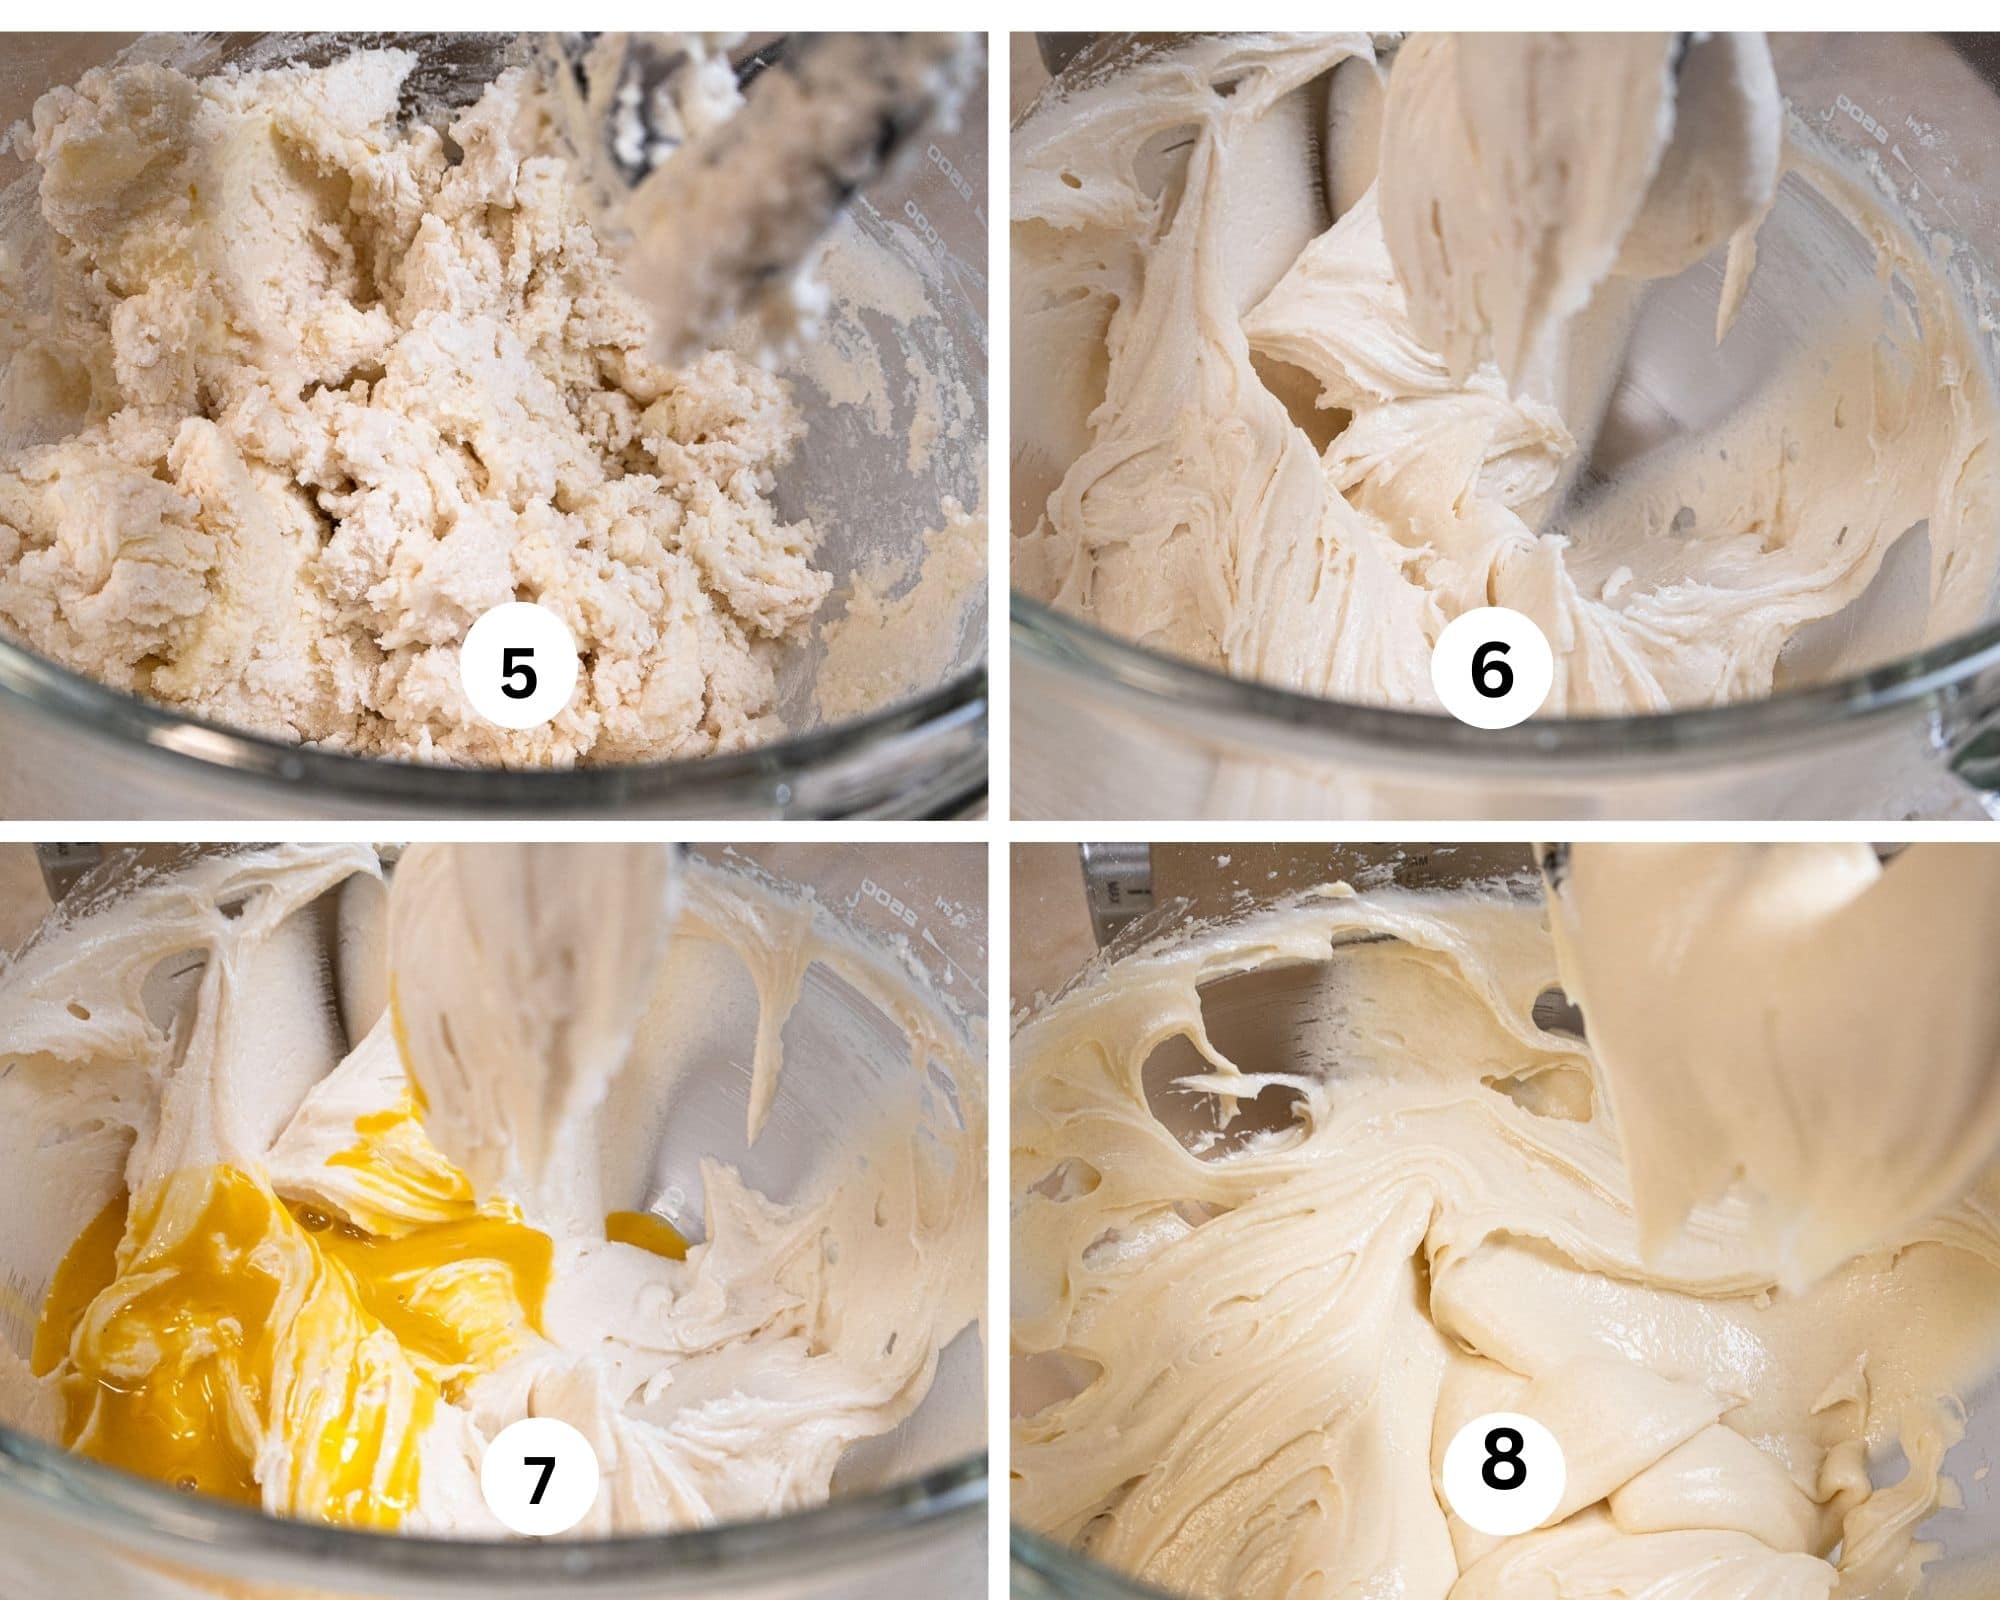
Step 5. Mix for 30 seconds on low to bring the ingredients together. Scrape down. Step 6. Raise the speed to medium and mix for 2 minutes. Step 7. Add ⅓ of the liquid to the batter and beat for 30 seconds. Repeat twice more. Step 8. The batter when it is finished.
Weights and Baking Times
These instructions for 9" pans.
- 2 layers = 540 grams each . Bake for 20 to 25 minutes. They are about 1 ½" tall.
- 3 layers = 360 grams each. Bake for 18 to 21 minutes. They are about 1" tall.
- 4 layers = 270 grams each. Bake for 15 to 18 minutes. They are about ⅔" tall.
- 25 to 30 regular size cupcakes with a #16 scoop, well scraped off. Bake for 15 to 20 minutes.
The layers can be frozen for later use. Freeze unwrapped until hard, wrap well in foil and freeze for several months.
The recipe can be easily scaled up to any size required. See Pan Size Conversions and The Secret of the 9 Inch Cake Pan.
Recipe FAQS
Egg yolks, because they are fat, add additional moisture to the butter along with buttermilk which is a natural moisturizer.
High ratio cakes of any flavor are super easy to make, generally taking only 2 steps.
Absolutely not. Yellow cake is a base cake as is white, chocolate, sponge cakes, etc. Any cake can be filled and finished as desired.
Expert Tip
- Don't overbeat the cake. Follow the instructions and times given.
- Use cake flour instead of all purpose flour.
- For the flat layers, follow the instructions above in Cake Pan Prep - How To Get Flat Cake Layers.
- I can't stress enough the importance of weighing over volume. It is very important when making high ratio cakes. Scales are extremely inexpensive and every baker should own one.
A Few More Cakes to Make
If you love this Yellow Buttermilk Cake, It would be hugely helpful and so appreciated it if you would take a moment to leave a rating below. Thank you.
Best Yellow Cake Recipe
Ingredients
- 6 large egg yolks (100 grams)
- 1 cup buttermilk
- 1 tablespoon vanilla extract
- 2 ½ cups cake flour (300 grams)
- 1 ½ cup granulated sugar (300 grams)
- 1 tablespoon baking powder
- 1 teaspoon baking soda
- ¼ teaspoon salt
- ¾ cup unsalted butter (170 grams or 1 ½ sticks)
Instructions
- For the flatest cake layers, spray the center only of 9" pans with a non-stick baking release, line the bottom of the cake pans with parchment paper and spray the center only with the spray. DO NOT SPRAY THE SIDES OR OTHERWISE PREPARE THE PAN. See Cake Pan Prep for detailed information..
- The butter must be very soft, but not runny in anyway. A temperature of of about 75℉ to 77℉ should do it.
- Preheat the oven to 350 degrees.
- Whisk the yolks, one fourth of the buttermilk and vanilla in a bowl. Set aside.
- In a mixing bowl, combine the dry ingredients and mix briefly to blend. Add the butter and the remaining buttermilk. Mix on low until the ingredients are moistened, then raise to medium and beat for 2 minutes. Scrape down.
- Add the egg yolk mixture in thirds, beating about 30 seconds after each addition. Scrape down between additions. Divide into the desired number of layers or cupcakes.
- 2 layers = 540 grams each . Bake for 20 to 25 minutes. They are about 1 ½" tall.3 layers = 360 grams each. Bake for 18 to 21 minutes. They are about 1" tall.4 layers = 270 grams each. Bake for 15 to 18 minutes. They are about ⅔" tall.25 to 30 regular size cupcakes with a #16 scoop, well scraped off. Bake for 15 to 20 minutes.
- Bake as called for or until a tester comes out clean or it springs back when the center is lightly touched. The cake should not pull away from the sides of the pans.
- Cool in pans, release and use as desired.
- The batter weighs approximately 1080 grams.
Notes
Nutrition

Terry says
Prepared pan exactly as you said for flat layers.
Helen S Fletcher says
Hi Terry, I saw that when I reread the original ask. At this point, especially since no one else has mentioned this as a problem, I have no idea. I don't think a different oven would cause this problem. The only thing I can think of is the oven temp may have been low but that wouldn't explain the center sinking. I check my oven all the time and lower or raise as necessary. Sorry to be of no help, but I just don'e know.
Pete says
I made this recipe exactly as written and was delighted with the results. It will now be my go-to for this kind of cake. Many thanks.
Helen S Fletcher says
Hi Pete - so glad you enjoy this. Can you do me a favor and give this a star rating. It helps a lot. Thanks.
Pete says
Of course.
Christopher McCarthy says
Hi Helen!
I bake at an altitude of
7280 feet. We usually adjust recipes by adding a tablespoon of flour for every cup, subtracting a tablespoon of sugar for every cup, and usually adding an egg. Since this is a high ratio cake, would you suggest baking as the recipe indicates, or making our usual high altitude adjustments? Thanks!
Helen S Fletcher says
High Christopher - I am not versed in high altitude baking but I googled it and there is information regarding this. I googled "what changes are made for a high ratio cake made at high altitude" addressing specifically high ration cakes. Also, King Arthur has information on this. This is also referred to as "reverse creaming", which I don't understand but you may find information there also.
Carol says
This is the most delicious cake I have ever made. And the layers freeze nicely for later use.
Helen S Fletcher says
Thanks Carol - I appreciate you letting me know. It keeps me going!
Terry says
Hi Helen,
I just pulled these from the oven and they smell wonderful! I did have a problem with the bake. All ingredients were weighed and at room temp. I made two 9" pans and prepared them per your directions. The cakes were in for 25 minutes. I checked them with a toothpick, and they were still wet in the center. After an additional 5 minutes toothpick came out clean. The problem is that the cakes sank where I first inserted the toothpick, and then did not rise back to be even with the sides. We will still eat these of course, but I would not want to serve them to company in their sinkhole condition. I did bake them in the center of the oven where I always bake cakes. Can you help me troubleshoot for next time?
Thanks!
Terry
Helen S Fletcher says
I have no idea why they would have done that. If you look closely at the bottom photo of the two in their pans you will see I used a cake tester also and they came out flat. Did you prepare the pan as I said to in the recipe?
Terry says
Exactly! Should they perhaps be on a lower oven shelf? I have a Wolf oven and have not experienced any problems baking cakes in the middle until today.
Helen S Fletcher says
Hi Terry - I asked if you prepared the pan as I did or did you grease and flour it including the sides.The reason I asked is if you prepare the pans as I suggest you will get flat layers. If you read Cake Pan Prep you will see how this works. It's how we baked all of the cakes in my bakery and almost every one came out flat as could be with no sinking.
Marisa says
Hi Helen, I am looking forward to trying this. I check out all your recipes when I get the email (haven't gotten to make them all...yet). I really enjoy all your tips and tricks too! It helps me be a better baker. Thanks!
Helen S Fletcher says
Hi Marisa - So happy to hear this. It's exactly what I aim for.
Karen says
How long would a 9”x13” cake bake?
Helen S Fletcher says
Hi Karen, I haven't made it in that size pan so I don't know the thickness of it. The square inches are about the same so I would guess the baking time will be about the same as for the 9" round cakes. Take a look a little before and judge by that.
Lori says
I'm presuming this is for a 9-inch pan, but you don't explicitly state it in the article.
Helen S Fletcher says
Hi Lori - thanks for pointing this out. I have added this information to the recipe and yes 9" pans.