
 This Chocolate Strawberry Ruffle Cake came about when a friend of mine was gathering items to auction off to help someone. She wanted a spectacular, showstopper of a cake cake that would draw a high bid. I was happy to donate the cake. I had made the cake, filled it and frozen it a week earlier. The day came to finish it and the night before she was to pick it up, we lost all power - for 19 hours. I couldn't open the freezer or fridge until the power came back on. So this Chocolate Strawberry Ruffle Cake never came to fruition for the auction.
This is another example of a cake made from recipes already on the blog. One of the reasons I love baking and pastry is that it is infinitely changeable. The chocolate cake is one of my base cakes that I use over and over in different versions.
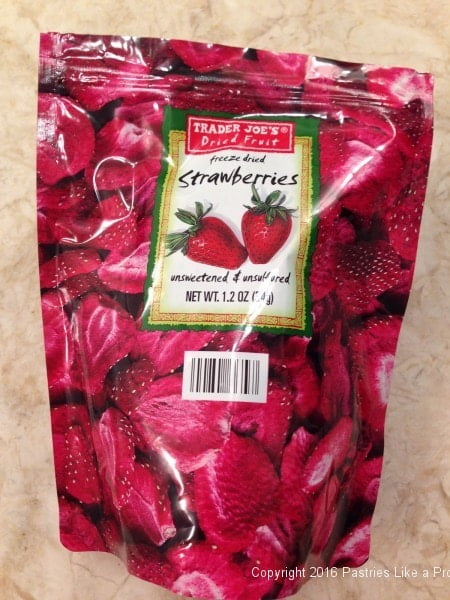
The Strawberry Buttercream for the Chocolate Strawberry Ruffle Cake is the easiest of American buttercreams and is intensely strawberry due to the powdered freeze dried strawberries. The best price I have found is at Trader's Joe's. A whole pound of fresh strawberries have been shrunk in this bag. A word of warning here. While it is true I generally favor Italian or French Buttercreams, there are notable exceptions. This is one of them. Do not try to substitute another buttercream as the intensity of the strawberries will be lost.
The Dark Satin Ganache has been featured in several recipes.
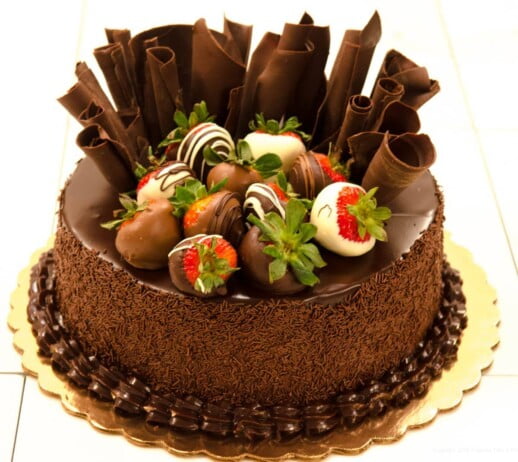
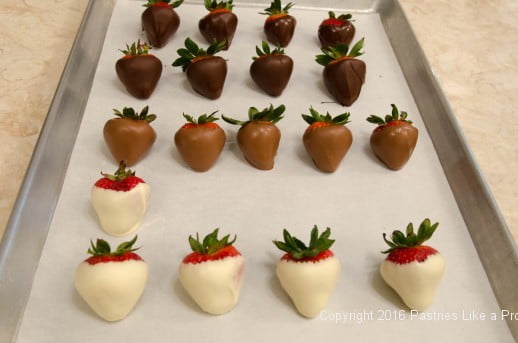
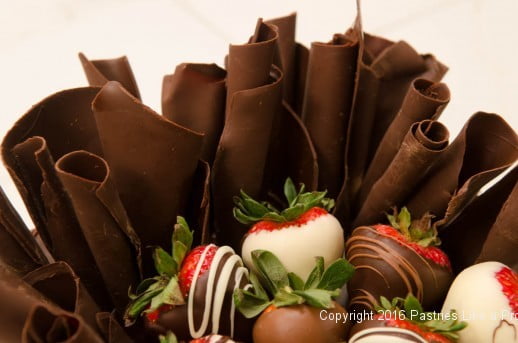
The Chocolate Curls and Ruffles add a final flourish to this Chocolate Strawberry Ruffle Cake that is topped with white, milk and dark chocolate dipped strawberries. While some of the strawberries are finished with drizzles of a different colored chocolate, it is important that not all of them are or the strawberries become confusing.
The curls and ruffles are made of melted chocolate and while not difficult do require a bit of practice. The key is the temperature of the chocolate. While it must be set in the refrigerator and be thoroughly cold all the way through, it must warm slightly at room temperature to be able to curl. If it is too cold, the chocolate will shatter when you try to maneuver it. To warm and it will stick to the tool. As you make them, put them in a container and store them in your refrigerator covered. They will last weeks, if not months, stored this way. We would keep large boxes of both white and dark chocolate curls and ruffles for use at a moment's notice. These do not do well with milk chocolate as it is too soft to hold its shape at room temperature. The final thought on the curls is, as you practice, the chocolate can be remelted and used again as long as you don't get it too hot.
For those of you who wonder how bakeries have the time to do this, most don't. They can buy all sorts of chocolate decorations already made including the curls in all sizes. I didn't use them because I didn't like the taste of the chocolate.
Speaking of tools, I use several sizes of flexible putty knives to make the curls and ruffles for the Chocolate Strawberry Ruffle Cake. We used 1, 2 4 and 5 inch putty knives at the shop. We could make small to very large curls or ruffles depending upon the knife we chose. We used the dark chocolate curls and ruffles on speciality cakes for the cakes going to a man instead of flowers. Often we used tuxedo strawberries tucked here and there to finish the cakes.
Of course the chocolate curls can be omitted and still have a beautiful cake, but they do add the final fillip to the Chocolate Strawberry Ruffle Cake.
While this Chocolate Strawberry Ruffle Cake may seem hugely challenging to some, remember it can be done in stages. Make the cake, fill and freeze it a month ahead. Make the chocolate curls and ruffles weeks ahead and store in the refrigerator. The Dark Satin Ganache can be made weeks ahead and stored in the refrigerator. Microwave it carefully to soften it but not melt it to undercoat the cake up to two days ahead. The remainder can be stored in the refrigerator to glaze the cake later. The cake can get's it final coat of glaze the day before leaving only the curls and strawberries to be placed on the cake the day of service. The only reason it can't be finished in its entirety is because sometimes the strawberries leak a little if made the day before. That would spoil all your work.
Chocolate Cake – baked in 4 layers as per the recipe - This can be made a month ahead, frozen, wrapped well and kept in the freezer.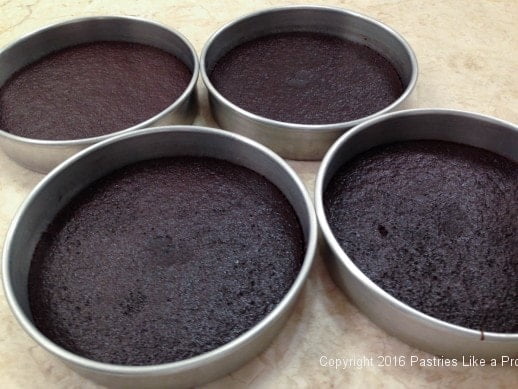
Chocolate Curls
155 grams or 5 ½ ounces per ½ sheet pan - you will need several pans
Melt the chocolate over a double boiler or in the microwave at half power. 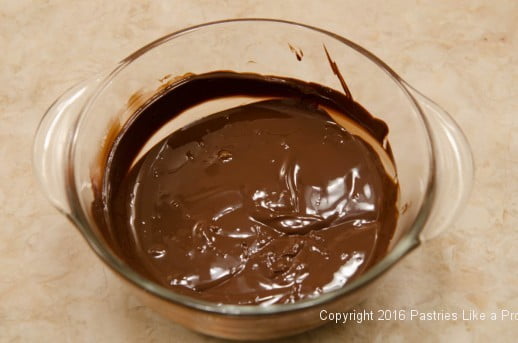 Spread evenly in the half sheet pan.
 Refrigerate or freeze until cold throughout.
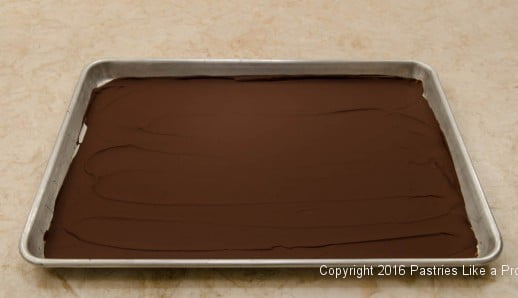
Let sit at room temperature. With a putty knife or other flexible tool, scrape the chocolate to form curls or ruffles as below. By turning the knife as you push, the size of the curl can be increased.
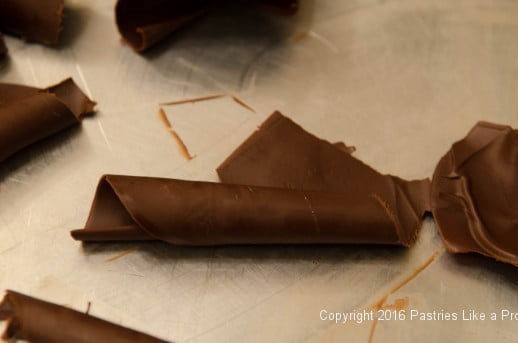
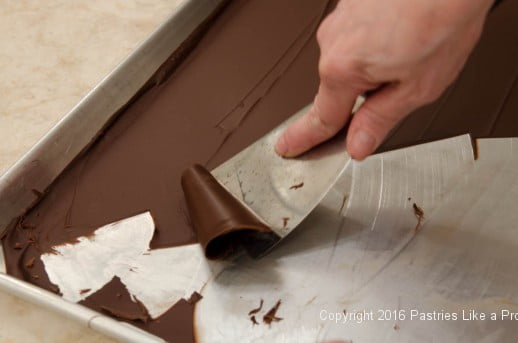 By pushing the knife straight ahead, a tight chocolate cigarette curl can be made.
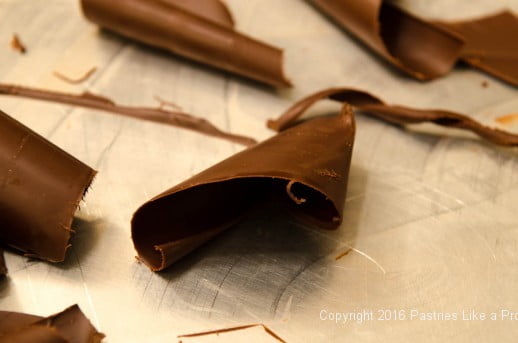
 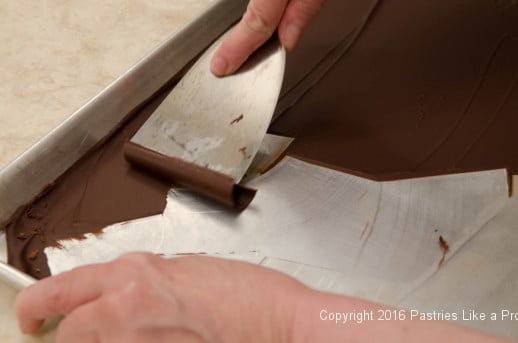 To make a ruffle ,push the knife under the chocolate to cut away a piece of the chocolate. Pinch the ends together to make a ruffle. Work quickly or the chocolate can melt.
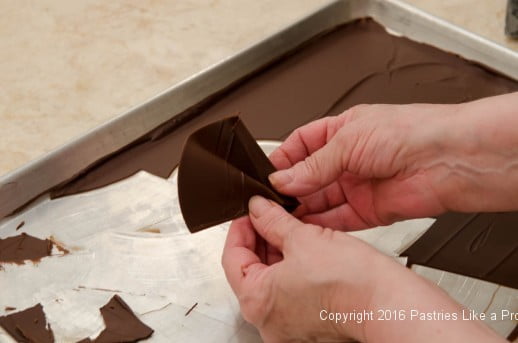 Move the chocolate in and out of the refrigerate as needed as the chocolate gets too soft to curl.
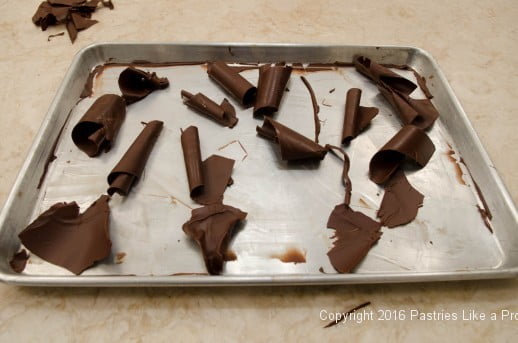
 Store in a covered container in the refrigerator. These can be made weeks ahead and stored.
Any chocolate scraps not used can be kept in the refrigerator and melted to use in other recipes.
Strawberry Buttercream
 2 - 1.2 ounce package freeze dried strawberries
3 ½ cups powdered sugar (400 grams or 14 ounces)
2 stick butter, softened
1 teaspoon almond extract
4 to 8 tablespoons milk
Red Food Coloring as desired
Place half of the strawberries in a blender or food processor. Blend or process until all the strawberries are powdered. You may have to stop the machine and stir the mixture several times being sure to get the bottom. Repeat with the second half. You will have about 1 cup.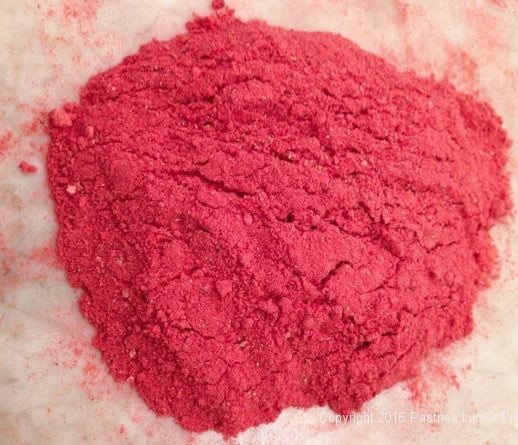
Place the strawberries, powdered sugar, butter and almond extract in a mixing bowl. Add 3 tablespoons of the milk.  Mix on low until blended; turn the mixer on medium high and beat several minutes, scraping often, to increase the volume and lighten the buttercream.
Add the additional milk, a bit at a time if needed to facilitate the mixing. Add the red food coloring as needed to get a pleasing color.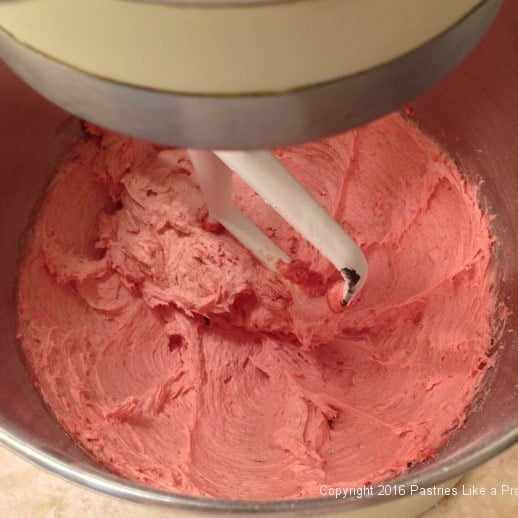
Yields: 720 grams or 25 ½ ounces
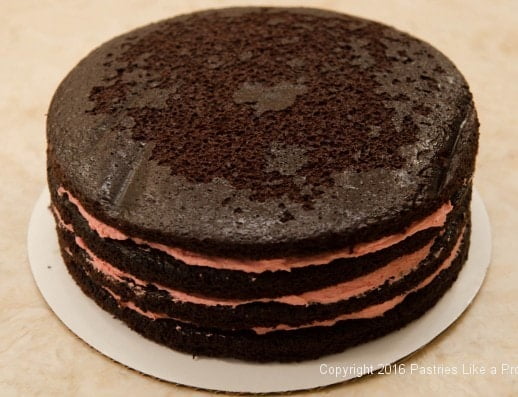
Place one layer of cake on a cake board. Spread about 240 grams or 8 ½ ounces or ⅞ cup of buttercream over the bottom layer. Top with another layer of cake, repeat filling. Repeat once more. Top with the 4 layer of cake. This may be made to this point, frozen, wrapped well and kept in the freezer up to a month. Thaw in the refrigerator the night before finishing.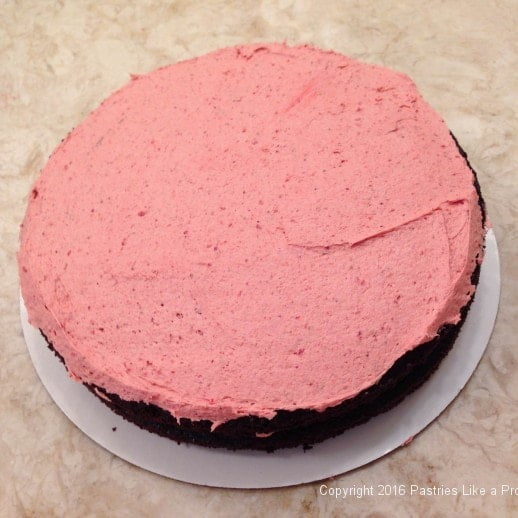
Dark Satin Ganache - how to photos
1 cup 40% or heavy cream
½ cup clear cornsyrup
10 tablespoons butter (140 grams or 5 ounces)
20 ounces semisweet chocolate (560 grams)
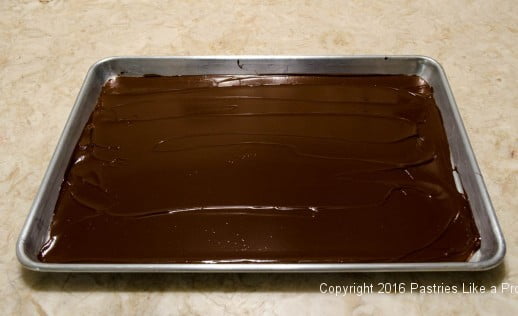
Combine the cream, cornsyrup and butter in a small saucepan. Heat until the butter melts cut do not let it boil. It should be steamy hot but not boiling. Remove from the heat and submerge the chocolate. Wait for 2 minutes then gently whisk until smooth. Set aside at room temperature until thickened. This may take several hours. If you are in a hurry, as I am undoubtedly am, pour the ganache out on a half sheet pan. It will set up much faster this way. You can also refrigerate briefly but be careful not to take it too far.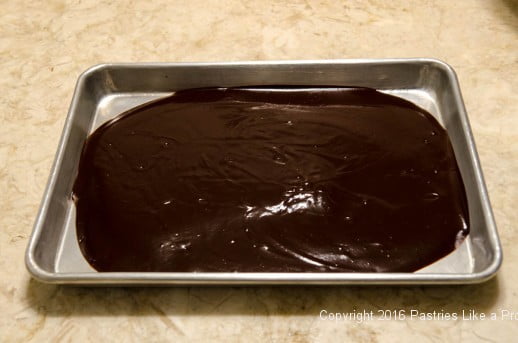
Chocolate Dipped Strawberries
Fresh strawberries
Dark, Milk and or White chocolate
Line a half sheet pan or a flat cookie sheet with parchment paper.
Try to select strawberries all about the same size. Melt about 5 ½ ounces of each of the chocolates and place them in short narrow containers. Juice glasses work well here.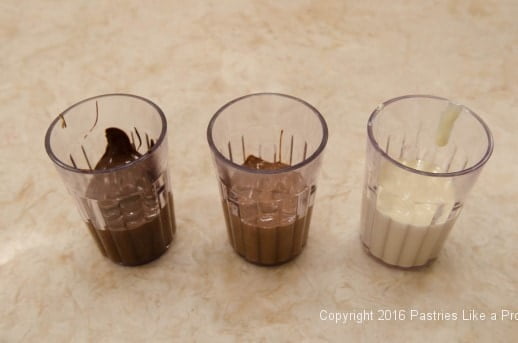
Hold a strawberry by its green leaves right next to the top of the strawberry. 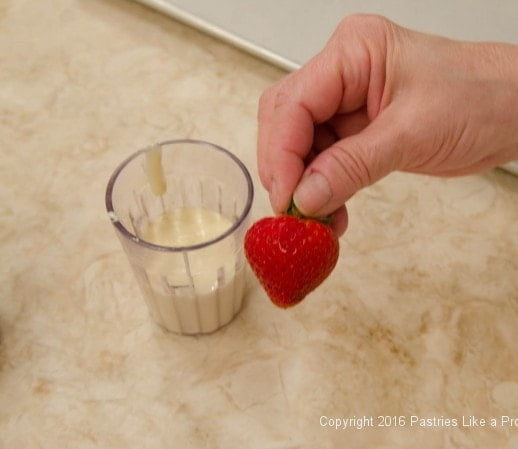 Dip the strawberry into the chocolate almost to the top.
 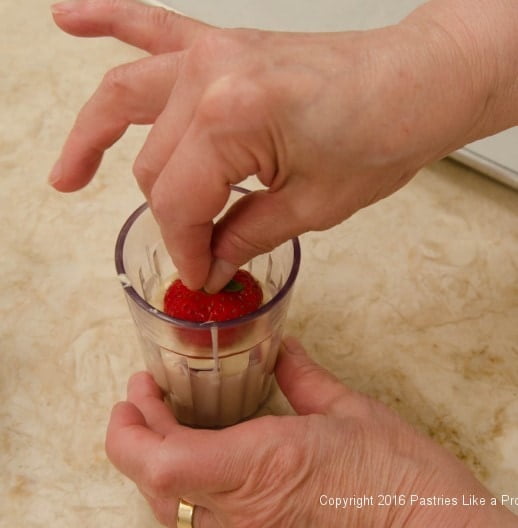 You want some of the top to show for the pretty red color. Lightly scrap the bottom of the strawberry against the edge of the glass to remove some of the chocolate. This will keep the strawberries from having excess chocolate form "feet" which is the term chocolate makers use for puddled chocolate that has set up under a piece of dipped chocolate.
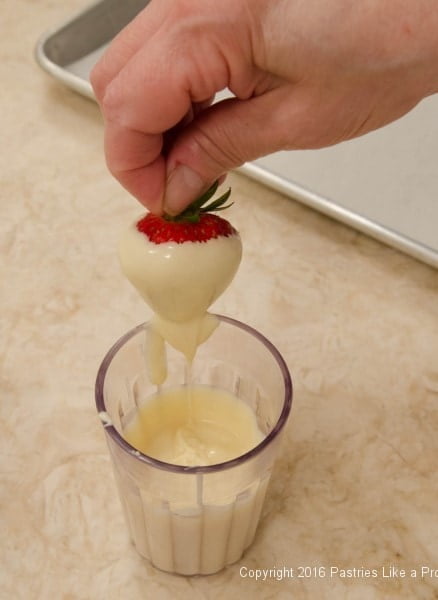
Place on the parchment paper to set up. After as many strawberries as you wish have been dipped, place them in the refrigerator briefly to firm up. Make sure you dip enough for everyone to have a dipped strawberry with their cake. Dip a few extra to reward yourself!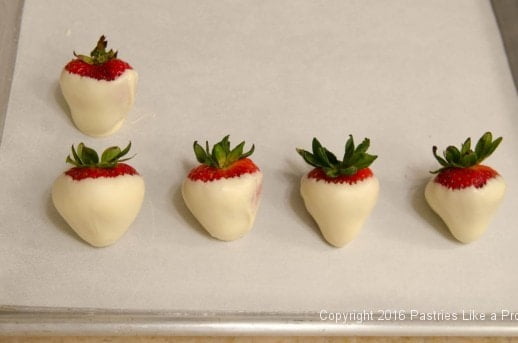
 To decorate them,dip a spoon in a contrasting color of chocolate and wave it over the strawberries, one at a time to make lines on them.
 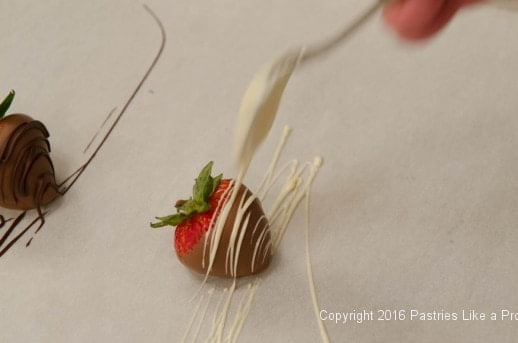 Leave some plain to make a more interesting finish on the top of the cake.
Store in the refrigerator until ready to use. These can be made the morning before serving the cake if desired.
Assembly
Filled cake layers, thawed if frozen and undercoated but still cold
Dark Satin Ganache
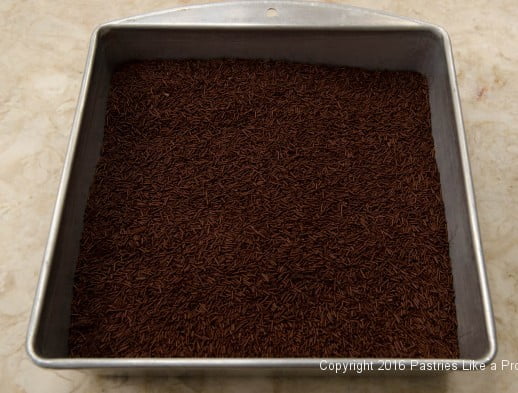
Decoratifs or Chocolate sprinkles, optional but recommended for the best look
Chocolate Curls
Dipped Strawberries
See the text above for a schedule to make this cake ahead of time.
It is difficult to glaze a cake unless it is on a metal bottom the same size as the cake. I use the bottom of my 9x3" cheesecake pan. However, a cardboard round of the same size or cut to the same size also works. The last option is to not use anything but it isn't a good one. The cake needs stability to cover with ganache and edge with the sprinkles.
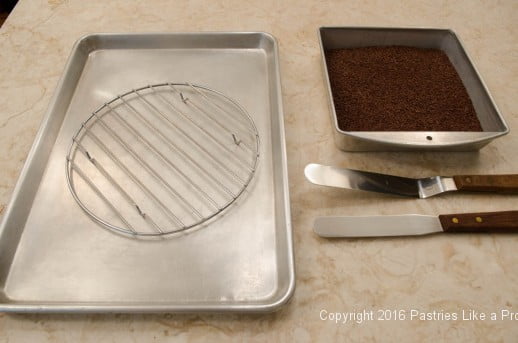
To glaze the cake you will need a rimmed baking tray. I use a half sheet pan. You will need a large offset spatula, a straight metal spatula, a cooling rack for the cake to sit on and a container to hold the decoratifs or sprinkles. Be sure you have a lot of sprinkles or it will be difficult to finish the sides.
Place several thicknesses of wet paper toweling (that has been wrung out) under the container holding the sprinkles. This will keep the container from moving when you scoop up the decorations in your hand.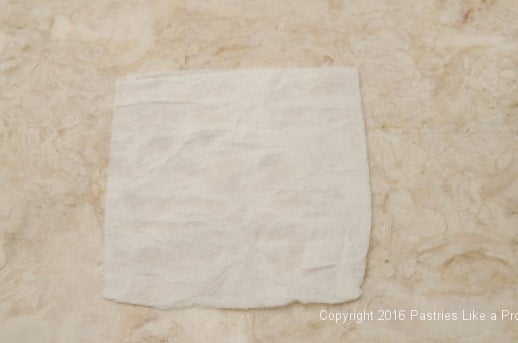
Line up the items as follows: The glazing rack in the pan to the left. The container of sprinkles near that on the right and lastly the finish cake board or plate on which to place the finished cake to the right of the sprinkles. It isn't shown here for lack of space on my tiny island.
If the undercoated cake is on a cake board, transfer to to metal bottom if possible or see above.
Place it on the rack in the half sheet pan. 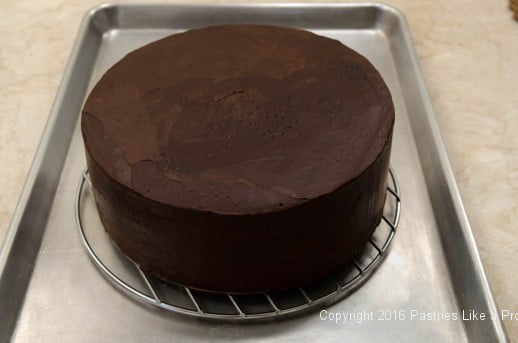 Heat the ganache to a pourable state but do not let it become really hot. You just want to liquify it.
  Pour it in the center of the cake and
 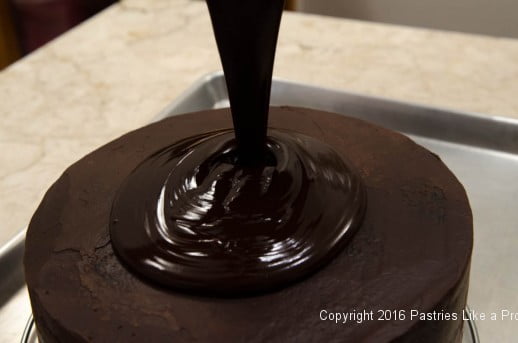 move it out so it runs down the sides with a large offset spatula.
 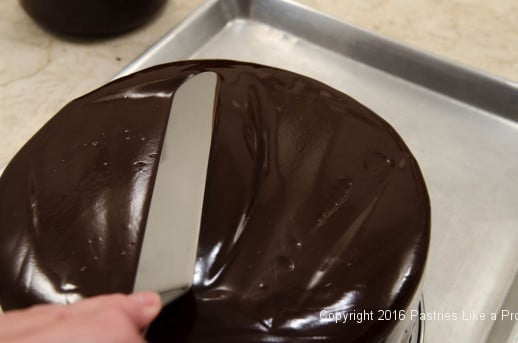 If the ganache runs unevenly down the sides or there are places on the side that is not covered, use a metal spatula to move the ganache around so it evenly covers the sides.
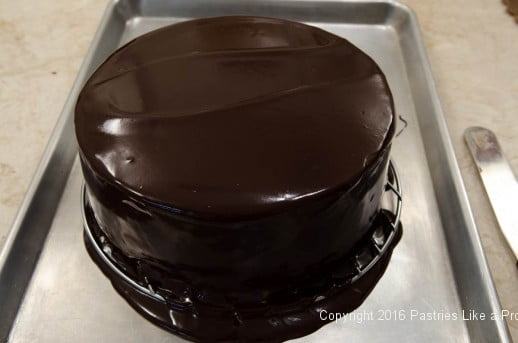
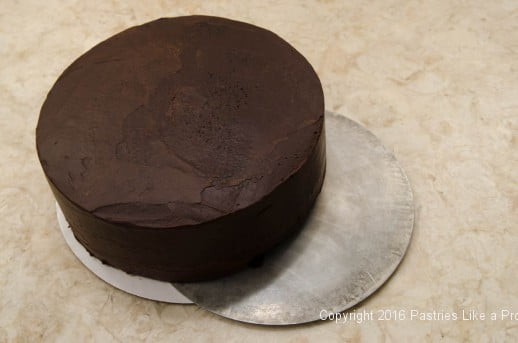
Let it sit for about five minutes to let the ganache firm up. When the ganache is no longer runny, but is not set, pick the cake up by sliding a large offset spatula under the metal bottom to tilt it so you can get your hand under the metal bottom and pick it up, placing it on your left hand. 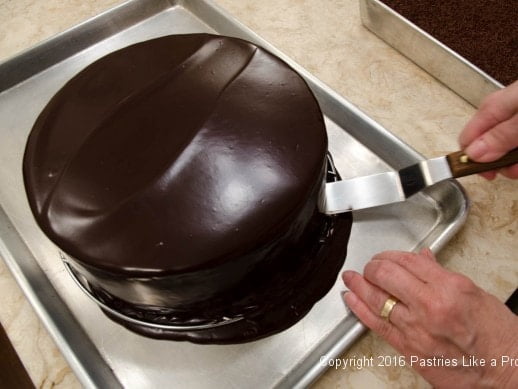 Using a metal spatula in your right hand, clean off any excess ganache on the bottom that is dripping off..
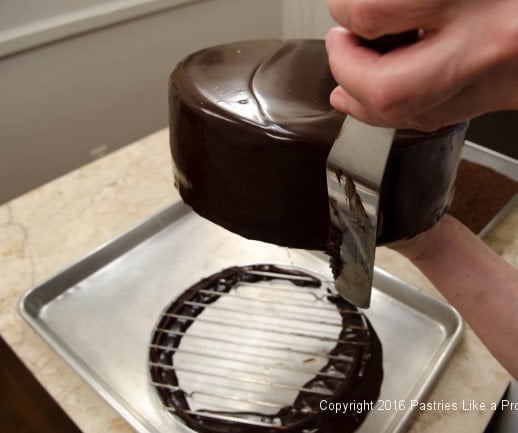
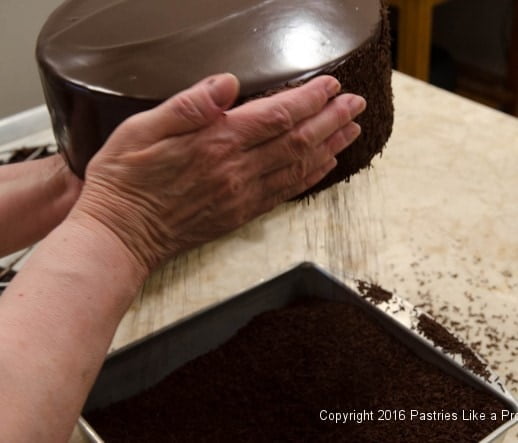
At this point you are ready to apply the decortifs or sprinkles. Still holding the cake in your left hand, pick up a large scoop of decoratifs and, holding the cake over the decoratif container press them gently onto the side of the cake allowing the excess to fall back into the container. Continue in this manner all the way around the cake.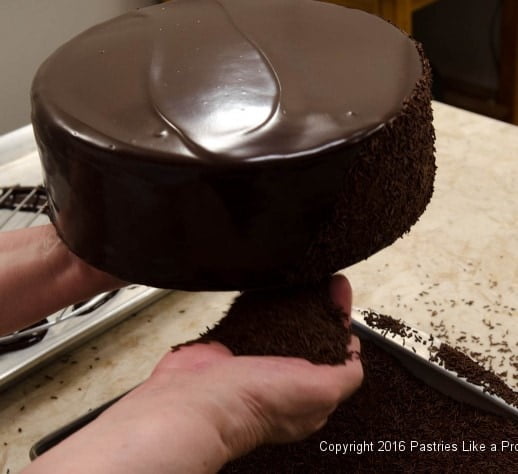
 To move the cake to its presentation board , place two pancake turners under the cake on each side and lift it onto the new board or cake plate.
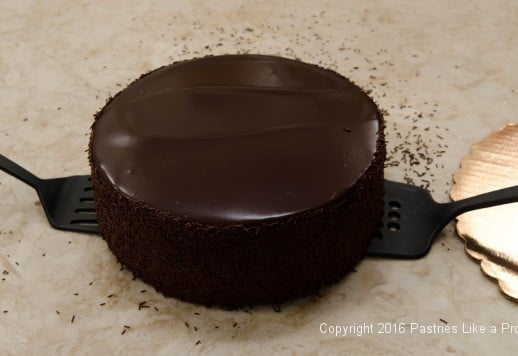
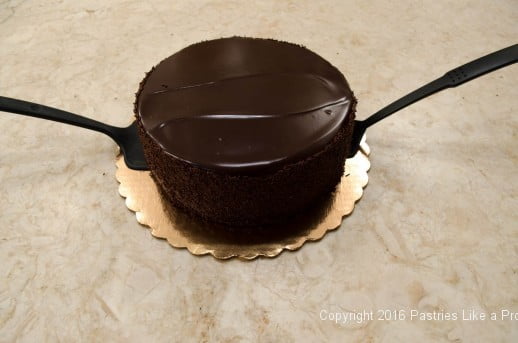 Remove the pancake turners by placing a flat, metal spatula just above the spatula and pull the spatula out. This will prevent the cake from being pulled out by the pancake turner.
 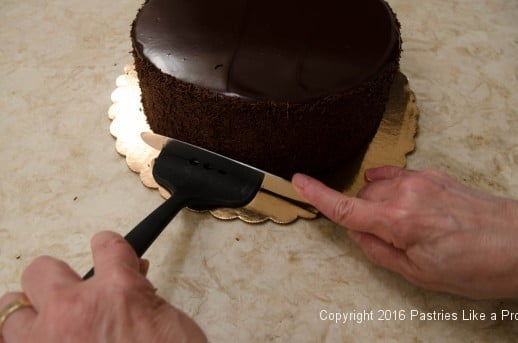 Place the cake in the refrigerator to completely firm up the ganache.
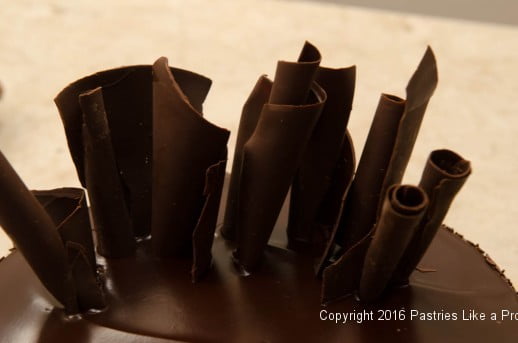
When the ganache is set, you can start decorating the cake. Remove your curls from the refrigerator 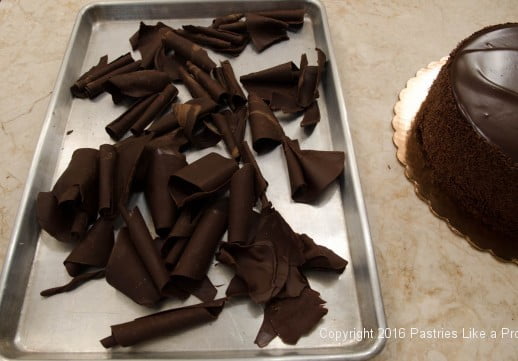 and place your first one in the center of the layer about 1" i inside the edge. Press them gently into the ganache. Continue until you have made a half circle on top. You can go back and fill in after the strawberries are placed but for now get the ruffle about ¾ in place.
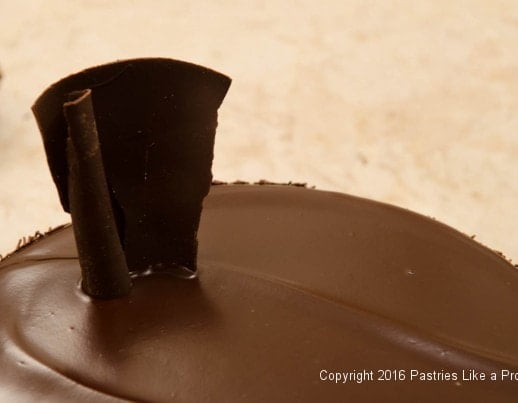
 Place the strawberries in front of the ruffle in a pleasing pattern of colors . Gently press them into the ganache but don't get too enthusiastic.
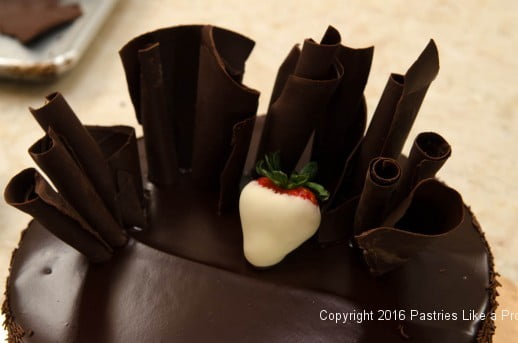
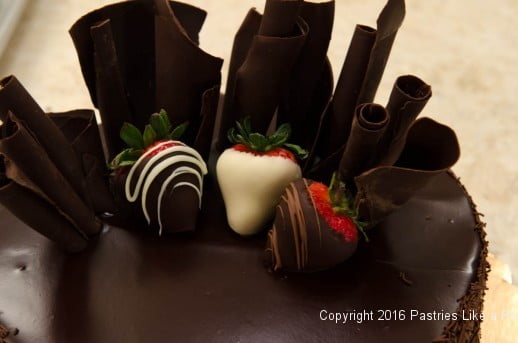 When the strawberries are in place, go back and fill in any gaps in the ruffle with more curls and ruffles. I sometimes put a narrow chocolate cigarette inside of a larger curl. There is no one way to do this, whatever looks good to you is how it should be.
Edge the bottom with a number 3 or 823 open star tip.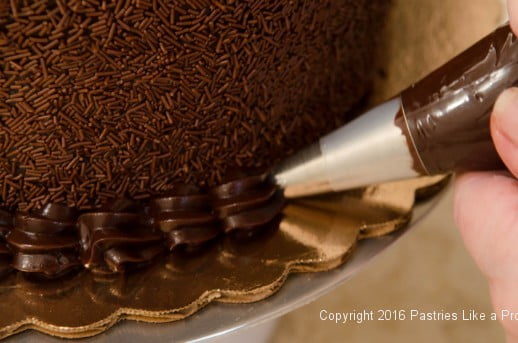
Refrigerate the cake after decorating. It will set up in the refrigerator and the chocolate curls and strawberries will be glued in place.
When you cut it, make sure everyone gets a chocolate strawberry and chocolate curl or ruffle as well as the Chocolate Strawberry Ruffle Cake. Make sure everyone sees the final cake (use it as your table centerpiece so everyone can admire it as they eat. The smell of chocolate and strawberries will perfume the air. To cut the cake take it into the kitchen. Remove the strawberries and gently pull out the curls, keeping them in tact as much as possible. Cut the cake into up to 16 pieces. Serve each with a chocolate dipped strawberry and at least one curl. You are now the "Hostess with the Mostest" and it will be difficult to out do you!

hfletcher says
Thank you Nagamma.
Diane says
Beautiful!
hfletcher says
Thank you Diane.
Jeannette says
Pat from "Back porch Musings" mentioned you on her blog which I've been reading for a long time. I'm so glad I came to visit yours. Lots of eye candy on your blog! This cake is just beautiful. I'll be coming to visit you regularly. Thanks for all the tips
hfletcher says
Hi Jeanette - I'm glad you found me too. That is the most difficult aspect of blogging - how to find the people who will enjoy it. Pat was wonderful to mention me. I was surprised at how many people popped in and signed up.
Eva says
Bless you Helen for this tutorial! This is the type of information I need to practice chocolate curls. I am headed to the home improvement store for putty knives. Then on the weekend, I will play with dark chocolate. Thank you, you are a wonderful lady!
hfletcher says
Hi Eva - make sure the putty knives are flexible. There are some that are stiff and they won't do as good a job. The other point is you have to learn where the chocolate needs to be as far as curling. This is just practice. You will get it.
Thank you for the compliment.
Zazamataz says
What an absolutely beautiful cake and detailed tutorial. This goes in my folder for a special occasion (really special occasion!) cake the next time I need one.
hfletcher says
To take the stress out of making this in one fell swoop, follow the schedule in the header of there blog. You will have some very appreciative guests I am sure.
Vicki says
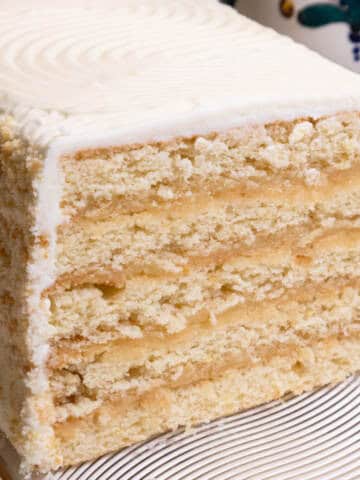
As always, THANK YOU for this tutorial. Your documentation and thoroughness makes the recipe FOOLPROOF! I only would have wished for a picture of a completed slice. I have trouble in getting a picture-perfect serving, especially when I have used a high-contrast filling. What is the secret? It seems that my knife drags through the beautiful light-colored filling and then smears all over the dark-colored cake.
hfletcher says
Hi Vicki - Thank you so much. There is a way to minimize the smearing. Cut the cake when the filling is cold. Use a knife dipped in hot water and quickly dried. Heat and dry the knife for each cut. Cut straight down - do not use a sawing motion. Pull the knife out at the bottom of the cake - do not draw it back up through the cake. This should help. If the cake is finished with ganache, melt through the ganache with the hot knife and then cut straight down. This should help.
Manisha says
This cake looks so classy!!! I can imagine the deliciousness of the strawberry buttercream :) and love the pink color too. I have been using freeze dried orange and lemon powder in buttercream and i love the intensity of the flavors freeze dried fruits add to BC without making it liquidy. I would love to use freeze dried strawberries as well if I can find them in small packaging. Helen I envy you for those beautiful chocolate ruffles :) One thing that I have not been able to learn.
hfletcher says
Hi Manisha: Thanks so much. I haven't seen the freeze dried orange and lemon powder. Can you tell me where you get it? I would love to try it. Have you gone on the internet for the freeze dried strawberries? A quick look says there are quite a few. The curls take a bit of practice but the size of the putty knife makes a huge difference. The other key is the temperature of the chocolate. Keep at it - you'll get it.
Rockyrd says
Wow just beautiful. Love your idea of using the dried strawberries ground to a powder.
How do you handle fresh strawberries? Some people wash, some dont. I usually don't wash but brush them off with a dry pastry brush to get the whiskers off.
Do you ever do glaceed strawberries?
I like decorating with them but they dont last and weep berry juice but they sure good and pretty. Wonder what shops do to them so they keep.
hfletcher says
Ahhh- the strawberry question. I don't do anything to them if dipping them because it is impossible to make sure they are dry and after being washed their shelf life is very limited. However, if I am eating them at home, I wash what we are going to eat, leaving the rest in the container if I am not preparing all of them at once. We would dip strawberries a day ahead when we had the shop but no more. Also, it is important not to take all of the chocolate off when scraping them on the side of the dipping container as the chocolate will help retard weeping.
Ginny Sher says
Gorgeous cake, great recipes, fantastic tutorial... I can't wait to try making this cake. Thank you for the clear and precise instructions. No wonder your baked goods look so perfect. You have a very organized mind, combined with lots of creativity.
hfletcher says
Thanks Ginny - I know you will do a great job. Follow the schedule so you don't become overwhelmed. Let me know how it comes out. Your kind words are very much appreciated.
Raffaella says
It looks absolutely divine. Thank you Helen for sharing this with us.
hfletcher says
Thank you Raffaella - Hope you have a chance to try it. Well worth the effort.