
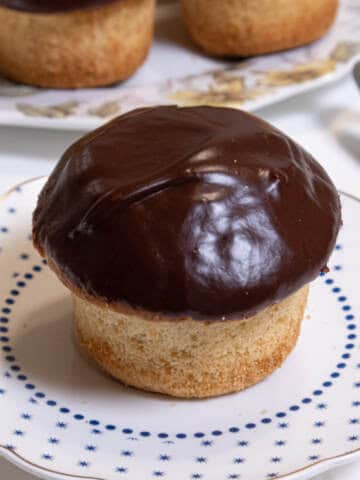
This version of Multiple Cake Layers from 1 Recipe is a makeover of the original post in 2017. It's a deep dive into baking this type of cake which I hope will get everyone ready for the upcoming season of baking.
The most exciting part of this amazing recipe is that a single recipe can be used to make eight different flavored cake layers to fill and finish as you like. You may never need any other layer cake recipes.
Many, many years ago when I first opened my bakery, the challenge was finding recipes for cake layers that worked and could be scaled up. It seemed like all I did was test.
Then I discovered, as did everyone, "The Cake Bible" by Rose Levy Beranbaum. It was a game changer for anyone interested in baking and cakes. The explanations of what was going on and why in each recipe helped us understand baking better. At that point in time (1988) there was not a lot of information on the science of baking, which made this book all the more valuable.
I found the recipes in her book for cake layers to be the recipes I was looking for. Although I used recipes from many sources, including those I came up with, "The Cake Bible" was always my back up.
This recipe is a slight variation of her White Velvet Cake. I have used it before in my Spirited Marble Cake.
Jump to:
- Base Recipes
- High Ratio Cakes
- Butter Temperature is Important
- A Surprise When Making The Chocolate Cake Layers
- Buttercreams to Use with the layers and ganache
- Cake Pan Prep
- Recipe Ingredients (for Base White Cake Only)
- Step by Step Instructions
- Variations on a Theme
- Recipe FAQS
- Expert Tips
- More Recipes Using High Ratio Cake Batter
- Multiple Cake Layers from 1 Recipe
Base Recipes
What is a base recipe? It is a basic recipe professional bakers use that can be changed in different ways to make many different bakery items. In my post, The Importance of a Base Recipe in Baking it focuses on a base recipe for cookies but the idea is the same for cakes.
You will see by looking at the recipes there will be additions or slight changes to the original recipe resulting in all of the different flavored layers.
High Ratio Cakes
This cake is a high ratio cake. High ratio cakes require the sugar to be equal to or exceed the amount of flour by weight not by volume. It's also the quickest way to make a butter cake. Not every cake can be mixed this way.
Basically, part of the wet ingredients are held out and mixed together. Everything else is added to the mixing bowl. After about a 2 ½ minute mix the wet ingredients are added in thirds, mixed for 30 seconds each and that's it. Into the pans it goes. It just doesn't get any easier, faster or better.
Butter Temperature is Important
The one point that needs to be stressed in this cake recipe is the temperature of the butter - it needs to be soft. As you will see, the recipe states softened. Most recipes states room temperature butter. That can mean a lot of different things depending on if you're in Alaska or the southwest. I have seen recommendations by several prominent authors that 68°F is the ideal temperature for butter when creaming. However, I find that is still too cold to blend or cream well with sugar. I got a sandy texture but not one where I would call it creamed. Creaming introduces air into the mixture helping the batter to rise.
The temperature of the butter I use for creaming or when calling for "softened butter" is 72°F or 74°F. At this temperature, it will mix together completely. It is important in this recipe as the butter is being combined with a large amount of flour, sugar, and liquid all at once. If you don't have an instant read thermometer (and you should) the best I can tell you is that it will feel soft when you press it in the package but not mushy. In no case should it be liquid. This happens a lot when butter is microwaved to soften it. I usually remove butter the night before if I am baking in the morning. I also keep my house around 73°F in the summer.
A Surprise When Making The Chocolate Cake Layers
The chocolate cake test was really surprising. I made one recipe of the white cake and split the batter in half by weight. I added cocoa to one layer and melted and cooled chocolate to the other layer. The two cake layers couldn't have been more different. The one with the chocolate was much paler and had less of a chocolate taste. It was more like a German Chocolate batter. The cocoa layer was very dark and was intensely chocolate. I am including both for your reference. I thought the one with chocolate would have tasted deeply of chocolate. Both are very good - just different.
Buttercreams to Use with the layers and ganache
Cake Pan Prep
I have an entire post on how I prepare my pans in order to get flat cake layers that aren't humpy and don't need to be trimmed. I show you below the basics but see Cake Pan Prep for more in depth information.
Recipe Ingredients (for Base White Cake Only)
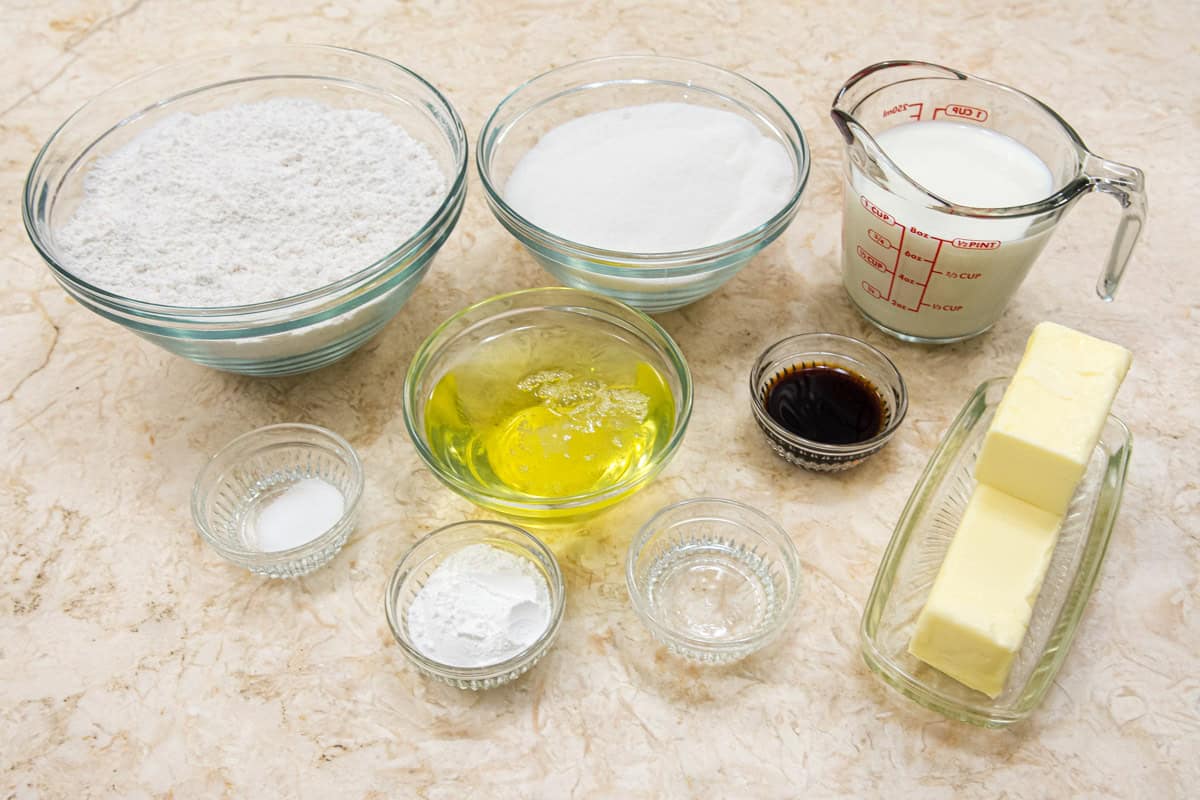
FRONT ROW: Salt, baking powder almond extract, unsalted butter
MIDDLE ROW: Egg wites, vanilla exract
BACK ROW: Cake Flour, granulated sugar and milk
Be sure to see the recipe card below for the full ingredients and instructions.
Step by Step Instructions
Cake Pan Prep

Step 1. The baking pans I use are from Parrish's magic pan line. Some of them are still from my bakery of 35 years ago. They are aluminum and are sturdy. Step 2. Spray the center only with a non-stick baking release. Do not spray or otherwise prepare the sides. This will help keep the paper flat when adding the batter to the pan. Step 3. Line the pan with a parchment paper circle. Step 4. Spray the center only with the baking spray. Again, Do not spray or otherwise prepare the sides.
Base Recipe for White Cake From Which All Others Come.
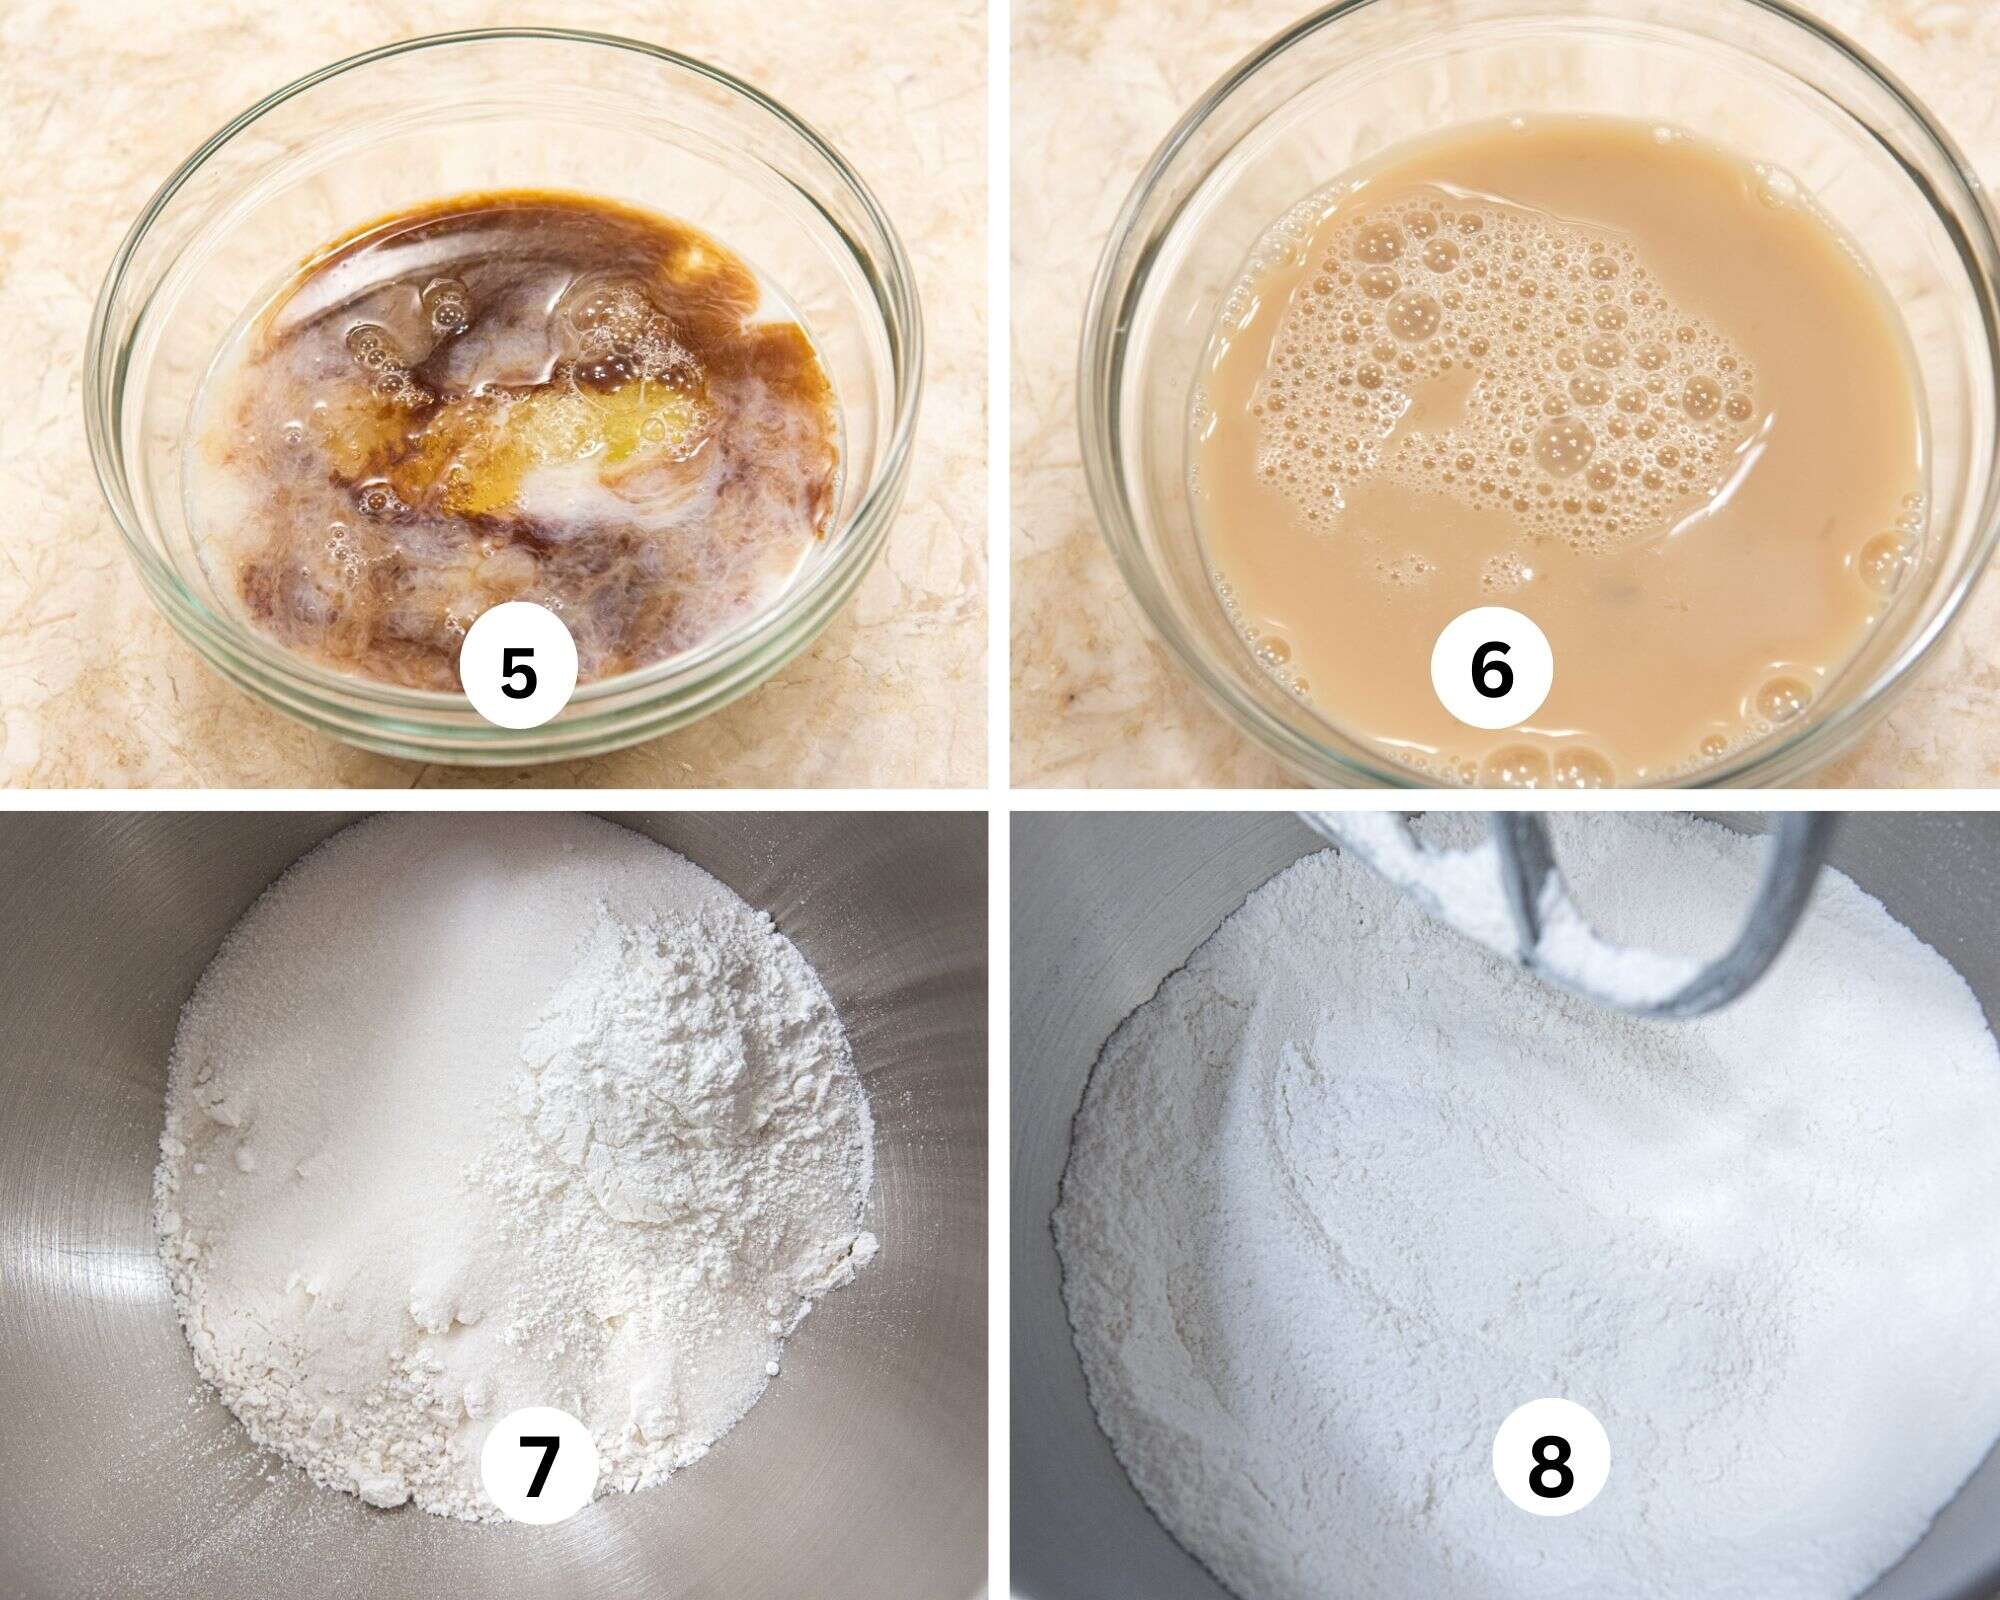
Step 5. Combine the egg whites, some of the milk and the extracts in a mall bowl. Step 6. Whisk to mix. Step 7. Place the dry ingredients in the bowl of a mixer. Step 8. Mix on low briefly to combie.
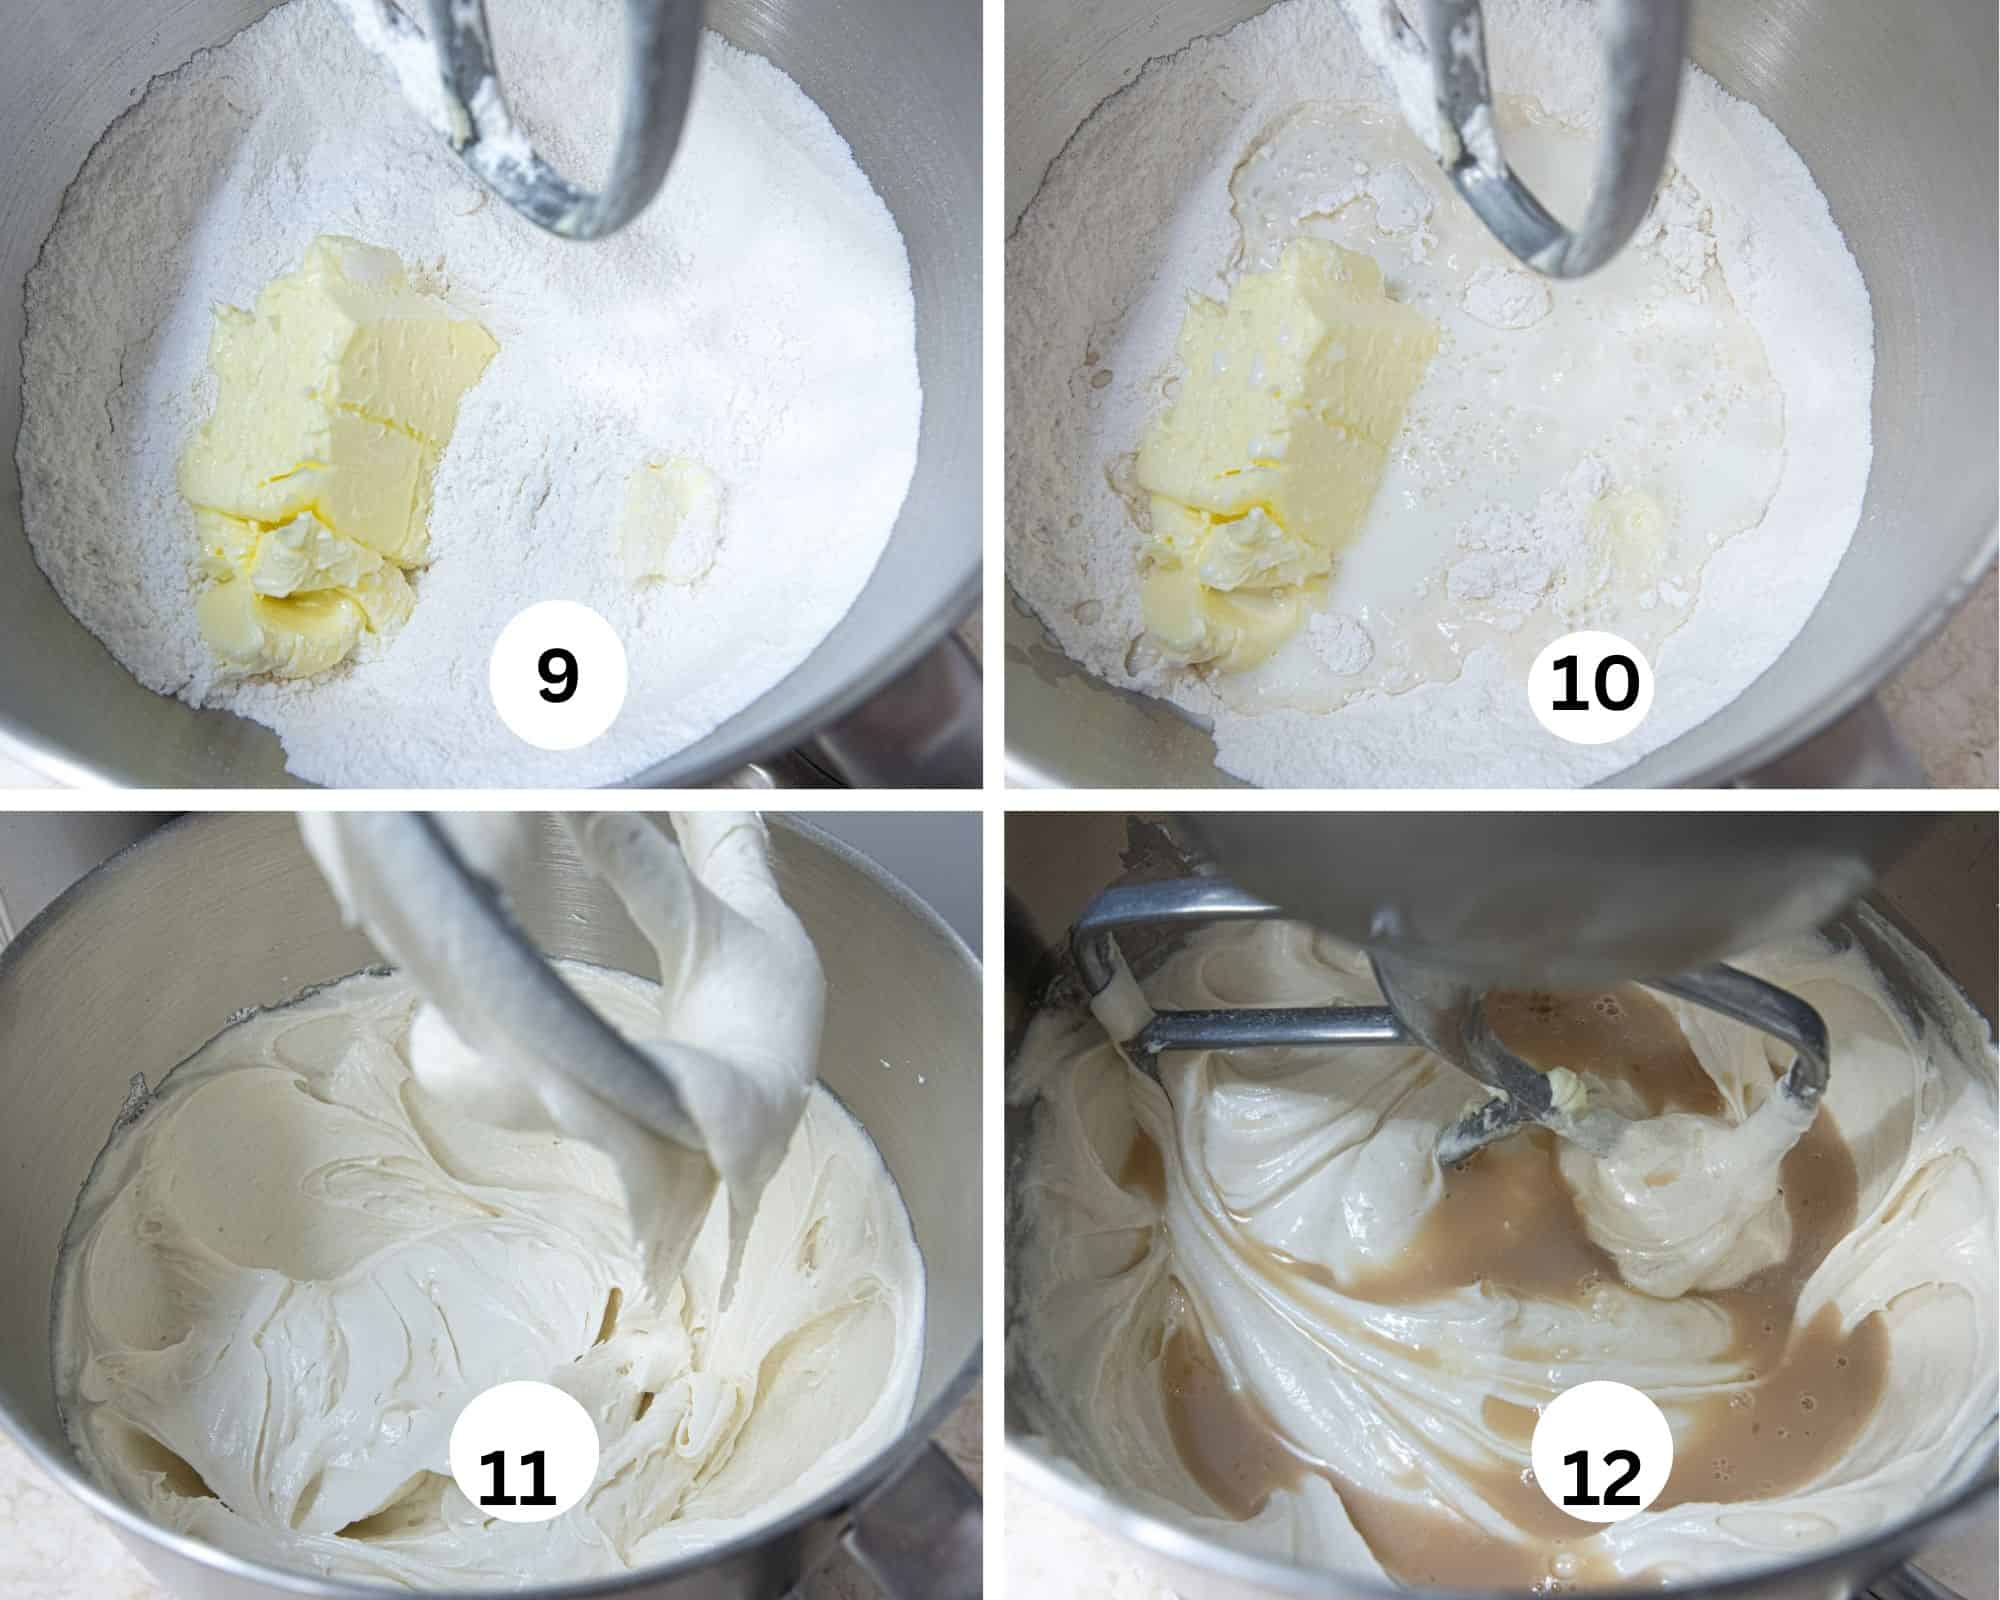
Step 9. Add the butter to the dry ingredients. Step 10. Add the remaining milk to the mixing bowl. Step 11. Beat For 1 ½ minutes. Step 12. Add the egg white mixture by thirds, beating for 30 seconds each time. Divide among the 2 pans and bake as directed.
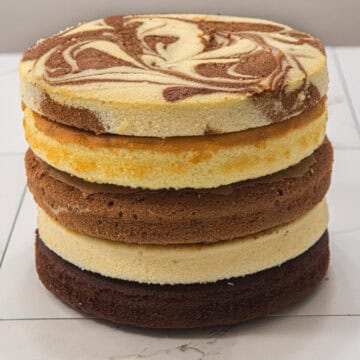
Marble Layer
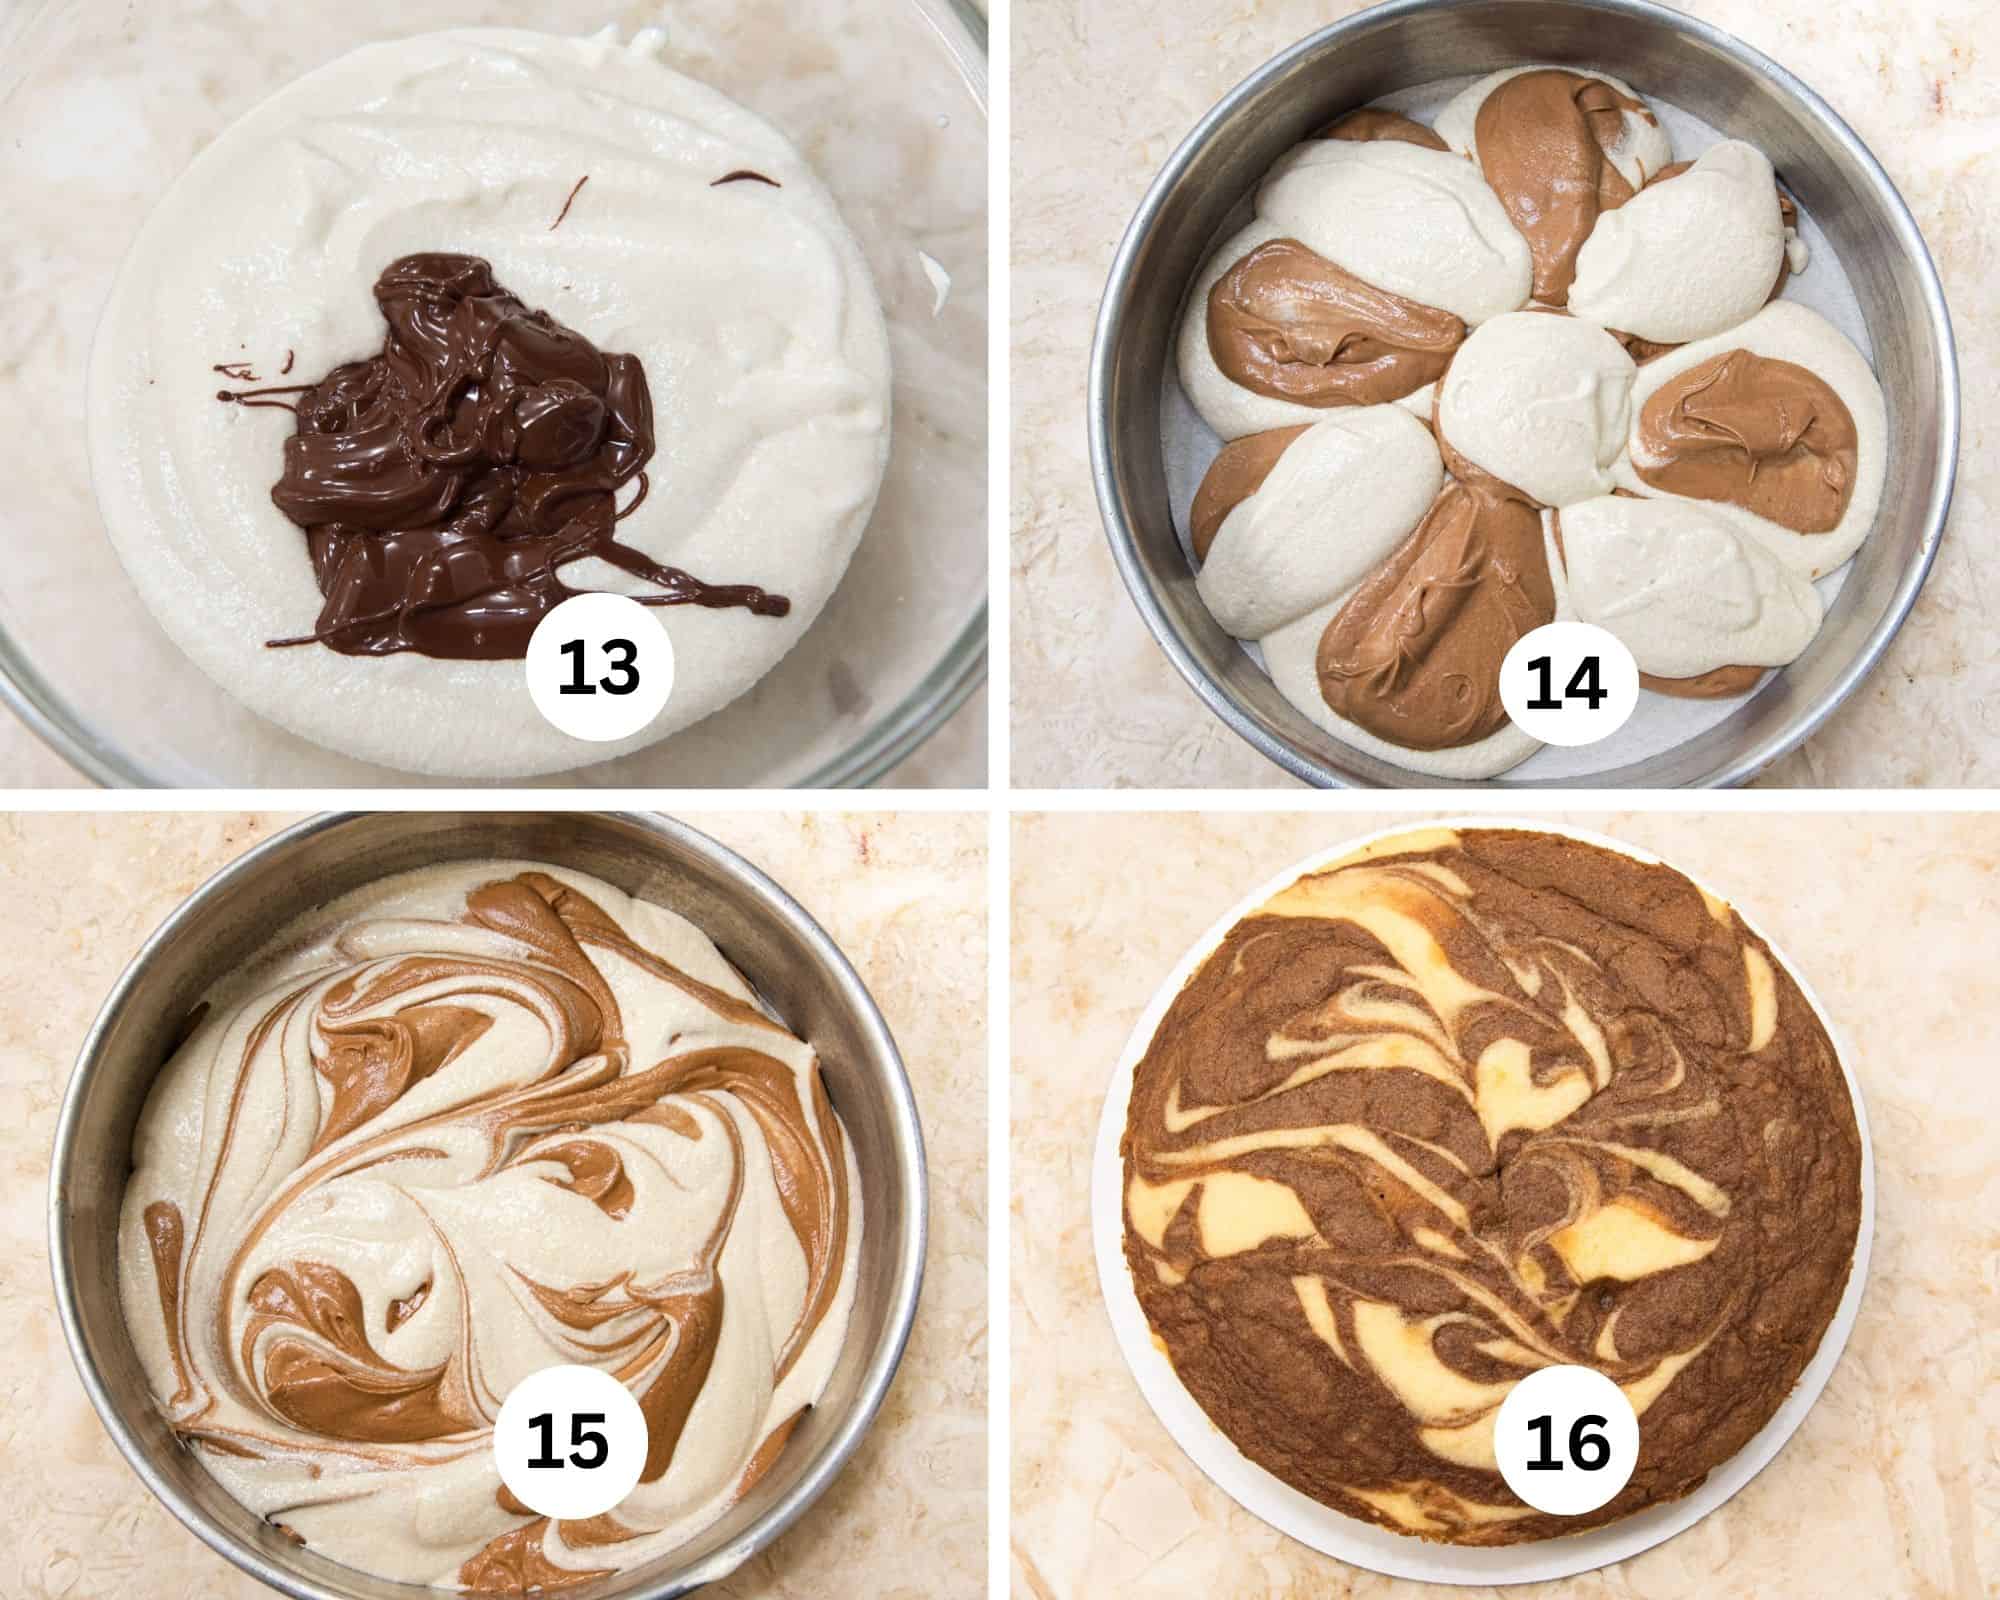
Step 13. Divide the white base layer in half. To one half add the melted and cooled chocolate. Step 14. Place a large spoon of the two batters alternately around the pan. Make a second row on top of the bottom one, placing the white batter on the chocolate one, and the chocolate on the white. Step 15. Swirl the batters together with a toothpick or skewer. Do not over swirl, there should be two different colors of batter visible. Step 16. The marble cake after baking.
Variations on a Theme
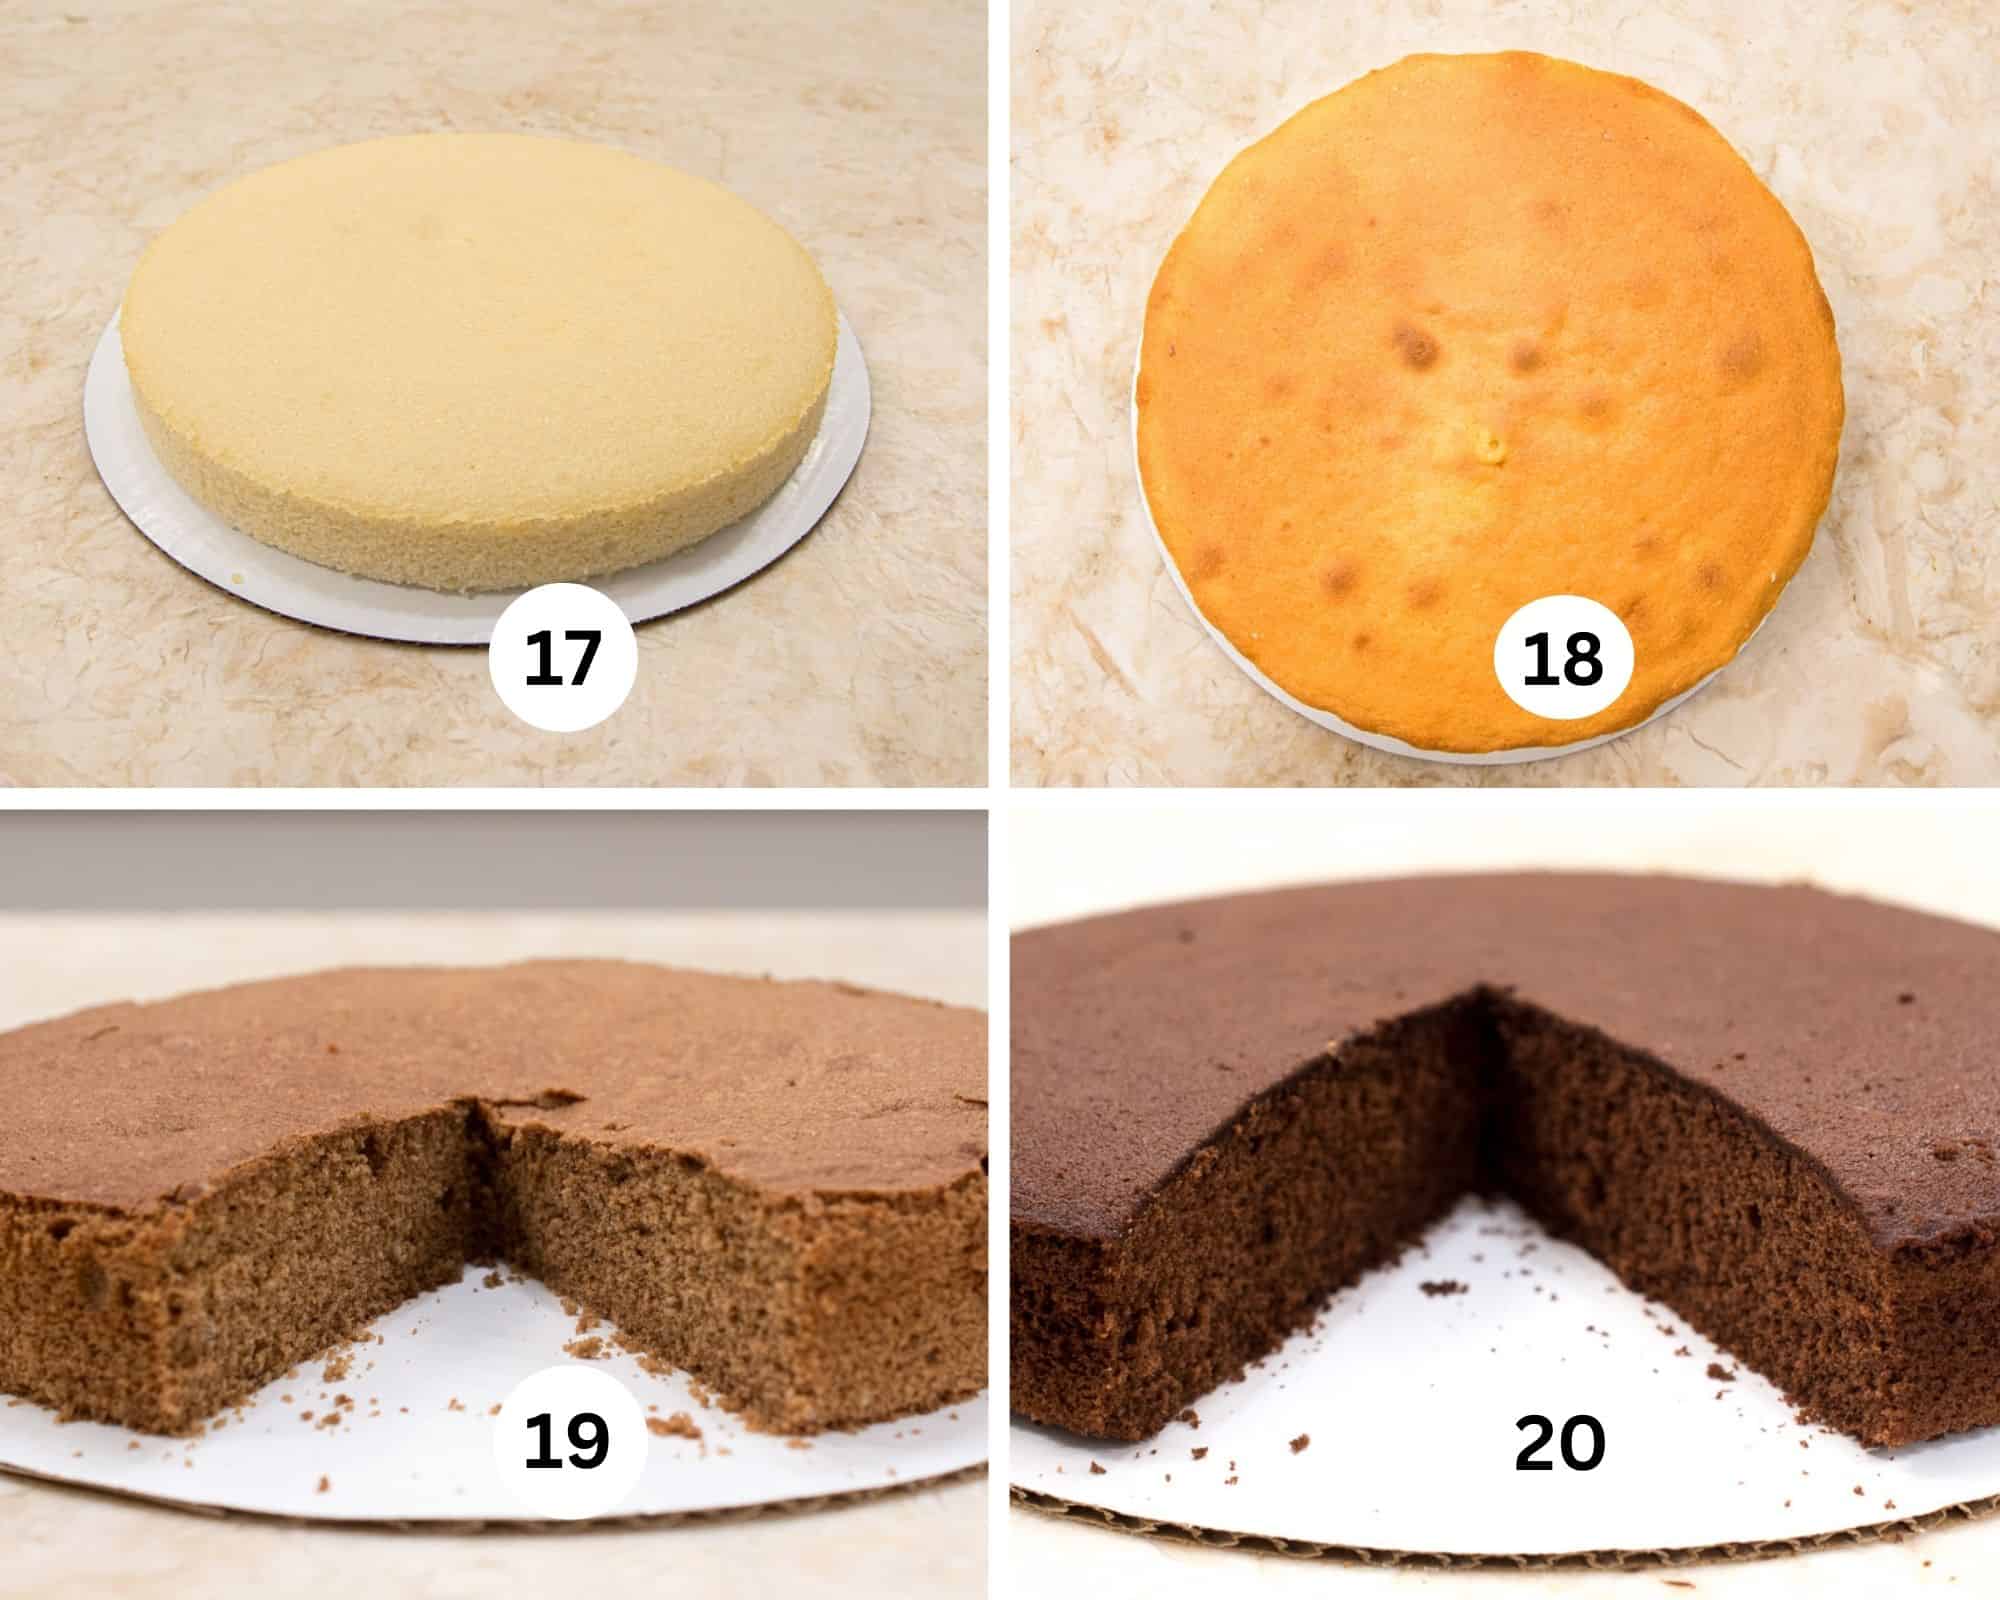
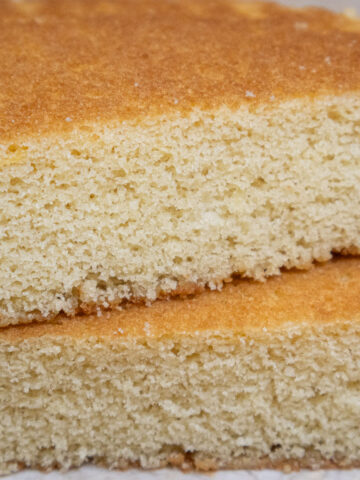
Step 17. The white layer baked. Step 18. The yellow cake layer baked. 3 egg yolks are substituted for the egg whites. All the rest is the same. Step 19. Melted and cooled semisweet chocolate is added to the batter then baked. Step 20. Cocoa is replaces part of the cake flour for this chocolate cake which is the deepest and most chocolatey of the two chocolate cakes after baking. There are also 3 citrus versions on the recipe card.
Recipe FAQS
Cake flour has the lowest amount of gluten of the common wheat flours. This makes for a softer layer which is usually more moist than if using other flours.
Yes, Either whole or 2% may be used. Do not use skimmed or less than 2%.
You will most likely get a cake that rises more in the center and has to be trimmed. By not preparing the sides of the pan, the cake clings to the sides and can't slide back down while waiting for the middle of the cake to finish baking. See my post on Cake Pan Prep for in depth information.
Expert Tips
- Be sure to follow the specific times as listed in the recipe.
- Do not beat above medium on a stand mixer to keep from developing gluten.
- If the milk and butter are about the same temperature, batter curdling is less likely.
- When using melted chocolate, cool it to room temperature before adding it to the white batter.
- Use Dutch cocoa in the cocoa layer for more flavor and to be able to use the same leavening agent.
- Prepare the pans as directed to obtain flat layers.
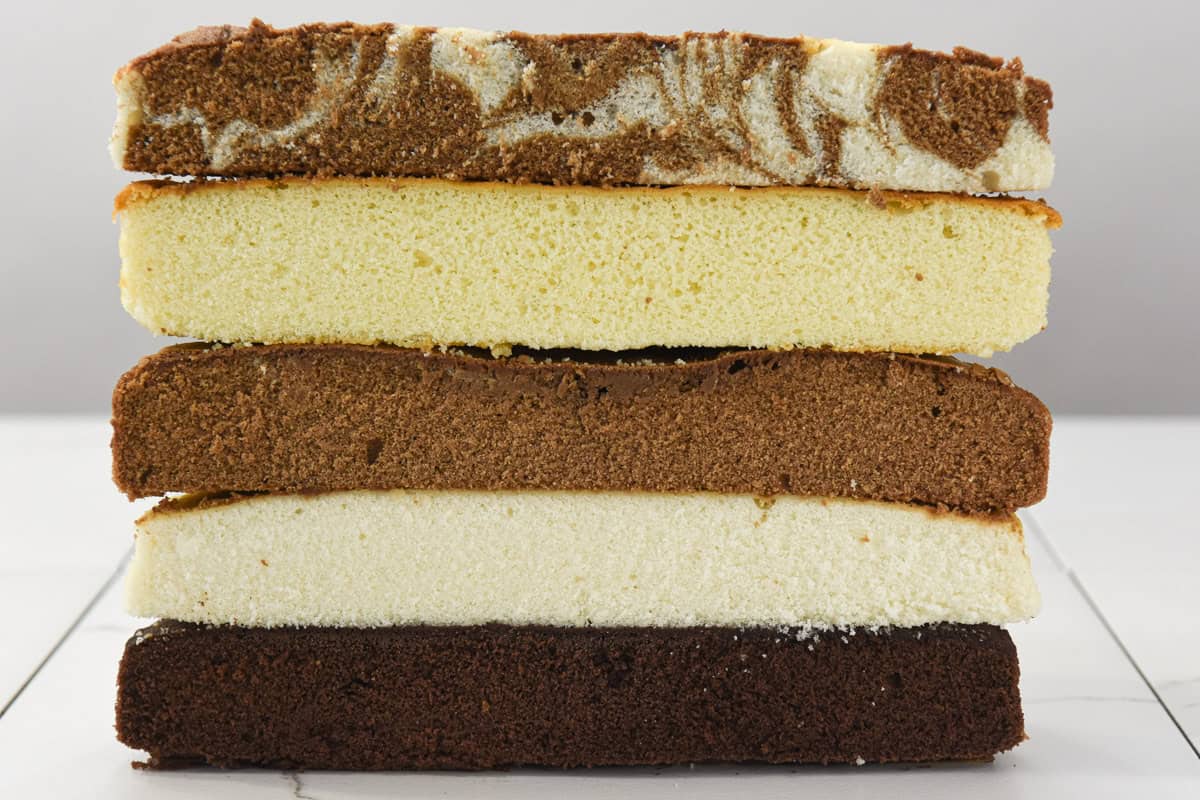
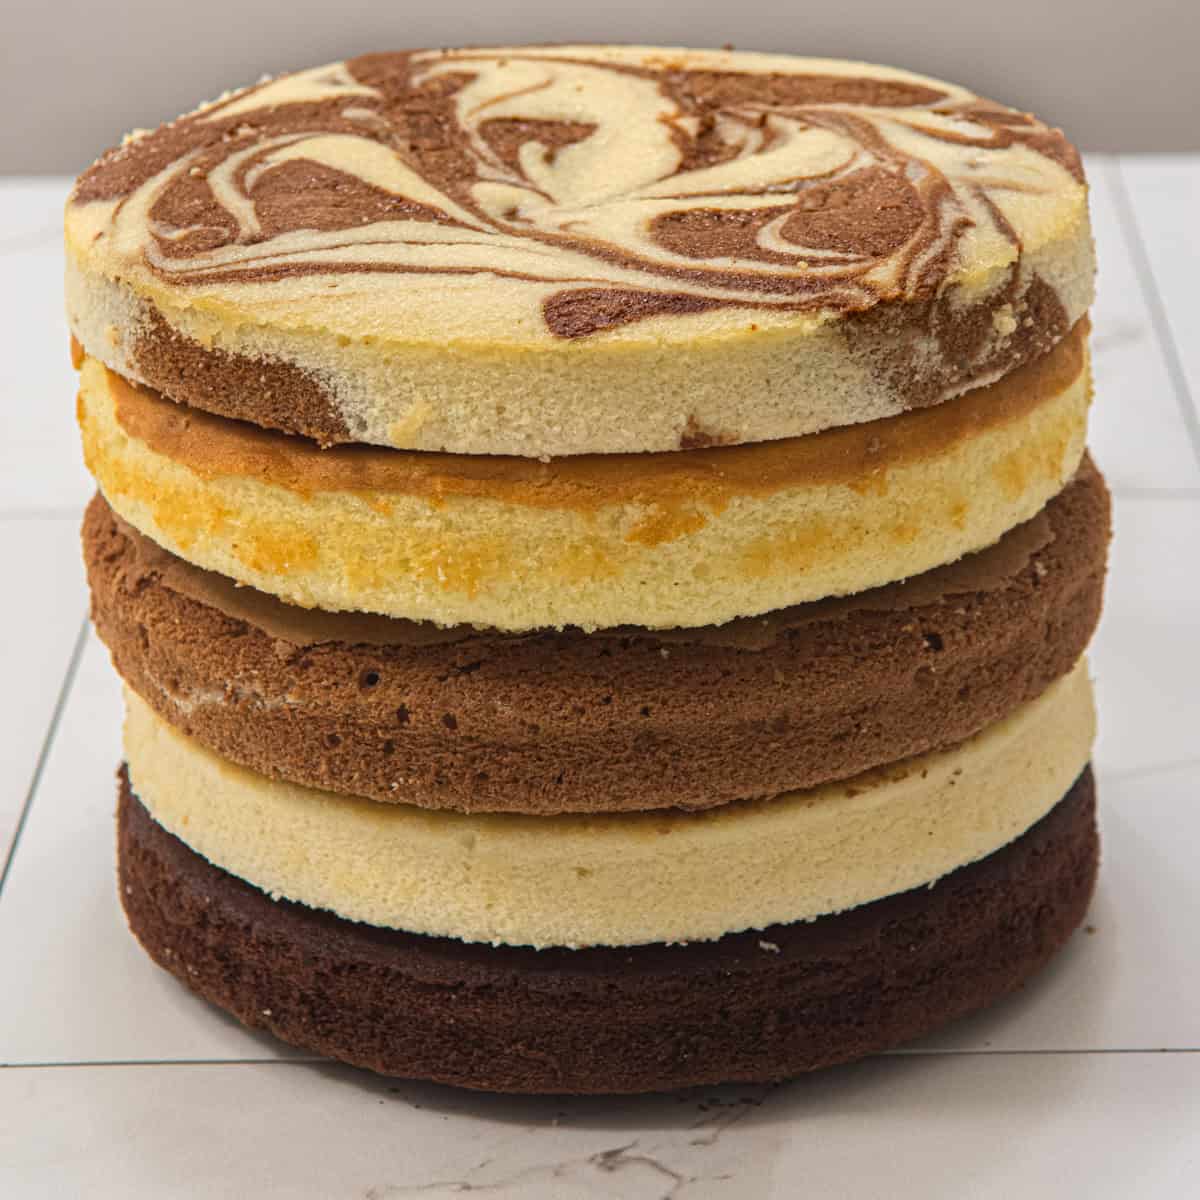
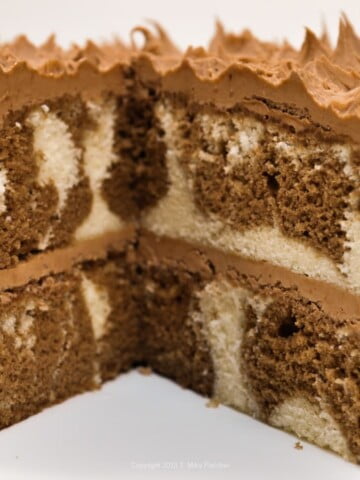
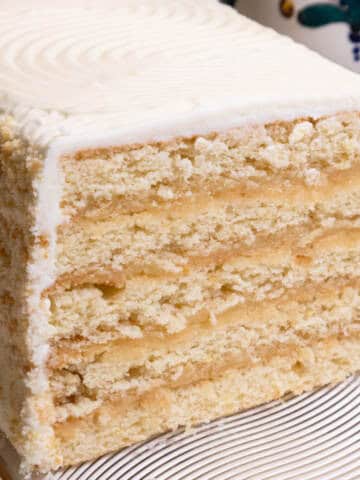
From top to bottom: The cut layers are: Marble, yellow, chocolate cake with chocolate (that is slightly under baked), the white cake and the cocoa chocolate cake.
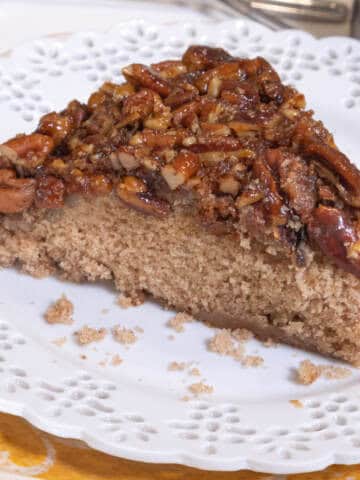
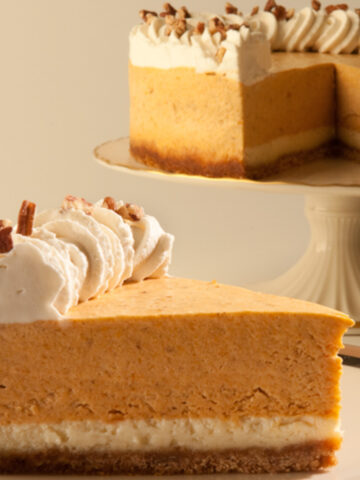
More Recipes Using High Ratio Cake Batter
A lot of work goes into each of my recipes and my only ask is that if you like the recipe or even the looks of it, please leave me a star rating to help me rank better. It’s important and I appreciate it.
Multiple Cake Layers from 1 Recipe
Ingredients
- 4 large egg whites (130 grams)
- 1 cup milk, whole or 2%
- 1 ½ teaspoon almond extract
- 1 teaspoon vanilla extract
- 3 cups cake flour (300 grams)
- 1 ½ cups granulated sugar (300 grams)
- 1 tablespoon + 1 teaspoon baking powder
- ¼ teaspoon salt
- 12 tablespoons unsalted butter, softened (170 grams or 1 ½ sticks)
Instructions
- Preheat oven to 350 degrees.Spray the center only of two 9x2 inch round cake pans a non-stick baking release. Line with parchment paper rounds and spray the center only of those. Set aside. .
- In a bowl, lightly combine the egg whites, ¼ cup milk, almond extract and vanilla.
- In a large mixing bowl combine the dry ingredients and mix on low speed for 30 seconds to blend. Add the butter and remaining ¾ cup milk. Mix on low speed until the dry ingredients are moistened. Increase to medium and beat for 1 ½ minutes. Gradually add the egg mixture in thirds, beating about 30 seconds each time.
- Gradually add the egg mixture in thirds, beating 30 seconds each time.
- Divide the dough between the two prepared pans (about 555 grams each). Bake for 18 to 22 minutes until a tester comes out clean.
- For three layers, divide the dough into 3 prepared pans of about 370 grams or 13 ounces each. Bake for 14 to 15 minutes or until very lightly colored.
Variations
- Yellow - Substitute 3 egg yolks for the egg whites. All the rest remains the same.
- Marble - Divide the white batter in half. Add 3 ounces of melted chocolate to one half. Alternated white and chocolate dough in the pans. Top with a second layer of white and chocolate dough over the first layer. Place the chocolate on the white and the white on the chocolate. Swirl together with a toothpick or wooden skewer. Do not over swirl.
- Chocolate Cake with Cocoa – This is the darkest and most intense of the two chocolate cakes. It tastes the most chocolatey. I used 60 grams (2 ounces) of dutched cocoa and 240 grams (8 ½ ounces) of cake flour in place of all flour. Place in the mixing bowl with the remainder of the dry ingredients. All the rest remains the same. Bake for 24 to 26 minutes.
- Chocolate Cake with Semisweet Chocolate - This cake is lightly flavored with chocolate and emulates a German Chocolate Layer. For this cake you whisk in 6 ounces (170 grams) of melted bittersweet or semisweet chocolate into the finished batter. The chocolate can be melted in a bowl over hot, but not boiling water or microwaved at half power for about 2 ½ minutes. Stir and, if not melted, microwave briefly at half power in 15 second bursts.The layers for this cake will weigh about 1200 grams (42 ounces) total or 600 grams).Bake for 24 to 26 minutes.
- Lemon Cake – Add the zest of 3 large or 4 medium lemons to the batter of the yellow cake using all vanilla in the batter. Add it with the dry ingredients in the mixing bowl. All the rest remains the same.Bake these layers for 18 to 22 minutes until the center springs back when lightly touched or a tester comes out clean.
- Orange Cake – Add the zest (orange part only, do not use the white pith below) of a large navel oranges to the white batter using all almond extract. Add it with the dry ingredients in the mixing bowl. All the rest remains the same.Bake for 18 to 22 minutes until the center springs back when lightly touched or a tester comes out clean. Juice oranges will not provide enough zest because of their thin skin.
- Citrus Cake – Use the zest of 1 navel orange, 1 lemon and 2 limes. Add them to the dry ingredients in the mixing bowl. All the rest remains the same.Bake these layers for 18 to 22 minutes until the center springs back when lightly touched or a tester comes out clean.
Notes
Nutrition
.

Marlene Kaminski says
Hi Helen. Do you think the white batter would make nice cupcakes? If so, how many?
Helen S Fletcher says
Hi Marlene - Almost any cake batter will make cupcakes and although I haven't used this for a cupcake I assume it would also. How many I can't say. Based on the recipe for the Amazing Boston Cream Cupcakes, my guess would be 6 to 8 jumbo or Texas cupcakes or about 15 regular size.
Mel says
Would it be OK to replace the almond extract with more vanilla (for allergy purposes)?
Helen S Fletcher says
Hi Mel - absolutely.
Tracey says
Helpful for my daughter's birthday cake! So easy!
Helen S Fletcher says
Hi Tracey - Happy to hear. Happy New Year to you and yours.
Laura Lee says
Thanks for all the information. It helps me work on my skills.
Helen S Fletcher says
Hi Laura, You're exactly who I blog for.
Bonnie says
These look great- good insight Having run a bakery where we made recipes from scratch- I appreciate all the effort you have put in- of testing recipes- Thank You! l have made many great recipes from your posts
Helen S Fletcher says
Thank you so much Bonnie. At the bakery, as I do here, when I get an idea I believe in, I test until it is perfect. Baking requires time and money and I don't want anyone to waste either.
Maida says
It seems delicious I'll try this recipe
Lynn Fiorante says
Perfection
Helen S Fletcher says
Thanks Lynn. I appreciate you taking the time to comment.
Karenb says
Helen, I love your recipes & have made several. I wish you would include baking times for 9” x 13” pan size. I prefer this size rather than layer cake because it’s less time consuming. Just frost the top & no fussing with the layers & easier to store.
I FINALLY found a copy of your book The New Pastry Cook - GREAT book!!!
Helen S Fletcher says
Thanks for the kind words Just start with the most time given for baking and add on in 5 minute increments until the cake tests done. As you approach the end of baking, reduce to a couple of minutes. That's what I do. It is hugely expensive in time and money to test every possibility, since I do all of this myself.
Jacquie says
How nice to have one recipe you can customize!
Helen S Fletcher says
Hi Jacquie - I agree. And they all are wonderful.
Mary Lee Butterworth says
Very helpful information!!
Patty says
I have learned so much with these blogs. Great information!